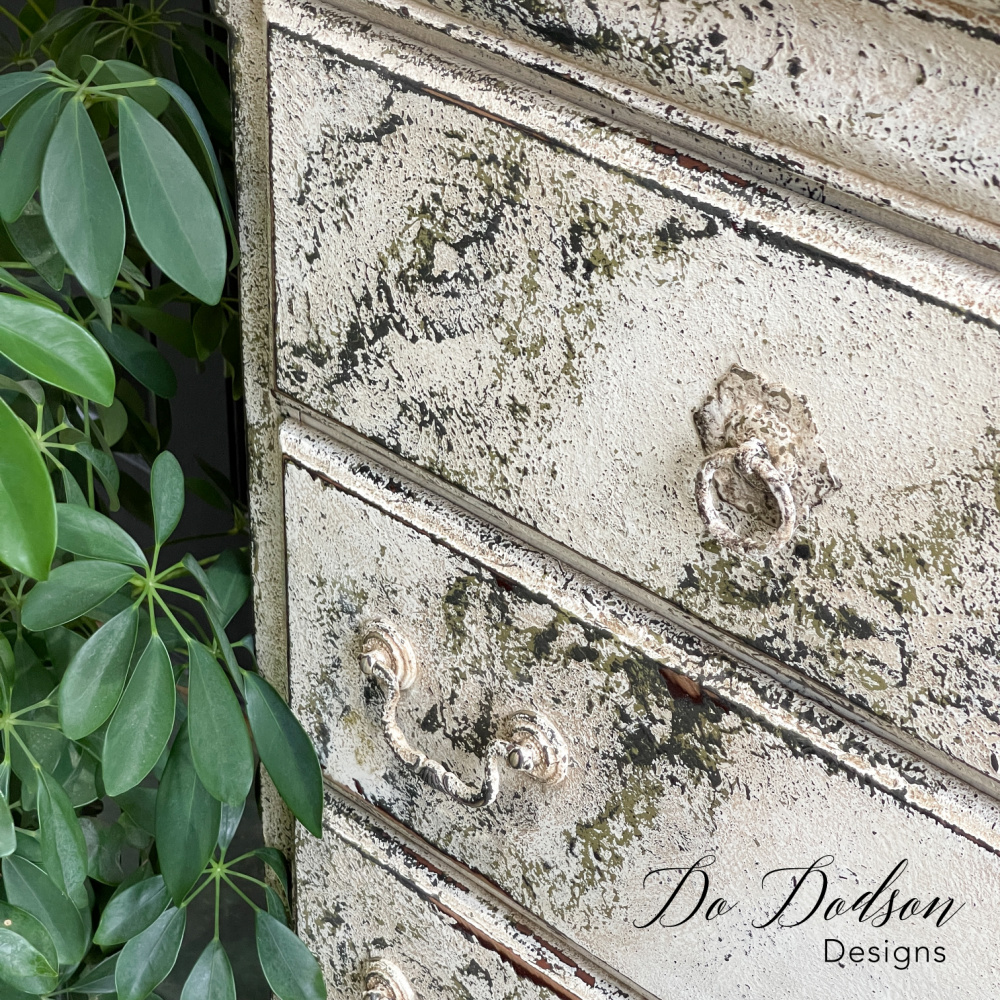

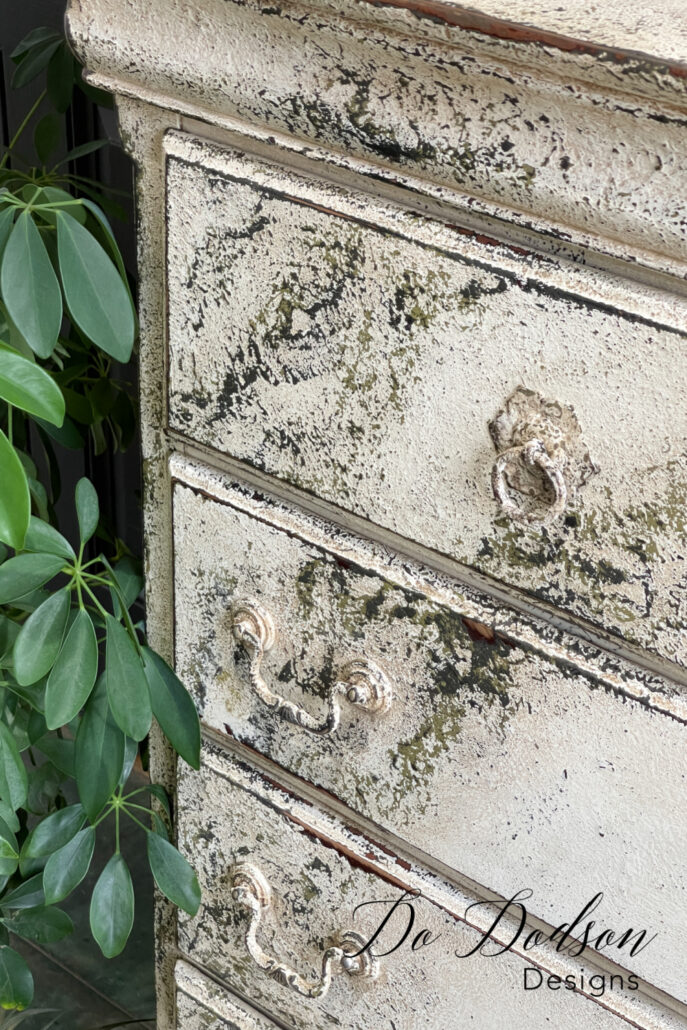
Hey, triple-D friends! Did you know a salt wash is a great way to create texture and age on painted pieces? Spice up your wood furniture with this salt wash paint technique that resembles the look of distressed, layered, and weathered surfaces. Let your creative juices flow!
Thanks to Dixie Belle Paint Co for sponsoring this post. While I was compensated to write this post, all opinions are my own.
* As an Amazon Associate, I earn from qualifying purchases and through other companies as well. You will not be charged extra when you purchase through these affiliate links, but any income I make helps me create more amazing DIY projects to share with you! To see my full disclaimer, click here!
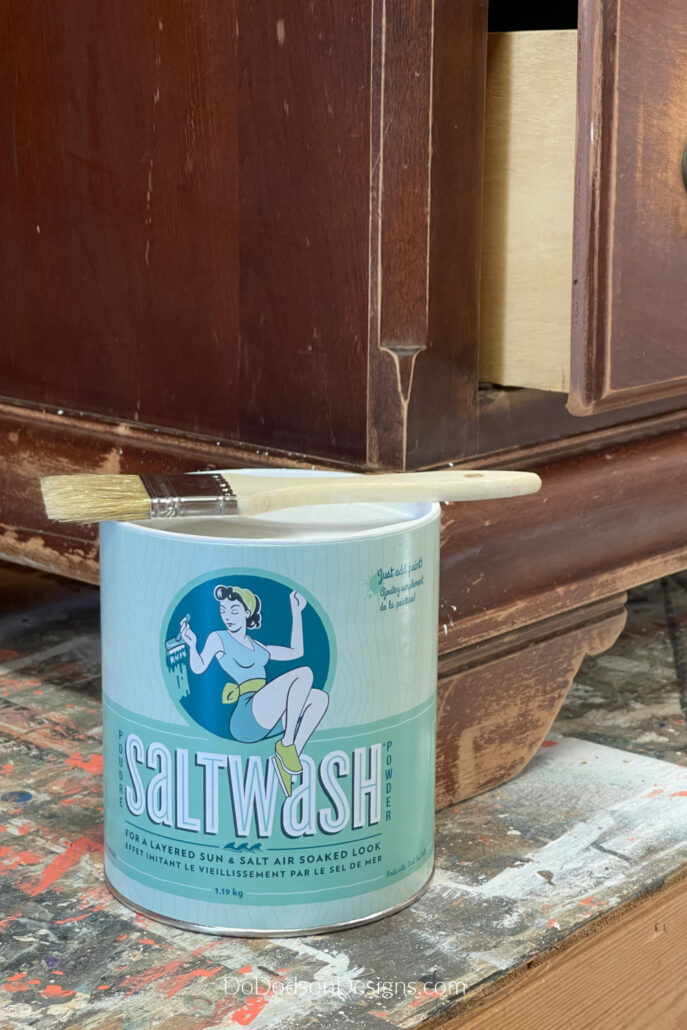
What Is A Saltwash?
It’s a Saltwash powder additive made with real sea salt that you can add to any brand or type of paint to create an interesting texture and an aged time-worn look. A weathered authentic look as if it’s been outside exposed to the elements for a long time.
To me, it looks like an old beach cottage that’s been kissed by the salt air. It can also be used to give that old-world-aged finish. The possibilities are endless using this salt wash paint mixture.

Texture That Will Cover A Multitude Of Sins
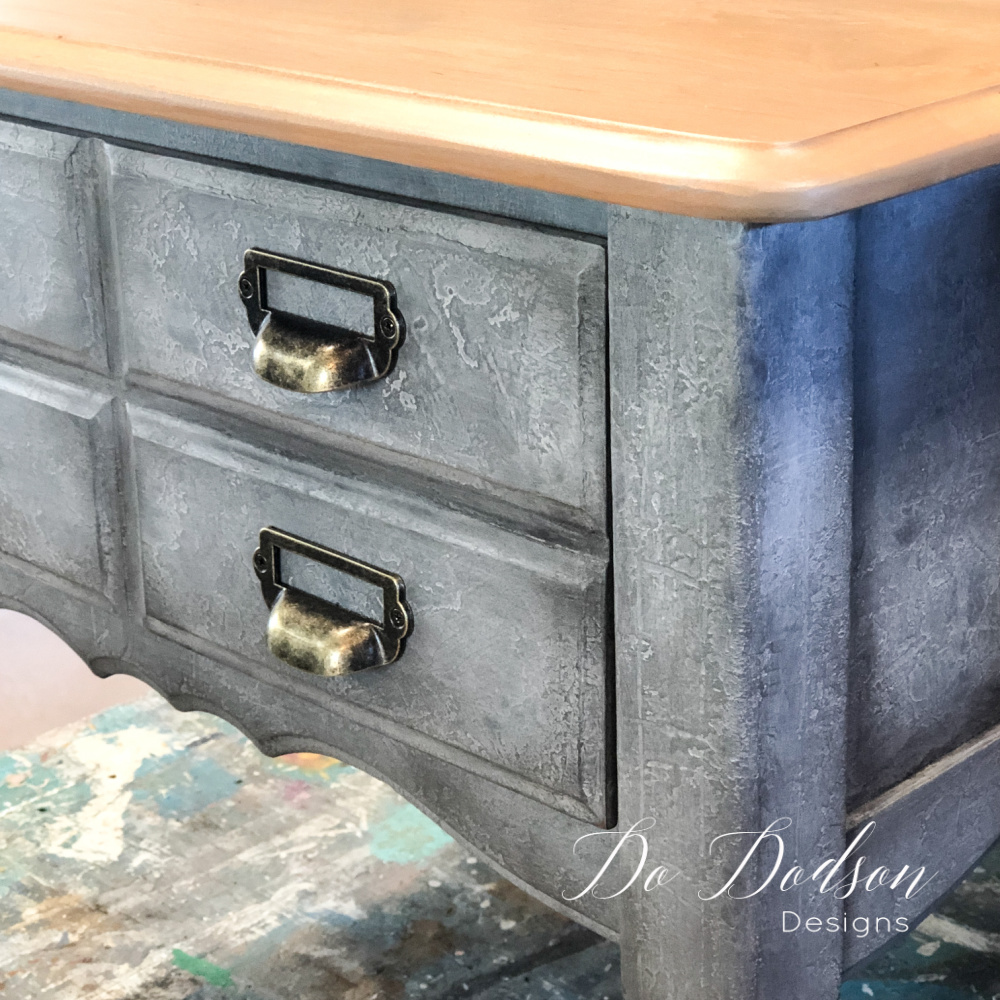
This old dresser was sad! I felt sorry for the lady that was selling it. Sorry enough that I even purchased it from her. It was listed as a solid wood piece. The internal framing and bottom structure were wood, but everything else was pressed board. Most people don’t know the difference.
But hey, I figured I could manage to revive it somehow. The drawers still worked, and that was a bonus. I offered $20, and she took it! I should have offered $5.
Hello, my new janky friend! With this chest of drawers, the sky was the limit on my creativity, so I grabbed the Bondo and filled as many holes and gauges as possible. It still wasn’t smooth enough for paint afterward.
SaltWash is the solution to my problem. I’ll create a textured finish on this dresser that covers all those sins—the imperfections.
Perfectly imperfect. 🙂 Check out this lovely old-world finish on a dresser done by my friend Denise at Salvaged inspirations. You can create so many looks with texture and a little paint. Channel your inner artist!

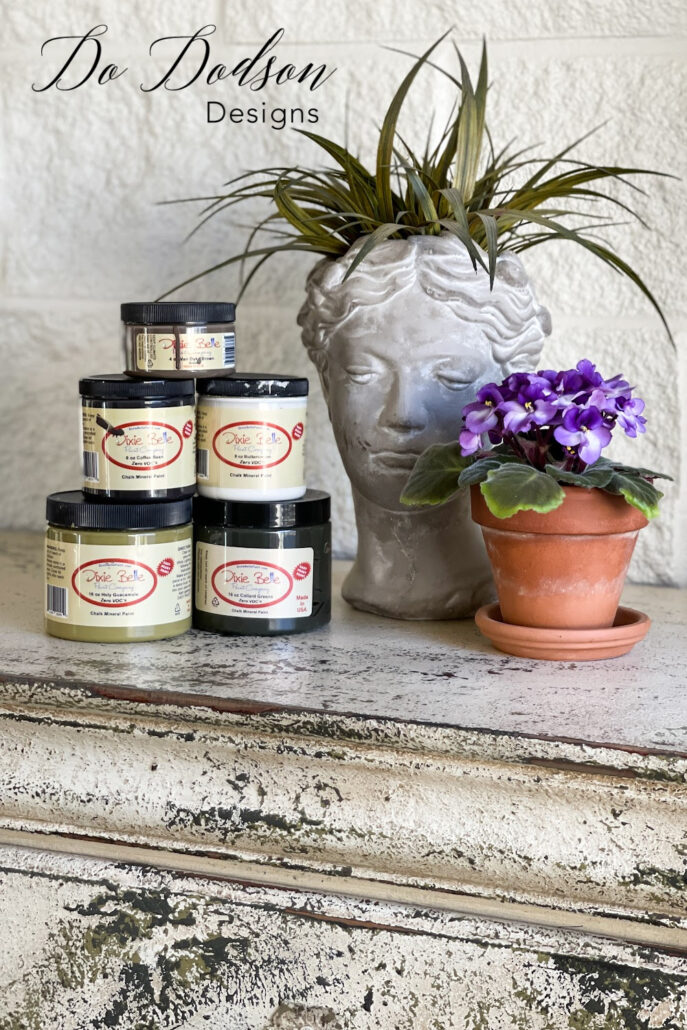
SUPPLY LIST:
Here are the supplies I used to create this salt wash paint technique.
- Saltwash
- gloves
- chip brushes
- fine mist spray bottle for water
- paper towels
- Coffee Bean Chalk Mineral Paint Dixie Belle
- Collard Greens Chalk Mineral Paint Dixie Belle
- Holy Guacamole Chalk Mineral Paint Dixie Belle
- Butter Cream Chalk Mineral Paint Dixie Belle
- SurfPrep Sanding System
- padded sanding pads AMAZON (medium grit) for an Electric Orbital Sander
- Carbide Scrapping Tool
- Glaze (Van Dyke Brown) Dixie Belle
- paintbrush for glaze Dixie Belle
- Blue Sponge Applicator Dixie Belle
- Gator Hide Top Coat Dixie Belle
How To Master A Salt Wash Paint Technique
STEP 1: Prep your furniture first by cleaning and giving it a light scuff sanding with 220 grit paper to prepare the surface for the textured paint. I did not use a primer or stain blocker on this makeover. I usually do, but since this had a black base, I felt it would be okay to skip this step. This is rare, and my finish could fail. It’s always a gamble, but this piece was janky, and I took a chance. After painting as many pieces as I have over the last 20 years, I know when I can.
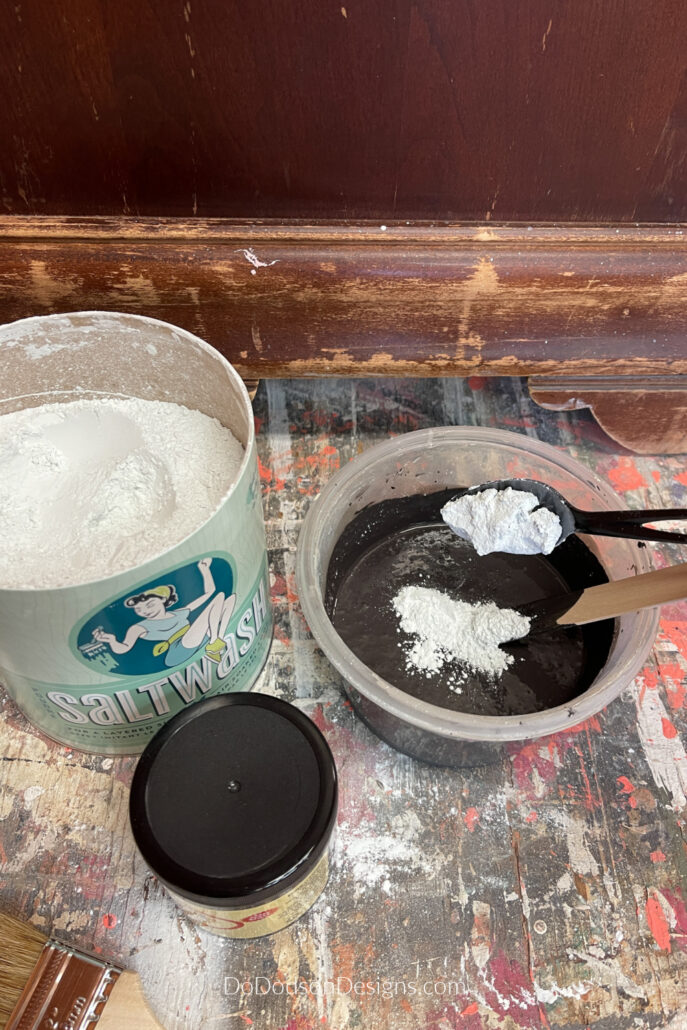
STEP 2: Gather your supplies. You’ll need a disposable mixing container to mix the powder with your paint—one for each color you choose.
Mix the powder into the (Dixie Belle Coffee Bean) chalk mineral paint. I didn’t measure, so there’s that—sorry, folks. I used a plastic spoon and added enough powder (a little at a time) to create a consistency somewhere between a thick pudding and cake icing. Or when you have reached your desired consistency. There are no hard rules. Just have fun.
Adding The First Layer of Texture
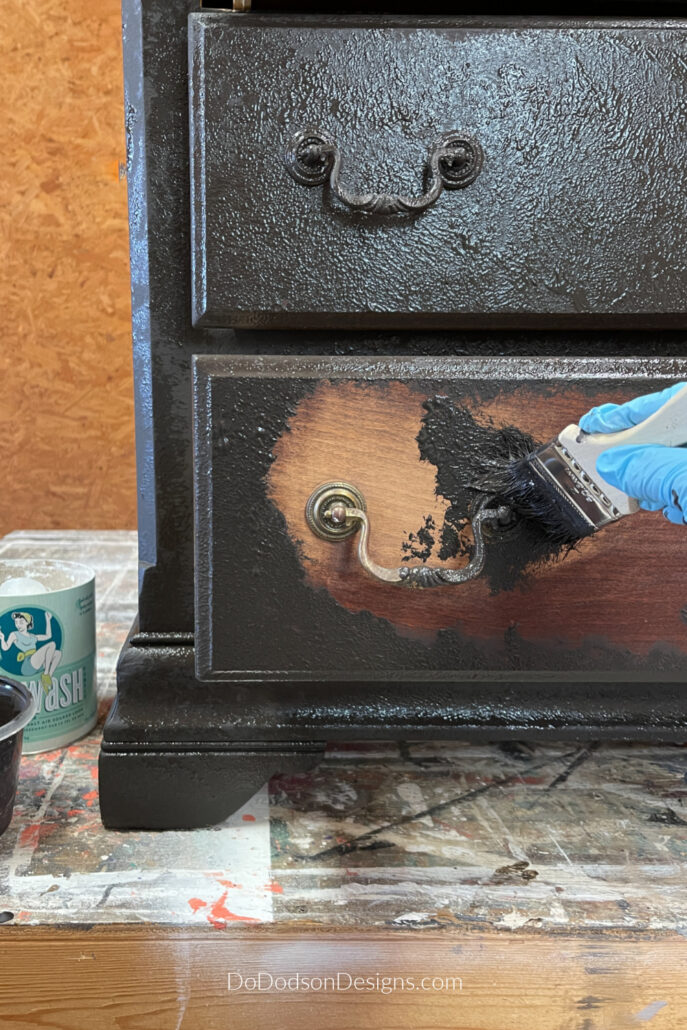
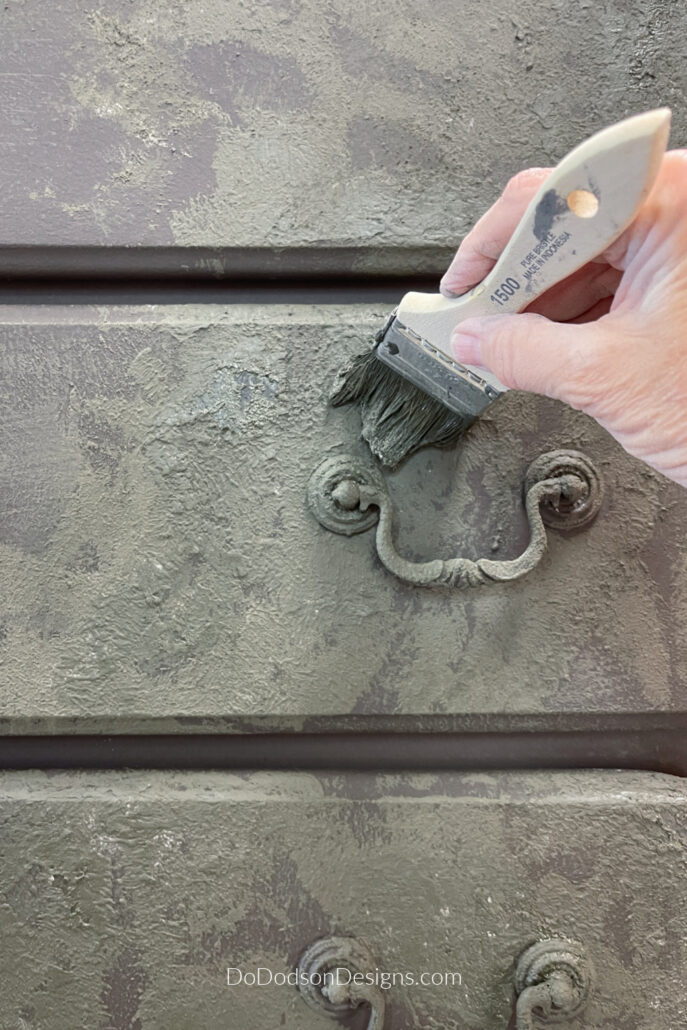
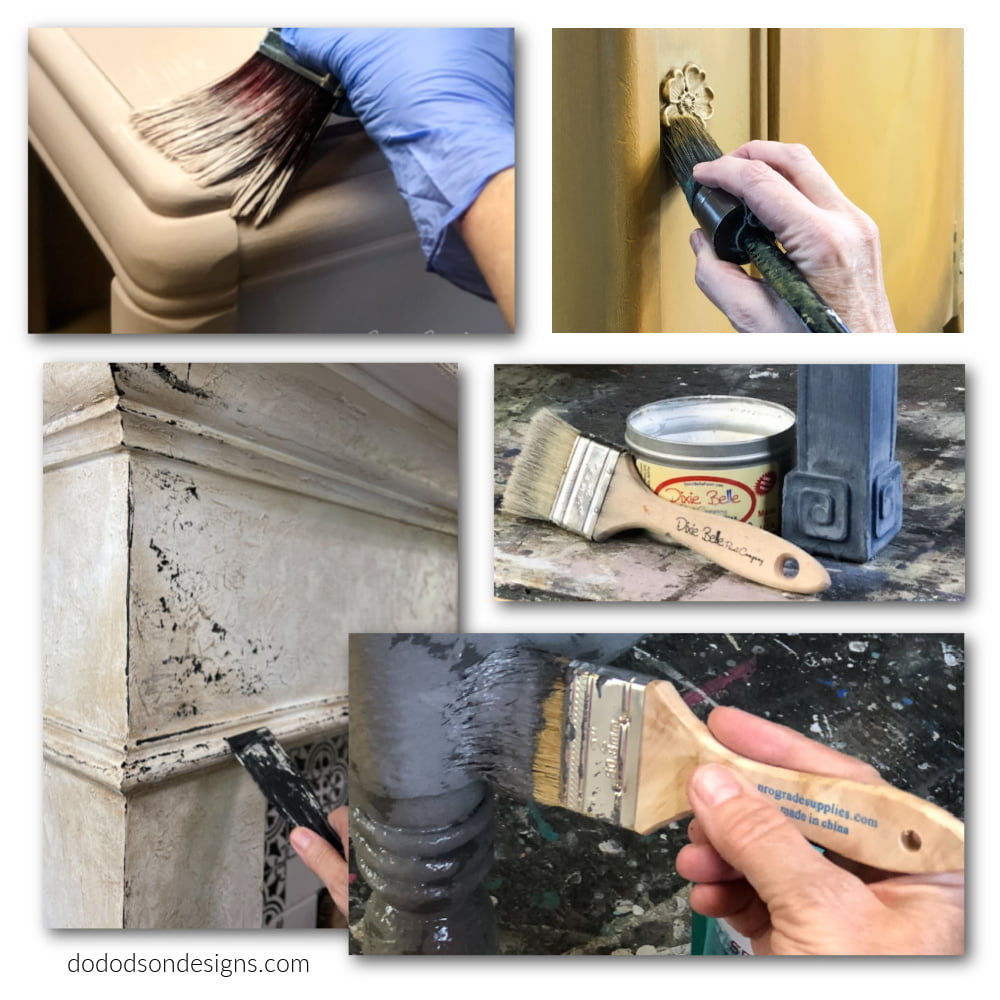
STEP 3: With a 2-inch chip paint brush, I added a GLOB (it’s so fun) of the paint mixture of Saltwash over the entire dresser using the stippling method. This went on quickly, and I covered the whole piece, including the hardware. STOP! Don’t judge. I did clean the hardware well before I painted over them. I purposely didn’t use a primer on the metal hardware because I wanted the paint to chip. This was my plan.
Allow the first layer to dry completely overnight.
STEP 4: Repeat STEP 2 and mix a second color (Dixie Belle Collard Greens) slightly thicker than the first, more like a brownie batter. Apply that color over the first color until you have reached the desired effect. You can go full coverage or create a random pattern. This is where you can let your freak flag fly! Get creative.
You will destroy a few chip bushes in the process, but that’s okay. They’re inexpensive.
STEP 5: Repeat STEP 2 again in the third color of your choice. I used my FAVORITE GREEN (Holy Guacamole Chalk Mineral Paint) with Saltwash, adding it to the random pattern I created in STEP 4.
Creating A Unique Look
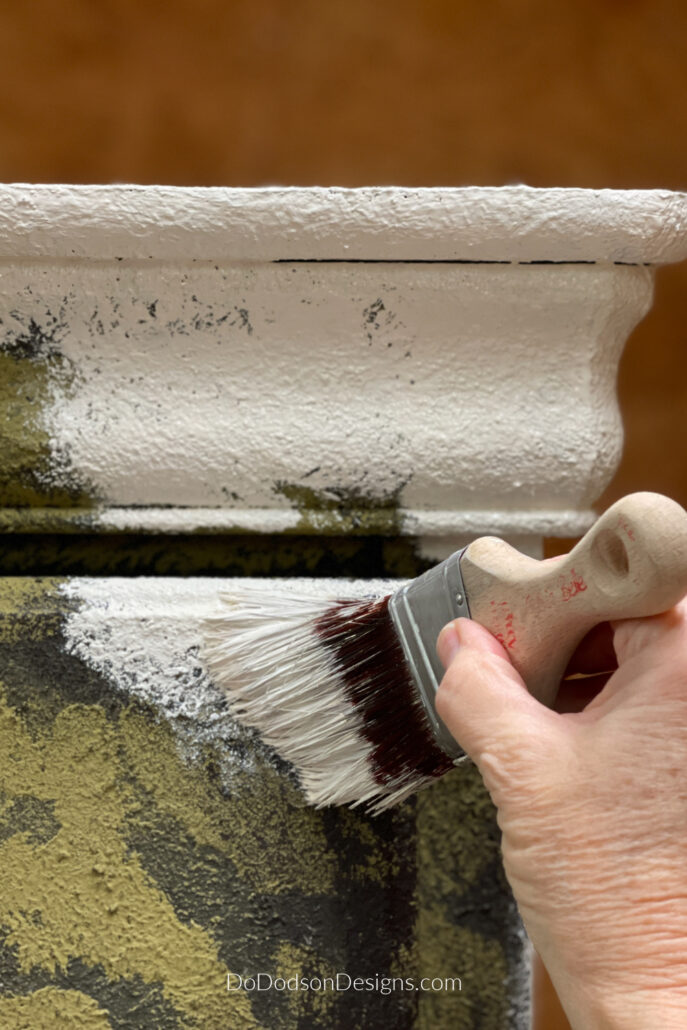
STEP 6: With the last and final color, I did not mix the paint with the Saltwash. I used straight-up Butter Cream chalk mineral paint and painted over the hot mess I had created. I ain’t lying when I say I was a bit nervous. It was almost a relief to cover all those crazy colors up.
It looked like a bad case of camo that went wrong. I digress.
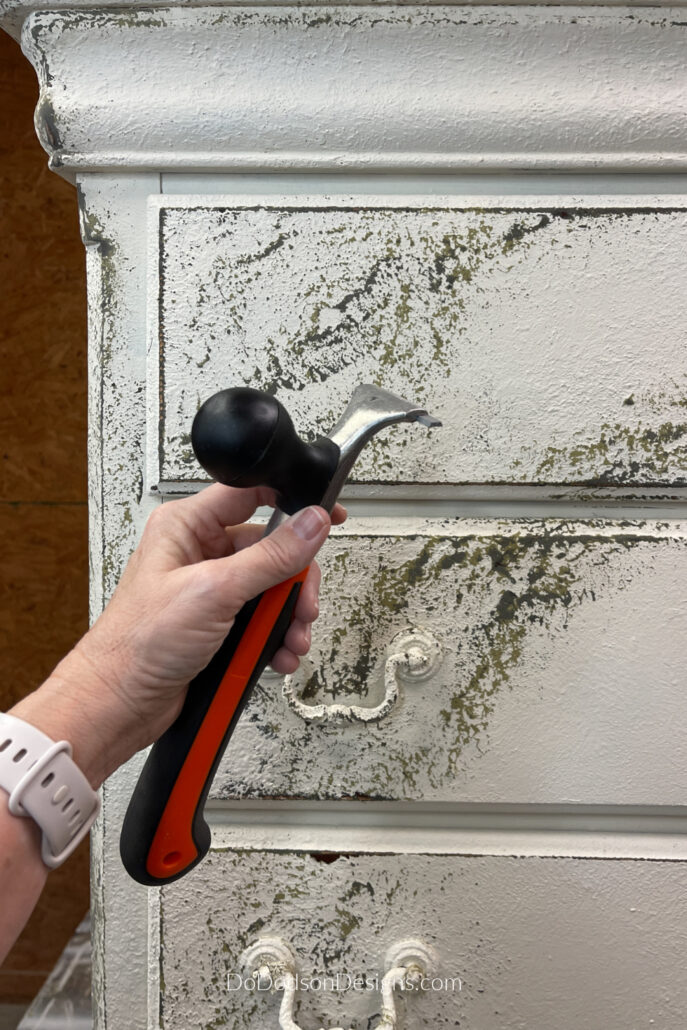
STEP 7: Overnight, after it had dried completely, I used a carbide scrapping tool to carefully scrape away the layers to reveal all the colors of Saltwash paint that were applied. This gets a bit messy, so be ready with your shop vac.
I was careful to scrape away only in the areas where I wanted the pattern to be revealed and where I added the most texture.
If you want an all-over authentic vintage look, apply the SaltWash everywhere and scrap away the Saltwash layers to get the look you want.
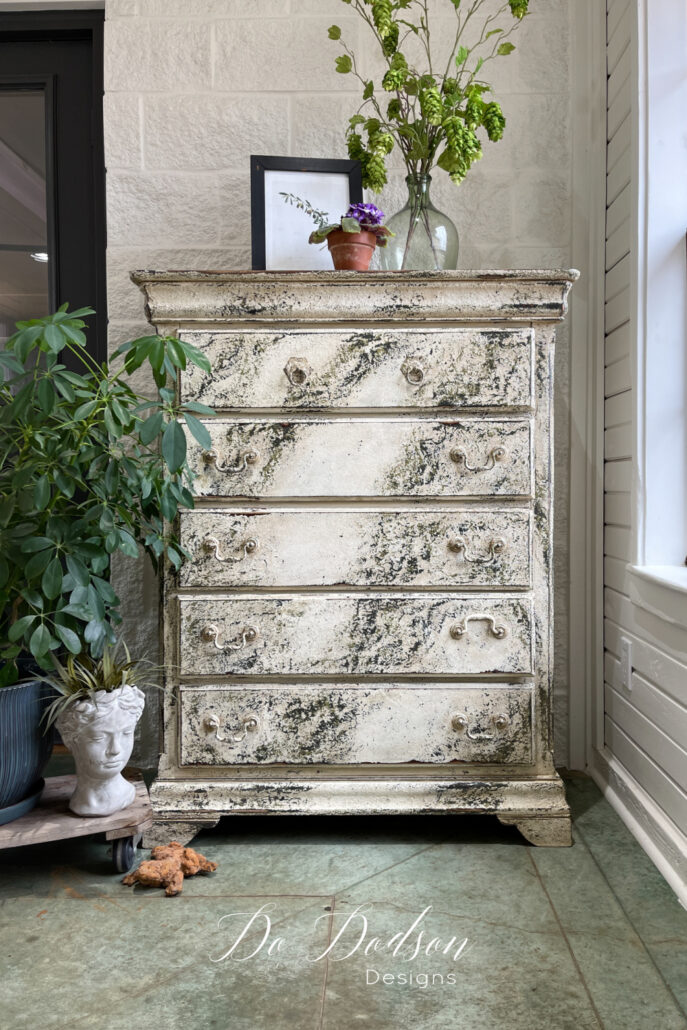
I personally like to start with a dark base color, adding lighter colors on top of each other, with the final coat being the lightest.
STEP 8: The finish on the dresser was still very rough, even after all that scrapping. I decided to use my electric sander with a 220-grit pad and gave it a good sanding. You can always use sandpaper or a sanding block if you don’t have a sander, but it sure does make quick work.
Glazing To Add Depth To Salt Wash
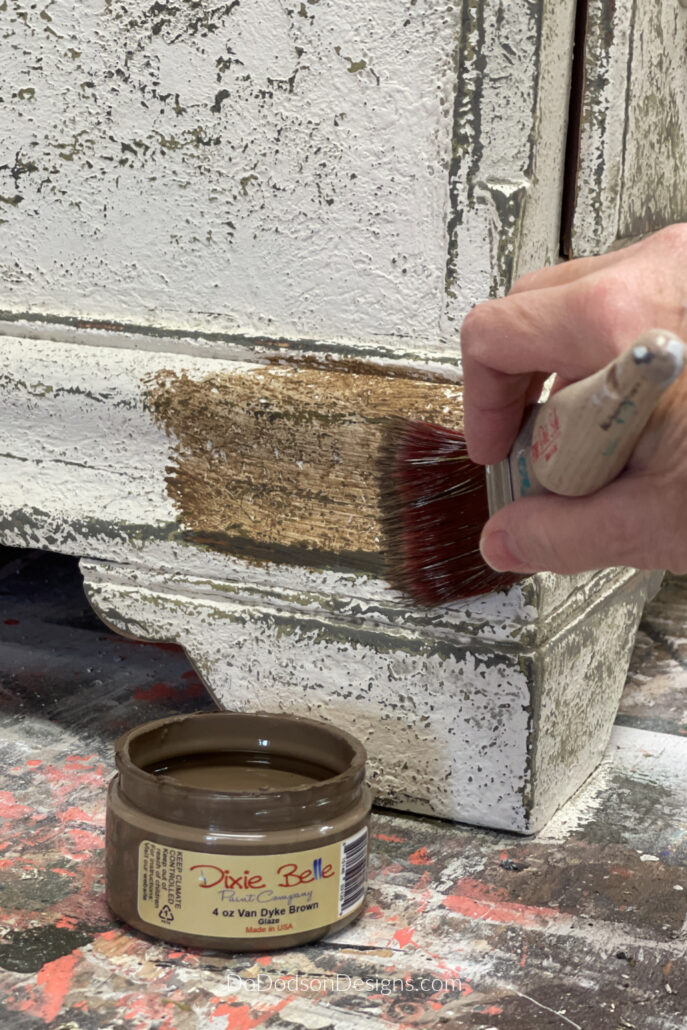
STEP 9: A brown tone glaze (VanDyke Brown Dixie Belle) was applied with a soft bristle brush and wiped away quickly with a soft cloth to give it that dirty, aged look. The glaze accentuates all the valleys and indentions left behind for the Saltwash texture, adding a beautiful depth and dimension.
QUICK TIP… if the glaze is a bit darker than you like on the finish, use a water-damp cloth to wipe back the glaze for a lighter finish.
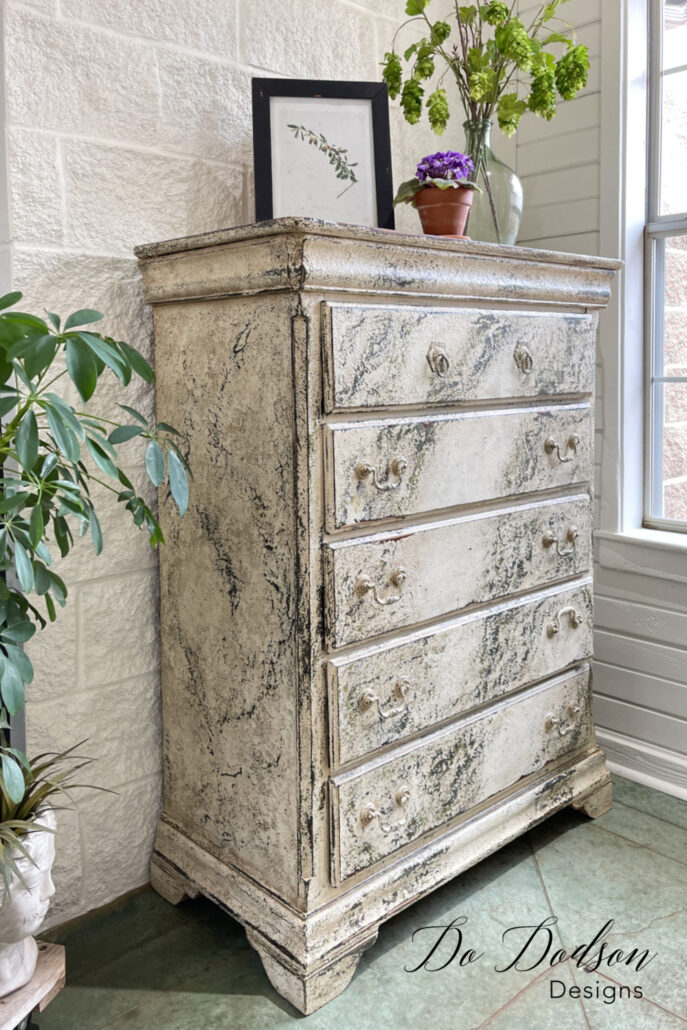
STEP 10: I used Dixie Belle’s blue sponge to seal the Saltwash finish I had created and applied one coat of Gator hide. It left my janky dresser with the most beautiful satin finish.
Guess what? I can no longer call it a janky piece of furniture.
Affordable Genuine Vintage Look
What can be better than an outcome that wasn’t expected? I seriously doubted the whole process, but that’s how furniture flippers roll. Don’t be fooled. I want you to know. We have all the same insecurities (living in our heads) that you might have.
So, what do you think about this salt wash paint technique? I’d love to hear your thoughts. Have you used it? Let me know in the comment section below. Or just say hi so I’ll know you stopped by. 🙂
Until the next project… xo, Do
I have used it and I appreciate the shout-out, my friend!😉😘 I absolutely LOVE your finish. 💕 With the colors you picked and how you distressed it, it seriously looks like gorgeous granite in the full-on images. Magnificent makeover Do! XOXO
Thanks, my friend!
It’s what I hoped it would look like. I wanted something with a European flare for my office. The jury is still out if I’ll keep it or not. And I’m still drooling over your door with the gold hardware. 🙂 xo
I love it! And really like the sheen gator hide added. I think you’re forgiven for painting the hardware. It’s what the piece was calling for.
Hey Leslie! 😂 I just knew I was gonna get some flack for painting the hardware. I think it works with the piece. Thanks for reading. 😊xo
I’ve never attempted this sort of finish, and was surprised by the number of colours you used, and the fact that you then scraped a lot of it off, but the finished articled is absolutely beautiful! I’m also stunned that you ended up with a smooth finish, having applied all the salt. I’d love to try something like this, but think I might be too scared. Is there any chance you might do a video showing the whole technique, as I think this is one of those projects that photos just can’t really capture well?
Thank you, Judi! I do have a video tutorial of this finish with so many others. Id love to paint with you.❤️ You can join me here in my private subscription. It’s free for a 7day trial period. Cancel anytime. https://www.dododsondesigns.com/join/
Oh I like saltwash too and the effects you can create! I love how your dresser turned out and the colors look great! Thank you for sharing your steps really enjoyed reading your posts! 😊
Thank you, Judy! I love sharing them with you. ❤️ Have a great week. 🙂 xo
I love it when I continue to be inspired by furniture flips and you never fail me. Thank you for putting in the effort and being willing to take risks on different techniques.
Thanks, Carol.
It’s always good to hear that what I’m creating is enjoyable and inspirational to others. I appreciate you sharing that. Have a great week. 🙂 xo
I have done several pieces in this finish. And love the surprises. Thank you Do for sharing the colors and layers, that is always the hardest part for me! Just wondering I sell my furniture and live in the PNW. I am finding these pieces can be a hard sell in my area…what about anyone else?
Hi Gail,
Yes, they are challenging to sell to the average person. It takes people like us to purchase them. Someone that is “different” and appreciates being different. The cookie-cutter people want white everything. That makes me sad.
Have a great weekend. 🙂 xo
I gotta say, it’s growing on me. That piece does look like granite. And it looks great where you have it staged. If that’s a wall in your office then that piece is perfect for it.
I really applaud where you boldly go.
LOL, I feel like I was in a Star Trek episode. Thank you, Joanne. I like to push my comfort zone’s limits to encourage others to try new things too. It’s the only way we will learn. In the process, we discover our talents and new techniques. That wall is my breezeway, AKA the dog room. At one time, it was my office. 🙂 xo