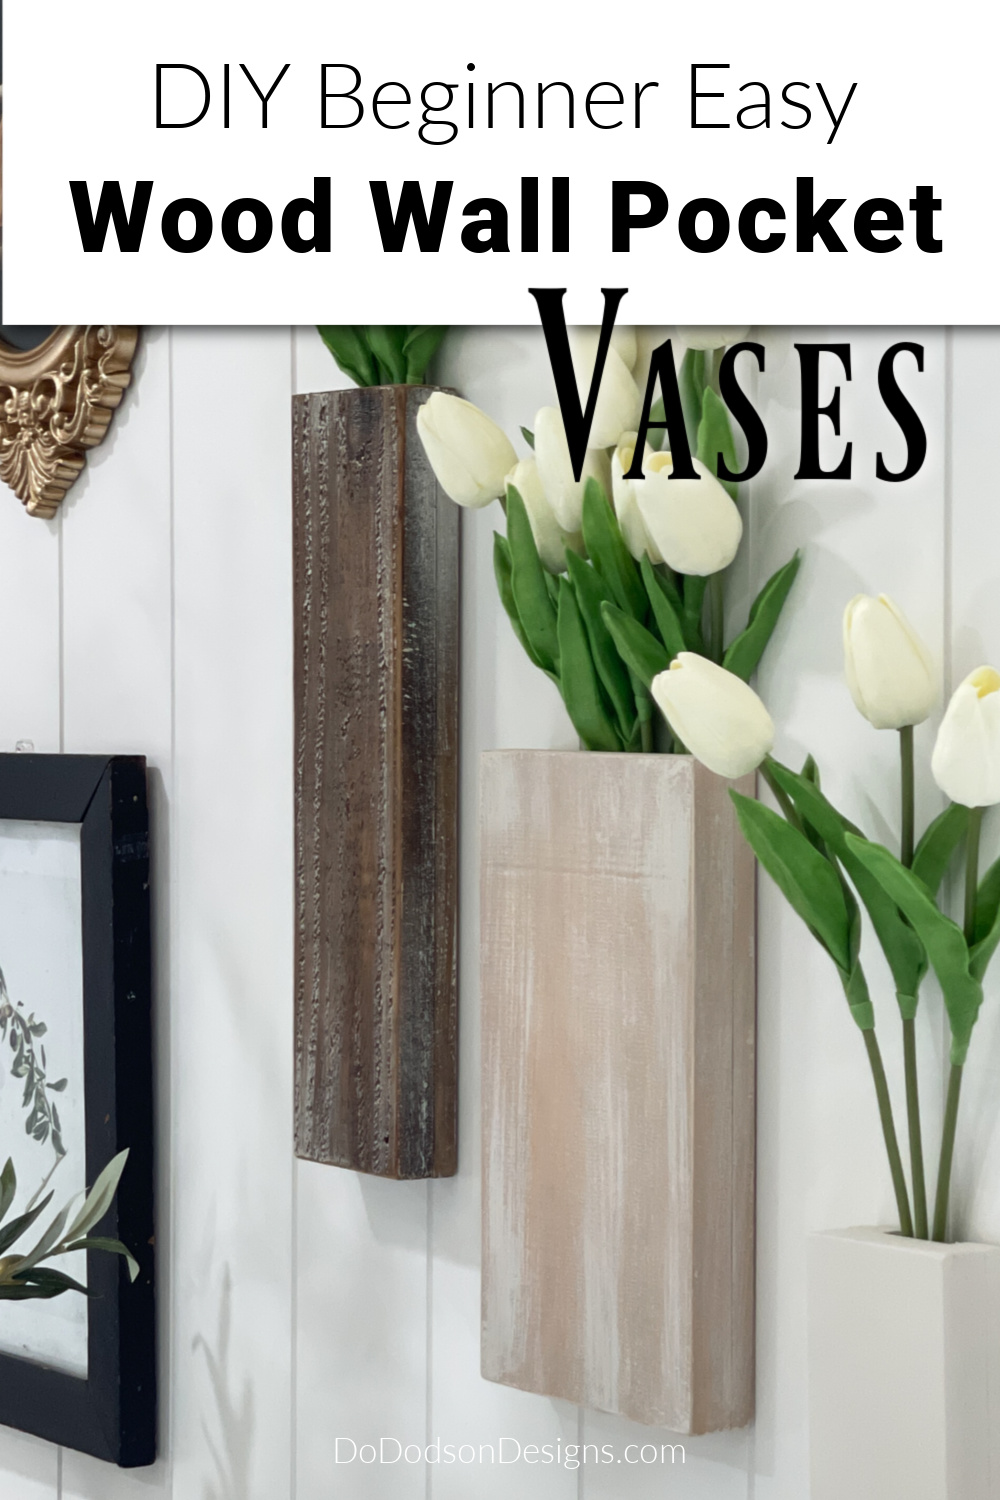
Hey there, triple-D friends and DIY enthusiasts! Looking for a fun and easy weekend home decor project? You gotta try this! Today I’ll show you how to create a simple but stylish DIY wood wall pocket using scrap wood and a few tools. This project is perfect for woodworking beginners and allows you to be creative with your style.
Thanks to Dixie Belle Paint Co for sponsoring this post. While I was compensated to write this post, all opinions are my own.
* As an Amazon Associate, I earn from qualifying purchases and through other companies as well. You will not be charged extra when you purchase through these affiliate links, but any income I make helps me create more amazing DIY projects to share with you! To see my full disclaimer, click here!
DIY Wood Wall Pockets
Once again, I find myself drawn to the scrap wood pile that I’ve been adding to on the regular. Save a piece, use a piece. Ha!
It’s my go-to place for quick and easy DIY home decor. I do tend to change out my decor pretty frequently, and by making it myself, I can customize the look and style to fit any room in my house.
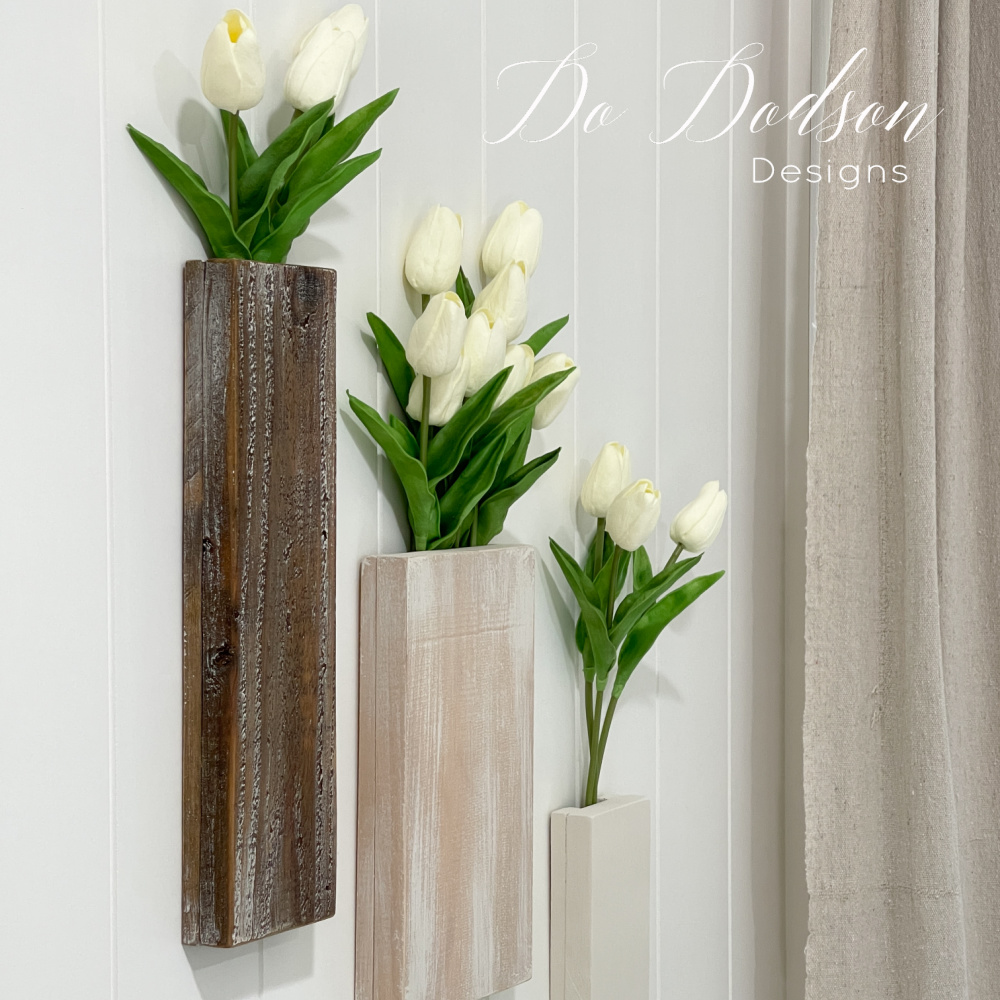
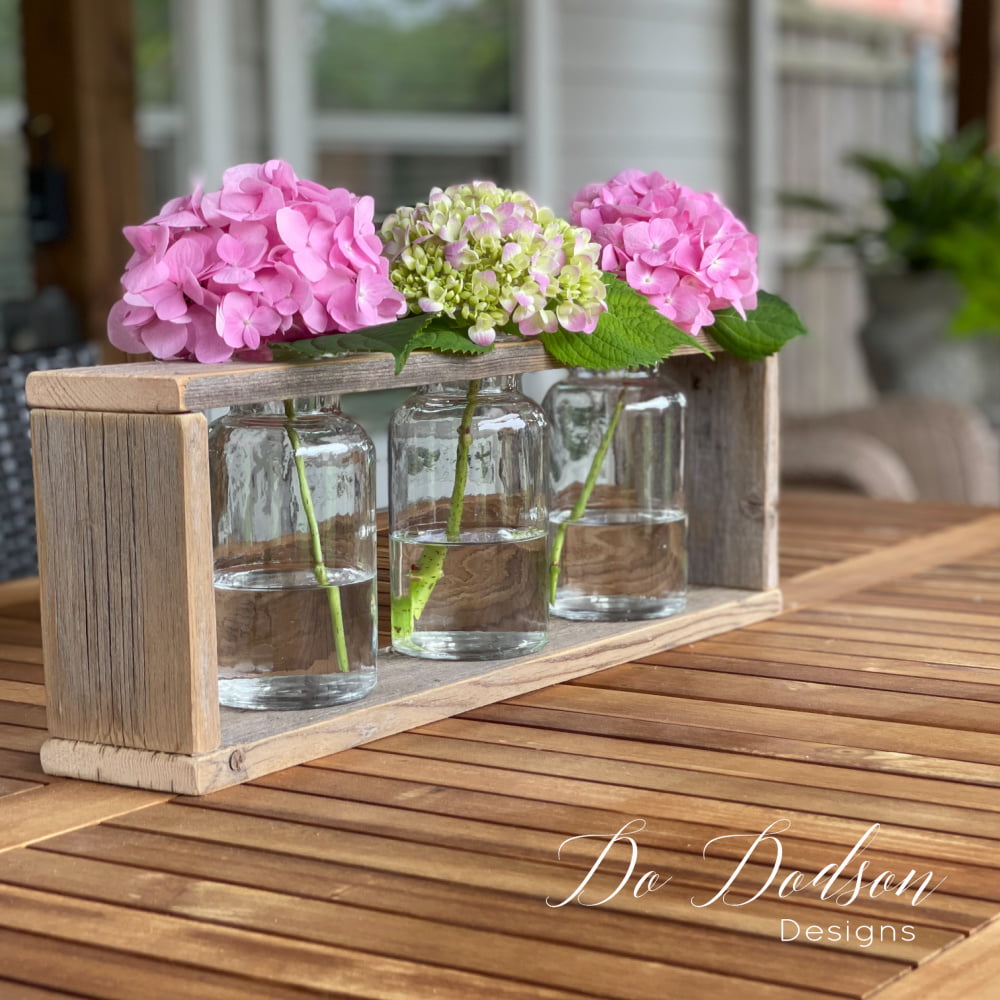
The wall pockets I’m making today will be used to hold faux greenery, florals, and anything else I can find to add character to my gallery wall in my office. Wall Pocket Vases!
But before I got started, I did some research to see what other creatives were making, and I found another cute idea from the blog LIVE OAK NEST that you might like too. CLICK HERE to see her wooden wall pockets and how she uses them.

SUPPLY LIST: Gather Your Materials
Before you start your scrap wood wall pocket project, it’s important to gather all the necessary materials to ensure a smooth process. Here’s what you’ll need:
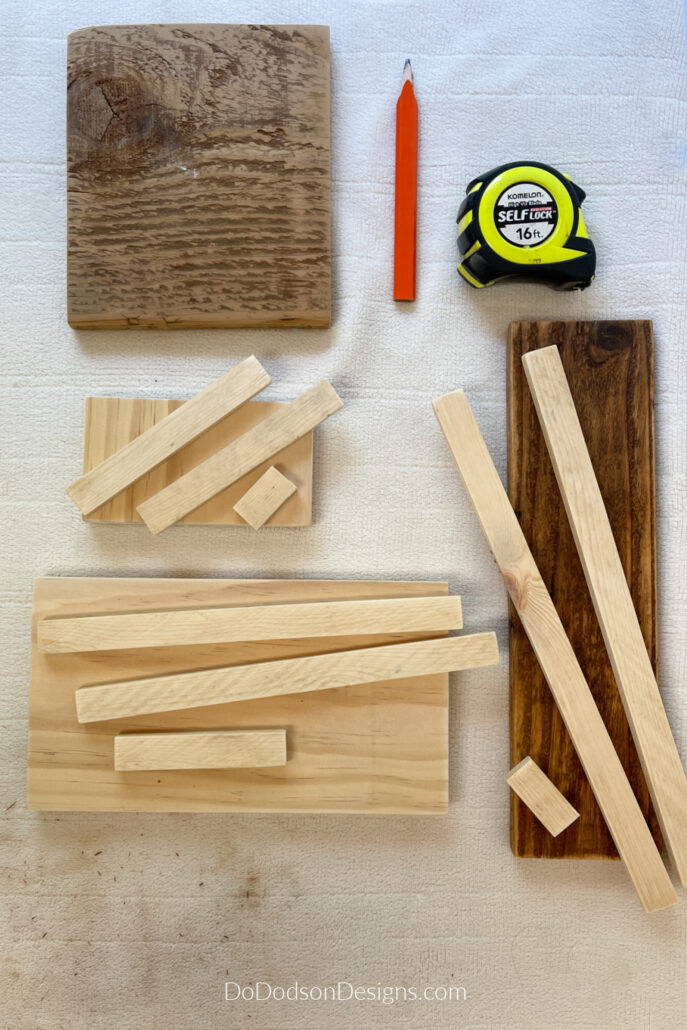
- Scrap wood pieces (in various shapes and sizes)
- Measuring tape
- Miter saw
- Sanding blocks or sandpaper
- Wood glue
- Pneumatic Nail Gun (hammer and nails or wood screws)
- Faux Tulips or greenery
Paint Supplies:
- Chalk Mineral Paint (Drop Cloth)
- No Pain Gel Stain (Golden Ash) oil-based
- VooDoo Gel Stain (Au Naturel) water-based
STEP 1: Selecting Your Scrap Wood
Searching your garage, attic, or backyard for any scrap wood pieces you may have lying around is a great place to start, or visit your local hardware store to purchase wood pieces in various sizes.
Start by selecting the pieces of scrap wood that you want to use for your project. Look for pieces that are straight, smooth, and free of any major dents or scratches.
But don’t overlook those rustic pieces. Those are my fave!
You can choose to use a rougher textured board for a farmhouse rustic vibe. It’s your choice! I personally like the texture of a rough-cut board. Don’t worry if your pieces of scrap wood aren’t perfectly matched; the unique look of each piece adds to the character of your DIY wood wall pockets.
STEP 2: Cutting Your Wood To Size
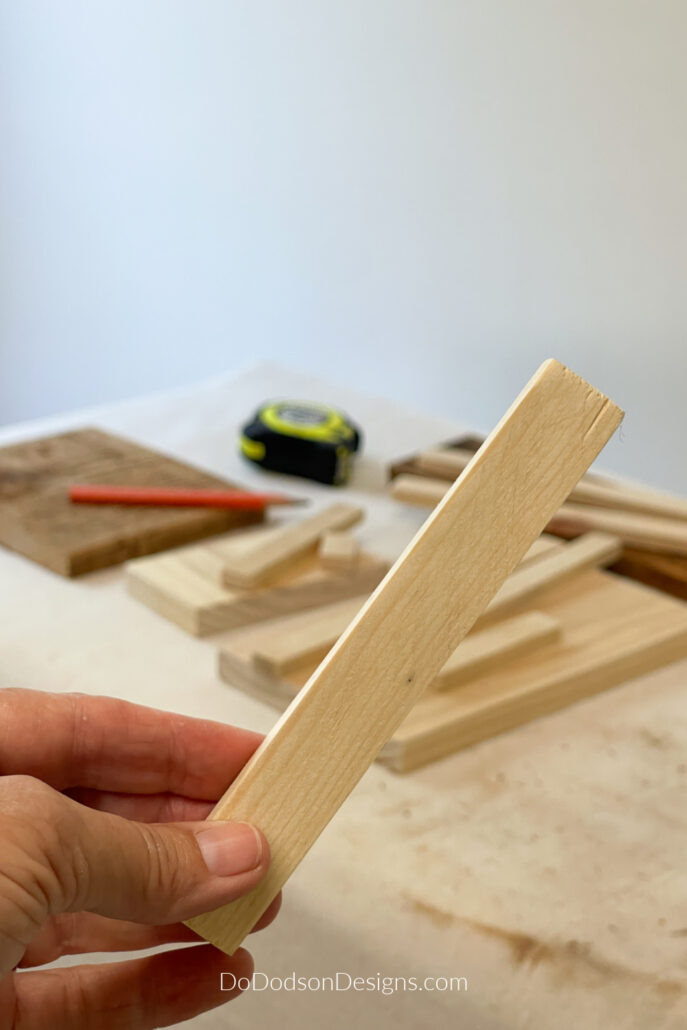
Next, measure and cut your scrap wood pieces to the appropriate size and shape for your wall pockets. You will need to use a saw or other cutting tool to achieve the desired shapes or angles.
I started by cutting the front pieces into three different sizes for my wall pockets. Each one with different wood and finishes in mind.
Two pieces were leftover select pine from a previous project, and the third was an old fence picket. All of the wood I used was lightweight. It’s important to use lighter wood so that you don’t need additional support to hang them from.
The front of the wall pocket is one solid piece. To make the pocket (behind), use three narrow strips of wood cut into three pieces. Two long pieces for the sides and one smaller one to connect the sides to make the pocket.
I actually intended to make four, but one of the boards was too brittle and broke when I was sanding it. Bummer! It was a piece I salvaged from my barn.
STEP 3: Prepare Your Scrap Wood
Sand down any rough edges or surfaces with 220-grit sandpaper to make them smoother and more uniform.
To make sure that your DIY wood wall pockets turn out looking their best, it’s important to take the time to prepare your scrap wood pieces. This step will make your final product look more polished and professional.
Be sure sure to remove any sawdust or debris before moving on to the next step.
By taking the time to prepare your scrap wood pieces carefully, you’ll ensure that your DIY wood wall pockets turn out looking their best. With your pieces prepped and ready to go, you’re now ready to move on to the next step: assembling your wall pockets.
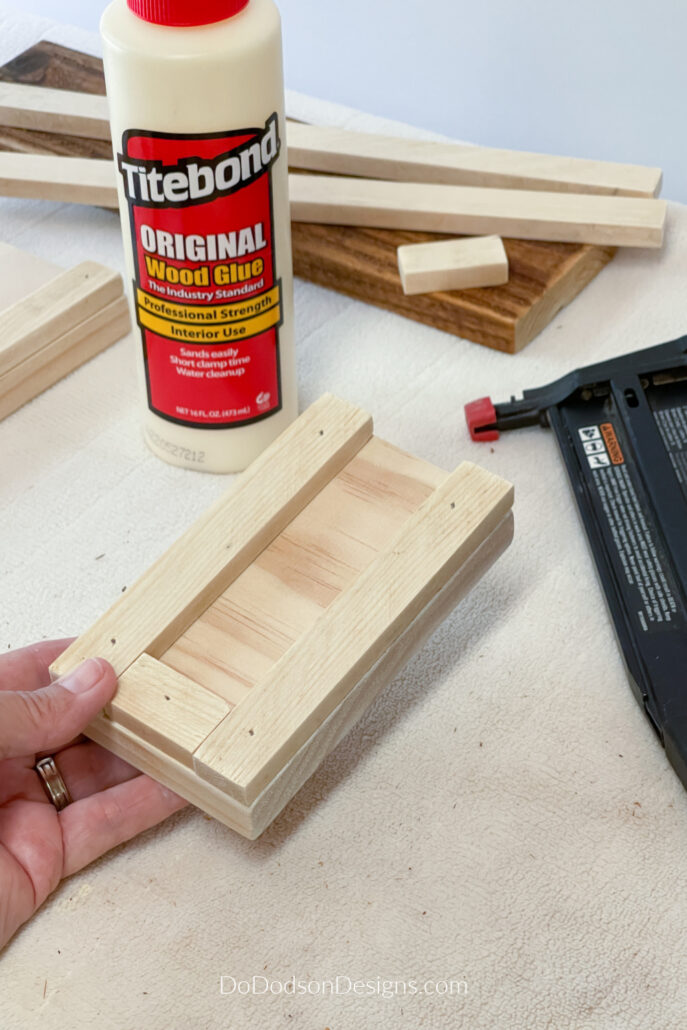
STEP 4: Assembling The Wall Pocket Vase
Apply wood glue to the back of the pocket pieces and push them into place on the back side of the board. Allow them to sit in place for a few minutes before securing them with nails.
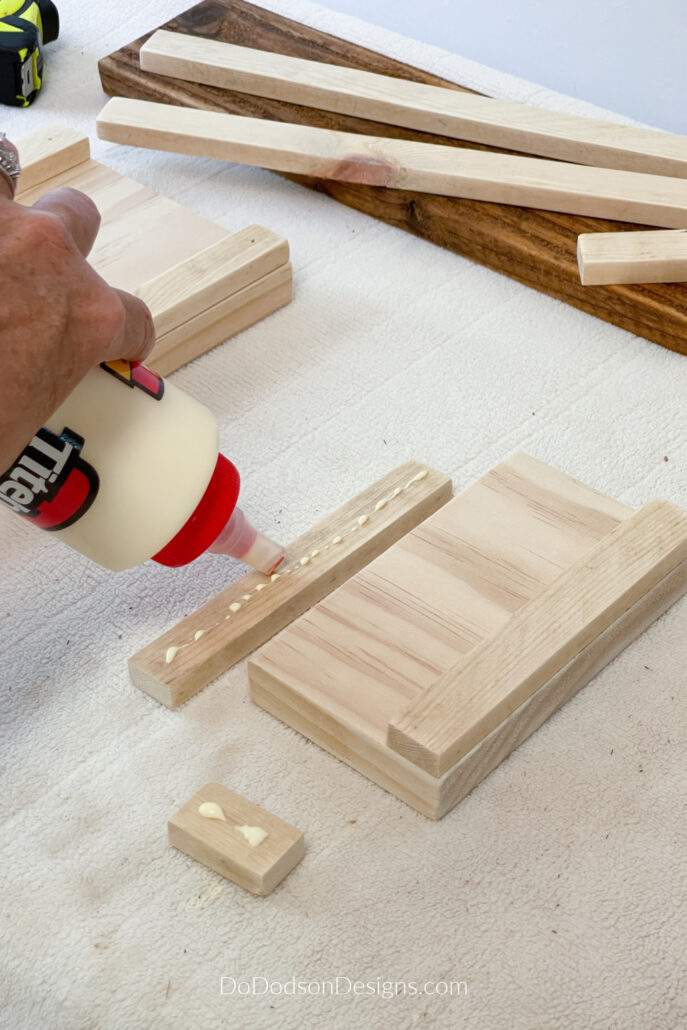
I prefer a finish nailer for this kind of small project. It sure does make it easier when you don’t have an extra set of hands nearby, but a hammer and a few nails will also get the work done if that’s all you have. Basically, you’re just making sure the glue dries without the wood pieces slipping.
On second thought, clamps would be a good alternative if you don’t want to use nails.
You now have a pocket!
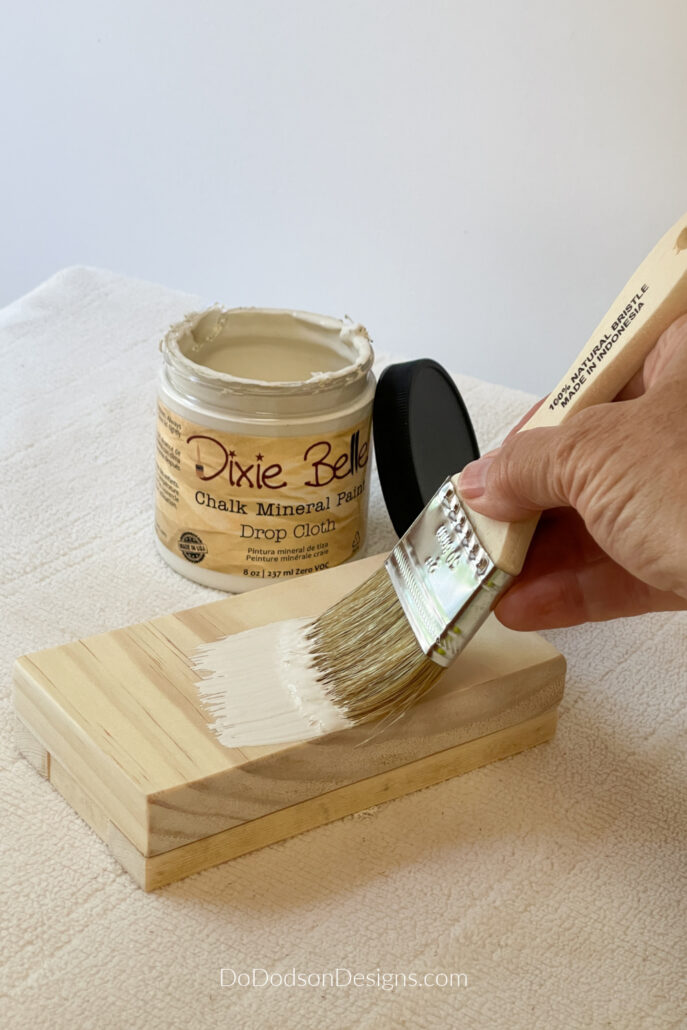
Step 5: Paint, Stain or Both
Once you’ve completed your DIY wood wall pockets, the next step is to put your personal stamp on them. That means looking beyond the basic functionality of the pockets and thinking about how you want to customize them to suit your style and personality.
One simple way to personalize your wall pockets is with paint. Whether you opt for a bold hue or a more subtle shade, a fresh coat of paint can transform your pockets’ look. You could also add a decor transfer, painted stripes, etc. You see where I’m going with this.
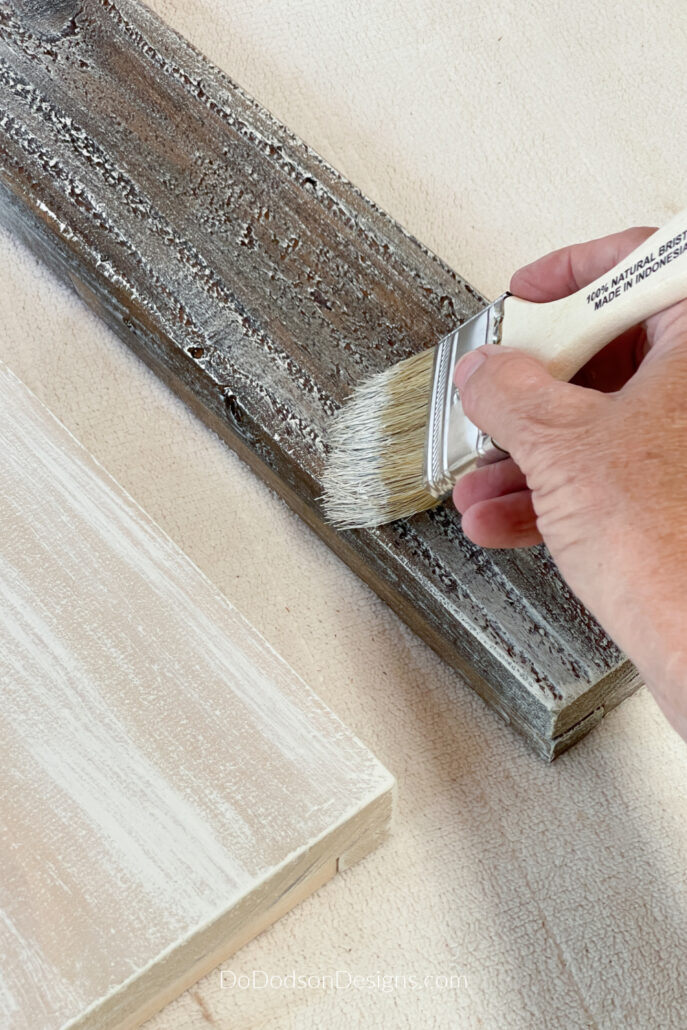
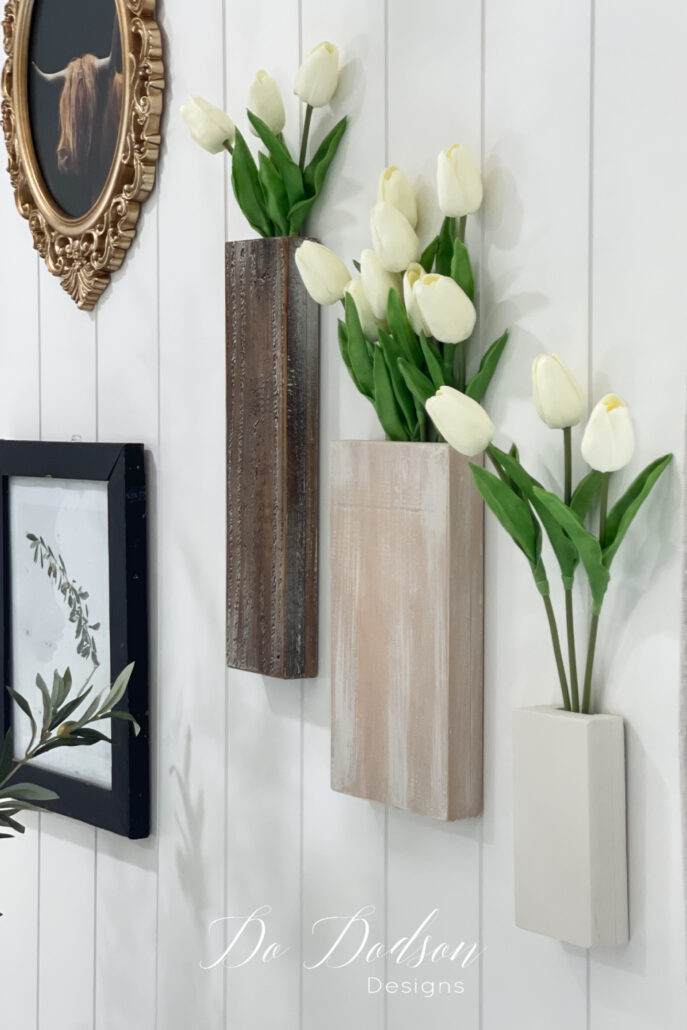
But you know me, I’m a less is more kinda gal, and I love chalk mineral paint. Paint it is for wood pocket #1. I chose a neutral shade called Drop Cloth by Dixie Belle Paint Co.
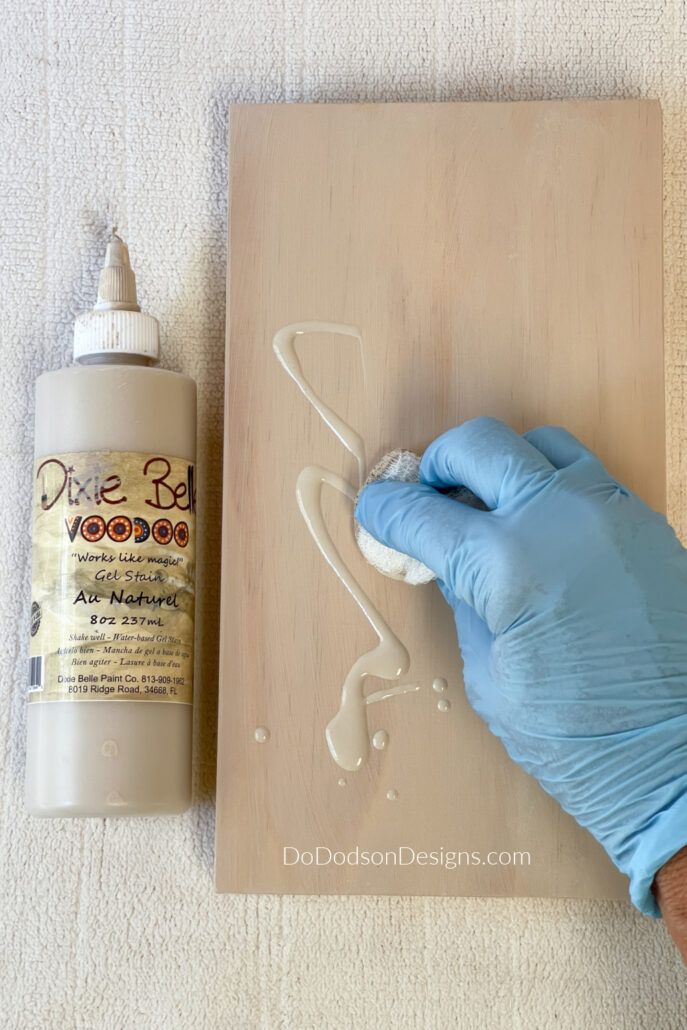
Wood pocket #2 got a beautiful water-based stain by Dixie Belle in Au Naturel. It adds a hint of color but allows the wood grains to shine through.
Squirt it straight from the bottle and rub it into the wood. It dries super fast.
Wood pocket #3 got a beautiful oil-based stain in the color Golden Ash. It’s easy to apply. Simply wipe it on with a soft cloth and watch how it instantly adds color to wood. This stain takes a little longer to dry, so allow it to dry overnight.
You can apply a second coat the next day if you want a darker color.

Step 6: How To Dry Brush With Chalk Paint
This step is totally optional, but I already had the paint on my chip brush, and I didn’t want to waste it.
To get the dry brush look of paint over paint or stain, simply brush the color of your choice over the surface with a light hand until you get desired look you want.
I dry-brushed over both stained pieces with the chalk mineral paint.
Step 7: Add Your Personal Touch
If you’re feeling more ambitious, you might want to experiment with different textures and materials. Consider using stencils, decoupage, or even fabric to add a unique touch to your wall pockets. The only limit is your imagination!
Of course, your personal touch doesn’t have to be purely decorative. You could also customize your wall pockets with functionality in mind. For example, you could attach hooks or knobs to the front of the pockets to create a place to hang keys, jewelry, or small bags.
Whatever approach you take, remember that your DIY wood wall pockets are an expression of your creativity and personality.
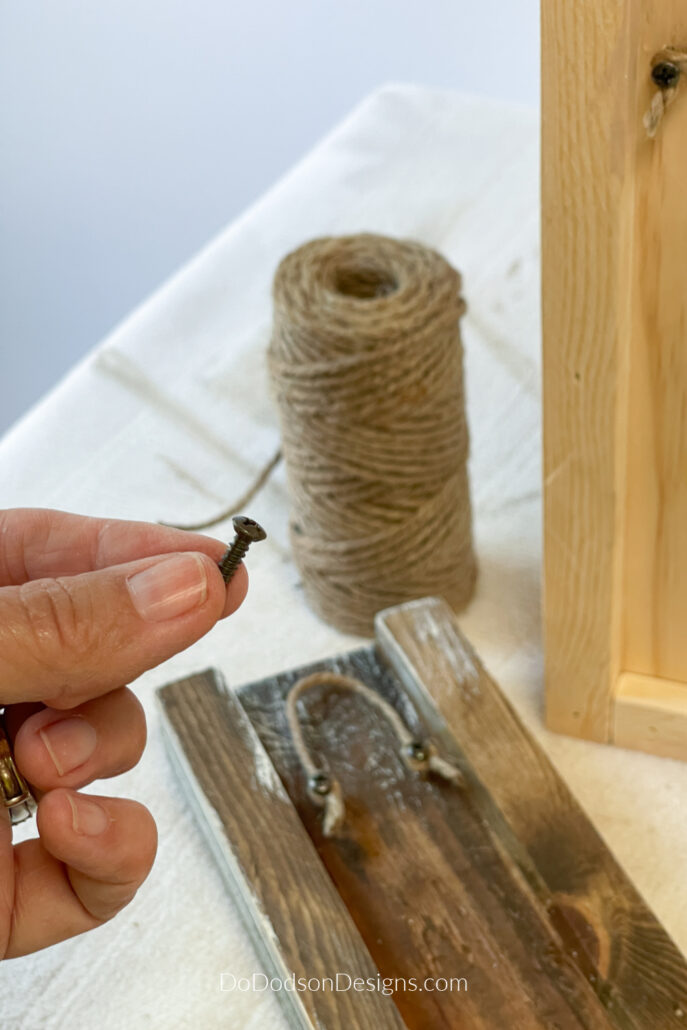
STEP 8: Hang Your DIY Wood Wall Pockets
Now that your DIY wood wall pockets are done, it’s time to hang them up, but before you do, attach picture hangers.
Or do like I did and use two screws and some twine to make a hanger. There is no hard rule that you have to use the traditional hangers, and I see no reason why you can’t DIY a hanger when you don’t have what you need on hand.
I don’t have time or want to wait on Amazon to hang my creations. They turned out so good!
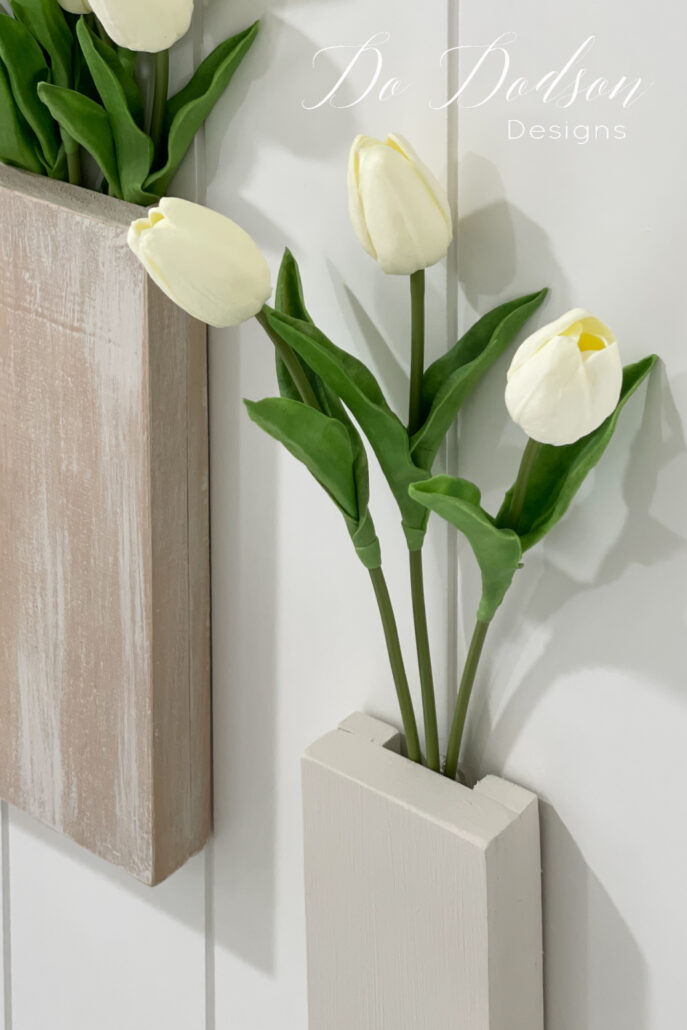
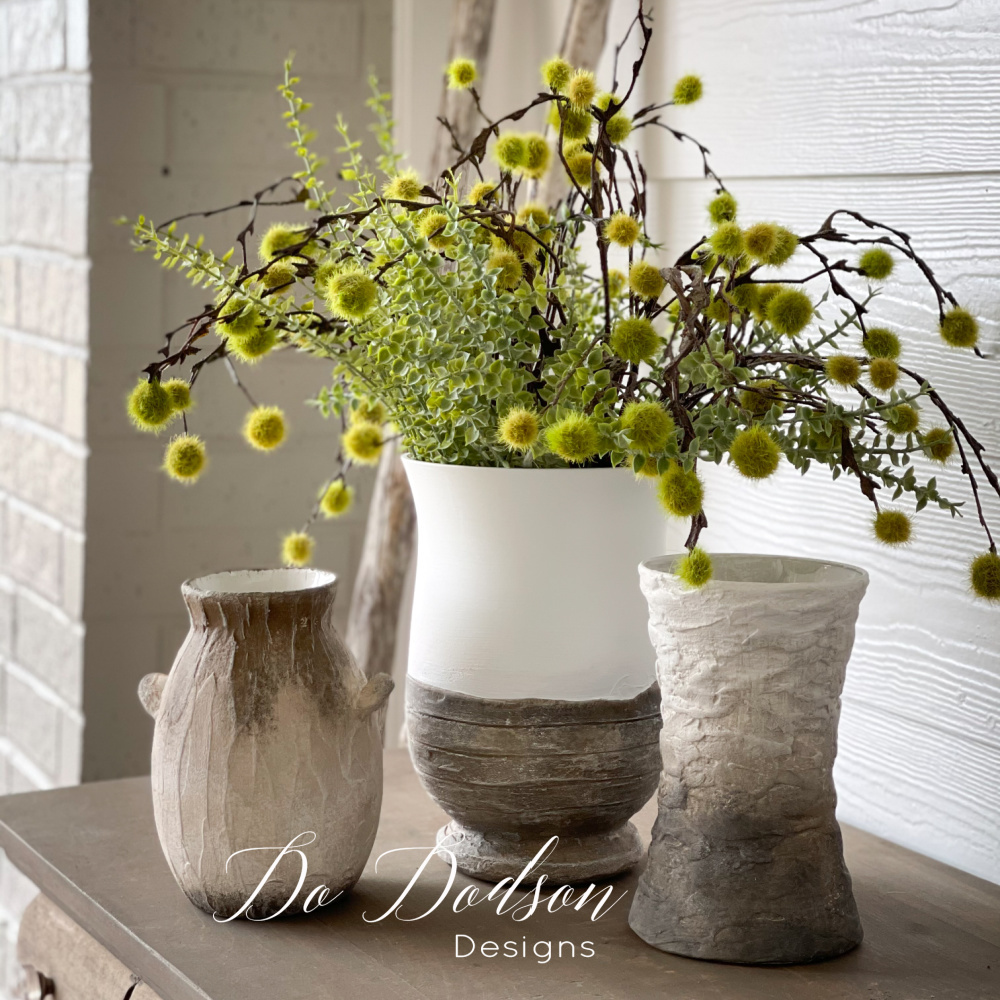
With your wall pockets now securely attached to the wall, add faux greenery, florals, or even dried flowers from your garden, and watch your DIY wall pocket vases come to life.
It’s the no mess, no fuss vase with flowers you can’t kill.
I’ve also seen them used for office supplies. Pencils, pens, etc.
Now, take a step back and admire your creation. You just created something beautiful that you can be proud of and did it on a shoestring budget, as Mom would always say.
The End Results
I love these DIY wood wall pocket vases, and the scrap wood I used to make them is like the icing on the cake for me! They don’t call me the scrap wood QUEEN for nothing.
My office gallery wall is growing!
L-O-V-E this so much!

So, don’t be afraid to experiment with different finishes and personal touches to make your wall pockets truly unique. Showcase your creativity and be sustainable by reusing those old pieces of scrap wood. As Albert Einstein said, “Creativity is intelligence having fun.” It’s one of my favorite quotes of his.
Before you go, I’d love to know that you stopped by. Give me a shout in the comment section, or feel free to share what you think about this unique DIY home decor project. My readers always have the best suggestions, and I love hearing from you. How would you make these your own?
Happy DIY-ing!
Until the next project… xo, Do

These are amazing! I gotta try! 👍😃😃 enjoy your weekend! XOXO
Hey Denise! Aren’t they fun? So easy! Maybe Andrea needs a set. 🙂 xo
Your tutorial on your fun wall pockets has added a spark to the beginning of this day. I have decided that I am going to have to learn to use our saw. I have reached the realization that my husband should no longer use power tools for his own safety.
LOL, you made me laugh out loud, Sonja!
My hubby and I joke about me having more tools than him. He has to come ask me when he wants to use them. I LOVE my power tools.
A word of advise… please be careful when using power tools. Ask someone that you know and trust to go over the basics with you first. Take your time. Start with simple one board projects. You can’t be too safe.
Have fun creating! 🙂 xo
Your wall pockets are a perfect solution for adding a simple but elegant wall decoration to various rooms. Love them.
Hi Jo!
Thanks for stopping by. I couldn’t agree more. Have a beautiful week. 🙂 xo
Love your scrap wood projects!
Thank you, sweet friend! I hope you’re feeling better. Praying for you. 🙂