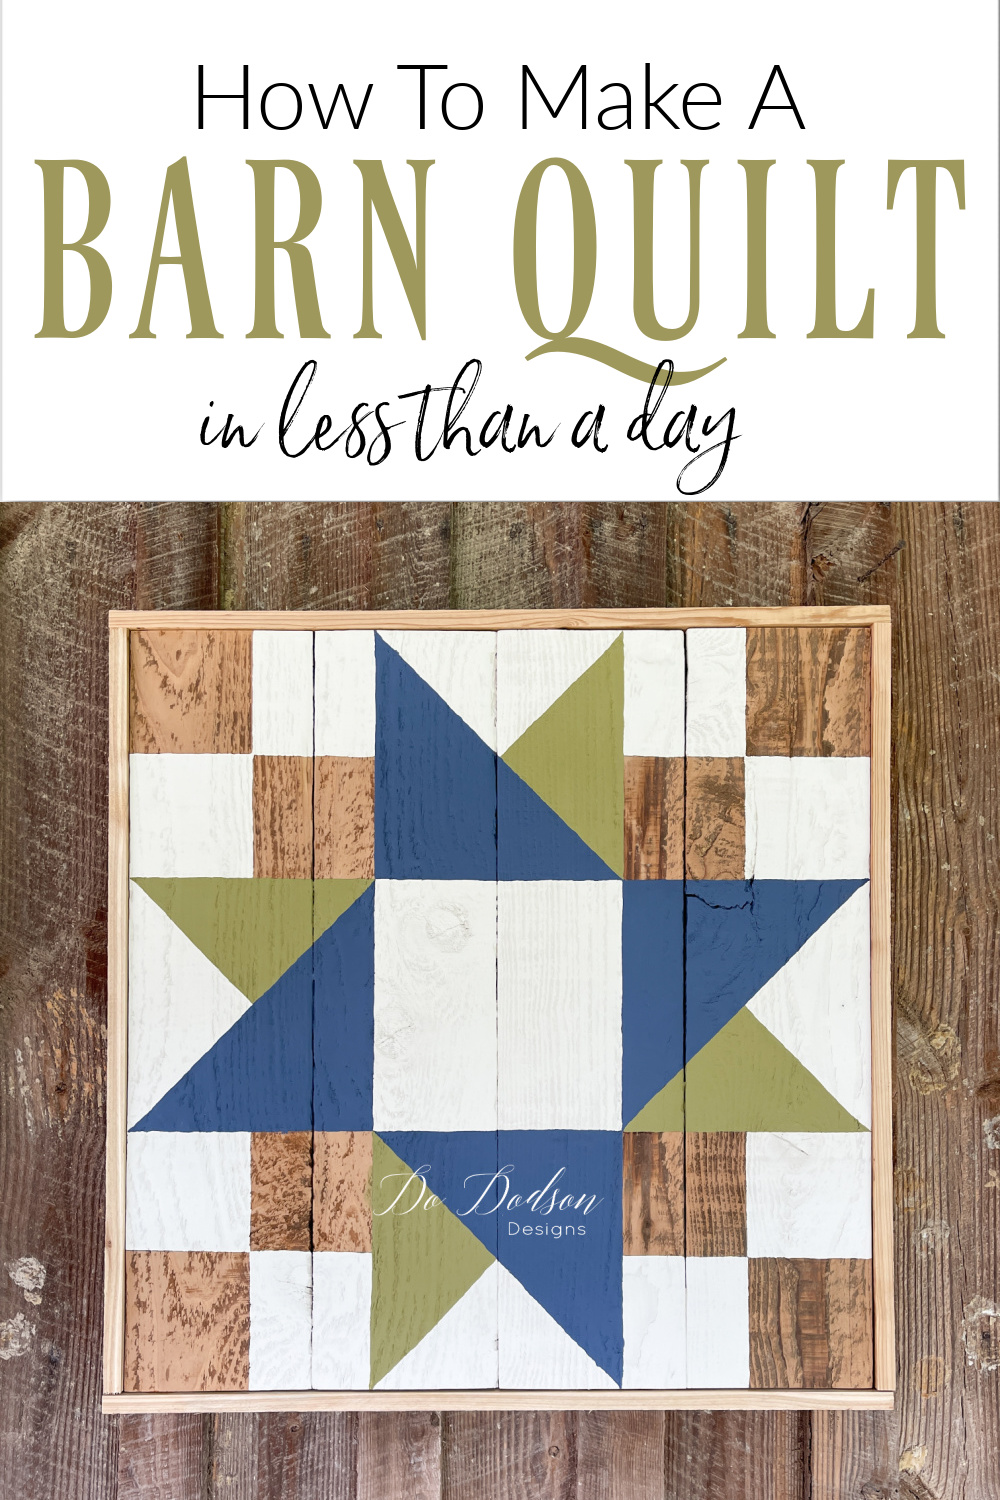
Hey triple-D friends! Are you looking for a fun and creative way to repurpose your old wood scraps into something amazing? Today I’m showing you how I made a DIY barn quilt for Jack and Diane, AKA the mini mukes. It won’t keep them warm in the winter, but it will bring a bit of charm to the barn.
Thanks to Dixie Belle Paint Co for sponsoring this post. While I was compensated to write this post, all opinions are my own.
* As an Amazon Associate, I earn from qualifying purchases and through other companies as well. You will not be charged extra when you purchase through these affiliate links, but any income I make helps me create more amazing DIY projects to share with you! To see my full disclaimer, click here!
A Painted Barn Quilt For My Mini Mules
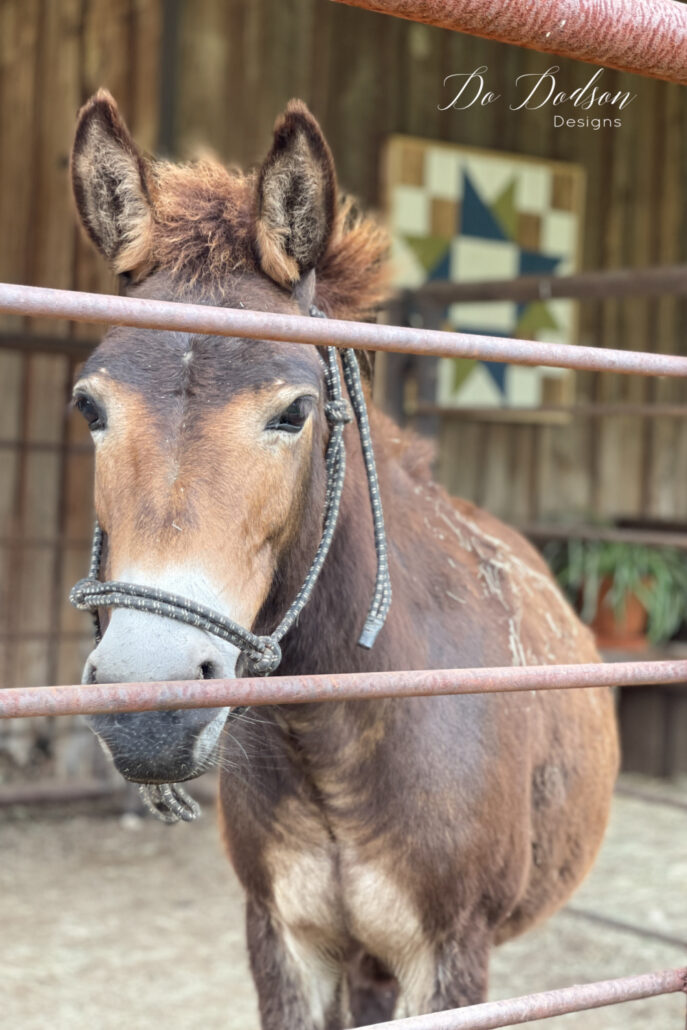
Well, I guess it’s not just for the mini mules. It’s actually for me, but I think Diane appreciates it more than Jack. She posed for the camera every chance she got. Yes, she got extra snacks for being so cute.
And Jack? He’s such an Ass. Let’s just say he had his mind on grass. LOL

SUPPLY LIST:
Here is what you’ll need to make a DIY barn quilt sign.
- Scrap wood or treated plywood, cedar, etc
- Chop Saw
- Carpenters Square
- Measuring Tape
- Sandpaper or Electric Sander (SurfPrep)
- Wood Glue (exterior)
- Wood Screws
- Primer, Stain Blocker (optional)
- Gator Hide (water-based topcoat)
- Artist Brush Set
Chalk Mineral Paint
STEP 1: Choosing Wood Or Wood Scraps For A Barn Quilt
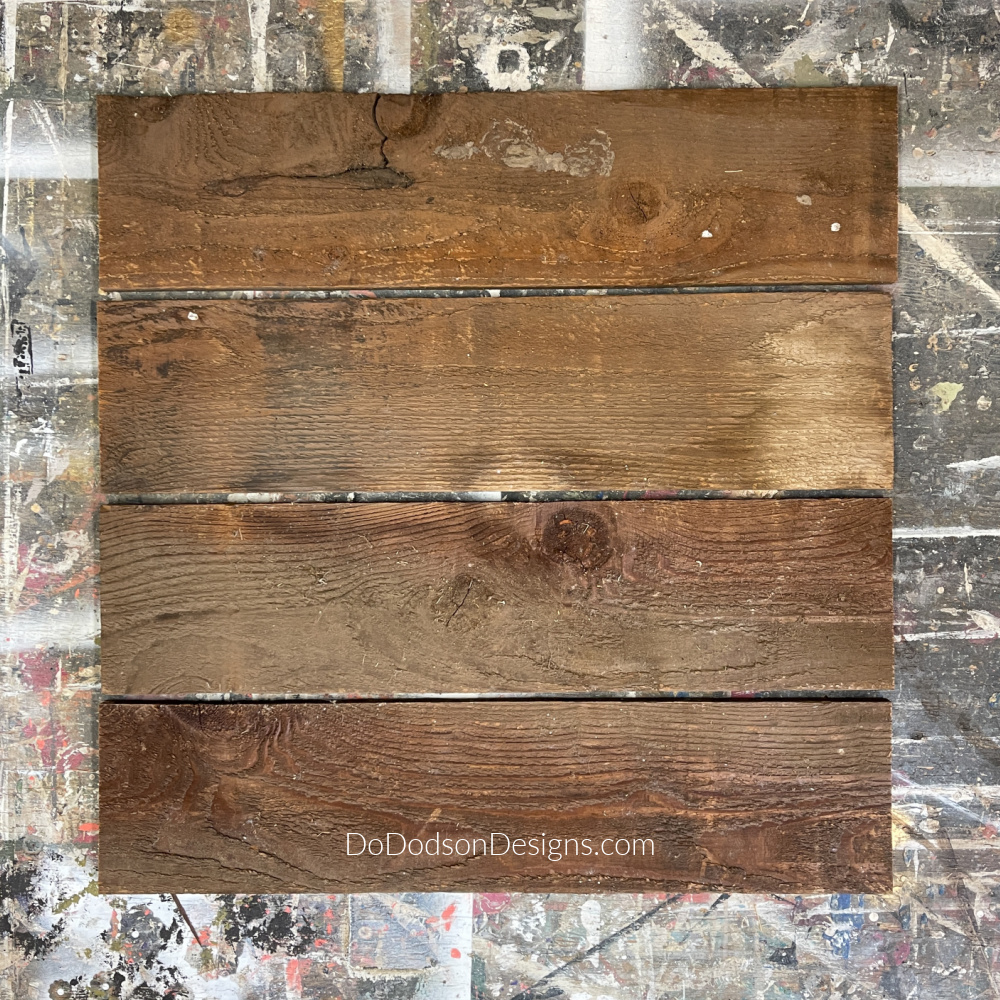
Before you can get started on your barn quilt, you need to gather your wood scraps. Luckily, this is the perfect project for using up any leftover lumber or salvaged rustic wood pieces you have on hand. But not all wood is created equal when it comes to creating a barn quilt. Rustic is a great look for a barn quilt.
First, choose wood scraps that are free of any major cracks or splits, as these imperfections can interfere with the stability of your quilt. Additionally, make sure your wood scraps are roughly the same size and thickness so that your finished product will be level and sturdy.
When it comes to the type of wood to use, there are a few things to consider. You may want to use wood that matches the color of your property or that has a naturally rustic or weathered look. If you’re planning to display your barn quilt outdoors, make sure to use wood that is weather-resistant, such as cedar or redwood. The wood you chose should be dry. New lumber (green) has moisture and will repel the paint from adhering.
Can you believe I found these old cedar planks in the loft of our barn? SCORE!
I assume they were leftover siding that the former owner kept in case of repairs if needed. Smart man! Lucky me!
*Cut your boards so that they will form a square by using this method.
After butting your boards together, decide on a length that will make a perfect square. This is important when painting a quilt design.
Then cut your boards so that they will make a square. Does that make sense?
Next up, I’ll cover everything you need to know about preparing your wood pieces for painting.
STEP 2: Prep Your Wood
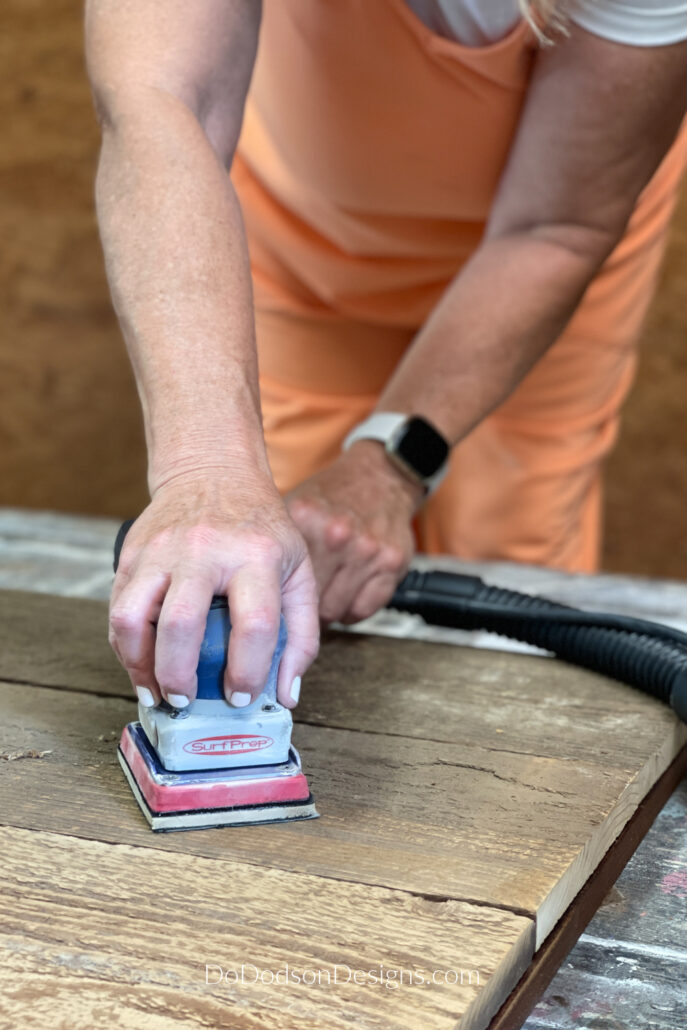
To ensure that your DIY barn quilt looks its best, it’s important to properly prepare your wood pieces first. Make sure the wood is clean and free from any dirt or debris. If your wood is rough, sand the surface of the wood with 80-100 grit sandpaper to knock off the rough spots, and then a final sanding with 220 grit. This will create a smooth surface for your paint to adhere to.
Be sure to remove or blow off any remaining wood dust.
If you plan on painting your design onto a dark or heavily-grained piece of wood, consider using a primer or base coat to ensure that your colors show up vividly. Allow the primer to dry completely before moving on to painting your design. For this project, I chose to skip the primer because I will be leaving some of the wood exposed in the design.
Once you’ve prepped your wood pieces, you can move on to painting your quilt design. By taking the time to properly prepare your wood, you’ll ensure that your finished product looks polished and professional.
STEP 3: Build Your Wood Sign
If you’re not using a solid piece of plywood (optional) for your barn quilt and choose to use old scrap boards, you’ll need to build the wood sign first.
Inspect both sides of the boards you choose to determine which sides you want facing outward. If you love old wood knots showing through, by all means, place them right side up.
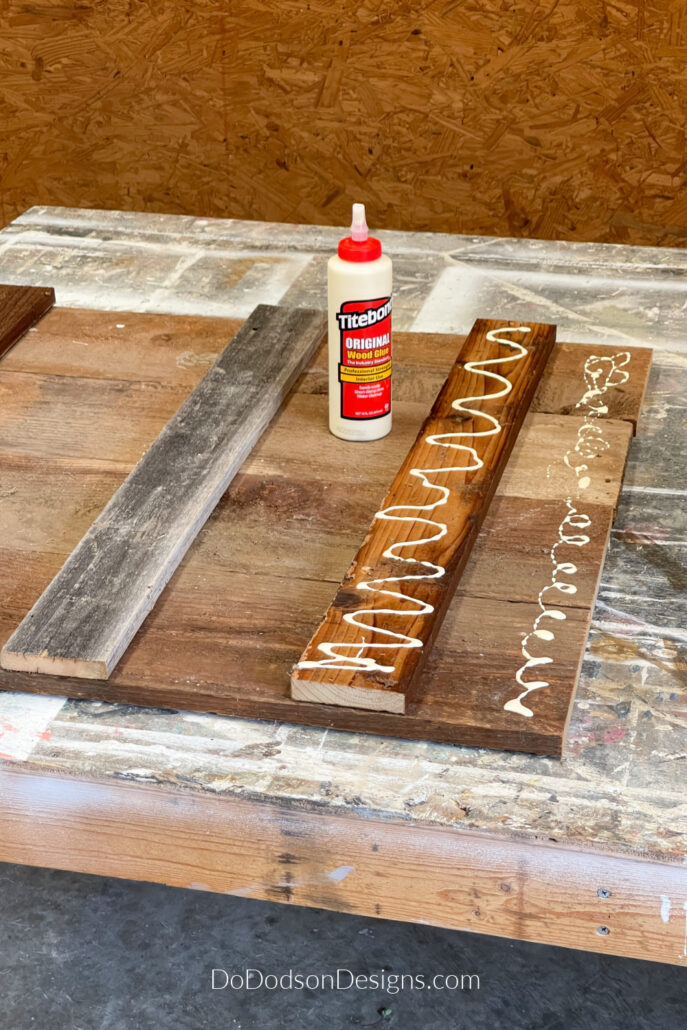
Cut three separate pieces the same length as the boards. These will be used to secure the boards together from the underside side.
Next, apply a good amount of wood glue to the boards, as I did in the photo below. Be sure to use exterior wood glue.
After I had built my wooden sign board, I noticed I grabbed the wrong glue. Oh well, It’s going to be under a covered area, so hopefully, it will be okay. I’ll keep you posted.
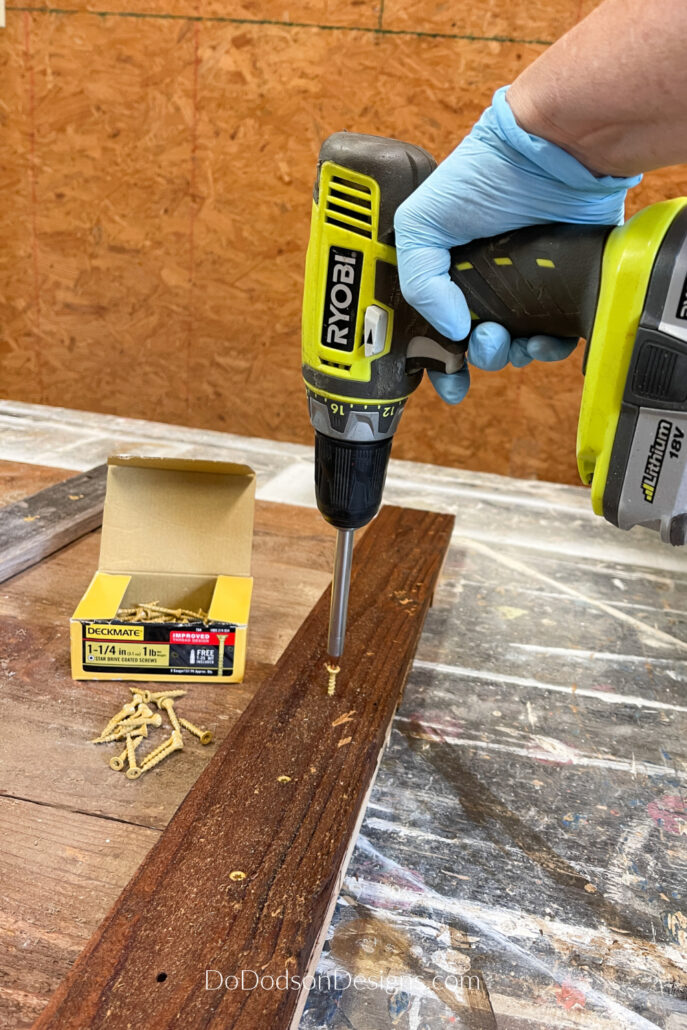
Lastly, secure them with wood screws. The glue will dry, and you’ll have a solid sign to paint your quilt on.
I have used this method with most of my outdoor signs, and they hold up very well.
Watch This Video To Learn How To Build A Wood Pallet Sign
STEP 4: Design Your Quilt Pattern
When it comes to designing your barn quilt pattern, there are endless possibilities. You can create a traditional block pattern and design your own unique geometric shapes. The key is to choose a pattern that speaks to you and complements the overall aesthetic of your property or barn.
Before diving into the actual design process, it’s helpful to sketch out some rough ideas on paper. This will give you a basic outline to work from and allow you to experiment with different color schemes and layout options. Once you have a few preliminary designs, you can begin to refine and finalize your chosen pattern.
Keep in mind that the size of your wood scraps will impact the scale of your design. Using smaller scraps may require a more intricate pattern, while larger scraps can accommodate larger shapes and simpler designs. Consider the overall size and placement of your barn quilt when choosing your pattern, as a larger quilt may require a bolder and more graphic design to make an impact.
Don’t be afraid to play around with color combinations and placement. You can create a dynamic and visually stunning quilt by using contrasting colors or incorporating different shades of the same color. And remember, the beauty of a DIY barn quilt is that it’s entirely up to you – so have fun with the process!
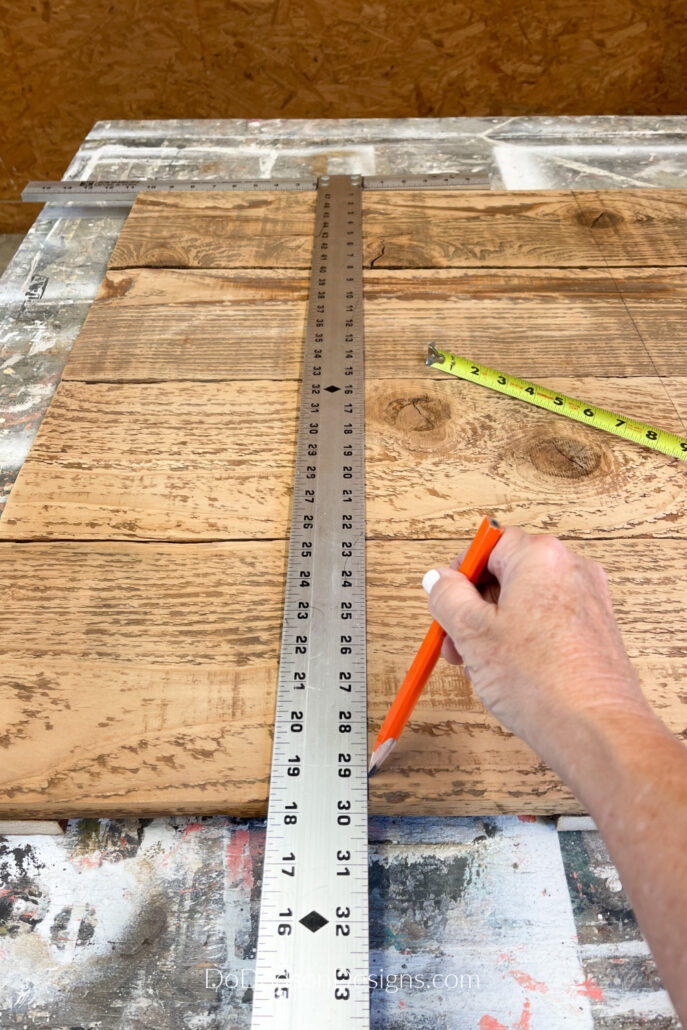
STEP 5: Mark Off The Blocks
Once you have chosen your pattern and design (Pinterest is great for inspo if you didn’t know), use a large woodworking square or any item with a straight edge to mark out your design with a pencil. Using a measuring tape is also helpful to ensure you have the perfect-sized squares.
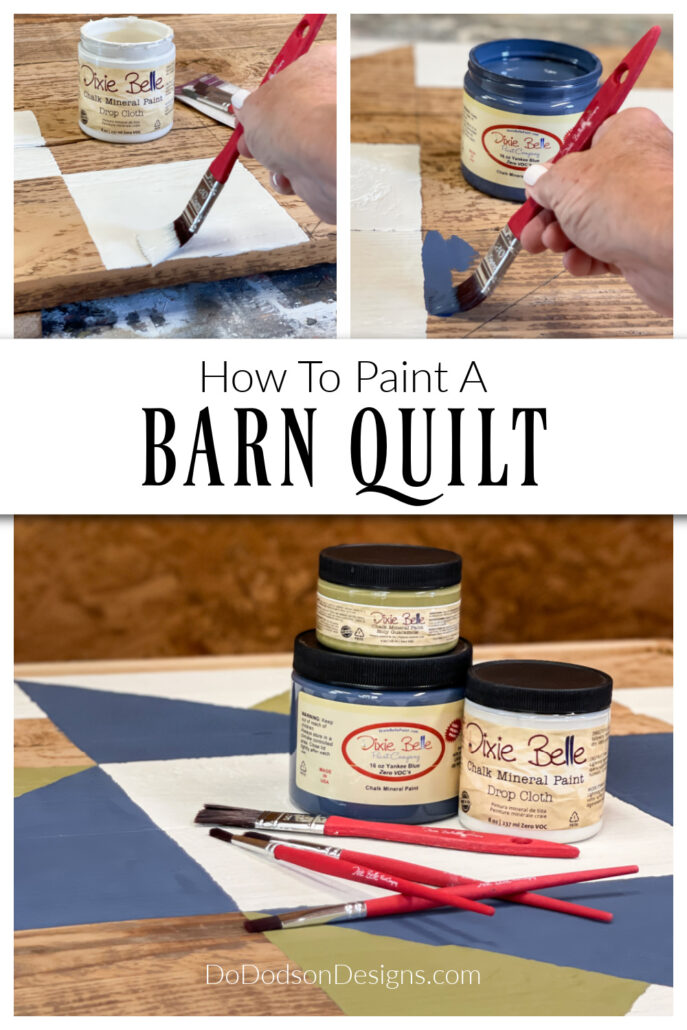
STEP 6: Painting Your Quilt Design
If you’ve completed the prep work, it’s time to move on to painting your design.
I used the Artist Brush Set from Dixie Belle Paint to paint my quilt design. Using the right brushes is everything! There are four different sizes to choose from, and they made painting this quilt design a breeze.
Make sure to take your time with each brush stroke and stay within the lines of your design. Use a steady hand to achieve straight lines and avoid smudging or smearing the paint. If you want to create a gradient effect or blend colors, use a wet brush technique to blend the colors together.
It’s important to wait for each layer of paint to dry fully before adding additional layers or painting next to blocks that haven’t dried completely. This will prevent any smudging or color bleeding. Allow it to dry completely before moving on to the next step.
By now, your quilt should be looking spectacular and well on its way to becoming a treasured piece of art.
STEP 7: Adding the Finishing Touches
After painting your DIY barn quilt, it’s important to take a step back and assess your work. Are there any areas that require touch-ups or additional brushstrokes? If yes, now is the time to make those changes before adding the final touches.
To add the finishing touches to your barn quilt, consider incorporating a border around the edges. This can be as simple as making a wood frame (CLICK HERE TO LEARN) around the quilt.
Adding a border not only gives your quilt a polished look but it also helps to hide any imperfections on the edges.
Another finishing touch that can really make your barn quilt pop is adding a top coat. This will protect the paint from fading and give it a long-lasting finish. Be sure to select a clear coat that is appropriate for the surface you painted on, such as a water-based top coat for wood.
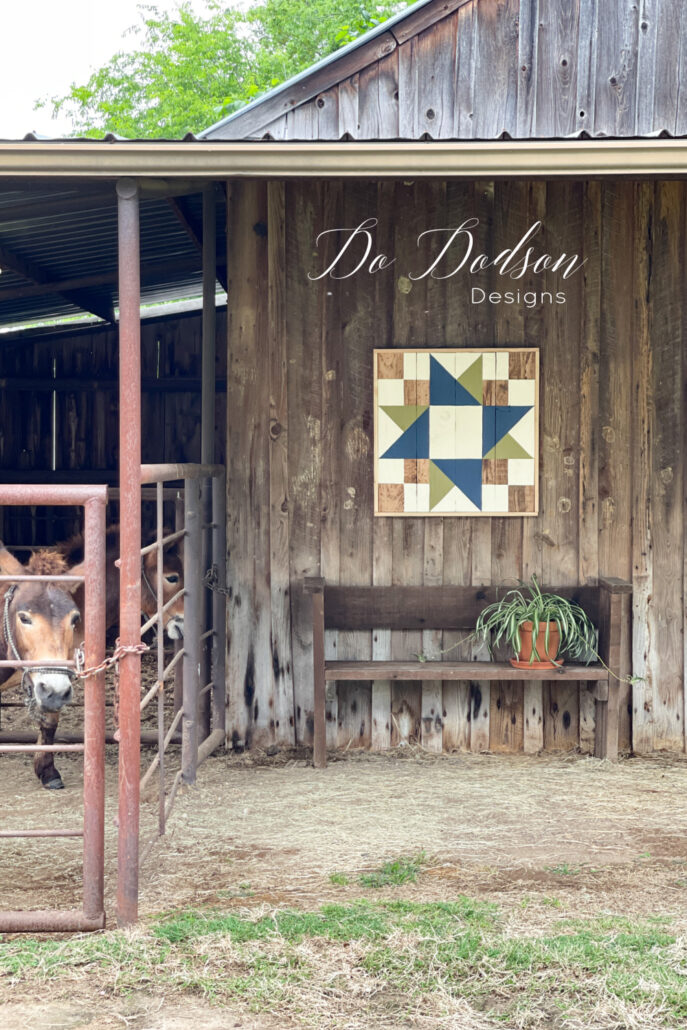
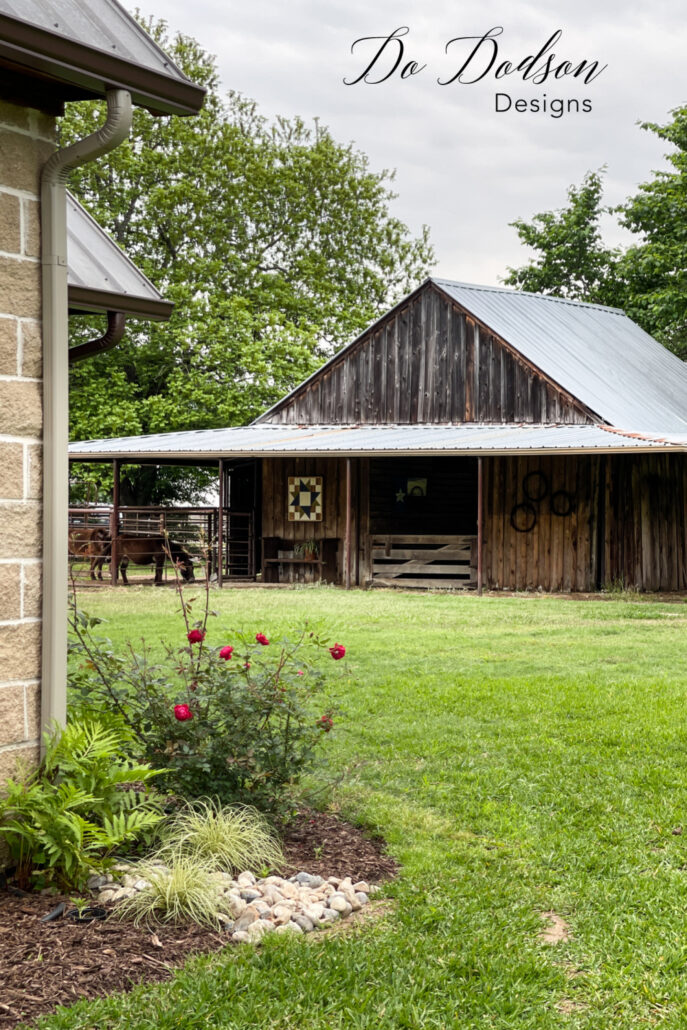
Finally, consider the placement of your finished barn quilt. Is it going to be hung on the side of a barn or displayed inside your home? Make sure it is hung in a location where it can be appreciated by everyone who sees it. A well-placed barn quilt can be a conversation starter and a beautiful addition to any space.
With these finishing touches, your DIY barn quilt will be ready to showcase to the world. It’s amazing what a few extra touches can do to take a project from good to great.
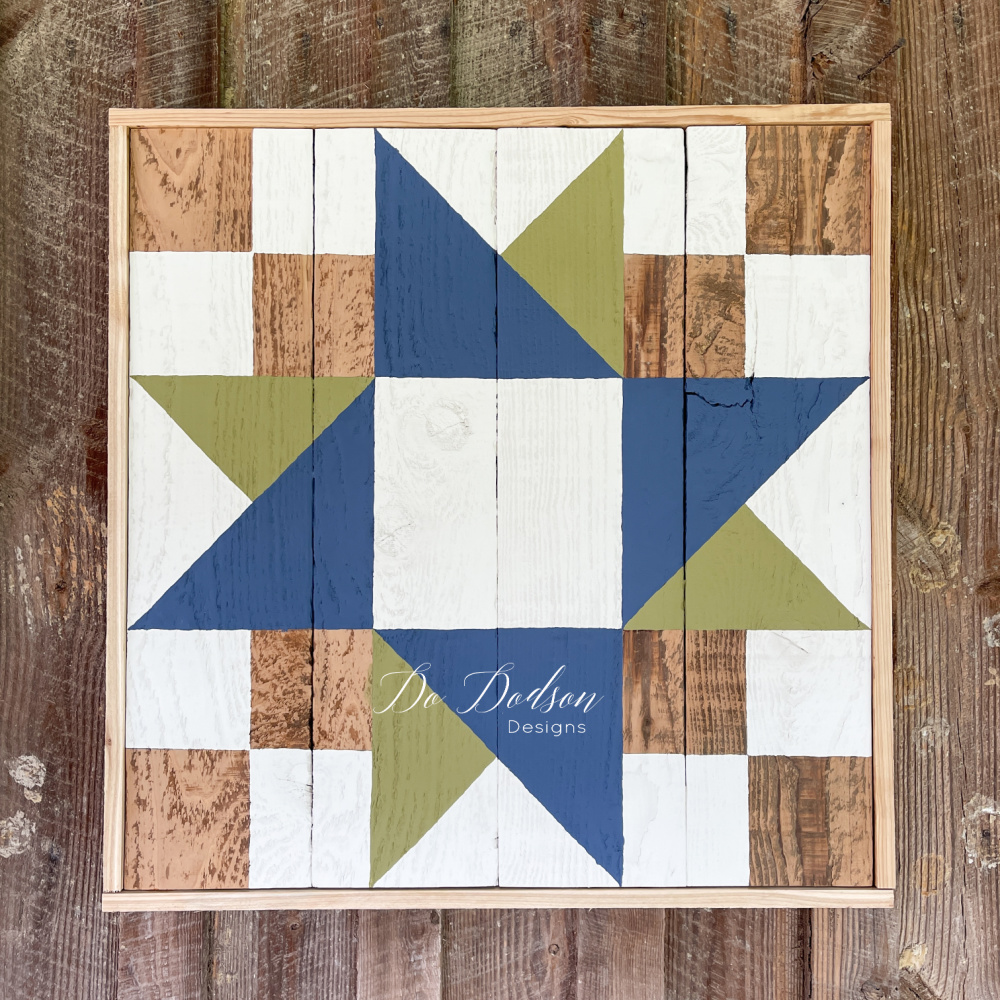
The Friendship Star Quilt Block Pattern
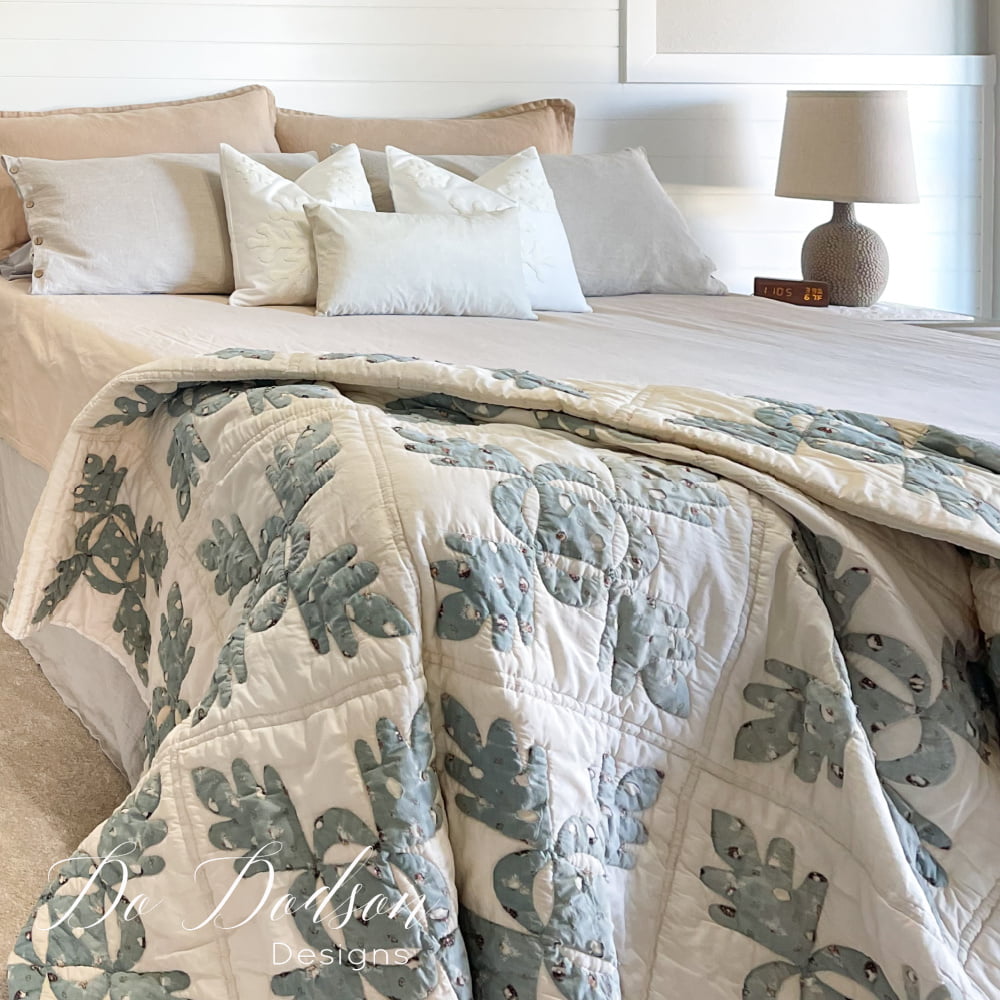
Creating this DIY rustic barn quilt from my wood scraps was fun and super rewarding. I’ll be reminded visually every day at feeding times with memories of days long ago when I quilted with my grandma. But this time it was with paint!
In Loving Memory Of Quilting With My Grandma
As the saying goes, “One man’s trash is another man’s treasure,” and in this case, my treasure is sure to bring a little color and charm to my old barn.
Hey, thanks for joining me today. I love sharing my projects with you, but I especially enjoyed sharing this DIY painted barn quilt tutorial.
Do you love this idea? Where would you display a barn quilt on your property? Y’all always have such great ideas. Inspire me in the comment section below, or just say hi, so I’ll know you were here.
Please, feel free to let me know if you have questions on this project that I may have missed.
Until the next project… xo, Do
Diane is very photogenic!
Hey Carol,
Yes, she is and loves attention. 🙂 xo
Perfect, Do.
Thank you, Leslie. It’s a fun addition to the barn. Thanks for reading. 🙂 xo
This barn quilt is absolutely adorable and super cute… almost as cute as Jack and Diane! 😉💕 Thanks for sharing your creativity and inspiration with us all! XOXO
Thank you, Denise! Those mules have won my heart, that’s for sure. Have a great week, my friend. 🙂 xo
Oh my goodness, this wooden barn quilt sign is beautiful. I love the colors. It looks perfect in the barn.
Thanks, Tammy!
It makes me happy to look out the bedroom window and see it, and it has landed in the perfect place. Have a great week, my friend, and thank you for reading. 🙂 xo
I am looking for “beginner” instructions and this is awesome! I don’t have a barn, but one will look great on the fence. something to share with those in our small neighborhood and bring a smile to all! Thank you so much. Looking forward to more topics.
Hi JoAnne!
It’s good to hear from you. I’m so glad you found this project helpful. Hanging your creation for all to see is a beautiful thing to share. We need more beauty in this world and you never know when it may brighten someone’s day. I know it would mine. Enjoy your week and best wishes with you barn quilt. 🙂
Would you share the pattern you have used here please?
Hi Colleen.
Sorry, I don’t have a pattern to share. Because the whole design is based off of squares, I used a carpenters square to draw out the design. I come from a long line of quilters so I guess I never thought about making a pattern for others. If I make another, I’ll make a pattern to share. Try searching Pinterest. There are many patterns for download there. I hope this helps. 🙂
I absolutely LOVE this project. I am hoping to make this for my mother and mother in-law for Mother’s Day this year. Can you please tell me the exact dimensions of this one you made? The size is perfect and I would like to make mine the same size. Thank you!
Hi Lynn!
My apologies for not responding back sooner. My father is very ill, and I’ve had my hands full caring for him and my mother. The barn quilt measures 30×30 inches (minus the wood border) with 36 individual squares. 6 rows with 6 squares for a total of 36 squares for the pattern. I found the best way to create this one was to mark off the 36 squares using a pencil and then painting the design. It looks complicated but it really isn’t too bad once you have the 36 squares marked as your guide. I sure hope this isn’t too late. What a sweet thing to do for the special women in your life.
Happy Mother’s Day! xo, Do 🙂