Picture ledges are an easy and budget-friendly way to display your favorite photos and artwork. In this tutorial, I’ll show you step-by-step how to make a DIY picture ledge shelf, the perfect project for beginners looking to add a stylish touch to their home decor.
Thanks to Dixie Belle Paint Co. for sponsoring this post. While I was compensated to write this post, all opinions are my own.
* As an Amazon Associate, I earn from qualifying purchases and through other companies as well. You will not be charged extra when you purchase through these affiliate links, but any income I make helps me create more amazing DIY projects to share with you! To see my full disclaimer, click here!
What I Love About A DIY Picture Ledge Shelf
I’ve always admired my late mother-in-law’s long picture ledges in her hallway. My husband has a huge family, and at last count, his mother had four children, grandchildren, great-grandchildren, and great-great-grandchildren. Some are blended families, but she counted each one as her family. She is missed!
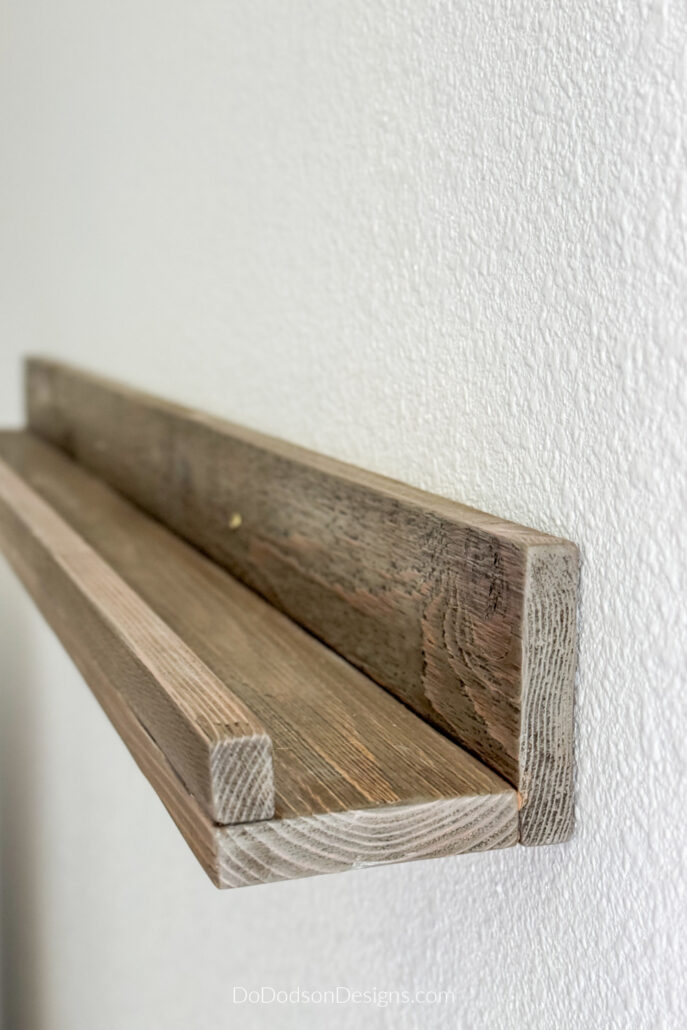
What do I love about these simple DIY picture ledges? Well, most importantly, they are customizable. You choose the length, the wood, and the finish (paint or stain color of your choice) that matches your home. These shelves are basic in design and work well with most home decorating styles.
For more inspiration, here’s another great tutorial I found while browsing Pinterest. I thought you might want to check this one out, too. CLICK HERE for the tutorial.
Or you might even find these interesting.

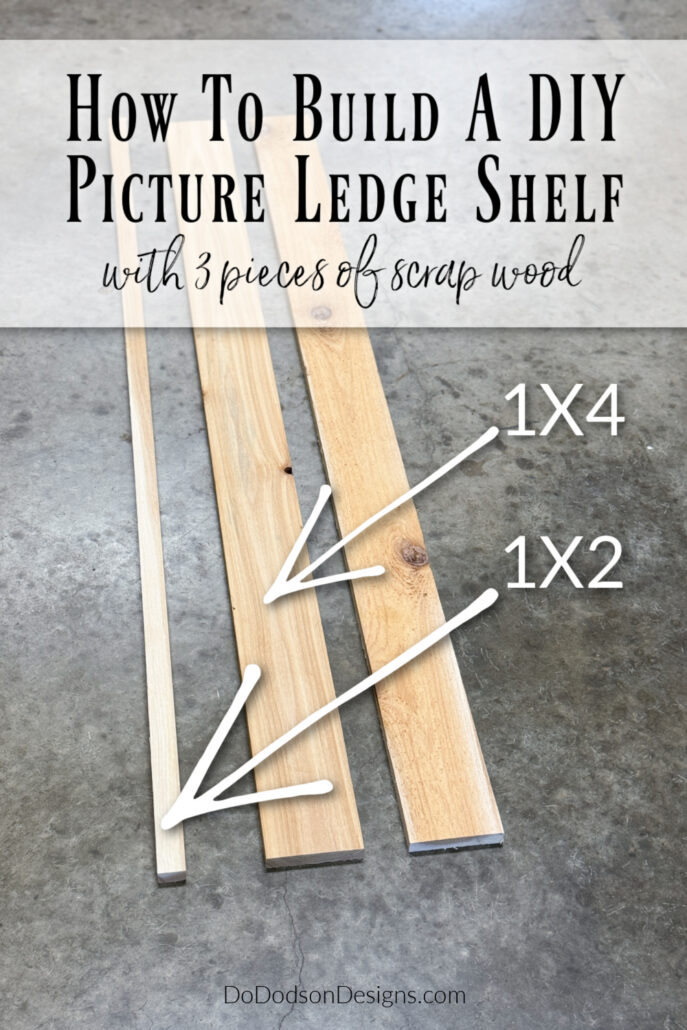
SUPPLY LIST:
- 2 1X4s select pine (4 ft or desired length) back and bottom board
- 1 1X2 select pine (same length as above) front piece
- chop saw or circular saw
- My preferred Sanding System SurfPrep Sander
- wood clamps
- wood glue
- wood screws
- stud finder
- level
- 220 grit sandpaper
- brad nailer
- brad nails
- wood filler
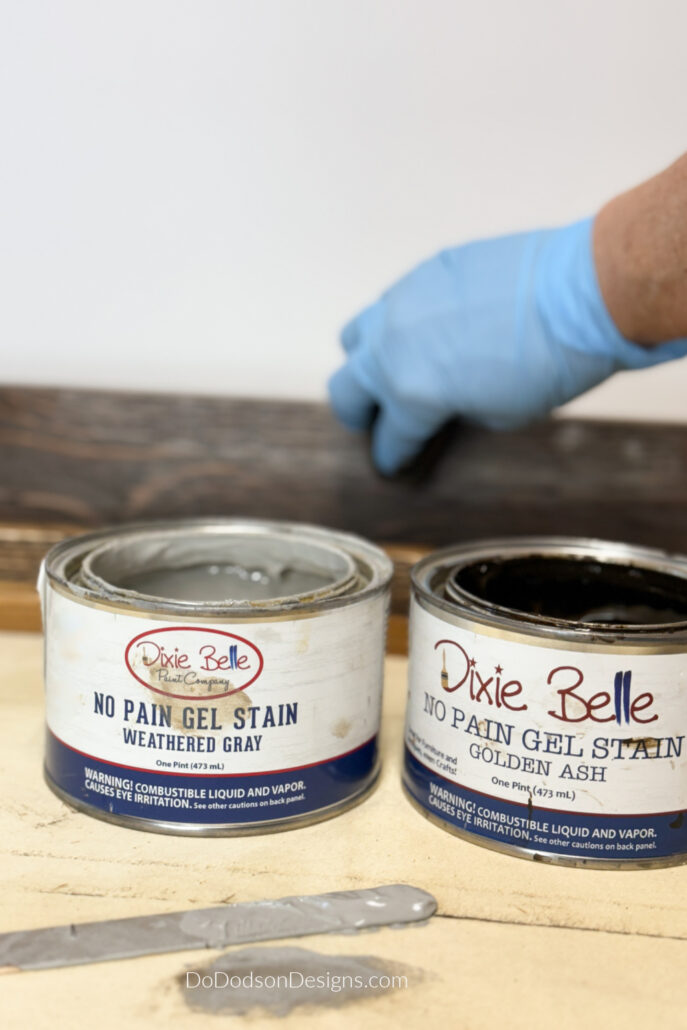
- Dixie Belle’s No Pain Gel Stain (Golden Oak and Weathered Gray)
* You can always make a picture shelf from scraps of lumber, too. I used leftover cedar fence boards from another project for my picture shelf. Remember to measure the area where you want the picture frame shelf first to get the desired length for your space.
Cutting The Strips Of Wood
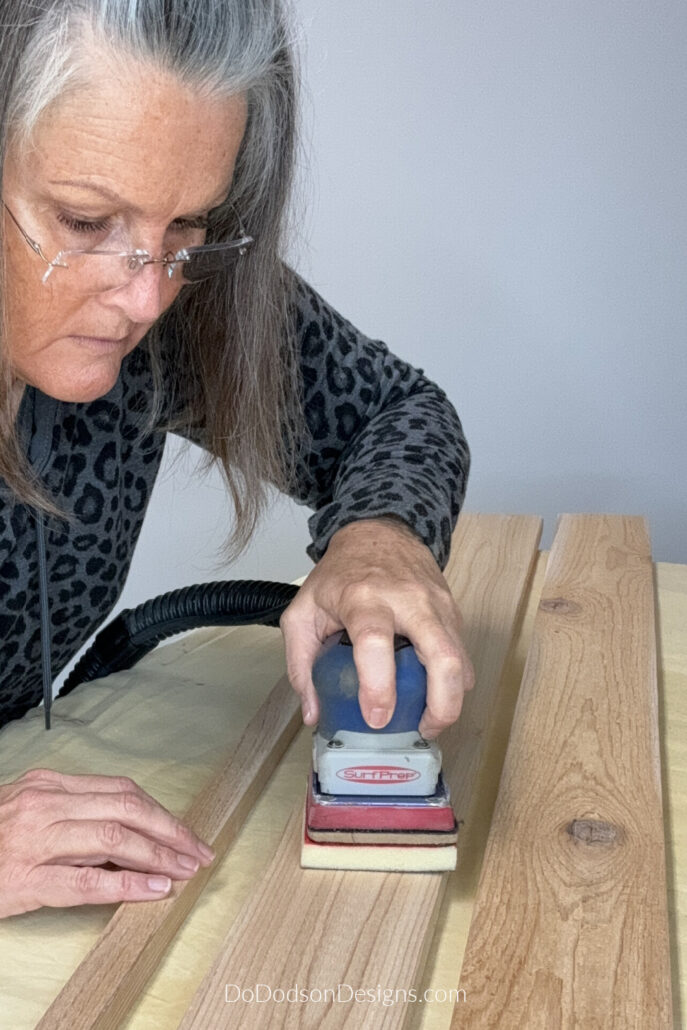
STEP 1: Cut your boards to the desired length for your space and sand the wood pieces with 220-grit sandpaper. My shelf measures four feet in length.
I prefer to sand the boards before assembling them. It is much easier and will give the frame shelf a smooth, even finish that can be painted or stained.
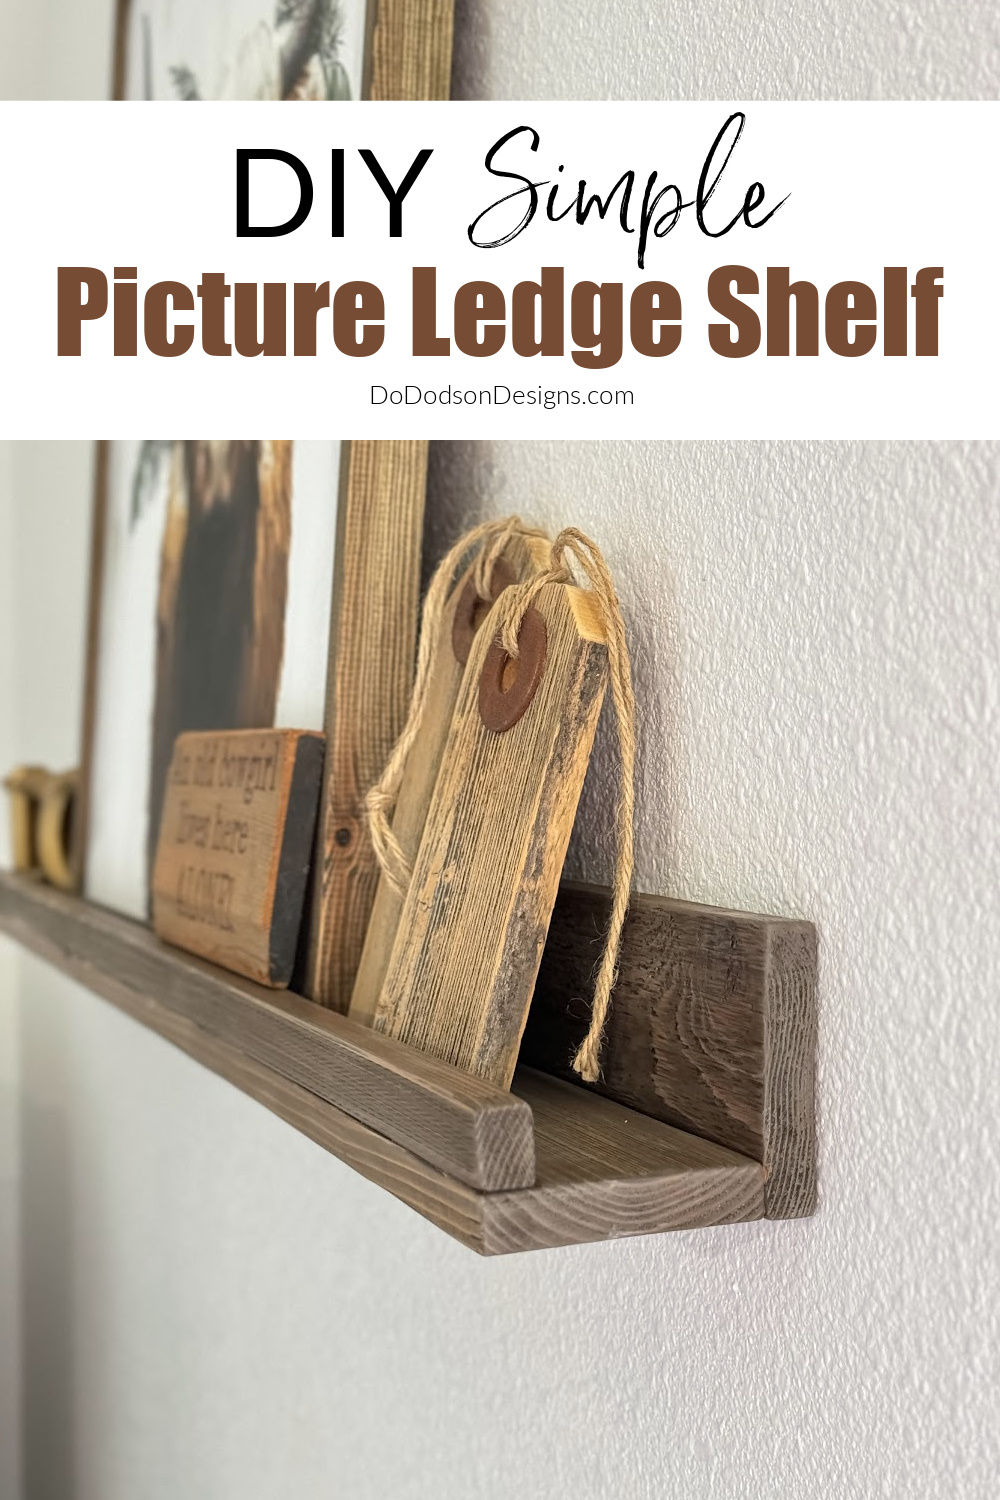
How To Build A Picture Ledge Shelf
STEP 2: Add a bead of wood glue along the board to secure the shelf’s backboard to the bottom board (the backboard sits on top of the bottom board), holding it in place with wood clamps while it dries. Be sure to wipe away any excess wood glue with a clean, damp cloth. Wood glue dries fairly quickly, so don’t let it sit too long on the wood.
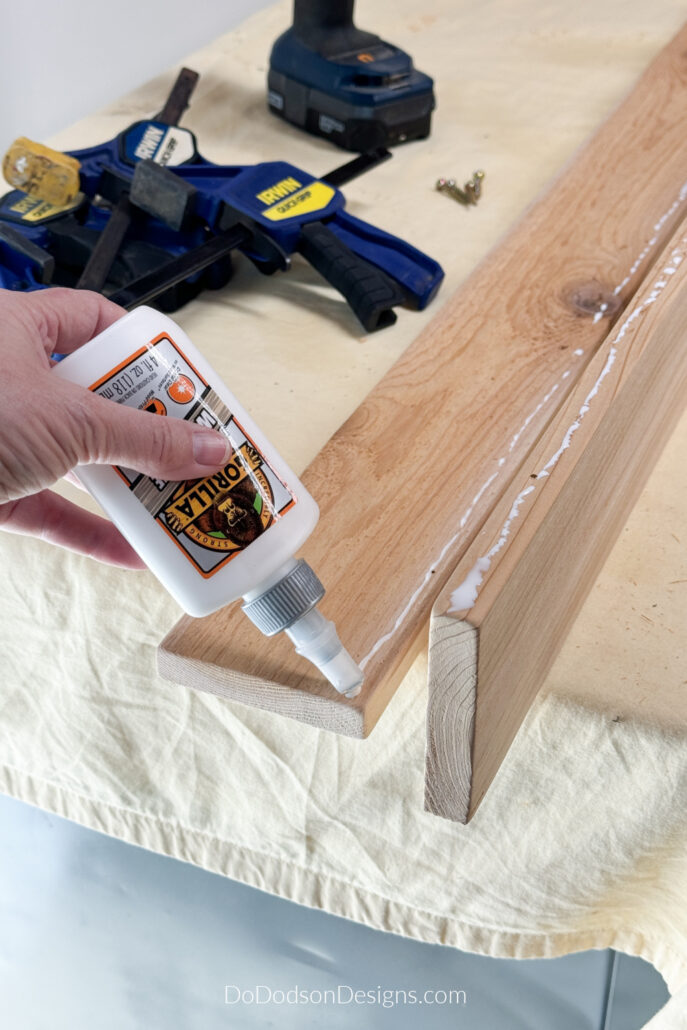
With a brad nailer, nail the bottom board and the backboard together in multiple places from the backside (not shown in photos) all along the connection for a strong bond.
Next, attach the front lip with wood glue like the other two pieces and nail it in place with a brad nailer from the underside.
I didn’t add wood screws to the front lip. The wood glue and nails are enough.
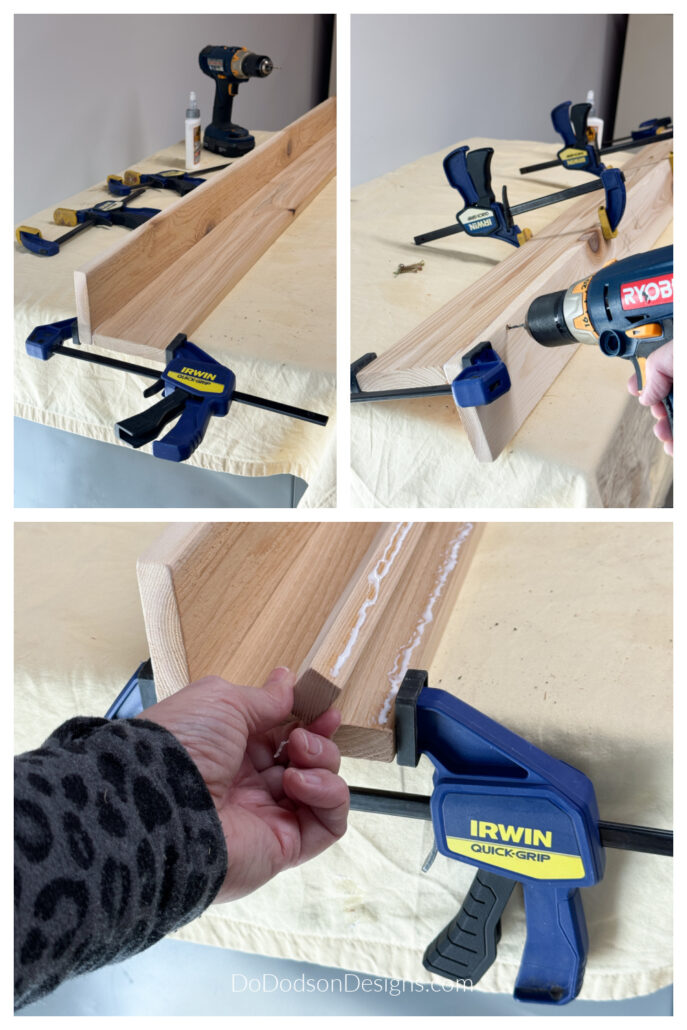
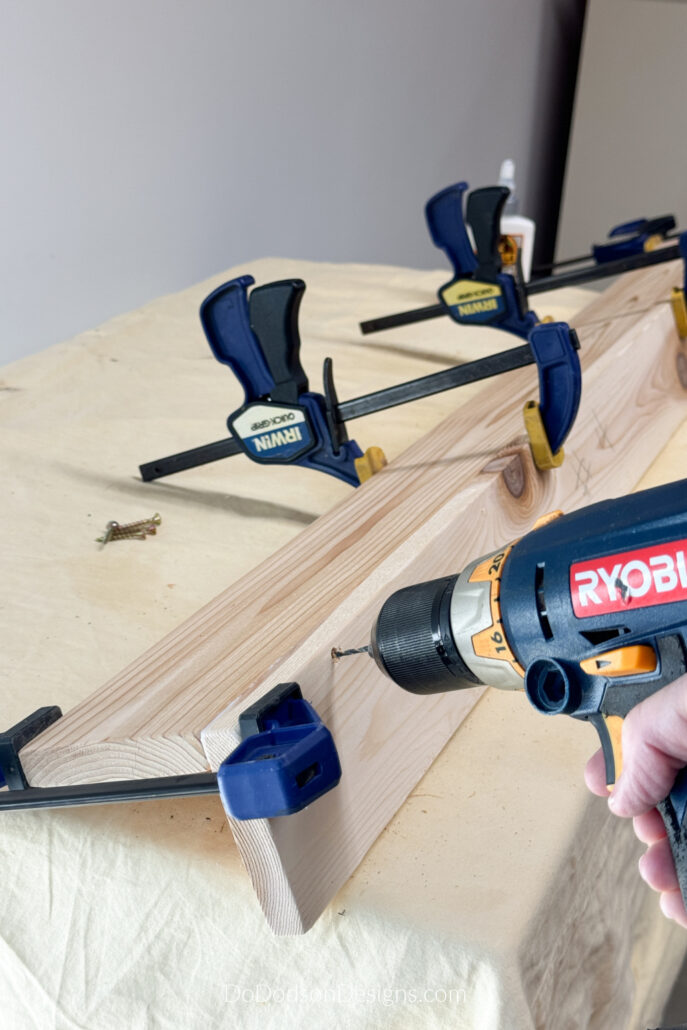
STEP 3: For extra strength, add wood screws securing the back and bottom pieces together. Doing this will ensure that your shelf will be strong. Counter sink the screws by pre-drilling holes so they will be flush with the wood. You can also use a Kreg Jig and pocket hole plugs, but with this shelf style, it isn’t necessary.
I used four wood screws to secure the back and bottom pieces of my four-foot shelf. The longer the shelf, the more screws you will need, and less for shorter shelves.
Prepare The Wood For Paint Or Stain
STEP 4: If needed, fill any nail holes showing with stainable wood filler and sand smooth with fine-grit paper. Wipe away wood dust with a clean, damp cloth.
If you plan on painting the shelf, you’ll want to fill in any seams, gaps, or cracks where the wood is connected with the painter’s caulk and allow it to dry before painting. Always use a good-quality stain blocker to prevent wood tannins from bleeding through your paint.
How To Use Oil-Based Stain On Wood
I like using gel stains instead of traditional ones on these smaller projects. It’s simple, easy and effective. Today, I’m using Dixie Belle’s No Pain Gel Stain in two colors: Golden Ash and Weathered Gray. I find it’s best to do a test spot on the same scrap piece of wood or the back of your project before applying to ensure the color and finish you want.
Here’s how to add gel stain to your wood projects.
STEP 5: With a dry cotton cloth, sponge pad, or staining pad (depending on the size of your project), wipe on the color of your choice in the direction of the wood grain, adding enough to cover the wood liberally.
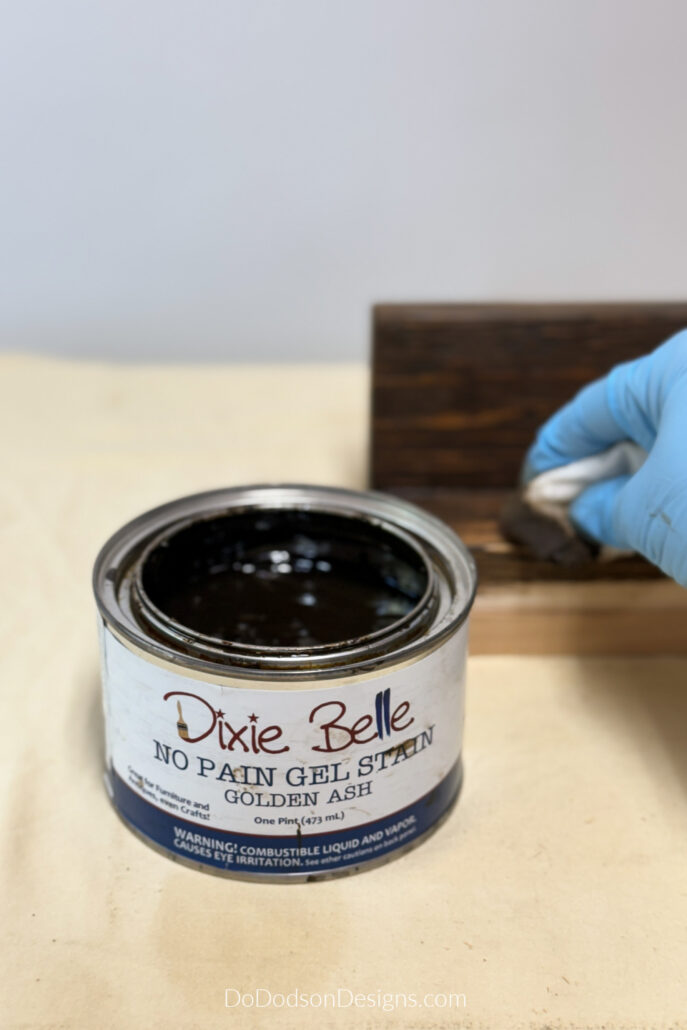
Allow the stain to sit on the surface for a few minutes, depending on how much color you want to absorb into the wood. If your wood is grainy, rub the stain in circles to ensure full wood coverage and that it gets into the grain.
Wipe away excess gel stain from the surface with a clean cotton cloth and allow it to dry. Depending on the color you want, multiple applications can be applied. This gel stain does not require sealing. Dry time is 6-8 hours, and cure time is 21-30 days.
I find it’s best to do a test spot on the same scrap piece of wood or the back of your project before applying to ensure the color and finish you want.
To get a weather look, try mixing several colors and layering the gel stain on the wood while it’s still wet. You can get as creative as you like.
How To Hang A Photo Ledge Shelf
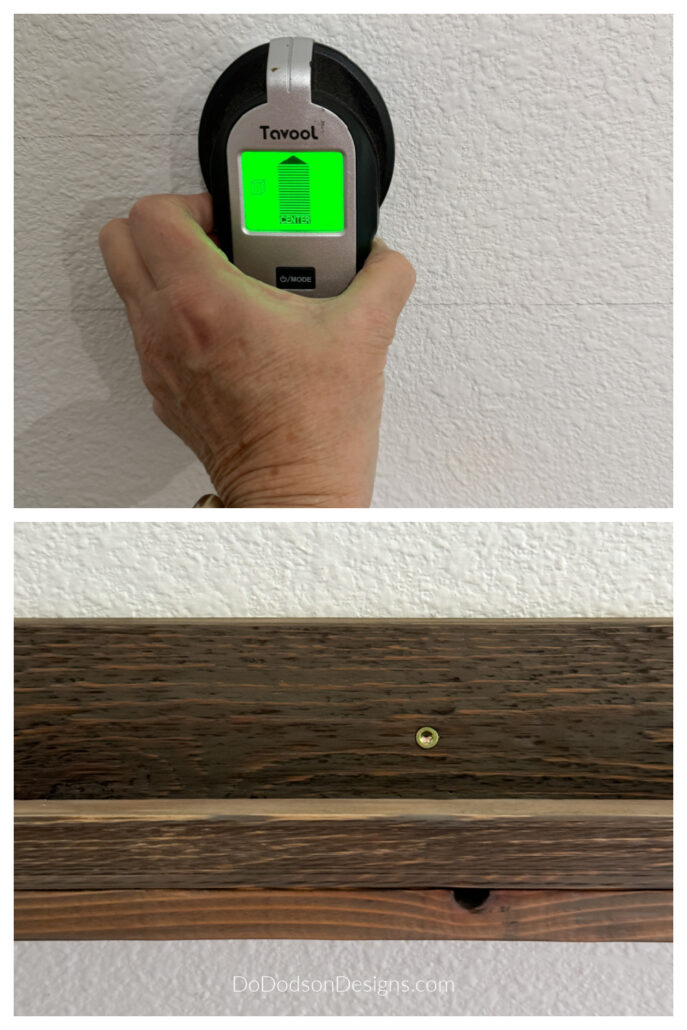
The first step in hanging your new DIY picture ledge shelf is to locate the wall studs. It’s necessary to secure the shelf or shelves (if you are making more than one) to a solid structure to support the weight. The studs in the wall will hold a lot of weight when installed correctly. The studs are usually located inside a wall, 16 inches from center to center.
Use a level to mark a line where the shelf will go.
To use a stud finder, start by turning on the device and placing it flat against the wall. Slowly move it from side to side until it beeps or lights up, indicating the presence of a stud. Mark the spot with a pencil and then move the stud finder again slowly until you find the center. Mark the centers with a pencil.
Use a small nail and a hammer to ensure the wood studs are exactly where the device says they are. You’ll know when you feel the nail hit the wood.
For my shelf, I used 1 and 1/4-inch wood screws. Long enough to go through the wood, sheetrock, and into the wood studs. Since I only had two studs within my four-foot shelf, I secured the shelf with only two screws.
I wasn’t worried about the screws showing because when the picture frames and or decor are added to the shelf, they will be covered up. This allows me to remove it if I should ever want to relocate it to a new location.
I don’t recommend hanging this shelf with hangers. It is designed to hold a good bit of weight, and if you plan on layering your photos, I suggest securing it into the wall studs.
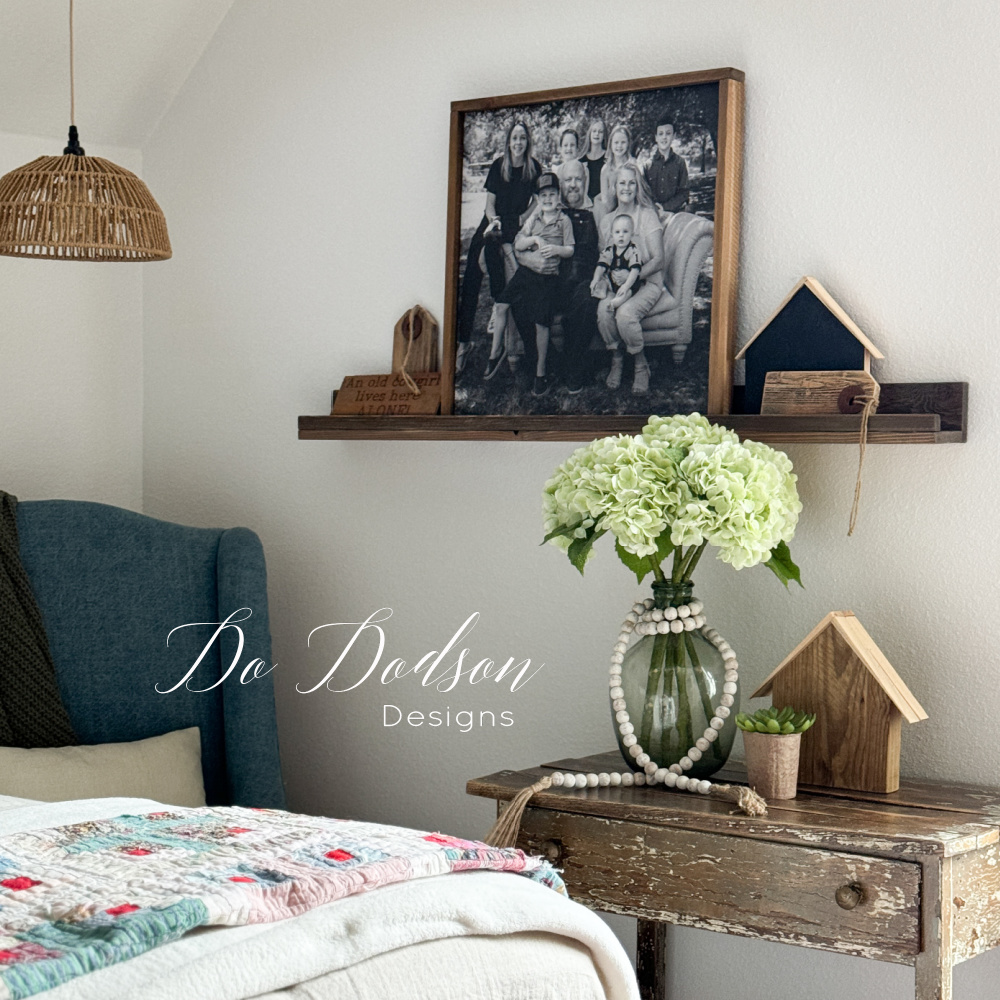
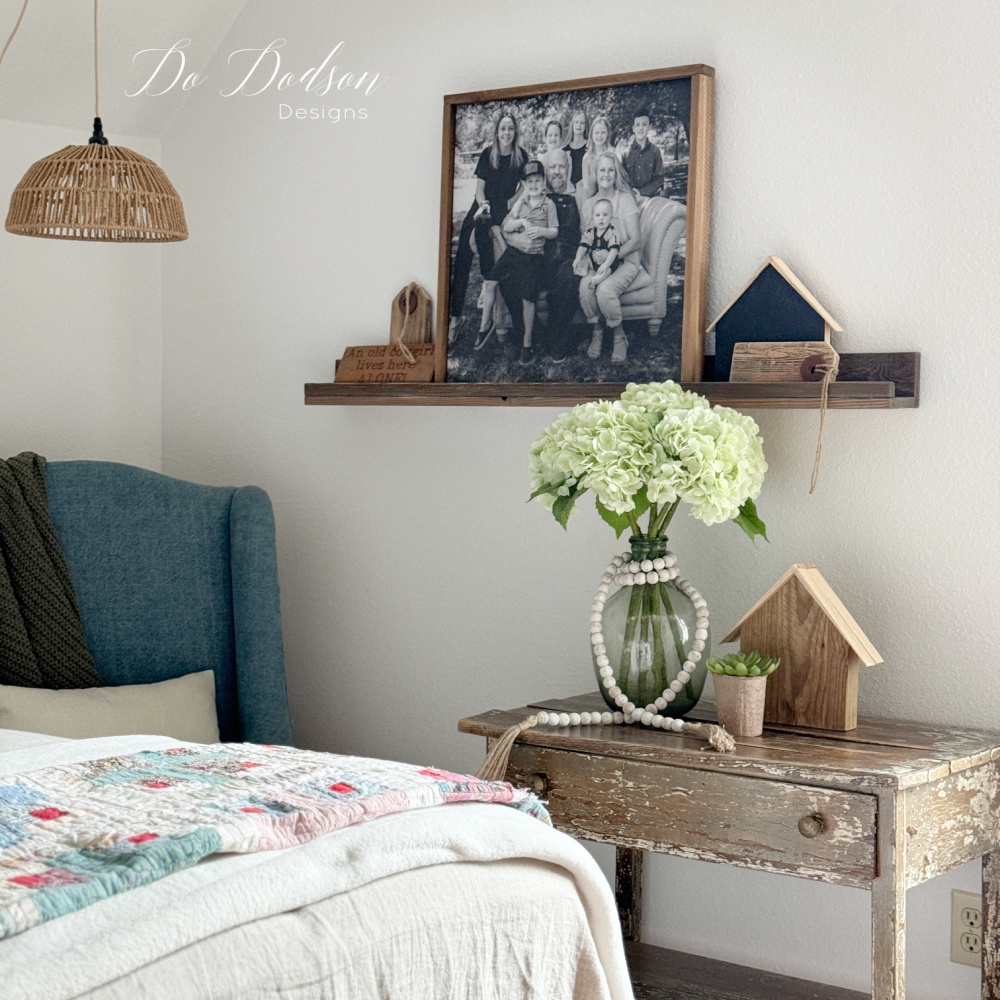
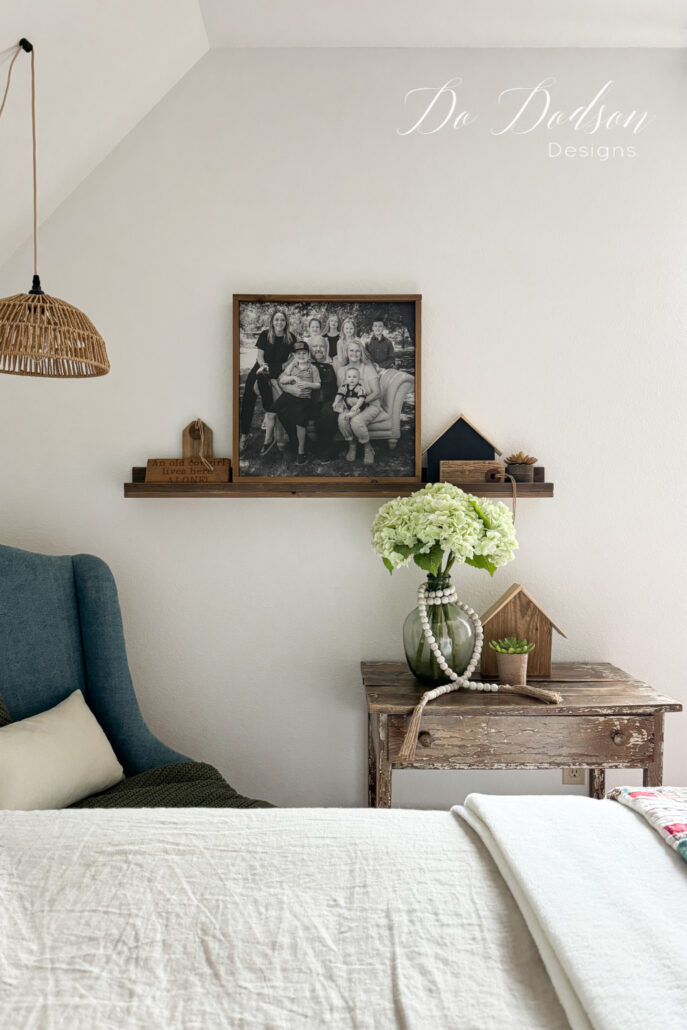
How To Style Picture Ledges With Frames
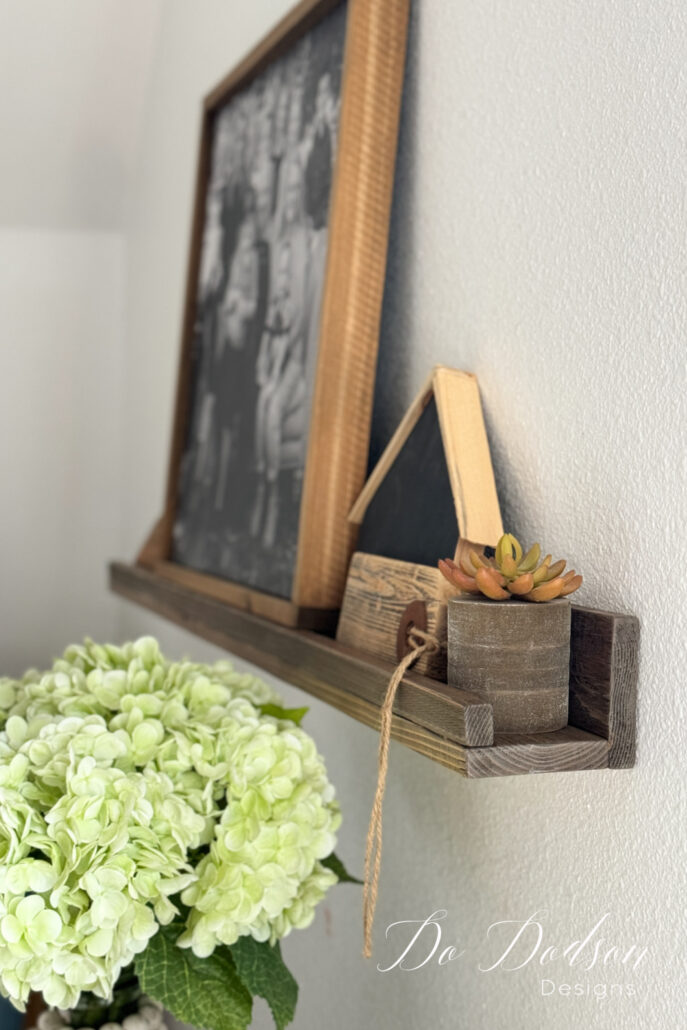
Style tip #1: Overlap smaller frames in front of the larger ones to create a stacked look, being mindful not to block your beautiful subjects.
Try mixing frame colors and styles for a stylish but unique look.
Style Tip #2: I also like to decorate them for the seasons by adding a holiday canvas and wood decor accents. This is where you can get really creative. It’s fun to redecorate for the seasons, and this is an easy way to do it.
Hey, thanks for joining me today. I hope you enjoyed my DIY picture ledge shelf tutorial and found this information helpful. Decorating my tiny guest room is so much fun, and I look forward to each and every new guest. It gives me a reason to redecorate. 🙂
I’d love to hear what your thoughts are on this DIY project. Leave me a comment below, or just say hi so I know you stopped by. I always love hearing from you.
Until the next project… xo, Do
Do- this tutorial is terrific! I’m in the process of redesigning my craft room and these picture ledges will be perfect for my newly patched and painted walls! Thank you for the great detailed description!
Hi Tess!
I’m so happy this was helpful. I can picture those tiny craft paint bottles in awesome colors on the shelf. LOVE this idea. Thanks for sharing and Happy Easter. 🐇 xo, Do
Hi Tess! What a fantastic idea! I can picture in my head those tiny craft paint bottles in color coded lines. The rainbow. 🌈 Have fun in your craft room. Happy Easter ✝️
xo, Do
I love this idea Do, and it looks so good in your guest room! 💙💙💙
Thank you, Denise! I gotta use up all those scraps (hubby said) so I can make room for more scraps. He knows me all too well 🙂 Have a great week, friend. xo Do