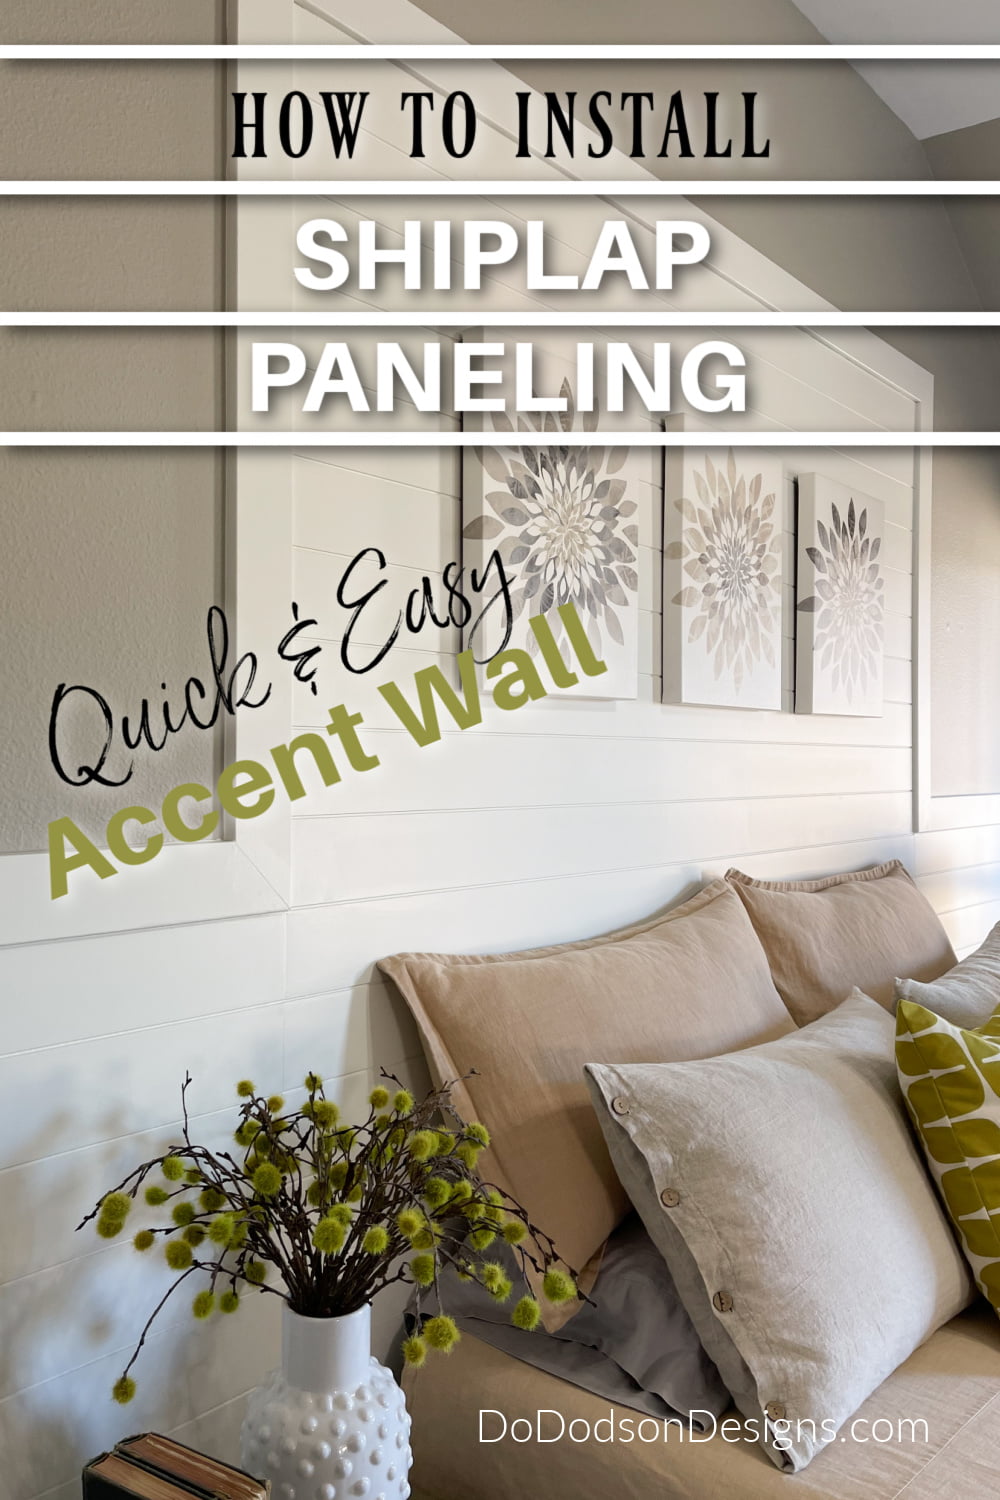
IT WAS QUICK AND EASY AND MADE A HUGE DIFFERENCE IN OUR BEDROOM. LEARN HOW TO INSTALL SHIPLAP PANELING TO CREATE AN AMAZING ACCENT WALL IN ANY ROOM IN YOUR HOME.
* As an Amazon Associate, I earn from qualifying purchases and through other companies as well. You are not charged extra to use any of the links, but any income I make helps me create more amazing DIY projects to share with you! To see my full disclaimer, click here!
Before The Shiplap Paneling – Bedroom Update
Scary! Let me say that allowing strangers into your bedroom is risky business, especially when your wall looks like this! Yep, you guessed it. There WAS a HUGE headboard (I painted around it because it was easier than taking it down) there at one time, but now I’m tired of the look and ready for a change. If you want to see the headboard that my hubby and I built 15 years ago and the last bedroom update, CLICK HERE.
And if you’re new to my blog and missed my last home tour, CLICK HERE to see more of our home.
Please don’t ask me about my lame attempt at a faux finish on my walls. It was a LONG time ago. We all had to start somewhere.
SUPPLY LIST For This DIY Project
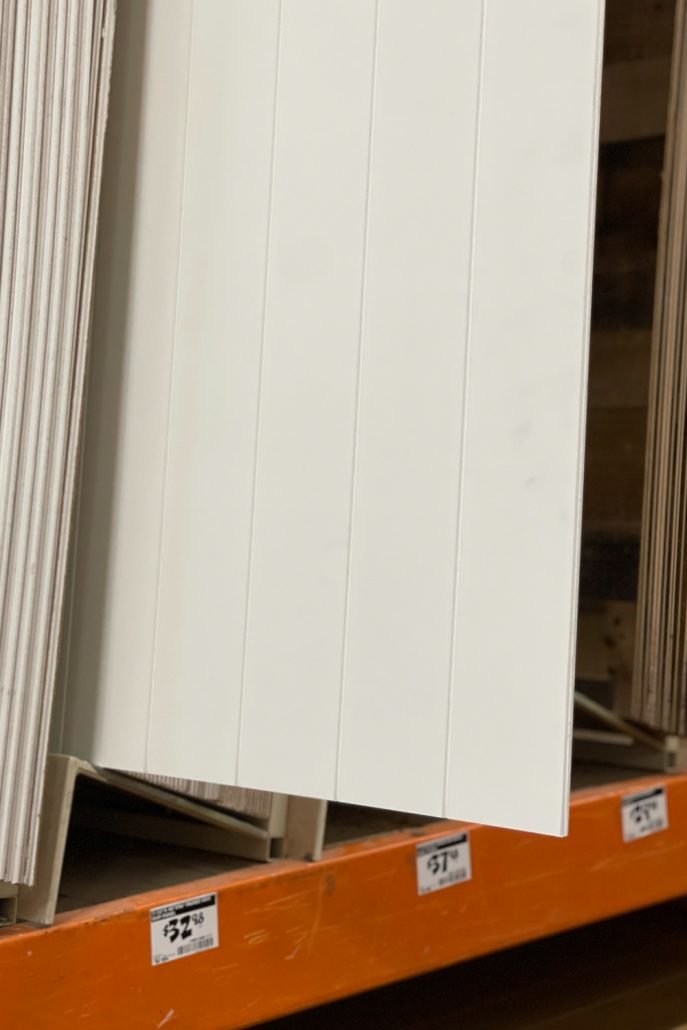
- white nickel gap shiplap panels 4X8 panels
- 1 X 4 primed boards (for trim)
- table saw
- liquid nail paneling and molding adhesive
- 3 ft level
- pneumatic nailer
- white wood putty (if you’re painting the shiplap paneling white)
- Sherwin Williams Pure White SW 7005
- Sherwin Williams Mindful Gray SW 7016
Installing White Shiplap Paneling And Trim
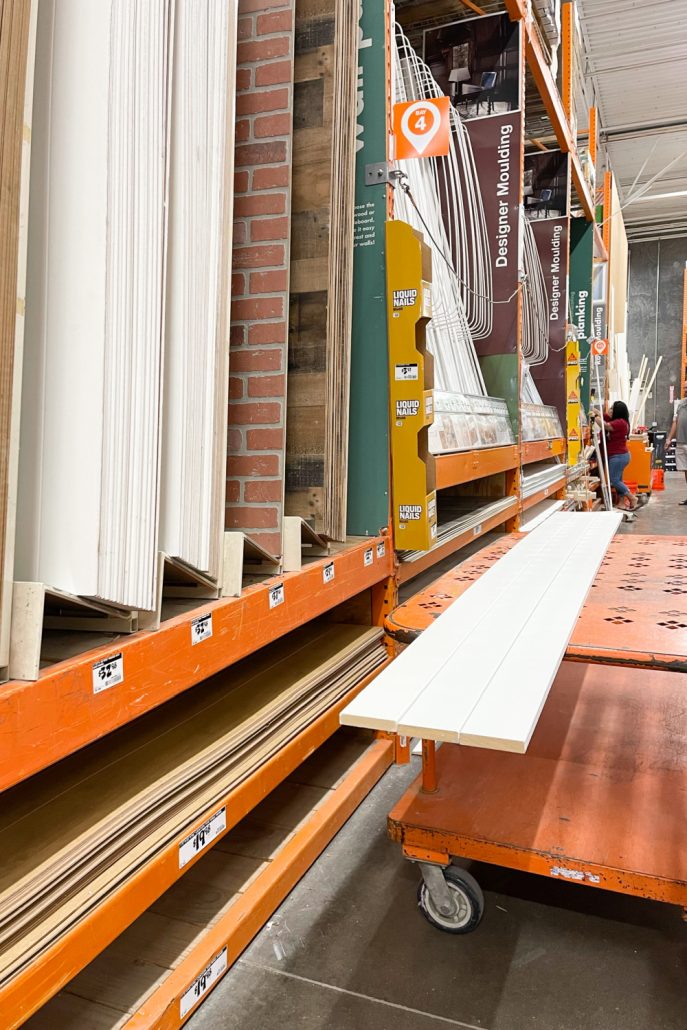
I found everything I needed to create my white shiplap paneling accent wall at Home Depot. This isn’t a sponsored post; I just love the store. I could spend hours browsing and coming up with new DIY projects for our home. Sometimes the hubby and I make it our date night. You may have seen us holding hands and walking the isles. 🙂
This is why we are showing you now how to install shiplap paneling today. Silly date night gets me in trouble every time. That’s what HE said!
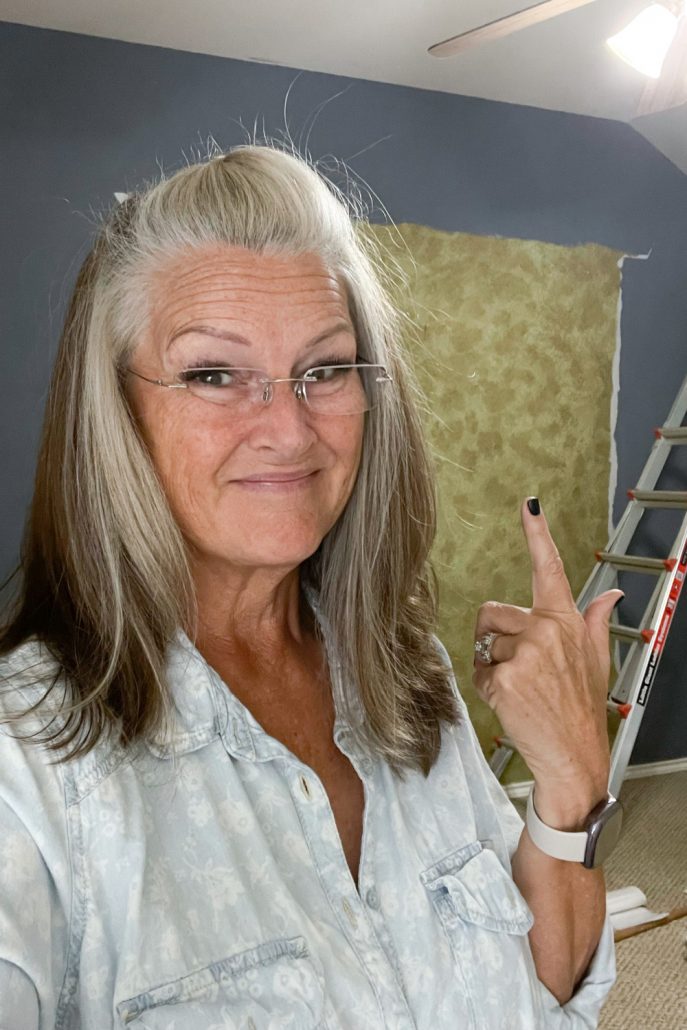
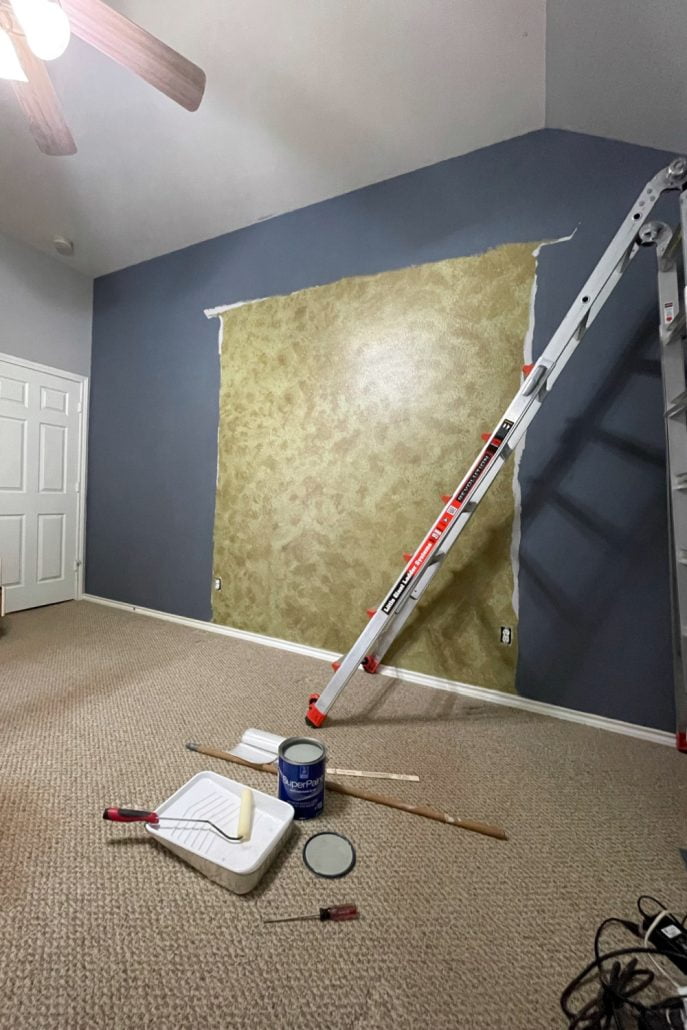
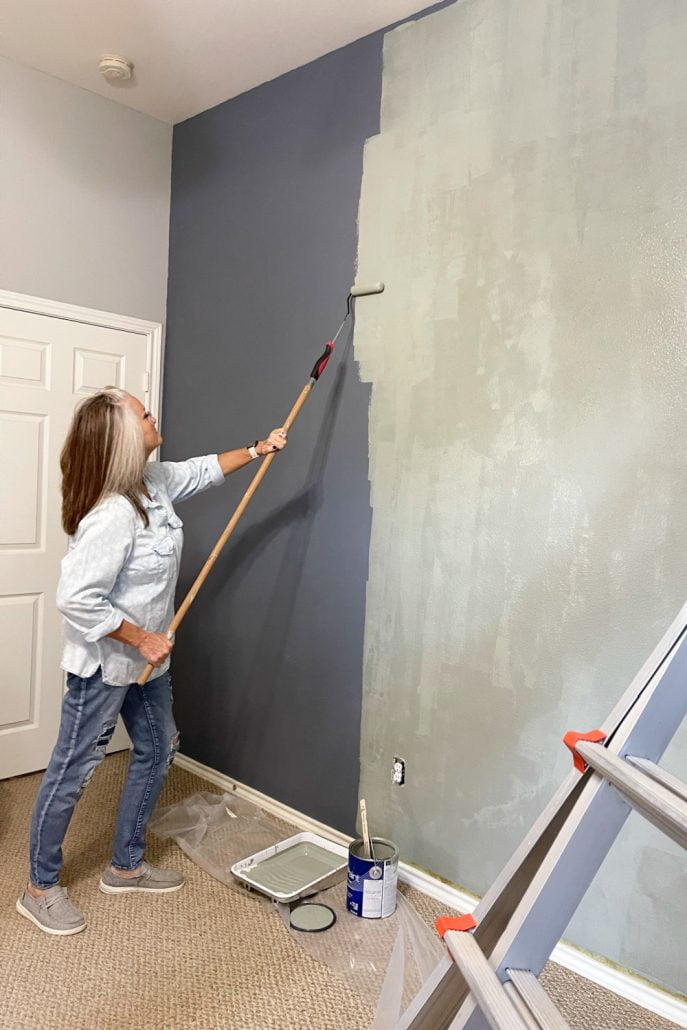
Updating The Walls With A New Color
Here’s where things got iffy.
I thought I would LOVE this new color I chose by Sherwin Williams called Evergreen Fog SW 9130. It’s the 2022 color of the year, but it just wasn’t happening. Maybe it was the time of day I was painting. Perhaps it was the blue wall. Maybe I’m colorblind; I was not too fond of it.
Just so you know, no matter what you think of me, not everything I do turns out as planned. I’m normal if there is such a thing. Wait, no, I’m not.
So, the walls were repainted to my favorite Gray. SW Mindful Gray SW 7016
How To Install Shiplap Paneling Accent Wall – Quick & Easy
STEP 1
Measure the wall to determine the amount of shiplap paneling you’ll need for your project. The paneling comes in 8 ft sheets. If your wall is taller or wider than the 8 ft paneling (vertical or horizontal) than 8ft, you will have to splice the paneling together. Doing this creates a seam, but the line will be minimal if your wall is straight and you use wood filler. That’s what I did.
A table saw comes in handy if you need to cut these large pieces. We had to rip one of the panels due to an uneven wall.
STEP 2
Mark the wood studs on the wall using a straight edge. Most walls are constructed with 2x4s and should be on 16-inch centers. That means there should be a 2×4 for every 16 inches. Find your first stud and measure over to the left or right, determine their location and mark them using your level, so they’re visible above or below the paneling. Use a small nail to find the studs and then keep them in a straight line, so they are easy to see. The shiplap paneling will cover the lines, so there is no need to worry about messing up the wall.
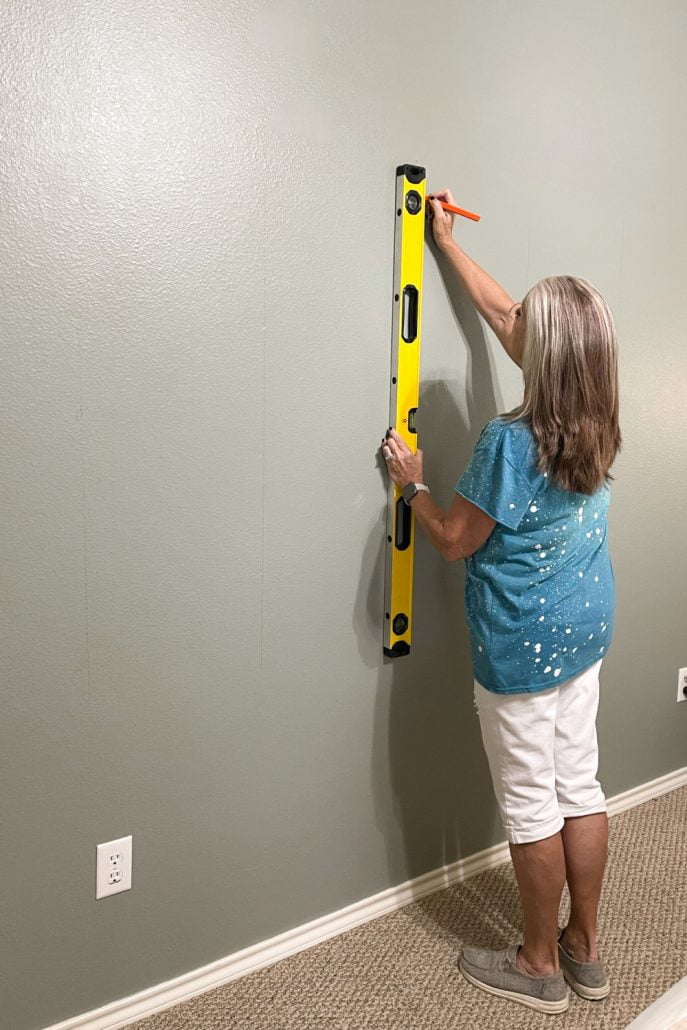
Use A Level
Where ever you start on your wall, you’ll want to make sure you have a level line to start from. Use that level! We started this accent wall in the middle of the wall centered over our bed. The first panel was leveled from the baseboard, and we worked our way up to make sure the top was level. A crooked line in the middle of a room will be very noticeable.
STEP 3
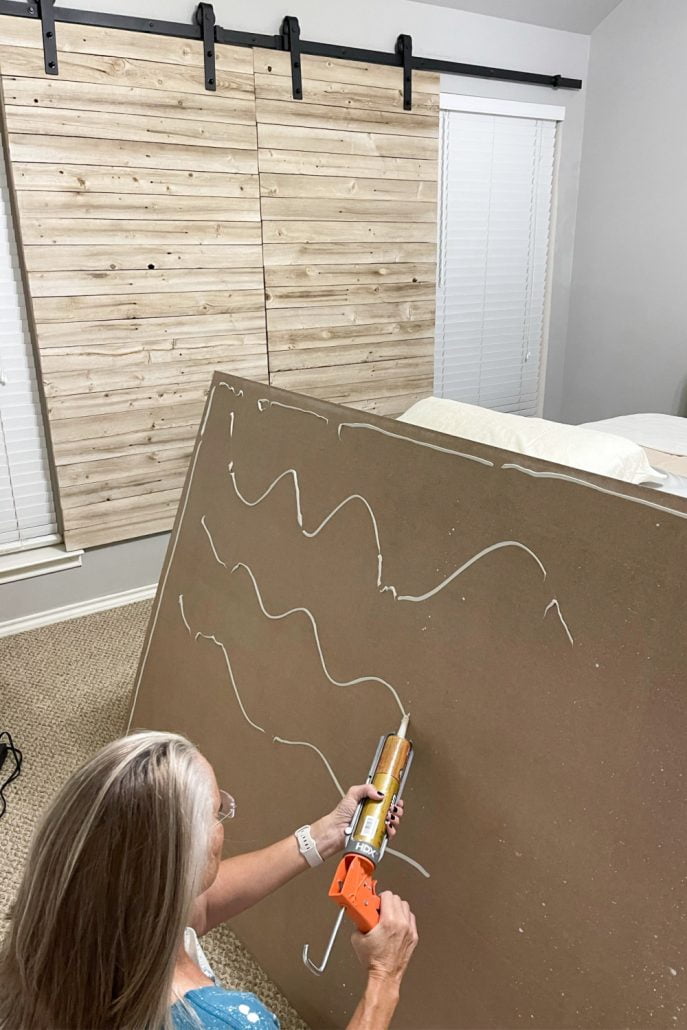
Apply liquid nail paneling adhesive to the back of the shiplap paneling around the edges (not too close) and in a zigzag pattern across the whole backside. This will help hold the paneling in place before you nail it into the studs.
I highly recommend using the liquid nail. The installation of shiplap paneling without the adhesive will not give you the best results. The paneling is thinner than regular shiplap boards, and you’ll need the extra hold to make the paneling lay flat against the wall, especially if your walls are not straight. Mine are not.
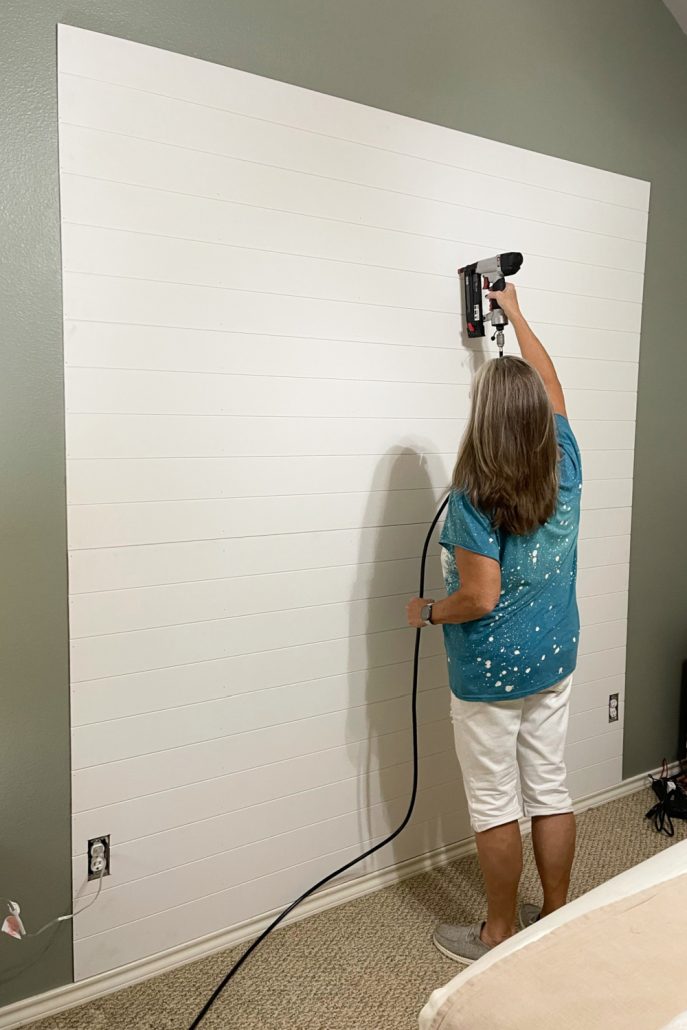
STEP 4
Once the shiplap paneling is where you want it on the wall, secure it in place with a finish nailer. You’ll need a set of extra hands to hold it in place while you nail it to the wall.
Kudos to my hubby for helping me and being a great photographer.
We used four sheets total (with leftovers for other DIY projects) to create the shiplap paneling accent wall.
To give our wall a finished look, we trimmed it with 2×4 trim molding.
How To Fill Nail Holes After Installing Shiplap Paneling
TIPS & TRICKS:
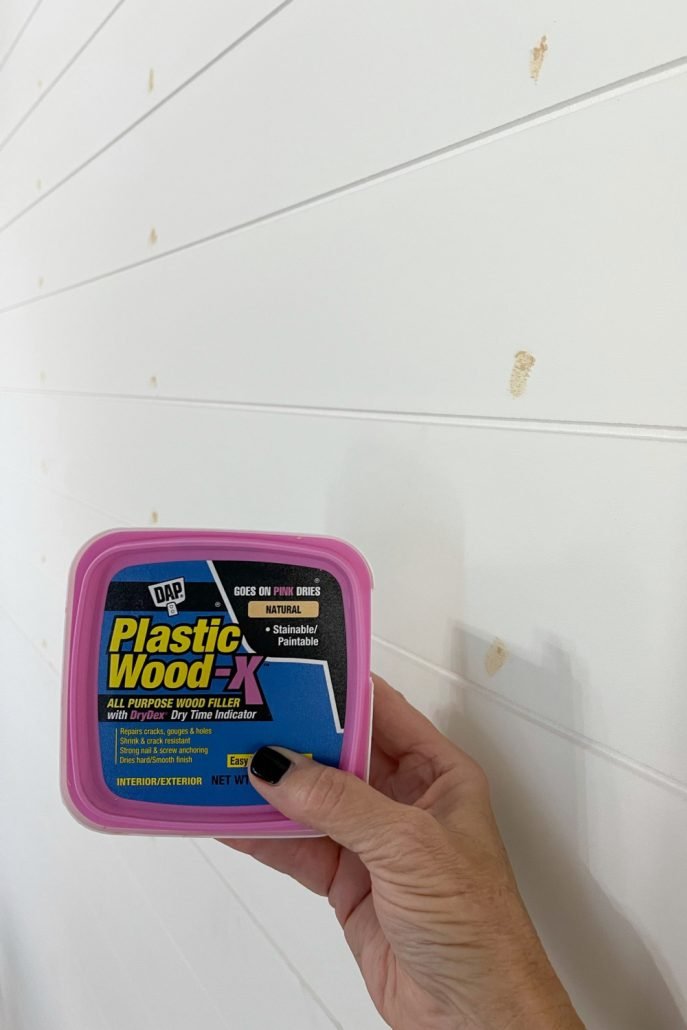
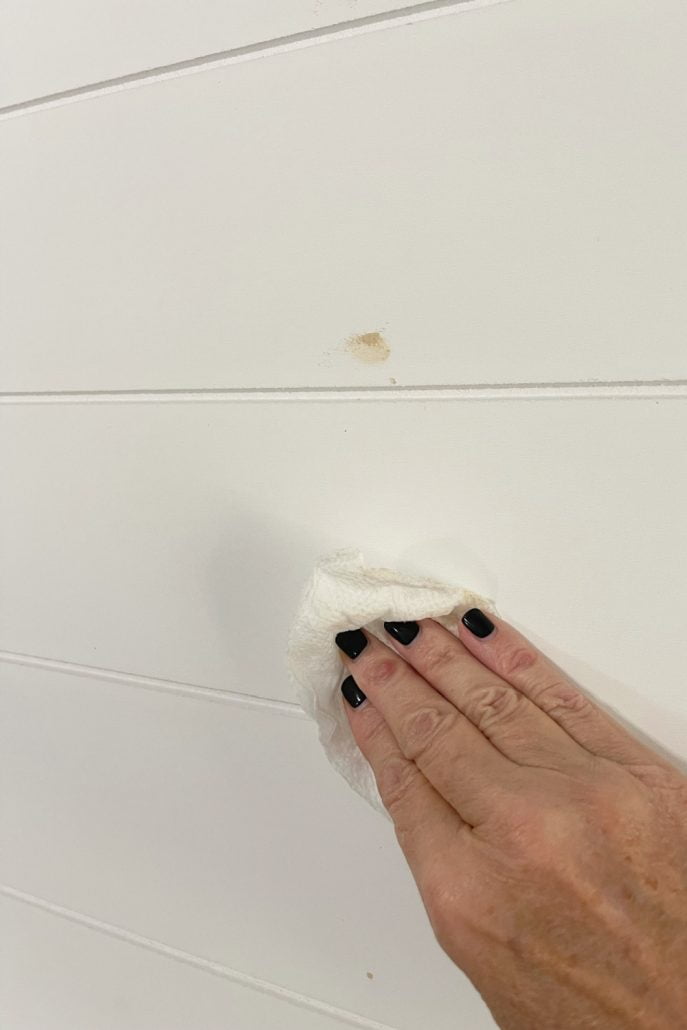
I love the look of the shiplap paneling after the installation, but all the nail holes weren’t the look I was after. The nails holes had to be filled and sanded before painting, and it was taking me forever. Then I learned this from TikTok! LOL, I’m so addicted.
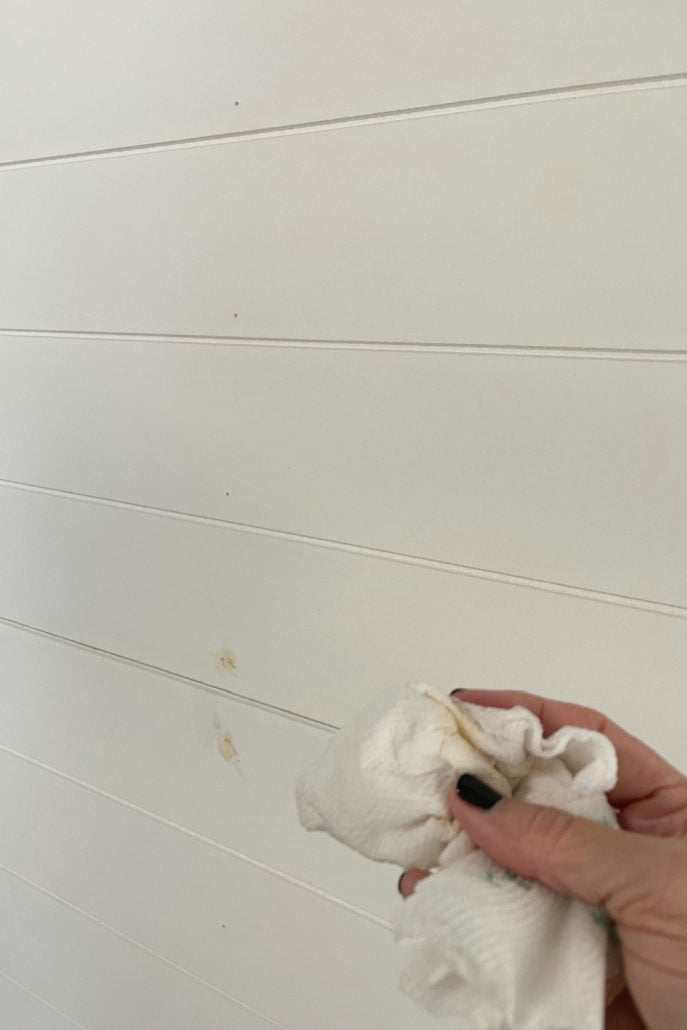
After applying a small amount of the wood filler into the 999,000 nail holes, use a damp cloth to remove any leftover wood filler around the hole before it dries. BOOM! No sanding is needed. It’s quick and easy. Thank you, TikTok!
Allow the wood filler to dry, and you’re ready to paint. I also discovered after the fact that they make a white wood filler. Good to know for the next DIY white shiplap paneling project.
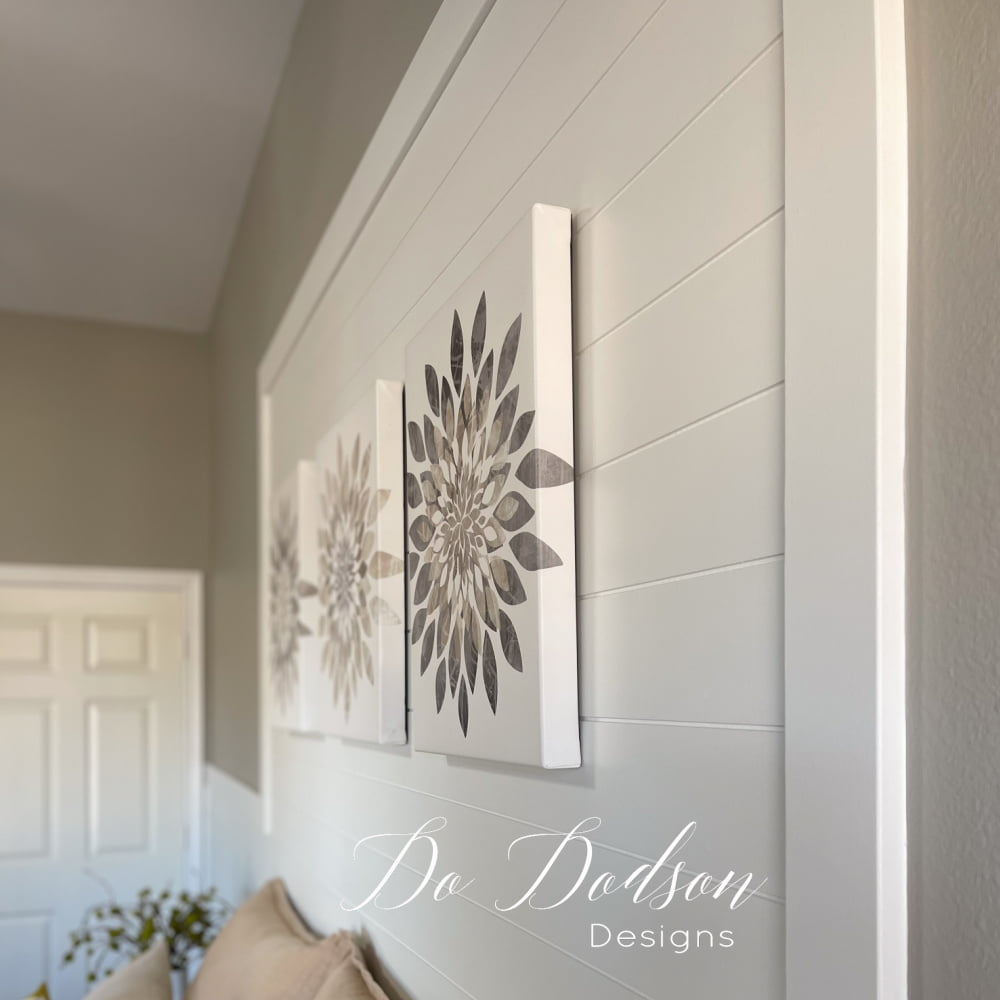
The Results Of The Shiplap Paneling Accent Wall
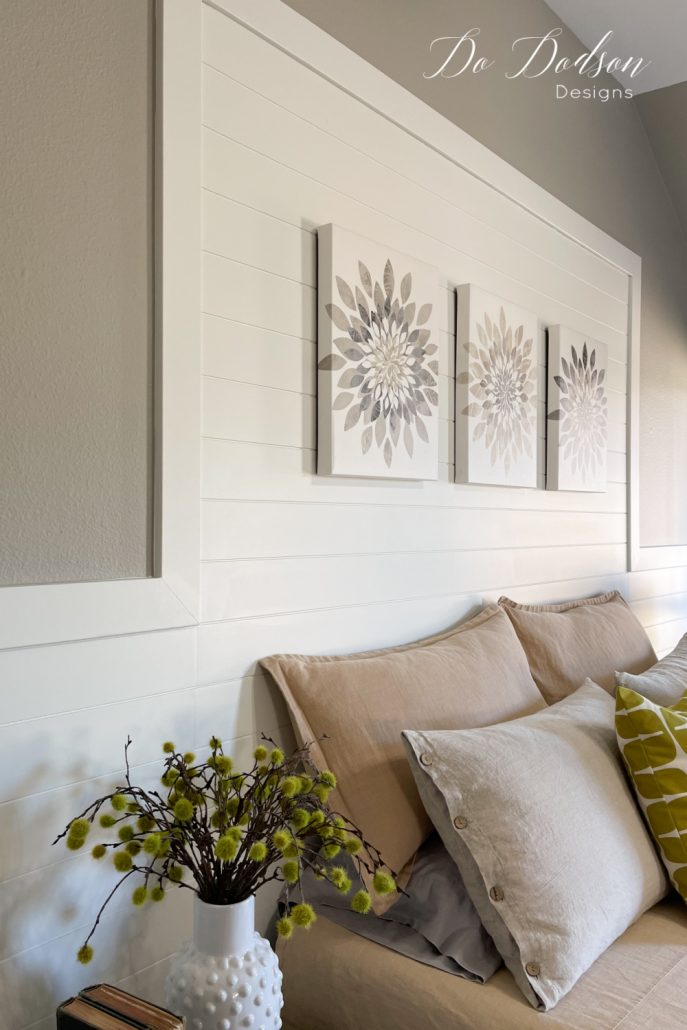
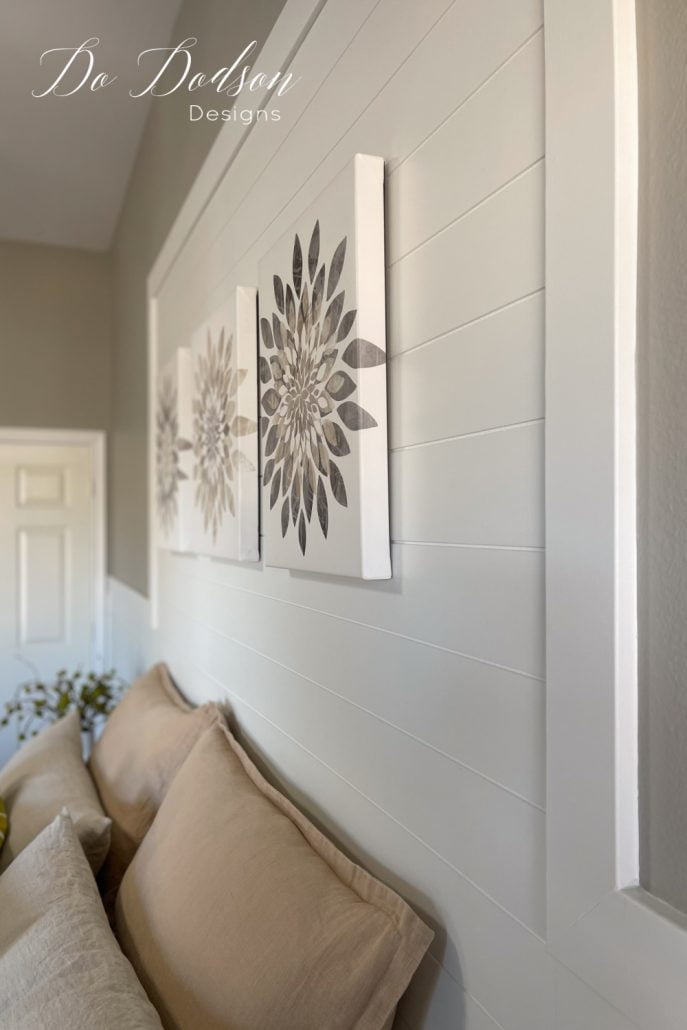
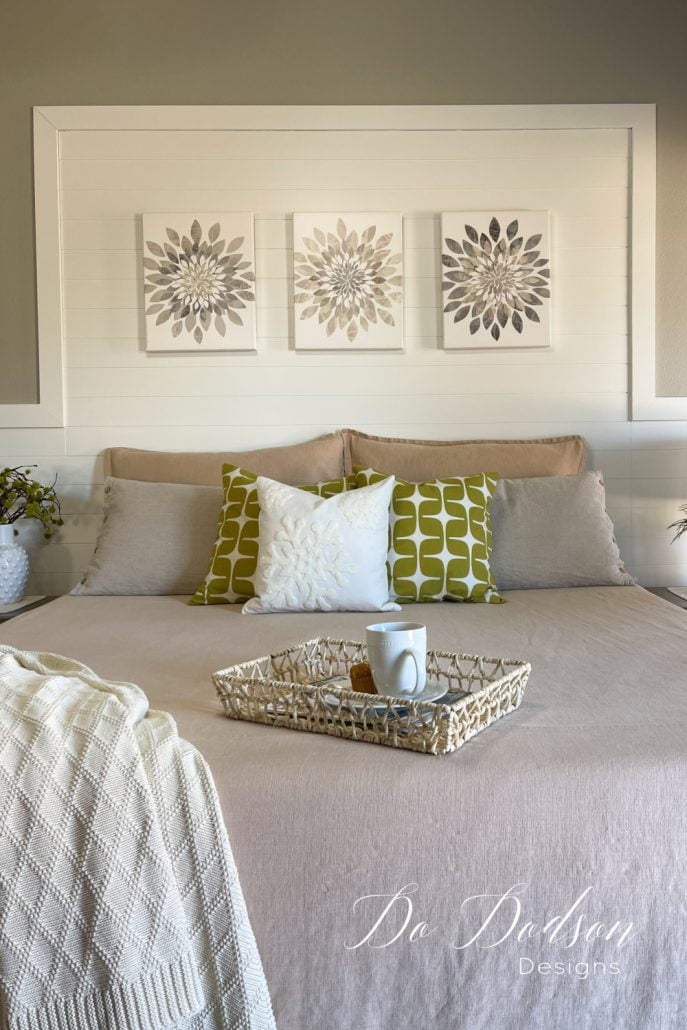
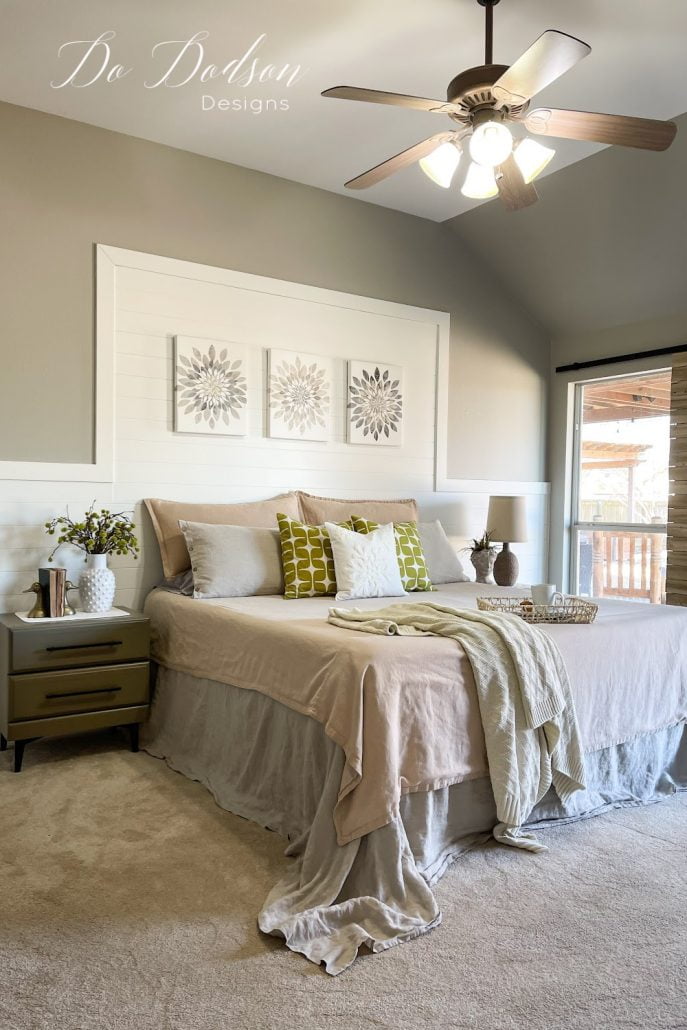
Learning how to install shiplap paneling wasn’t as hard as we thought it would be, and we are super happy with the results. Gosh, I LOVE this room.
Thanks for joining us today, and we hope you keep coming back for more. We love sharing what we do and look forward to the next blog post. And as always, we are happy to answer your questions in the comment section or just say hi so we know you were here. We really love hearing from you.
Don’t forget to pin this for later or share it with your bestie for inspiration.
Until the next project… xo, Do
Love this project so much, my friend! Great idea to have it like a headboard – the space for artwork is brilliant! Thanks for the tutorial – I’ve pinned it for the future shiplap wall I want to put up! 😊
Thanks, Cindy! Yes, it’s perfect for artwork and no more bouncy headboard. I don’t think I’ll ever get tired of the look, but I’m sure I’ll change the artwork 🙂
Date night at Homie Dee-pot, haha! So fun.
I love the accent wall/headboard, Do! Looks fabulous. That liquid nails stuff is the best! It helped us on the laundry room and powder room walls. Love all your DIY projects. 🥰
Thank you, Wendy! Gotta get that date night in. I’m ready to DO it again. LOL 🙂
Oh my goodness! I love this so much. I have been wanting to put shiplap in the bunk room, but I don’t want to spend a fortune on the wood or spend a ton of time doing it. This is brilliant! I can’t wait to do my project now. Thank you so much, my friend.
Hi Renea! Thanks for stopping by. I think you’re going to love the shiplap paneling. Isn’t it brilliant? And it looks authentic! Have a blessed day. 🙂 xo
Do, I just love your bedroom. The shiplap on the walls is the perfect touch. You can never go wrong with SW Mindful Gray. It is a beautiful gray. Honestly, I had no idea that you could get shiplap panels. Love it! Your bedroom is beautiful.
Thanks, Tammy. It was a great discovery for me, so I just had to share. xo 🙂
Love it. Great idea!! Wish I lived closer to Home Depot, I sure could use a date night lol.
LOL, I’d rather have a gift from Home Depot than flowers and a card any day.
Love this!! Great job, Do!!
Thank you, Leslie. Thanks for stopping by. 🙂 xo
Love the new look. The grey is perfect on the walls. I remember seeing the prior makeover with the headboard. This look is so different but equally sensational.
Thanks, Joanne! It’s a nice change and I love the clean lines. THanks for stopping by. 🙂 xo
Your room is look gorg! Great job! XOXO
Thanks, Denise! It was fun to see the transformation so quickly. 🙂 xo
Donna, love your room, this is exactly what I was wanting, the bedroom is beautiful! Thank you so much for sharing step by step and all the tips. Question SW Mindful Grey 7016, would it go with SW Pediment & or SW Egret (master bathroom)? I was planning on carrying those colors from the master bathroom into the bedroom walls with the creamy white on the shiplap and around the window. Paint out the sliding doors on the double wall closet opposite the bed in creamy white to match?
I think it would be stunning, Christine. Thank you so much for reading my blog. 🙂 xo
Hi! I was curious- in one photo I can see a seam where the paneling lines up. How did you get rid of the seam?
Hi Johnna,
There is a seam that isn’t that noticeable in the photos. Cutting the paneling clean and having a smooth wall helps a lot. I used a wood filler and sanded the line. Use a good primer and paint. I hope this helps. 🙂 xo
I could you link to the paneling product from home depot?! I can’t read the Product details on the photo of the shiplap paneling
Hi Becca. I went to check and it is there. I’m not sure why you can’t see it but here it is. I hope this helps. 🙂
https://rstyle.me/+y6Z0td9XpptQ2ah7k1LEWA
Love it. Love it. Thanks for the detailed info.
Trying to do the same in our bedroom. Have you put trims on the panel or it is put next to it? Were the actual nails necessary for the panel? As the panel board manual says to use only liquid nails. Looking forward to some information from you.
Hello! Yes, if the end is open I use trim. The nails are optional but my wall had a few dips so I used both. It’s a great way to update a wall.