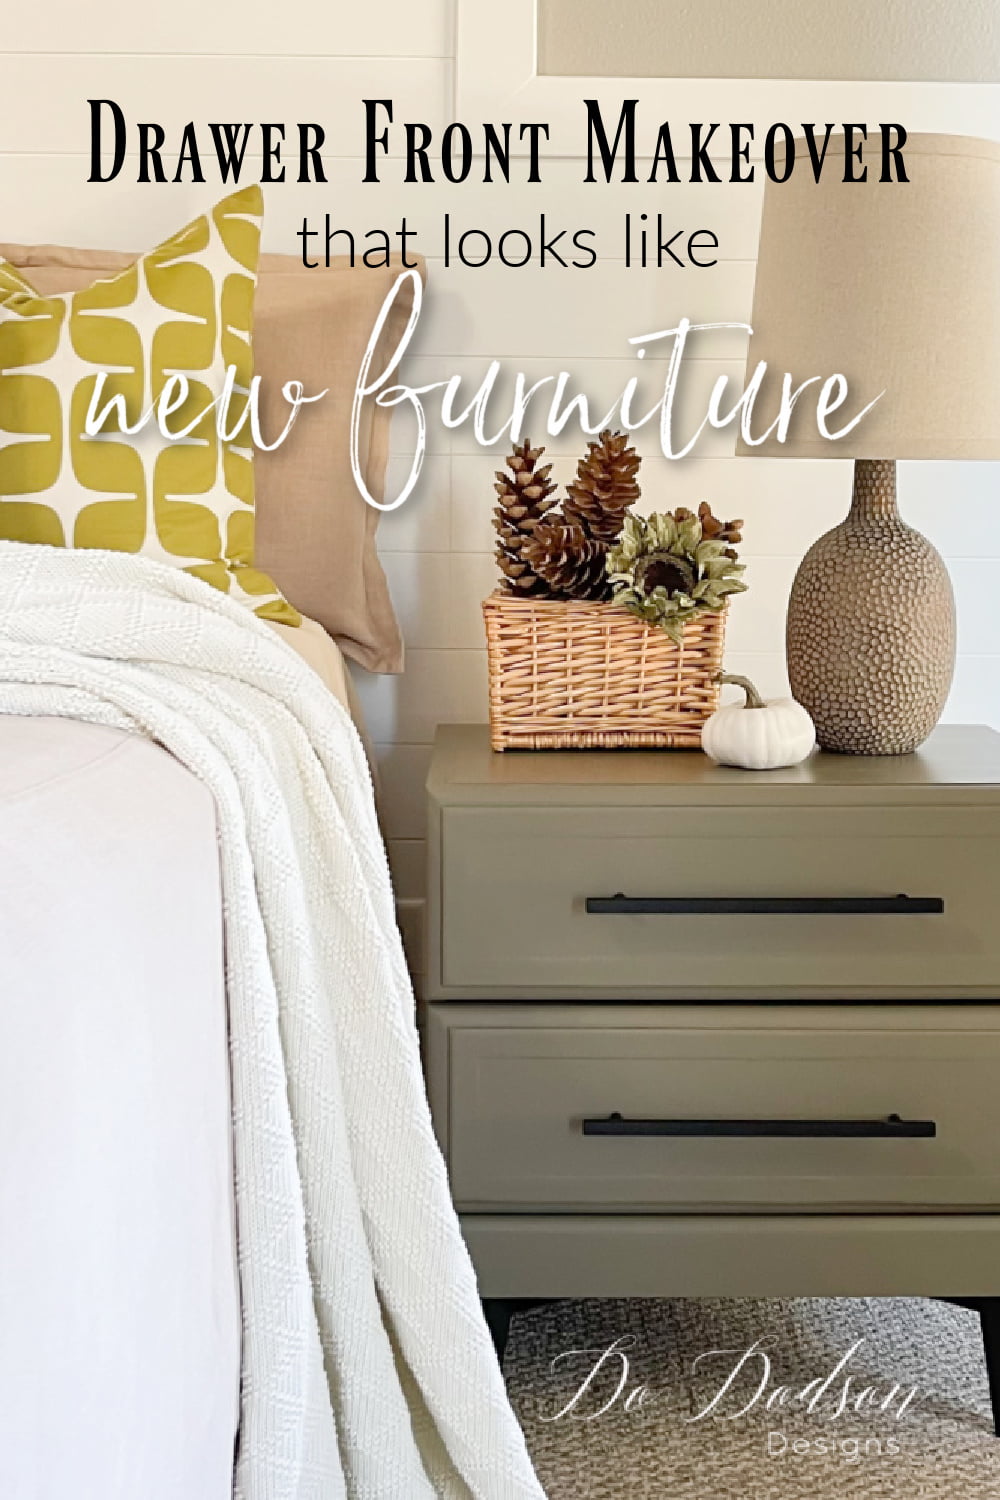
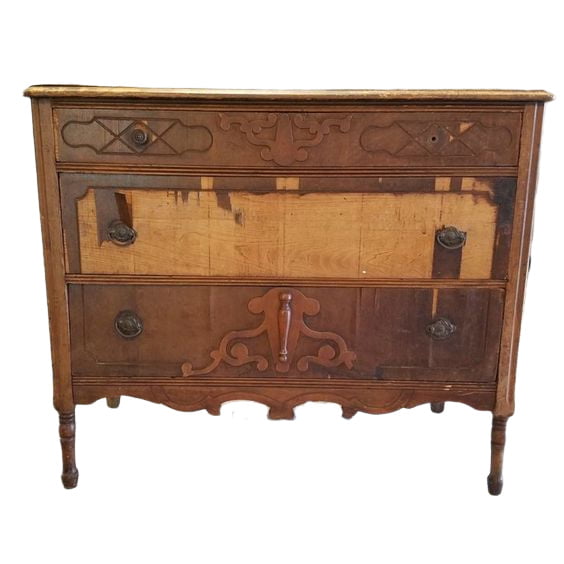
We’ve all seen those ugly 1990s drawer fronts on furniture. I’ll go a step better; I had to live with them for years! It seems that my hubby is attached to the old bedroom set that he brought with him after we married. Finally, a solution we both can agree on. Today I’m sharing the DIY drawer front makeover update that changed his mind about this old style.
* As an Amazon Associate, I earn from qualifying purchases and through other companies as well. You are not charged extra to use any of the links, but any income I make helps me create more amazing DIY projects to share with you! To see my full disclaimer, click here!
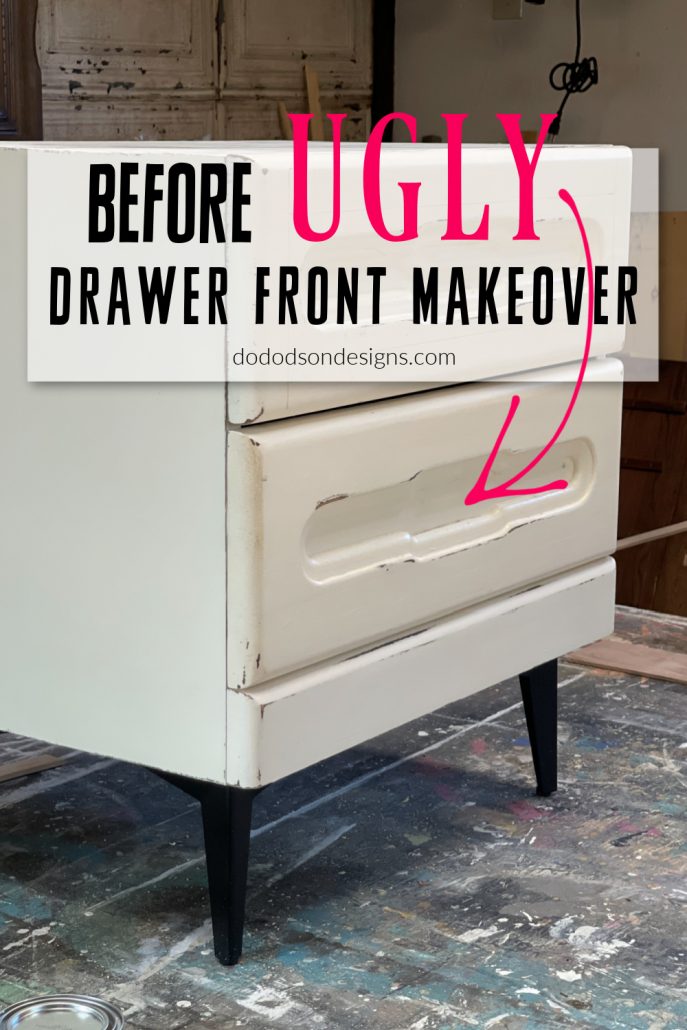
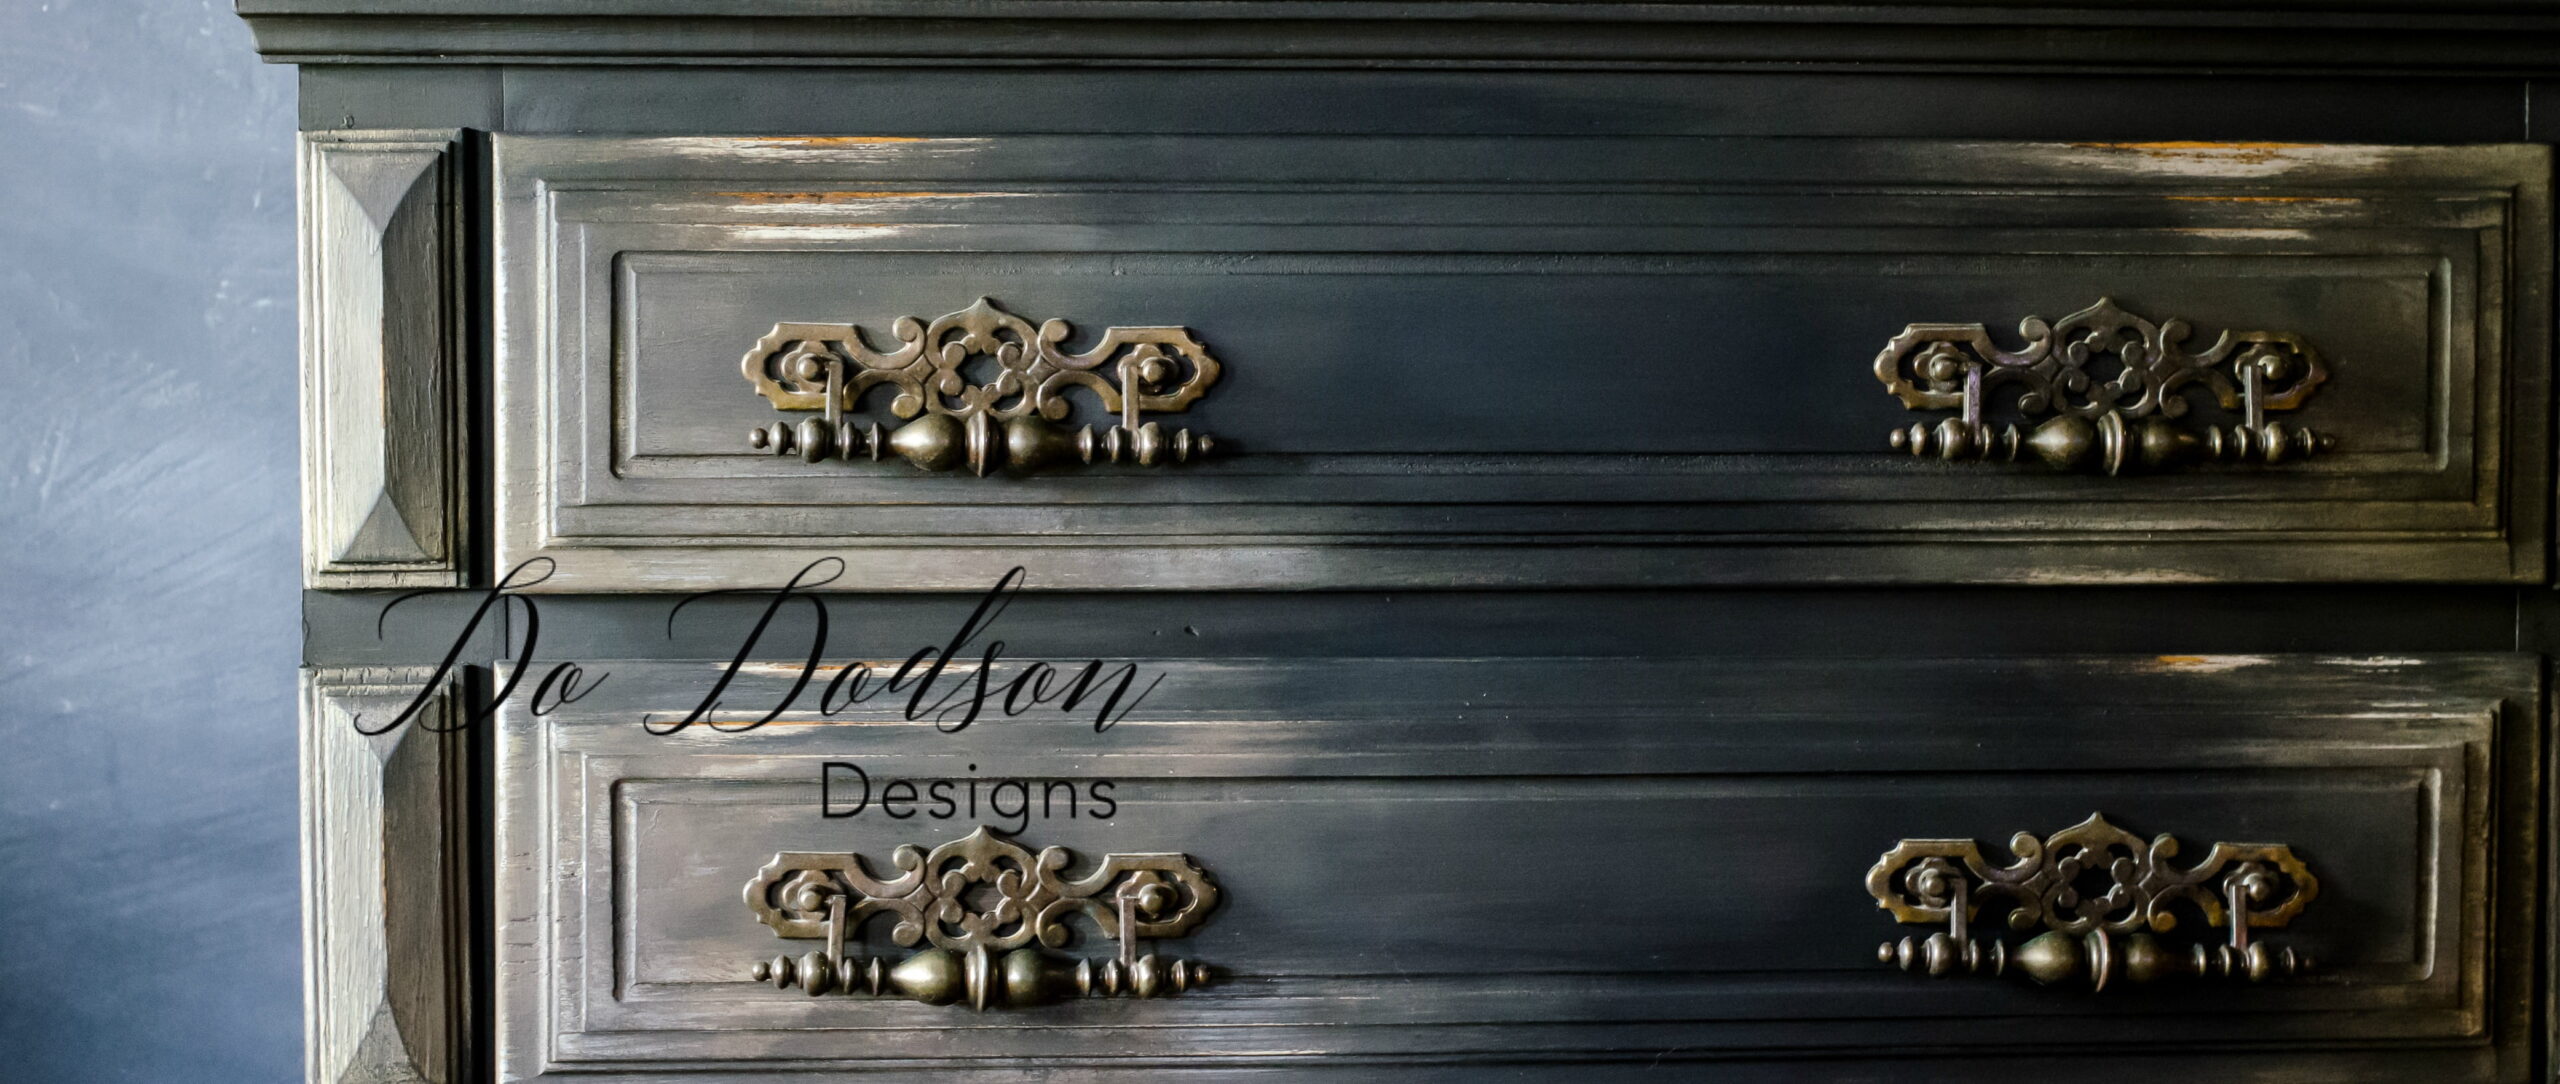
Before And After Ugly Drawer Front Makeover
So, what is the solution? I’ve seen others use Bondo to fill in the ugly recessed area to create a smooth drawer front but that’s a lot of stinking Bondo work. Here’s my solution and the end results because who doesn’t love a good before and after story.

SUPPLY LIST:
- liquid nail
- caulk gun
- 1/4 inch plywood
- pinewood trim
- pin nailer
- wood filler
- BOSS (blocks odors, stains and stops bleed thru)
- synthetic paintbrush
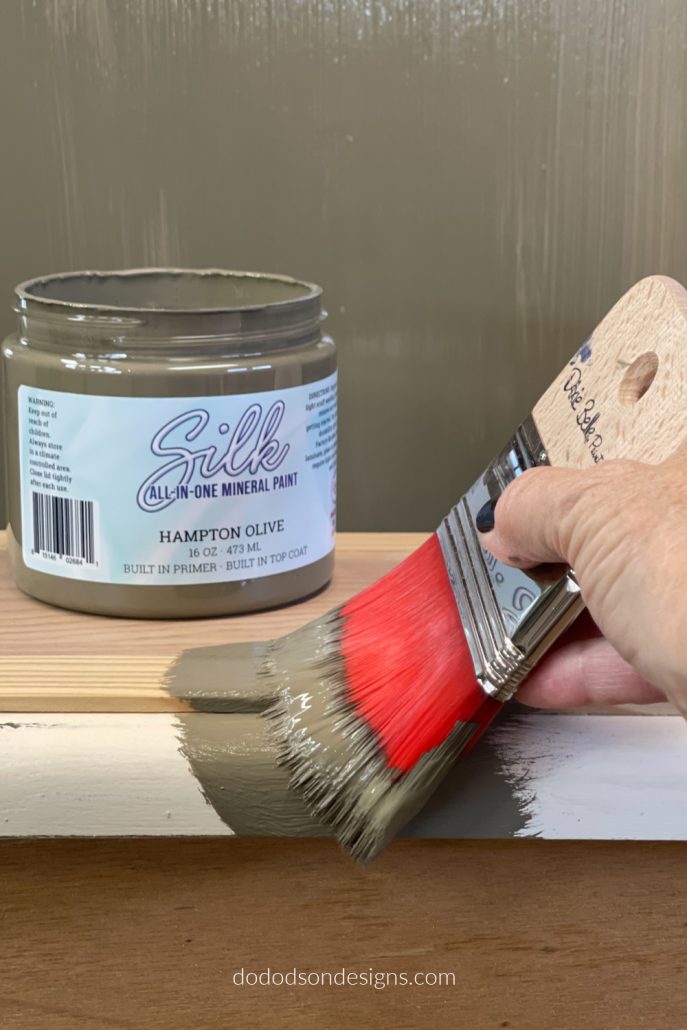
- Silk All-In-One Mineral Paint (Hampton Olive)
- scarlet brush
- gator hide (for extra protection on high traffic areas)
- hardware pulls
- matte black metal legs
Covering Up The Ugly Drawer Front
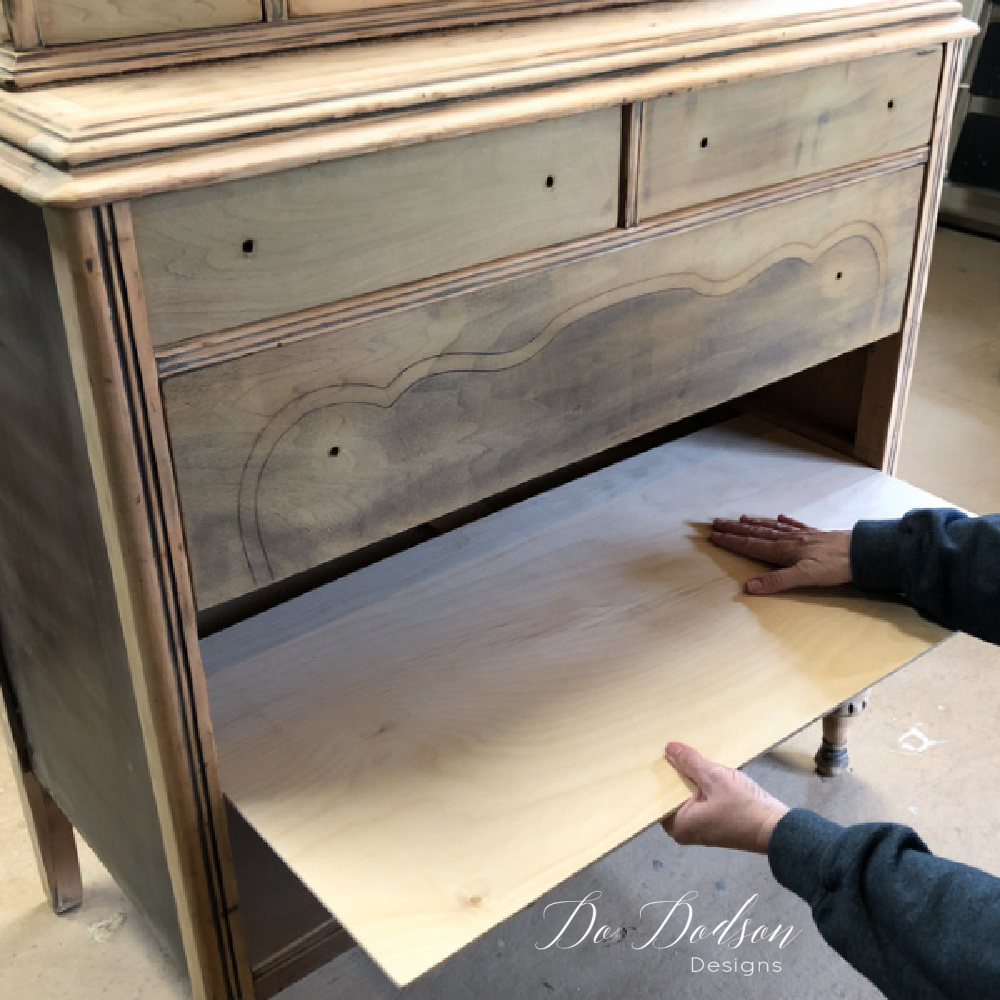
STEP 1 Yep, I’m covering it up. It’s actually very simple if you are handy with a saw. Measure the area you want to cover and cut a piece of 1/4 in plywood. Be sure to leave enough of a border to overlap the recessed area. And inch or so.
Initially, when I came up with this drawer front makeover idea I thought that the plywood wouldn’t be sturdy enough to hold the handle. because there will be a gap between the surface and the wood. It’s kind of like you’re building a bridge.
Let me reassure you that the plywood is strong even though it’s only 1/4 inch. I was pleasantly surprised about the makeover.
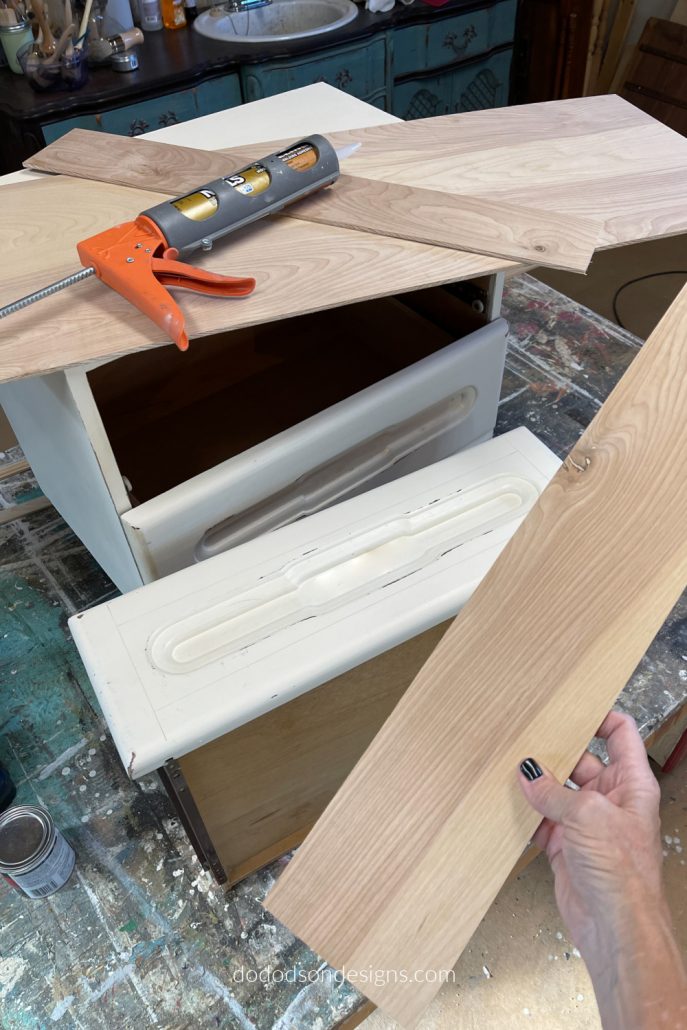
Attaching The New Drawer Front Cover
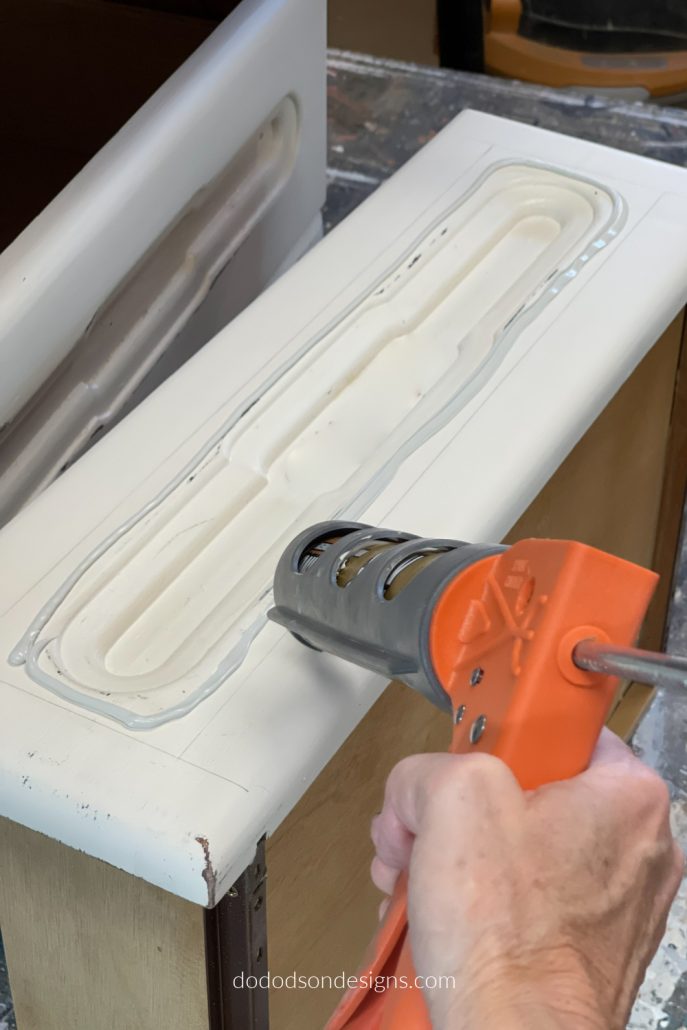
STEP 2 To secure the plywood over the recessed area of the drawer front I used a product called liquid nail adhesive. I have used it in the past to secure some shiplap to a wall where I couldn’t nail and it worked beautifully. I promise it will stick for good!
Apply a small bead of the liquid nail inside the area where the plywood will be placed. Then carefully place the plywood over the area you want to cover and gently add pressure so that it gets good contact. It doesn’t stick immediately so you have a little time to make sure it’s in the exact place you want it.
Be mindful that you may have a bit of the adhesive seep out from underneath that you will want to remove.
Next, add a few pin nails to each corner to secure it in place while the adhesive dries.
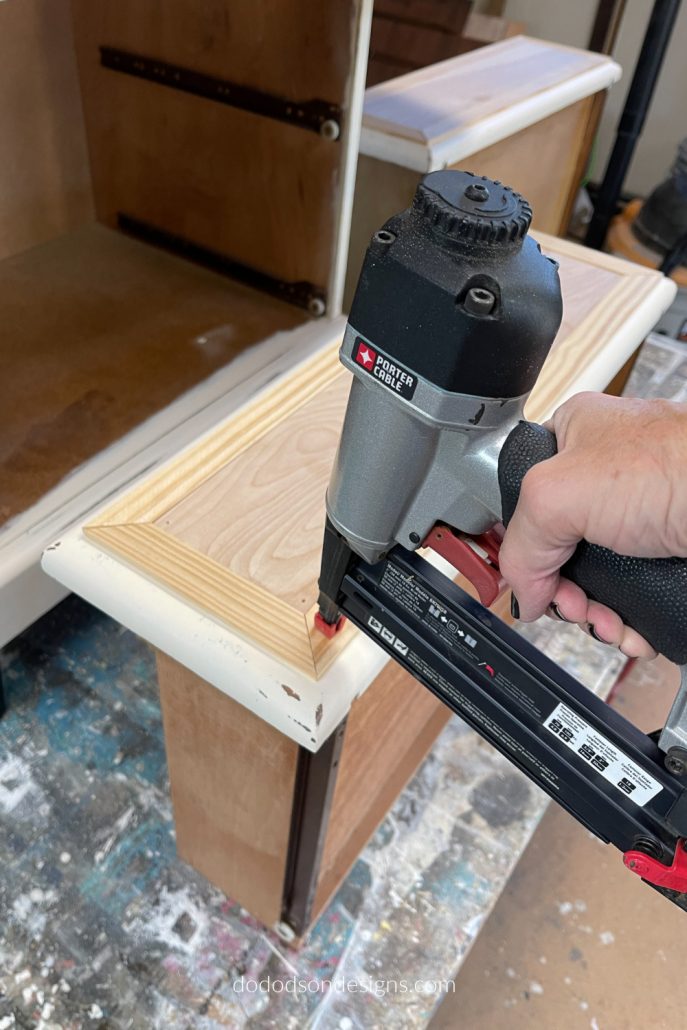
Add Wood Trim
STEP 3 To give the drawer front makeover it a finished appearance, use a wood trim around the plywood using a 45 degree cut to cover up the raw edges. I used pine wood because it’s softwood and is easy to sand the edges with 220 grit sandpaper for a finished smooth edge.
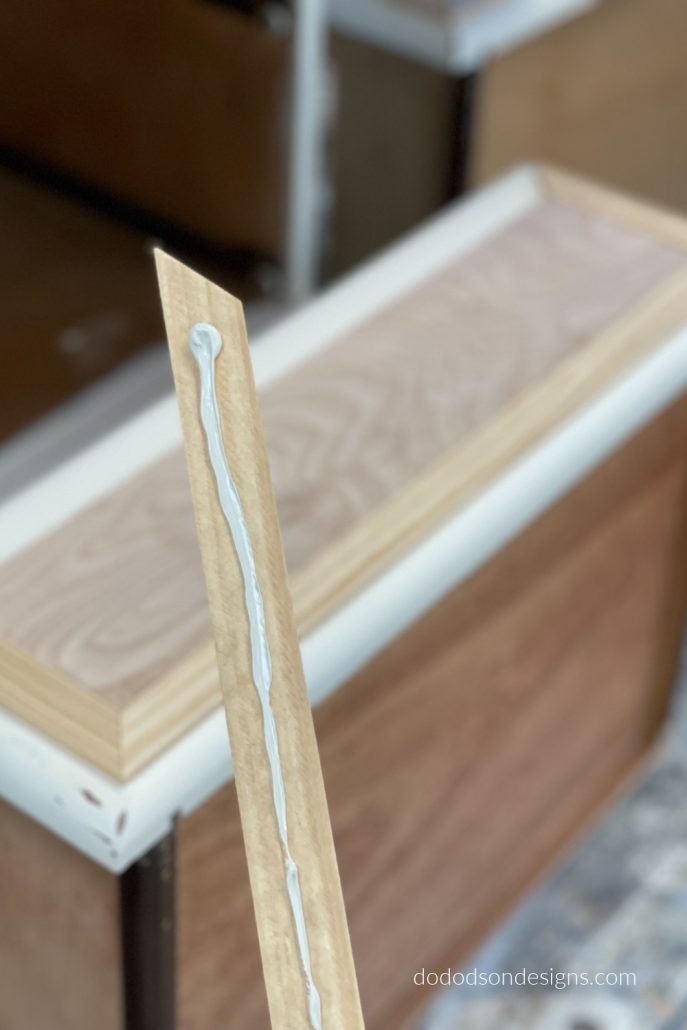
Basically, you’re creating a frame to cover the ugly area. Apply the adhesive to the trim as well for extra stickability and secure with pin nails.
Fill The Nail Holes
STEP 4 Fill the nail holes with a good quality wood filler. I like plastic wood because it dries hard and quick. Apply a small amount to your finger and rub over the nail holes. Once the wood filler is dry, use a fine grit sandpaper and smooth over the nail holes and give the wood a little love too. Wipe away any remaining wood dust leftover from sanding before the next step.
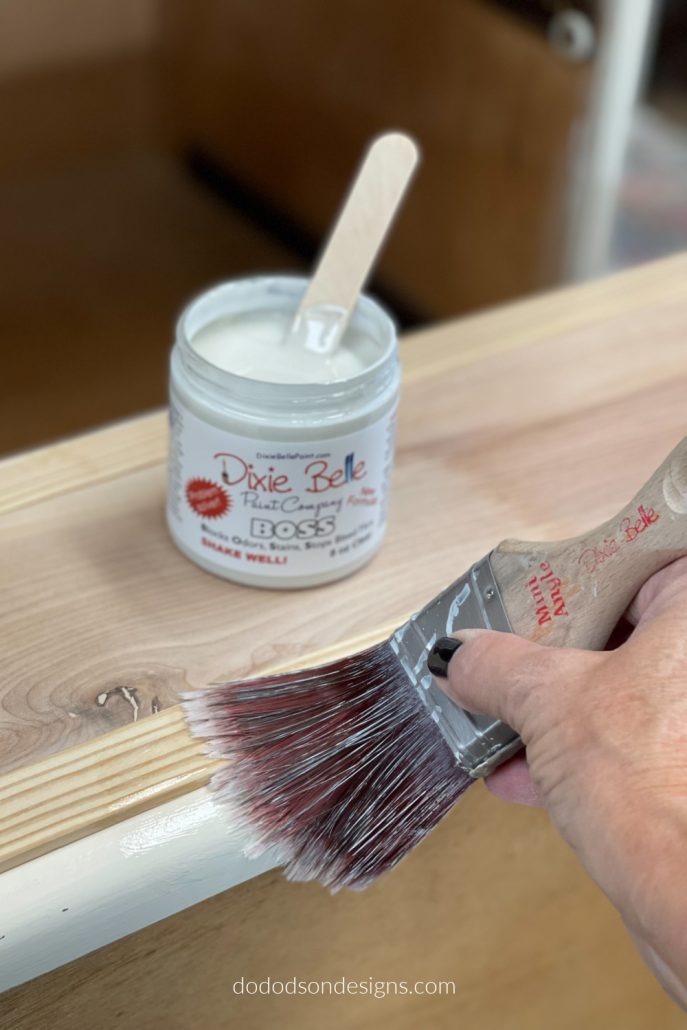
Why You Need A Tannin Blocking Wood Primer
STEP 5 If you are planning on painting the drawer fronts, you will need to use a stain and tannin blocking wood primer.
Stains and tannins are a pain when it comes to painting over wood surfaces. Tannins exsist in many woods will cause bleed thru of your paint if not properly blocked. Fortunately ther are products available to eliminate this proble.
Uses a good quality stain and tannin blocker like BOSS. Apply two coats with a good quality synthetic paintbrush and allow to dry before painting.
Silk All-In-One Mineral Paint
STEP 6 Paint your drawer front project! I love using this paint. It’s quick, easy and it holds up to it’s name.
The built in topcoat is a winner for me. It covers in two coats and dries to a hard, durable, satin finish.
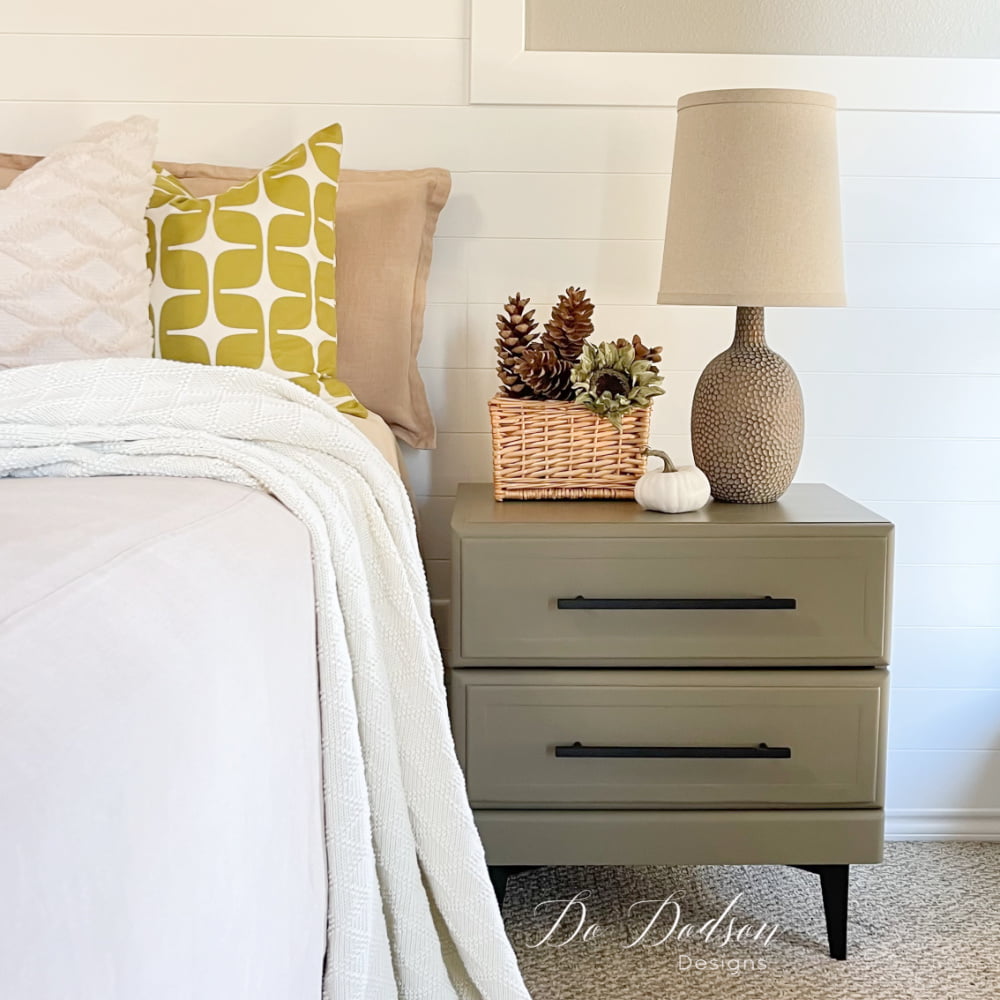
The color I chose for my drawer front makeover on these nightstands is Hampton Olive. The dreamiest of greens in my honest opinion. These nightstands are going to look amazing in our bedroom.
The UGLY Drawer Front Makeover Result!
I added some much needed height with these gorgeous matte black metal legs!
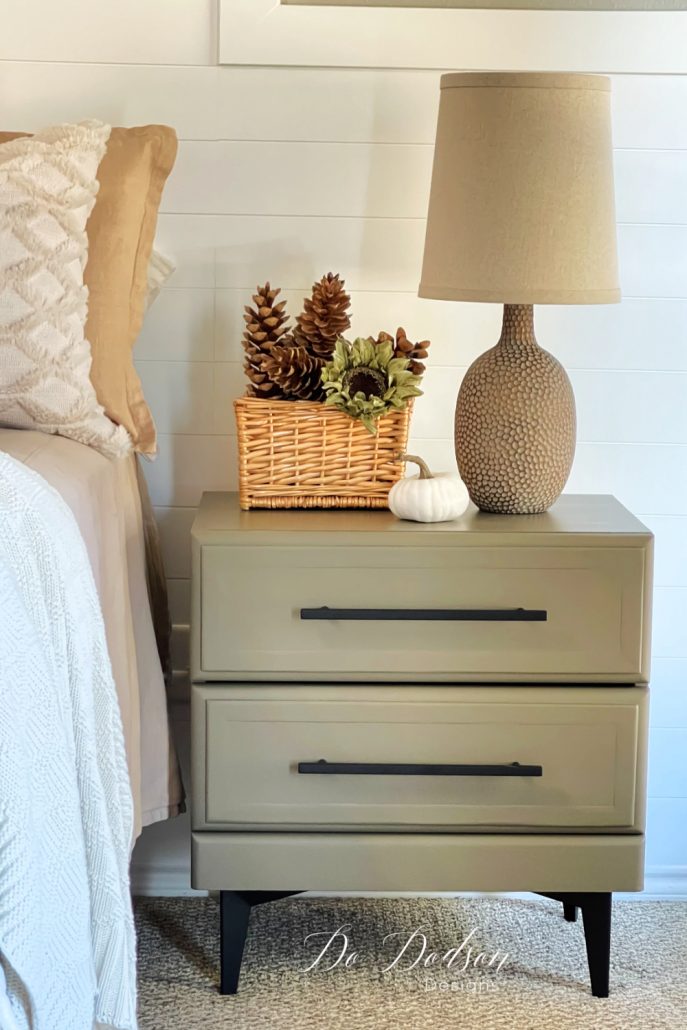
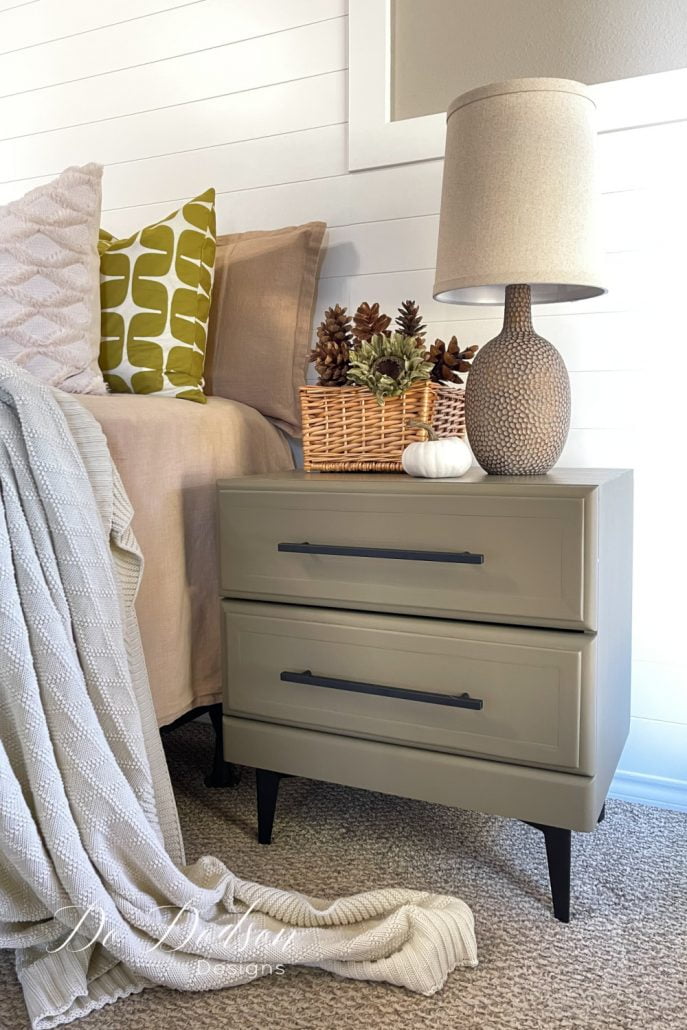
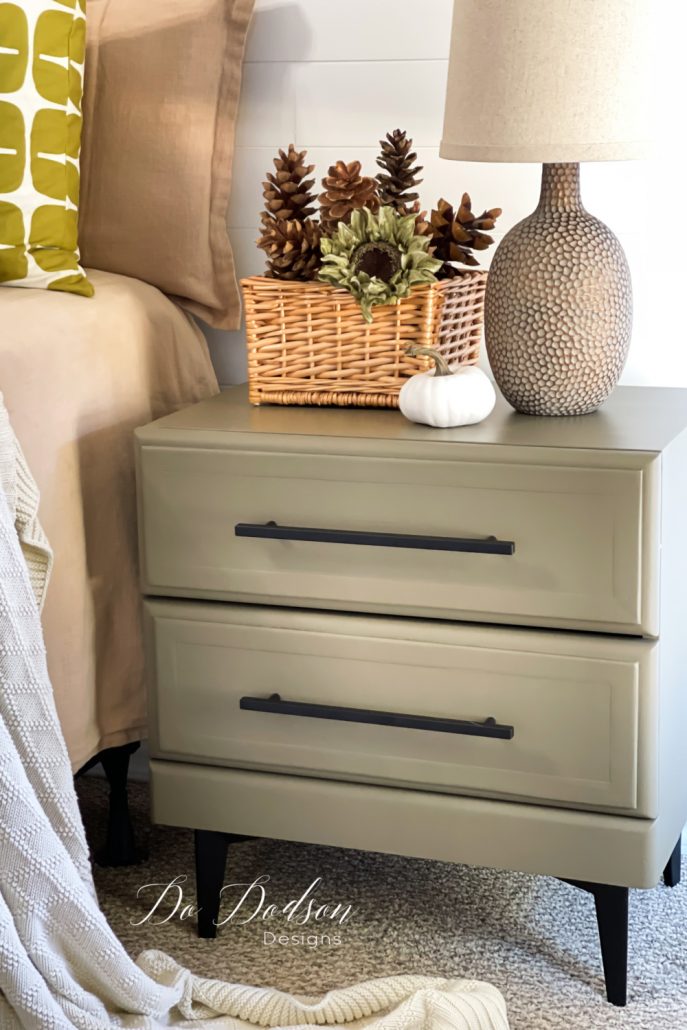
I’m speechless! I never dreamed these drawer front makeover nightstands would turn out this well. Trust me, I tried my best to purchase new ones and I couldn’t find what I wanted. THESE are what I wanted. And hubby is happy with the results and the nightstands lived happily everafter in our bedroom. The End
So, what do you think? Did it shock you too? I’d love to hear from you and any feedback that you may have. Have a question I didn’t cover here. Ask me below or just say hi so that I know you were here. Have a fantastic day!
Until the next project… xo, Do
I love the new look. I just finished a dining room table in Hampton Olive and it turned out great, plus I love the fact that when you finish painting you are actually DONE!!! You did a fantastic job on the tables.
Hi Barbara! Good to hear from you. I bet your table is gorgeous in this color. Dixie Belle did well when they chose this color. 🙂 xo
These came out gorgeous, Do! Love how you changed the drawer fronts, excellent idea. Hampton is one of my most loved Silk colors.
Thanks, Wendy! Ron even liked them. SHOCKER! 🙂 xo
Love the transformation! It now looks very modern!
Thanks, Cindy! It turned out better than I expected. You just never know until you try. 🙂 xo
I couldn’t see the piece with its original legs in your post, but it turned out great in the end.
Hi Robin, it didn’t have legs. It was a real shorty! It was part of a console that I removed years ago. I wished I had saved those pics. 🙂
These look amazing. I even like the color, even though I’m not a green enthusiast. Thank you for sharing.
Hi Kathy! Thanks for joining me on the blog. Green is a hard color to get right, but the right shade does look beautiful. 🙂 xo
Great job!!!
Thank you so much, Jen! 🙂 xo
They are beautiful, you are a talented woman! I enjoy reading your posts and all the great ideas you come up with. By the way I love your hair. Hope that doesn’t sound too weird.
Thanks for sharing, Lucie
Hi Lucie! Thank you, and no, that’s not weird. I appreciate the compliment. 🙂 xo
I can’t say nothing but awesome!!! Another proof that you are so creative and new life giver. I like that cause you are also saving the world , wooden furnitures can last forever if we do what you do….
Hi Andrea! Thank you! Yes, I believe we should preserve as much as possible. They don’t make furniture like they used to. Thanks for joining me on the blog. 🙂 xo
Hi Do, love how it turned out!! My husband gets attached to furniture to! Great solution it looks awesome!! Green is my favorite also, this is the first time I saw the Hampton green, great color!!😊
Hi Holly! Isn’t it a great color?
Hi Donna, these nightstands look amazing now. Great job
Thank you, Cheryl. I think they were a huge improvement. 🙂 Good to hear from you.
Luv it
Thank you! 🙂 xo
Love the makeover; you really modernized it!
Thank you, Sara! It’s amazing what a little wood and some paint can do. 🙂 xo
Great job, Do. I like that you show how simple it is, and not to be afraid to invest in some simple tools to achieve amazing results.
Tools are everything to me and they’re always a great investment. Thank you! 🙂 xo
Wowsa! What a makeover! Covering the problem instead of filling it is a great idea Do!! Pinned!
I didn’t have enough Bondo so I improvised. 🙂 Ha!
Hi Do! I absolutely love your style! Your tutorials are great also, I can’t wait to do the drawer fronts on a 1980’s pine dresser I have and didn’t just want to get rid of!
Also going to make your churches ! Thanks again for all your creative ideas ! MERRY CHRISTMAS 🎄
Hi Sheri! Thank you. That is so sweet of you to say. I wish you the very best with your projects and Merry Christmas. 🙂 xo
Love the new, fresh, updated look.
Hi Leslie! Yes, it needed an update badly. I’m really happy with the look. 🙂 xo
I LOVE the new look – so modern, sleek yet perfect in a traditional home! Thanks for sharing my friend. XOXO
Hey my friend! Yes, I love how they blended in so well with what I already loved. They no longer make furniture as sturdy as these. I’ll keep these for a long time. I may repaint them a time or two but they work. Thanks for reading. Have a great weekend. xo 😘
Love the paint color and the outcome! Just one question: Boss was not needed on the plywood, but everywhere else, correct? I will have to buy some of that.
Great job!
Hi Paula,
When painting over any wood surface you will need a stain blocker. I used clear Bonding BOSS on this project. Sorry if that was confusing. The paint I used, also has a primer and a topcoat included in the paint. SILK All-In-One Mineral Paint. I love this paint.