
Want to add farmhouse curb appeal without spending a small fortune? These DIY wood shutters were made from leftover pressure-treated decking, making them practically free—and such a simple way to give the exterior of our home a warm, finished look.
In this step-by-step tutorial, I’ll show you how to build decorative board-and-batten shutters, protect the wood for outdoor use, and securely attach them to a brick exterior.
August 2026: This post has been updated with additional building tips, exterior wood options, and more details about how we attached the shutters to our brick home.
* As an Amazon Associate, I earn from qualifying purchases and through other companies as well. You are not charged extra for using any of the links, but any income I earn helps me create more amazing DIY projects to share with you! To see my full disclaimer, click here!
Supplies and Tools for DIY Wood Shutters
- Pressure-treated decking or exterior-grade 1×6 boards
- Two exterior-grade crosspieces for each shutter
- Tape measure
- Pencil
- Miter saw, or circular saw
- Electric sander and sandpaper
- Drill and drill bits
- Exterior wood screws
- Safety glasses
- Dust mask or respirator
- Gator Hide Topcoat (Exterior wood sealer, stain, or paint)
- Concrete or masonry anchors for installation on brick
I repurposed pressure-treated decking left over from another project, which kept my cost extremely low. If you don’t have reclaimed decking, cedar, pressure-treated pine, or another exterior-grade lumber will also work. Your total amount of wood will depend on the number and size of the windows you’re dressing.
How to Build DIY Exterior Wood Shutters
I built these decorative exterior shutters using pressure-treated decking left over from another project. This is one of those times when my habit of saving scrap wood really paid off!
Pressure-treated lumber is a practical option for an outdoor project because it is designed to resist rot, insects, and moisture damage. You can also use cedar or another exterior-grade wood if you’re purchasing new boards. Whatever wood you choose, make sure it is suitable for outdoor use and protect it with an exterior-rated sealer, stain, or paint.
DIY Wood Shutters at a Glance
Project type: Decorative board-and-batten exterior shutters
Skill level: Beginner-friendly
Estimated time: A few hours, plus drying time
Number of boards: Three vertical boards and two crosspieces per shutter
Cost: Varies depending on the wood and finish; mine were practically free because I used leftover decking
Important: These shutters are decorative and are not designed to open and close over the windows.
STEP 1
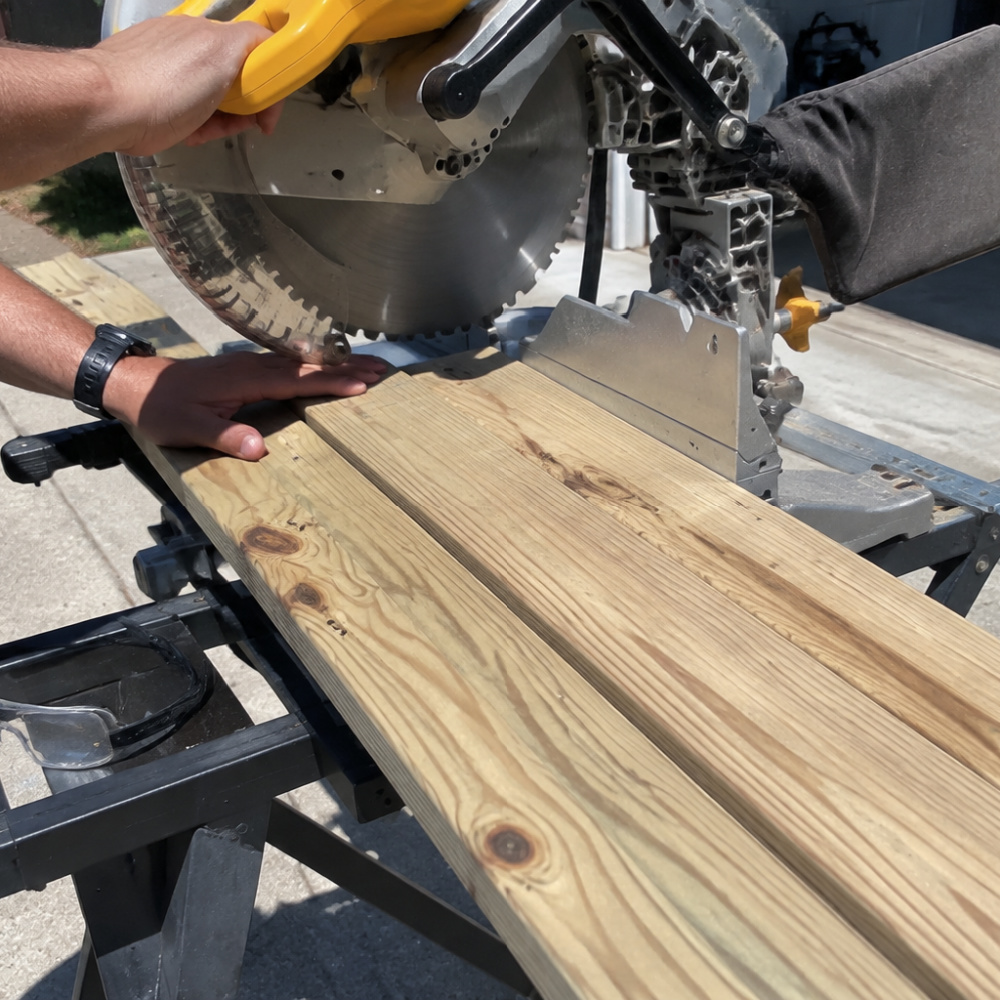
Measure and Cut the Shutter Boards
Measure the height of the window, including the exterior trim you want the shutters to frame. Use that measurement to cut three equal-length vertical boards for each shutter.
You will need six vertical boards to make one pair of shutters—three boards for the left side of the window and three for the right. Measure each window separately because window sizes can vary slightly, even on the same house.
Before cutting all your boards, hold one beside the window to make sure you’re happy with the finished height. Remember the old saying: measure twice and cut once. It has saved more than a few pieces of lumber around here!
Sizing tip: My shutters are decorative, so I chose a width that looked balanced beside the windows. Lay three boards side by side and measure their combined width before assembling them. You can leave a small, even gap between the boards if you prefer a more defined board-and-batten look.
STEP 2
Sand and Prepare the Wood
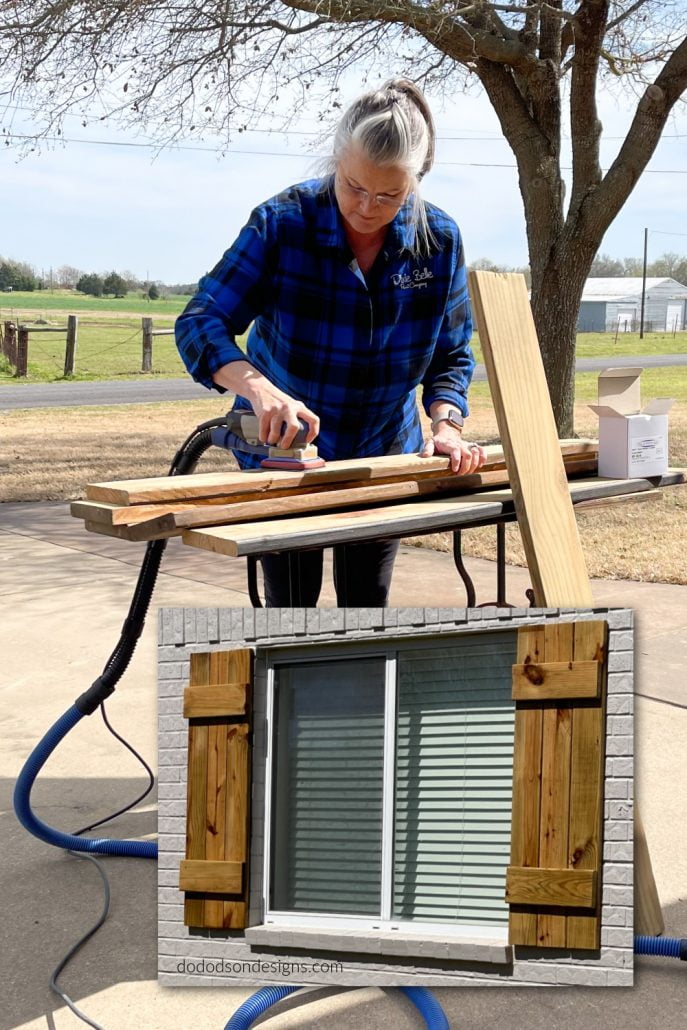
Because I used older decking that had been exposed to the weather, I sanded each board to remove the rough surface, smooth the edges, and bring out more of the natural wood grain.
Outdoor wood often develops a gray appearance as sunlight and moisture break down its surface. This discoloration isn’t necessarily mold, although mildew can sometimes grow on damp wood. Clean away any visible dirt or mildew and allow the boards to dry completely before sanding.
Always sand pressure-treated or reclaimed wood outdoors or in a well-ventilated area. Wear safety glasses and a properly fitted dust mask or respirator, and clean up the sawdust when you’re finished. Protect those lungs!
Not sure which sander to use? Take a look at my honest guide to choosing the best electric hand sander for furniture and DIY wood projects.
STEP 3
Lay Out the DIY Wood Shutters
Arrange the Boards and Cut the Crosspieces
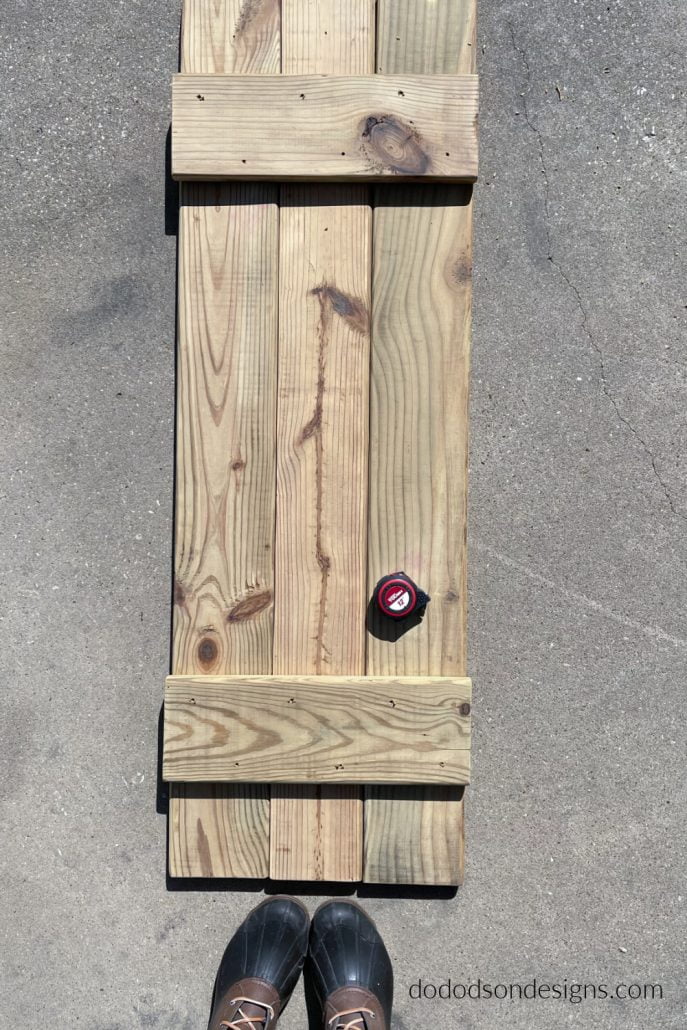
Place three vertical boards side by side on a clean, flat surface. Line up the top and bottom edges and check that all three boards are the same length. This dry fit gives you a chance to catch uneven cuts before reaching the point of no return. 😏
Decide whether you want the boards to sit tightly together or have a small gap between them. If you prefer visible gaps, place equal-size wood spacers between the boards to keep the spacing consistent.
Measure the total width of the three arranged boards. Using that measurement, cut two horizontal crosspieces for each shutter. These crosspieces will hold the vertical boards together and create the simple board-and-batten design.
Quick tip: Assemble both shutters for the same window at the same time. This makes it easier to match the board spacing and crosspiece placement so the finished pair looks balanced.
STEP 4
Predrill the Wood Shutter Crosspieces
Mark and Predrill the Screw Holes
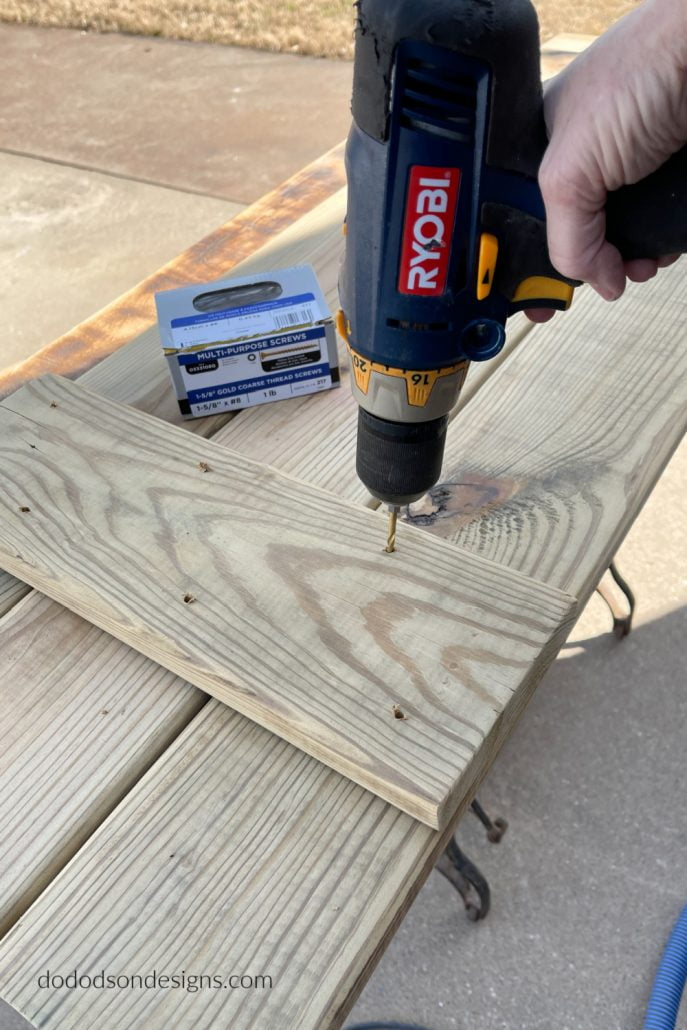
Position the two horizontal crosspieces across the three vertical boards. Make sure they are straight and placed the same distance from the top and bottom of the shutter.
Mark the screw locations where each crosspiece overlaps a vertical board. Predrill through the crosspieces at each marked location before adding the screws. This is especially important when working with older, dry, or reclaimed lumber because it helps prevent the wood from cracking or splitting.
Choose a drill bit slightly smaller than the diameter of your exterior wood screws. The pilot holes should guide the screws while still allowing the threads to grip the wood securely.
Helpful tip: Clamp the crosspieces in place before drilling so they don’t shift. Also, check the screw length before attaching the boards—the screws should hold both pieces securely without coming through the back of the shutter.
STEP 5
Attach the Wood Shutter Crosspieces
Secure the Shutter Boards Together
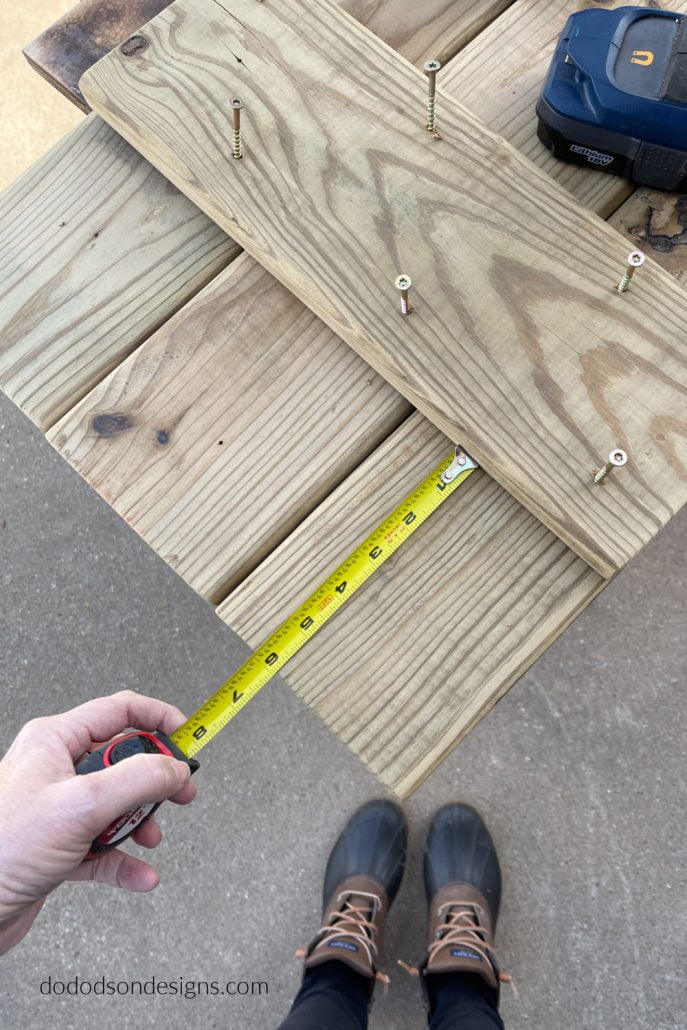
Double-check that the three vertical boards are straight, evenly spaced, and lined up at the top and bottom. Position the horizontal crosspieces the same distance from each end of the shutter so the design looks balanced.
Secure each crosspiece to all three vertical boards using exterior-rated wood screws. Drive the screws firmly into the wood, but avoid overtightening them because that can strip the holes or damage the boards.
Once everything is attached, turn the shutter over and make sure none of the screws have come through the back. Repeat the same process to assemble the second shutter, matching the spacing and crosspiece placement of the first.
Design tip: Place the completed shutters side by side before finishing them. Small differences in the crosspiece placement will be much easier to correct now than after the shutters are sealed and installed.
Step 6
Apply an Exterior Wood Sealer
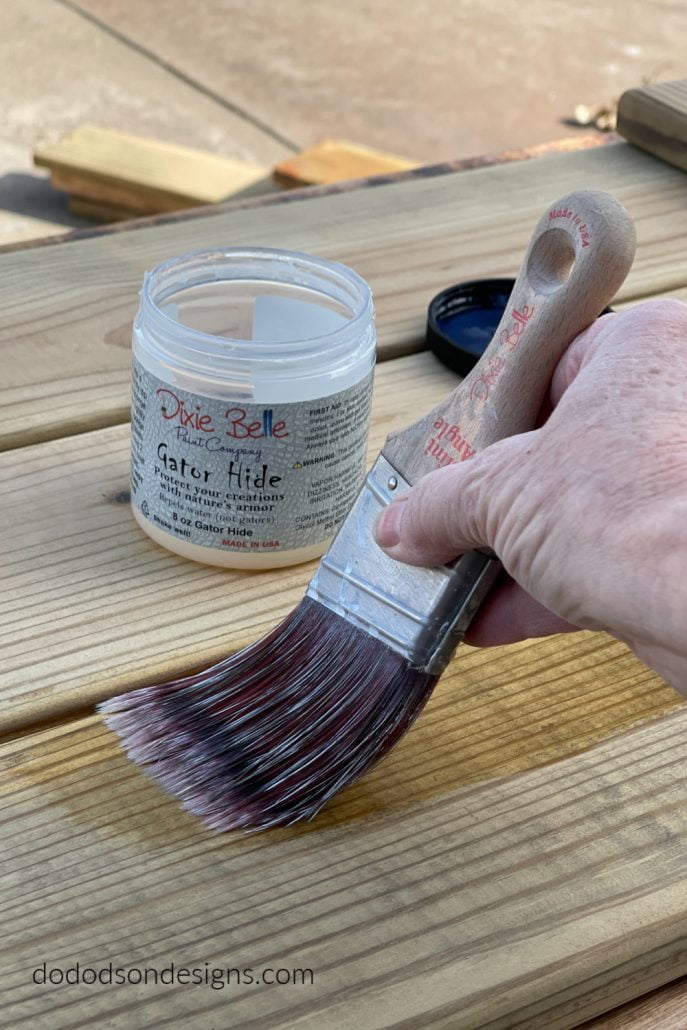
Pressure-treated lumber is designed to resist rot and insect damage, but it can still absorb moisture and gradually develop a weathered gray appearance. Because I wanted to preserve the warm, natural look of the wood, I applied a water-resistant clear topcoat.
For this original project, I used three thin coats of Gator Hide. It deepened the color slightly while allowing the natural knots and wood grain to remain visible.
You can also use another clear exterior-rated wood sealer, exterior stain, or outdoor paint. Make sure the product is intended for exterior wood, and always follow the manufacturer’s directions for preparation, application, drying time, and the number of coats.
Before sealing pressure-treated wood: New pressure-treated lumber may contain too much moisture to accept a finish immediately. Allow it to dry before applying a sealer, stain, or paint. To check, sprinkle a little water on the surface. If the water soaks into the wood rather than beading on the surface, the boards are generally ready to be finished.
Step 7
How to Attach Wood Shutters to Brick
Install the Shutters on the Exterior
Once the exterior finish has dried or cured completely, position the shutters beside the window. Use a level to make sure each shutter is straight, and mark the installation holes before drilling.
We attached our decorative wood shutters by drilling through the front of the shutters and securing them into the mortar joints with concrete anchors. We avoided drilling directly into the brick because holes in mortar are generally easier to repair if the shutters are removed or replaced later.
Use a masonry bit and the appropriate drill or hammer drill to create the pilot holes. Follow the anchor manufacturer’s directions for the correct drill-bit size, hole depth, and installation method. Secure the shutters firmly without overtightening the fasteners.
After installation, I covered the visible screw heads with a finish that blended with the wood, making them much less noticeable.
Important: Exterior surfaces and installation requirements vary. Brick, stone, stucco, wood siding, and vinyl siding may require different anchors or mounting methods. Choose fasteners rated for your exterior surface and the weight of the shutters. If you’re uncertain about drilling into your home’s exterior, consult an experienced contractor.
Installation tip: Ask someone to hold the shutter while you check its position from a distance. A shutter can look perfectly straight when you’re standing beside it but slightly uneven when viewed from the yard.
The Finished DIY Exterior Shutters
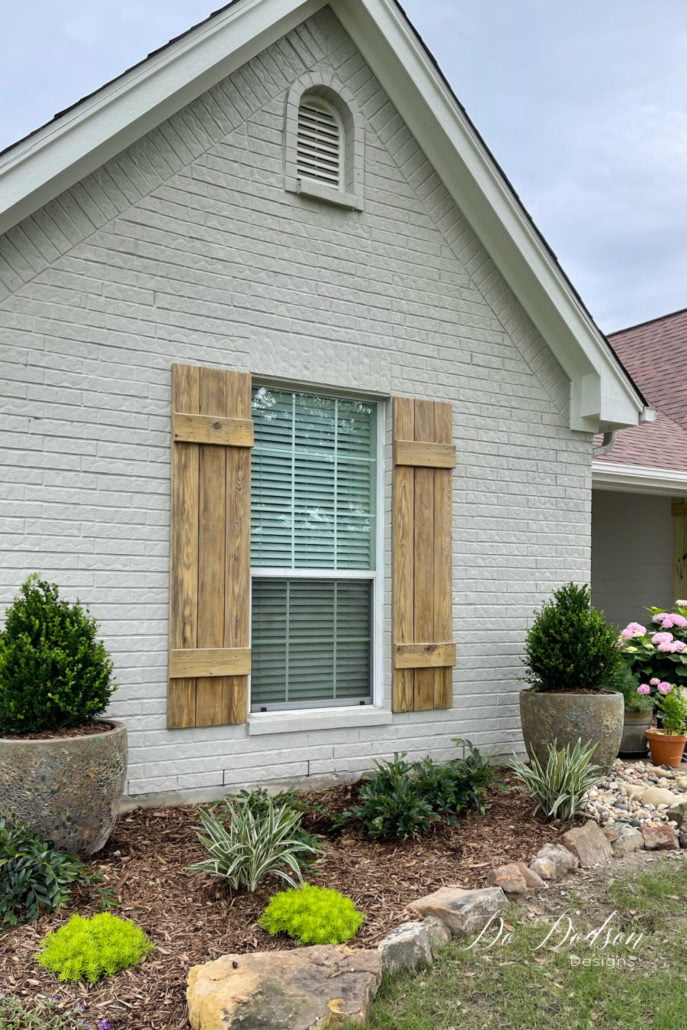
What a difference a few pieces of leftover wood made! The natural wood shutters added warmth and contrast against our painted brick while giving the windows a more finished, modern farmhouse look.
Combined with the updated landscaping, this simple project gave the front of our home a welcoming boost in curb appeal—and I especially loved that I made the shutters with wood we already had.
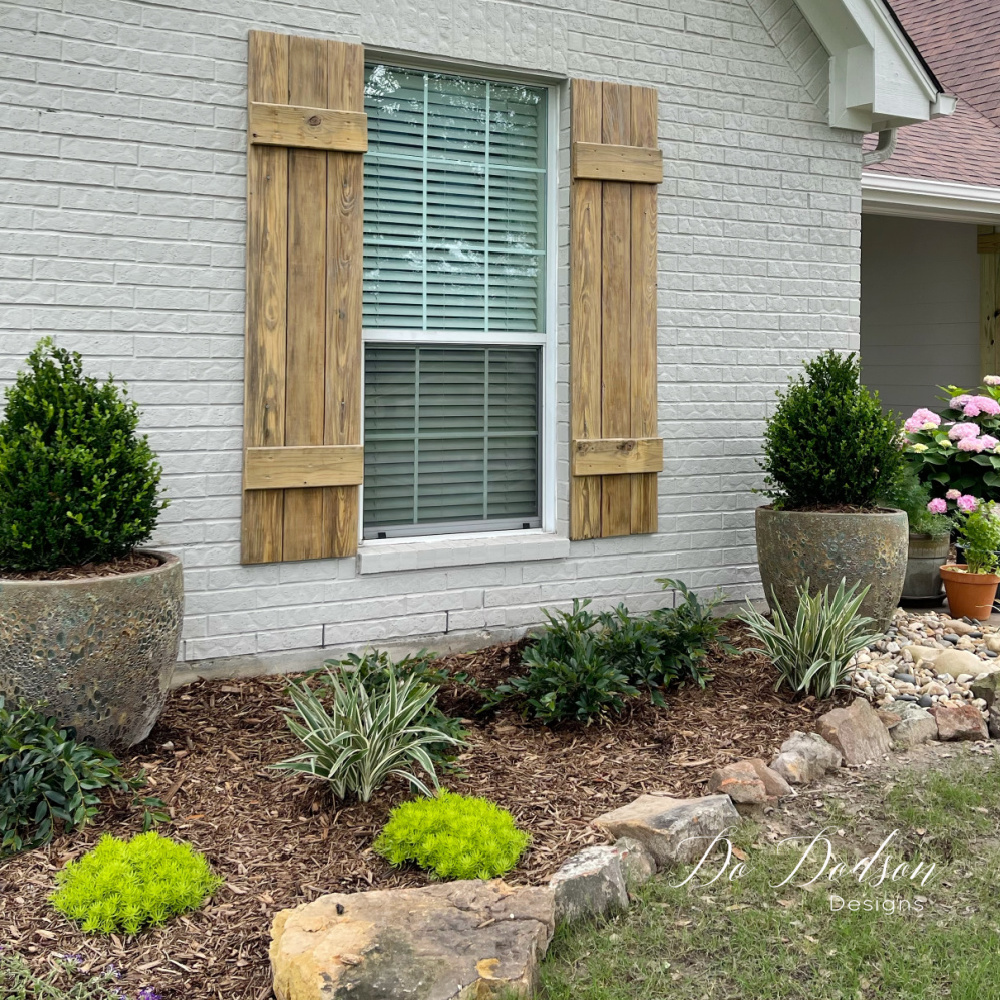
These DIY wood shutters are simple enough for a beginner and can make a surprisingly big difference to a home’s exterior. Whether you use leftover decking as I did or purchase new exterior-grade lumber, the basic board-and-batten design is easy to customize for your windows.
Do you prefer natural wood shutters, or would you paint them to coordinate with your home? Leave me a comment below—I’d love to hear what you’re planning.
Thanks for joining me for another DIY project. Until next time, keep creating beautiful things for your home.
xo, Do
More DIY Curb Appeal Ideas
Once you start improving the exterior of your home, it’s hard to stop at just one project! These simple DIY curb appeal ideas coordinate beautifully with natural wood shutters and can help give your home a more finished, welcoming appearance.
Cheap DIY Wood Shutters That Look Expensive
See how I made another style of affordable exterior shutters using lightweight cedar fence pickets.
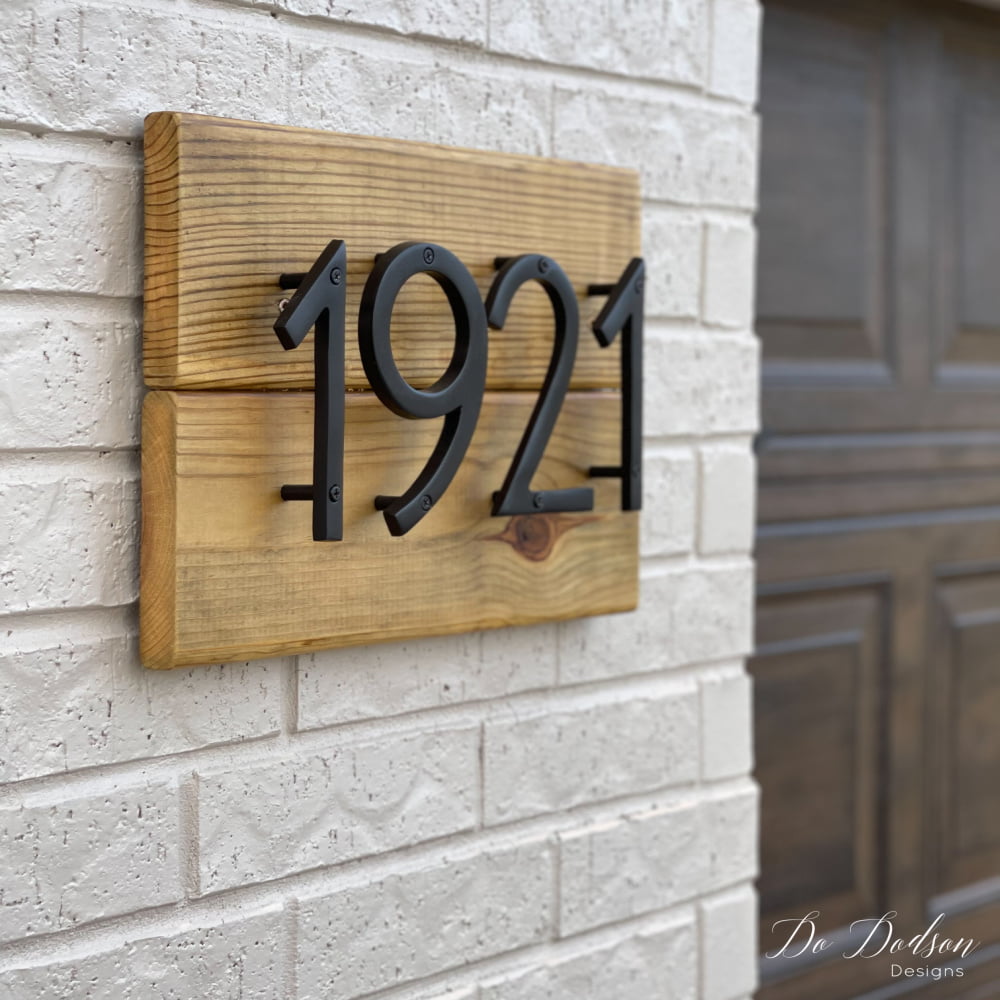
Use leftover treated lumber to create a modern house-number sign that coordinates with the natural wood shutters.
How Painting Red Brick Transformed Our Home
See how painted brick completely changed our home’s exterior and created the perfect background for these wood shutters.
DIY Wood-Wrapped Porch Columns
Carry the natural wood look across your exterior by wrapping plain porch columns with pressure-treated boards.


Just Beautiful! Thanks so much for this one, it’s on my Honey Do List now!
You’re welcome, Rosaland! 🙂
How did you attach shutters to
Brick exterior
Hi Sharon, we used concrete anchors and drilled into the mortar. It would be best if you didn’t drill directly into the brick. If, later on, you choose to change the shutters, you can always patch the holes.
Hi! Love the shutters – I was wondering what color your exterior doors are, including garage?
Hi Ashley,
The garage door is a faux wood finish. I do have a video tutorial in my private subscription. Also, the paint color we used is by Sherwin William called Mindful Gray. We painted our front door black, but I can’t recall what we used. I hope this helps. You can learn more here about subscribing for more video tutorials.
Thanks for reading, and I hope to hear from you again. 🙂 xo
I almost forgot. You can join me here and get 7 days to try it for free. https://www.dododsondesigns.com/join/
Hello, wondering what color you painted your brick!
Hi Brittiny! The color is Mindful Gray by Sherwin Williams. It appears white outside but I also used the same color inside my home. I love it. 🙂
Hello, I was wondering what color the stain you used on shutters?
Hi Cristy,
I used a clear waterproof topcoat. It did darken the wood a bit but gave it a beautiful rich tone. I love it! But you most certainly could add an oil based stain. Wishing you all the best with your project. 🙂
You mentioned drilling into the mortar to hang them. Is there something that attaches to the back of the shutter to hang on the screw? Or does drill in from the front of the shutters?
Hi Kristie,
Yes, we drilled through the fronts of the shutters. I used the same stain to cover the screws to make them less noticeable. I hope this helps. 🙂
Love the look! What color did you paint your bricks?
Thank you! The color is Sherwin Williams Mindful Gray and the trim is Snow Bound. 🙂
How thick is each piece of wood?
Hi Katie,
These were old treated pieces of decking. Probably about 1 inch. Maybe a bit less.
We have moved from that house or I would just step outside and measure them. I hope this helps. 🙂
Thank you
Lost the love of my life 2 months ago and have been doing long neglected updates. House painting done so wanted something to break up all of that Gray! These are perfect! I know my winter project…Thank you
Oh Ellise, I’m so very sorry for your profound loss. As I age I fear this the most. Giving you a big ole virtual hug from Texas.
DIY is a great therapy and renewing your home can really help you focus and heal. It has saved me more than once. Best wishes on your journey until you meet with the love of your life once again.