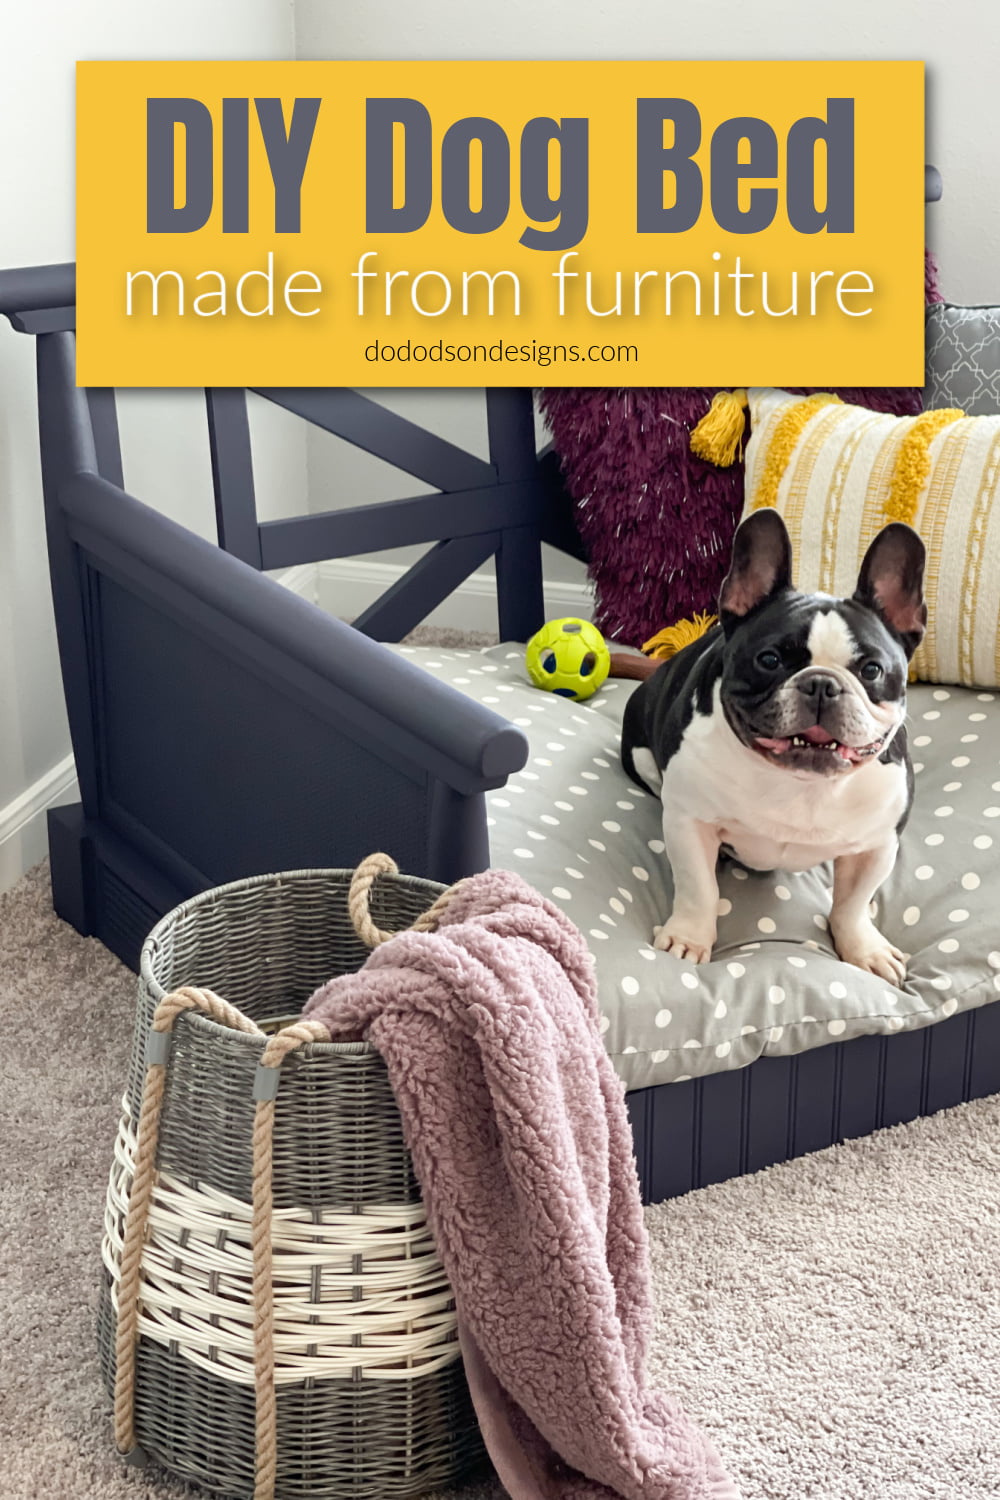
If your pup is like our spoiled Granddog, they love lounging on the couch with you. So it made total sense to make him his very own DIY dog bed from a piece of furniture. It was the easiest DIY dog bed I had ever done. Actually, I didn’t do much.
* As an Amazon Associate, I earn from qualifying purchases and through other companies as well. You are not charged extra to use any of the links, but any income I make helps me create more amazing DIY projects to share with you! To see my full disclaimer, click here!
The EASIEST DIY Dog Bed You CAN’T Screw Up!
Wait till you see what we did with this oversized chair. Are you ready?

MATERIALS NEEDED:
- oversized wood chair with removable legs
- white lightning (cleaner)
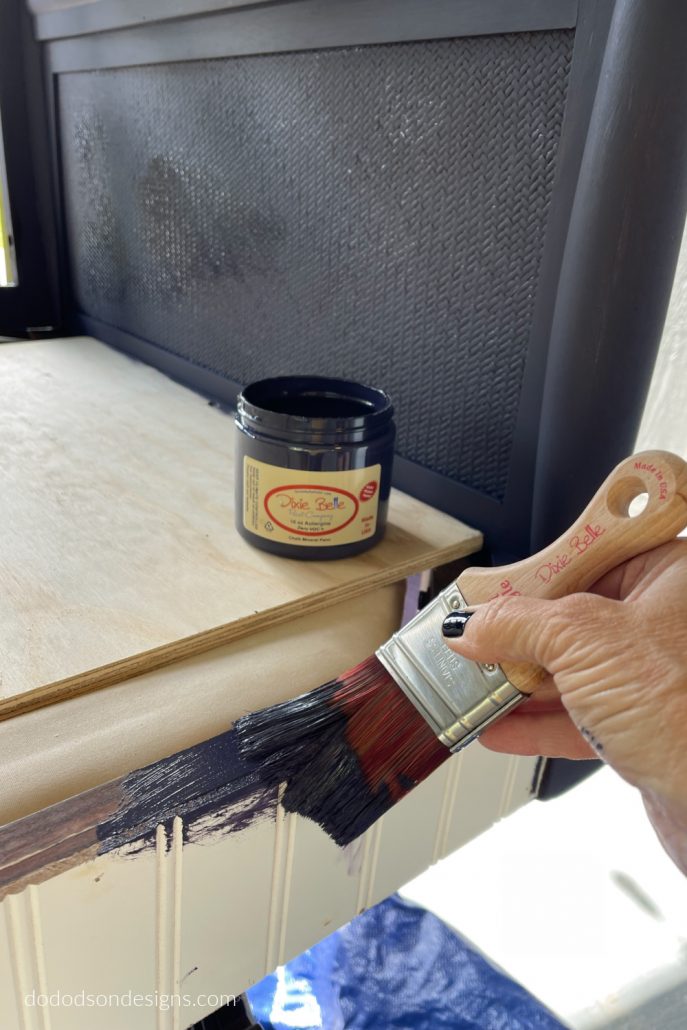
- aubergine chalk mineral paint (HER FAVE)
- 2 inch mini angle paintbrush (MY FAVE!)
Why Make A Dog Bed?
If your dogs are like ours, they are a part of your family. In fact, your dog is probably the greatest family member you’ve ever had. Have you ever heard the saying, “I love my dog more than people?” There you have it! They probably love you more than your whole family combined. Ain’t that the truth. LOL
Finding The Perfect Chair For A DIY Dod Bed
I have a super creative DIL that shops marketplace often and comes up with some of the best ideas for repurposing old furniture. I’d love to tell you this was my idea, but it wasn’t.
My husband and I recently visited our son and DIL in their new home in San Antonio, Texas. We were so excited when they told us they would be moving back to Texas. Even though it’s still a 6-hour drive, that’s nothing to us Texans. LOL
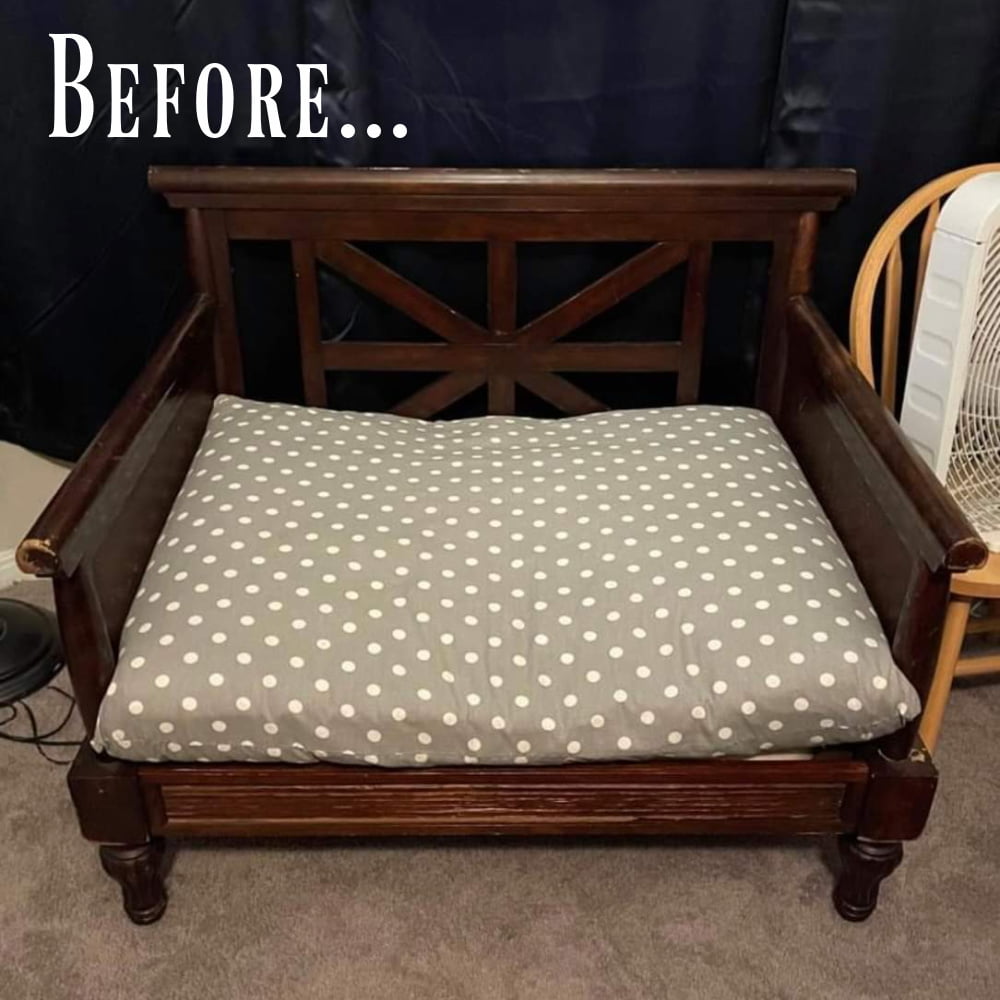
The week before we arrived, she had mentioned that she had found a chair that she wanted to make into a dog bed.
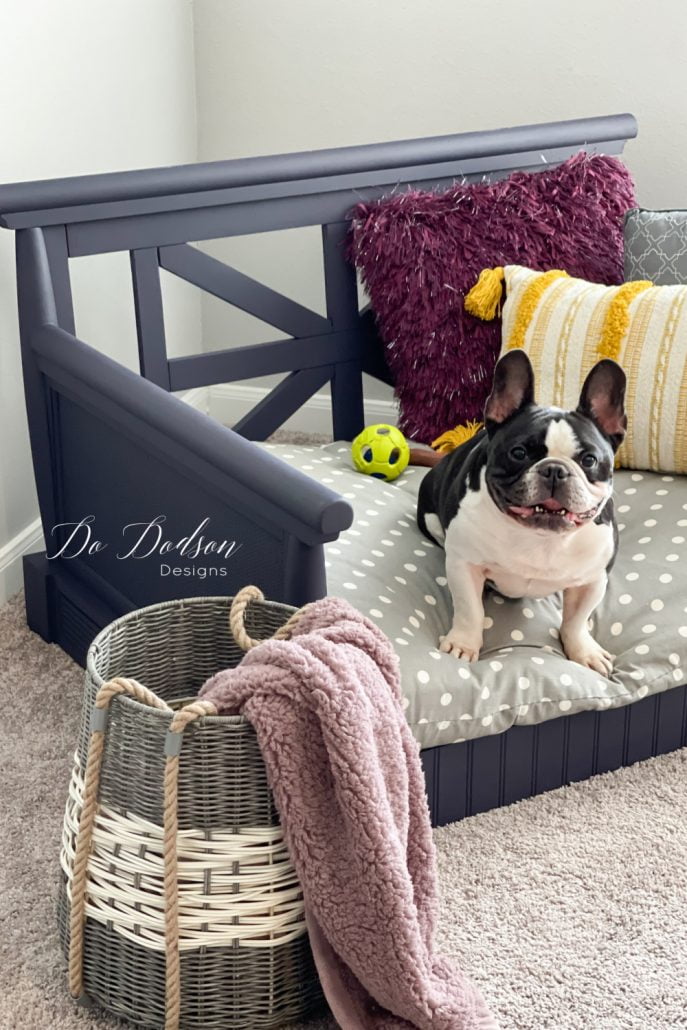
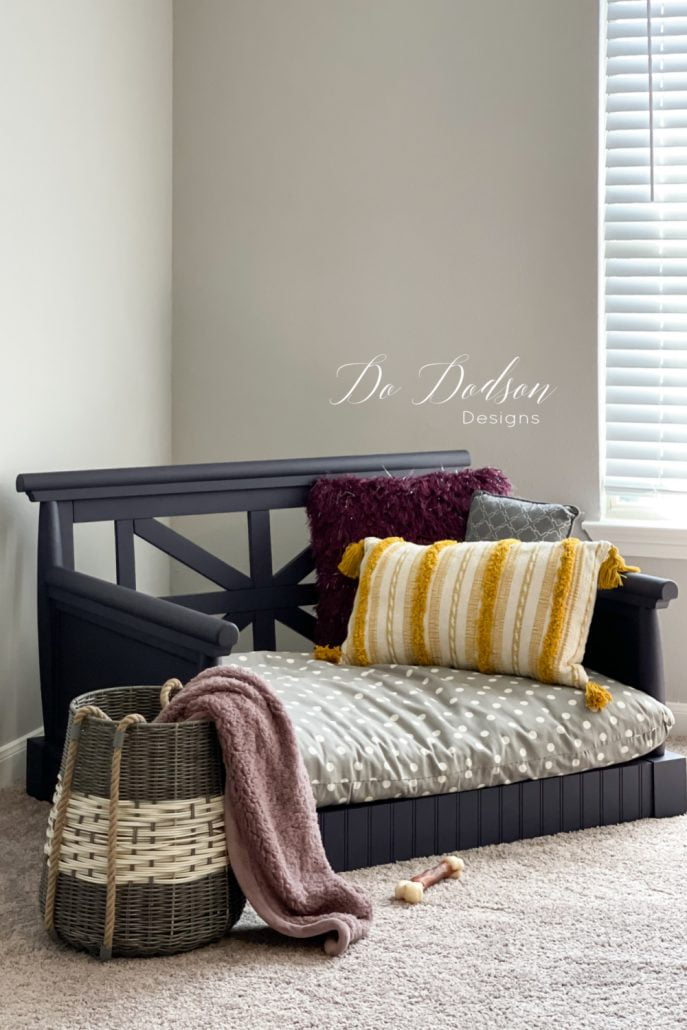
The chair was solid wood, oversized, and had short legs (like my G-dog).
She purchased it for $40. What a steal! It also came with a cushion that was in perfect condition. The only issue was some minor wood damage on the front of the chair. Nothing a couple of DIYers can’t fix.
Of course, I knew she would need paint to complete this DIY project, so I told her to pick her favorite Dixie Belle chalk mineral paint color, and I’d bring the paint and supplies.
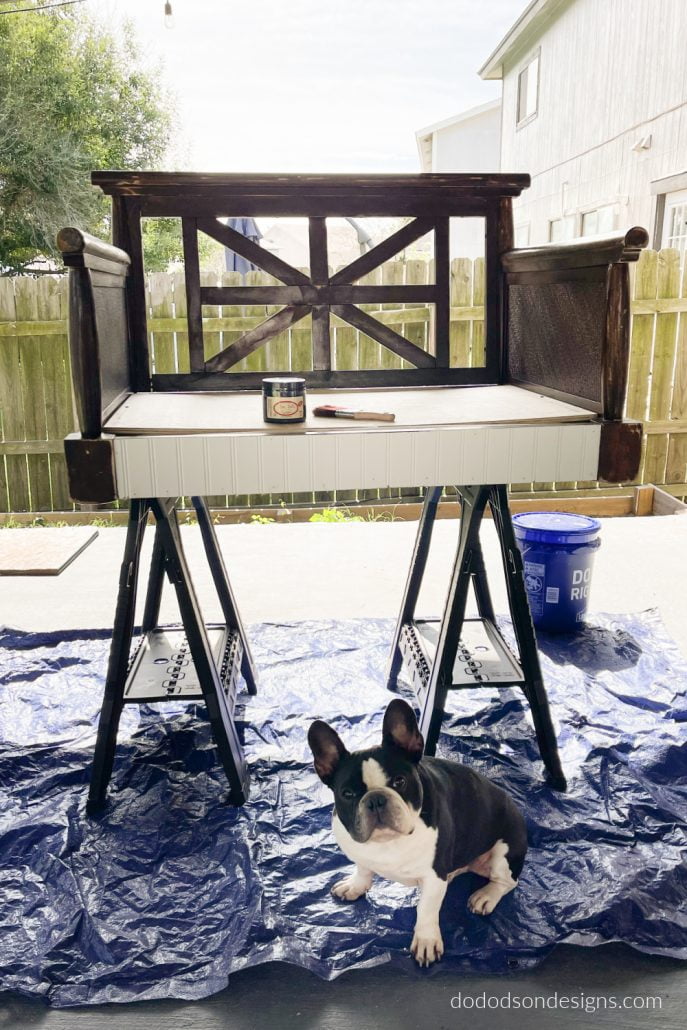
To repair the wood damage, we cut a piece of beadboard she had lying around in her garage. Yep, I’m a proud MIL because she saves scrap wood too. We secured the beadboard to the front of the chair with wood glue and some finish nails.
Someone had already added a piece of plywood to the bottom of the chair which made it super strong. Time to paint!
Painting The DIY Dog Bed
STEP 1:
Before painting wood furniture, always clean with Dixie Belle’s White Lightning to de-grease and remove debris you can’t see. Scuff sand the area you want to paint with 220 grit sandpaper. Wipe away any remaining dust from sanding with a clean damp cloth before painting. Doing these steps will ensure the surface is ready to accept the paint.
STEP 2:
With a good quality synthetic paintbrush ( I recommend Dixie Belle’s synthetic paintbrushes) and apply the first coat of chalk mineral paint using a thin coat. A spray mist bottle of water will also help the color go on smoothly without brushmarks. CLICK HERE to watch a video on how to create a smooth finish without those ugly brushmarks marks.
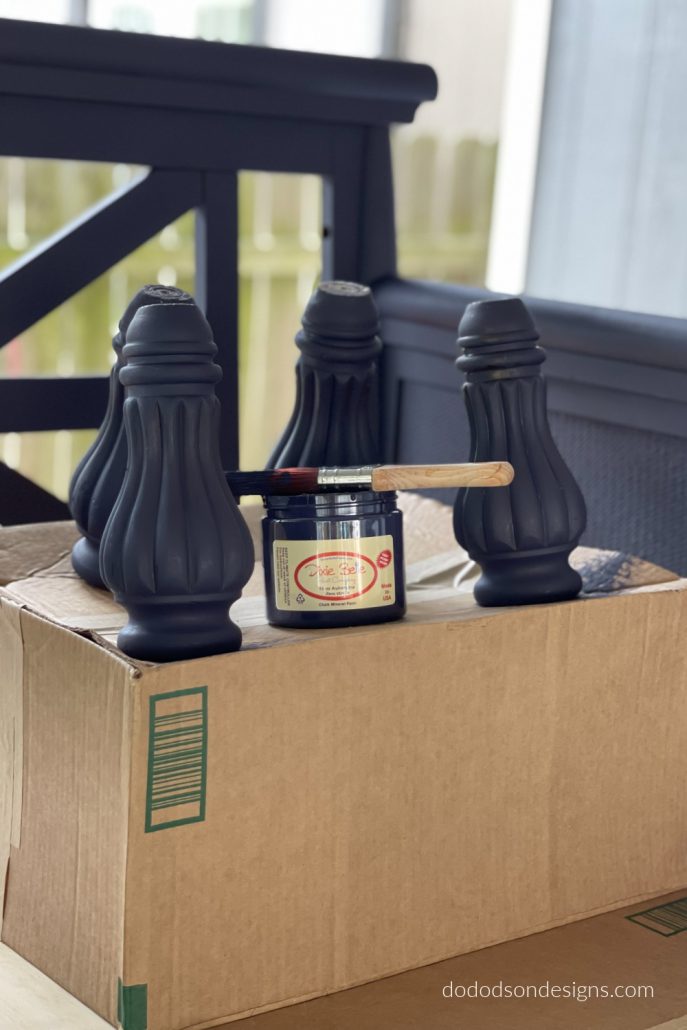
We decided to go ahead and paint the furniture feet. The screws made them easy to remove for painting.
However, there was no way that my G-dog would make it into his new DIY dog bed that high. So, we will save them for later. Maybe he will get taller. LOL
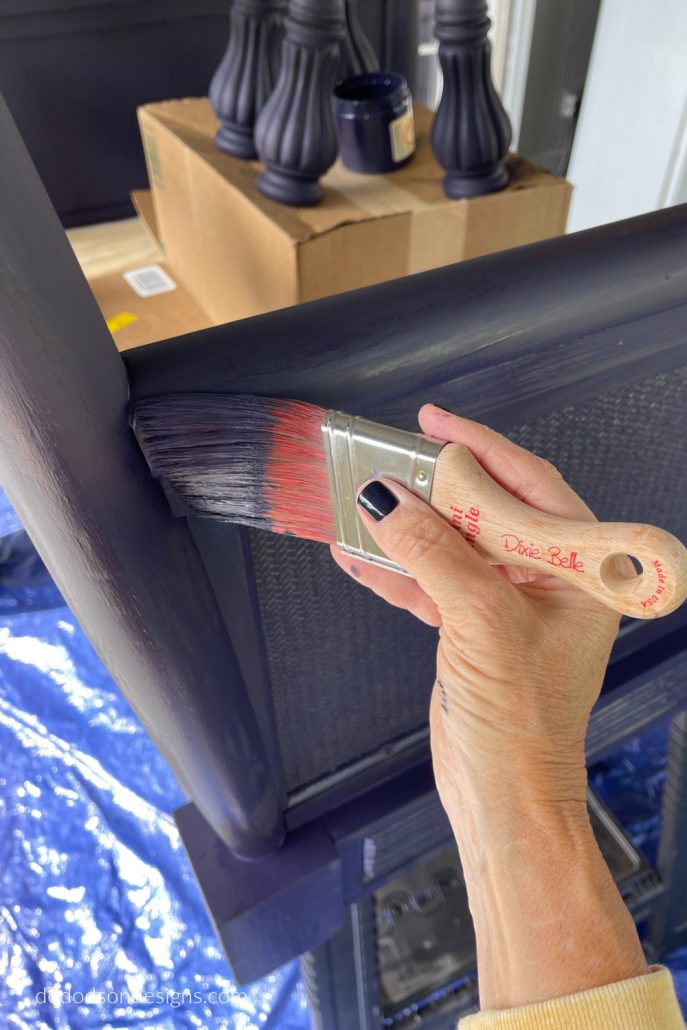
STEP 3:
After the first coat is dry (about an hour or so), apply a second coat the same as the first. When using a darker color like Aubergine, it is safe to say the chalk mineral paint will cover in two coats.
Once the paint had dried, it was time for a dry run. Boba was hanging around supervising us on the back patio, watching to make sure we were doing it right, no doubt.
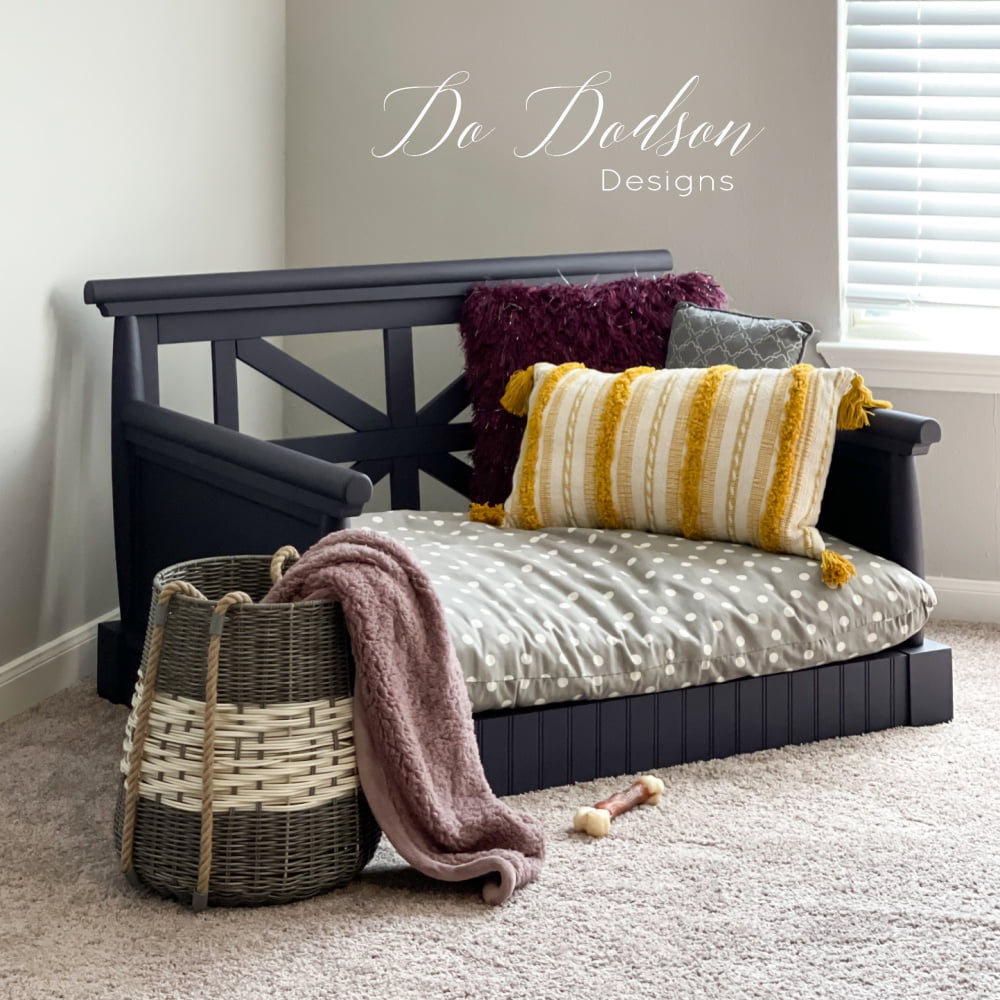
Add A Throw Cushion
Fortunately, this beautiful polka-dotted cushion came with the oversized chair, but a large dog pillow would have fit perfectly and will probably be needed in the near future.
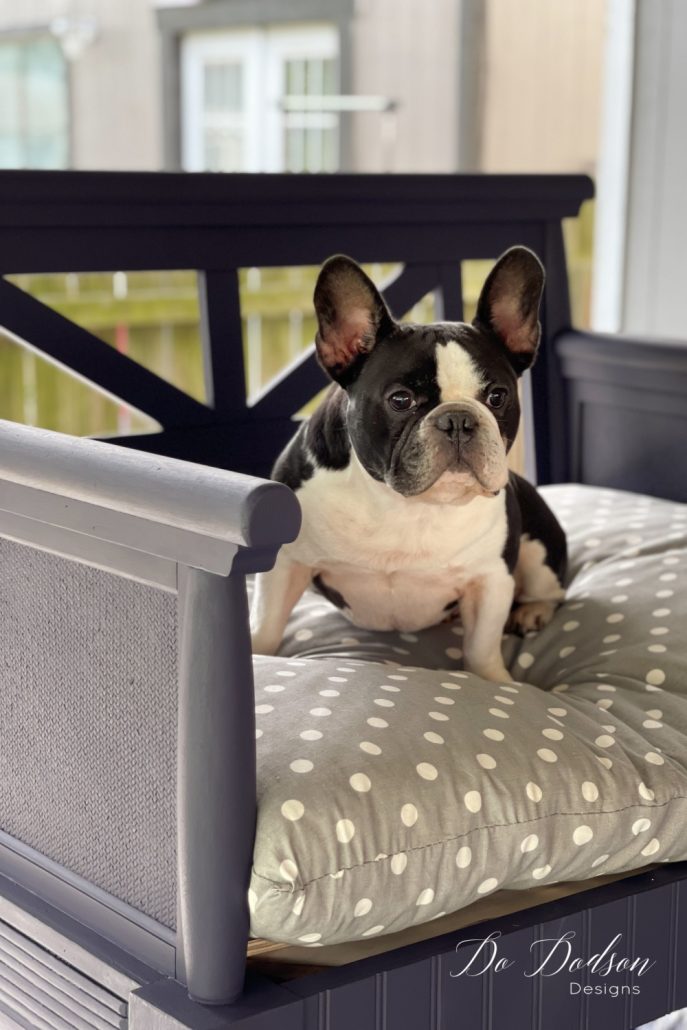
I Think He Likes It!
After lugging our masterpiece up a flight of stairs (actually, the boys did it for us), we found the perfect corner of their bedroom. The aubergine chalk mineral paint was an ideal choice as it matched their bedroom colors perfectly.
Yes, we pulled a few cushions from their bed, but I bet Boba gets to sleep with them. What a HASS! Isn’t he a cutie?
So what do you think about this simple DIY dog bed? Easy peasy, right? There’s no reason you can’t make your fur baby the perfect spot to rest, relax and take day naps with a repurposed piece of furniture.
Let me know what you think in the comment section below, or just say hello so I know you’ve been here. Don’t forget to pin it to your DIY projects board.
Until the next project… xo, Do
I love this dog bed! And the Aubergine is such an amazing color. Perfect bed time for your so-cute, G-Dog!
Yes, it was the perfect color and matched their bedroom perfectly.
Do, you did it again!! What a masterpiece and a fun project for a huge dog lover! 💕🐾
It was a lot of fun to make him a bed. He’s such a sweet boy. 🙂 xo
Such a great idea! I love it.
Thanks, Renea! He really liked it. 🙂
My pup would LOVE this!
Who wouldn’t love their very own spot? I have mine, so why not give the fur baby a place to hang out and chill? 🙂 Thanks for joining me here. Blessings to you.
This is such a fun project and you both did a great job! I’m sure Boba loves it!
Thanks, Kim! I just got a report that he loves it and sleeps in it every night. #winning 🙂
Seriously, the cutest doggie bed in Texas!! And what a fun time you had with your DIL!!
Thanks, Cindy! We did enjoy our time together. 🙂
Your G-dog Boba is AHHH DORABLE! And so glad you kept those cute feet for another project. Super cute project my friend! XOXO
Thank you, Denise. He’s a real sweetheart for sure. As of the last report, he loves his furniture. 🙂 xo
I love this dog bed. It is so adorable.
Thanks, Tammy! A cute bed for a cute dog. 🙂 xo
I must find another chair like that. My dogs are begging me too. You and you DIL worked magic to bring this to a great masterpiece. Love it!!
Hi Leslie! It was an unusual chair, that’s for sure, but it worked perfectly. My DIL is very creative. WE have a lot of fun together. 🙂 xo
Hi Do! Loved the chair, both before and after! It’s really unique. I can only imagine how much Boba loves his new special place to sleep! The former legs look like they might make some nice candle holders (with a wooden candle cup added) or just some pretty “set around stuff” on the corner of a table. Thanks for the ideas!
Hi Lori,
Thank you so much for reading this post. I’m glad you enjoyed it. As for the legs, I’m sure my creative DIL won’t let them go to waste. Have a great week!
OMG!! I am so loving this project!! I need to get this done for my Bella 💗 Perfect color choice 💜💜
Hi Mary Ann! It is a perfect size, and since then, they have added another dog to their family, and they both sleep on it. So sweet! Thanks for reading. 🙂 xo