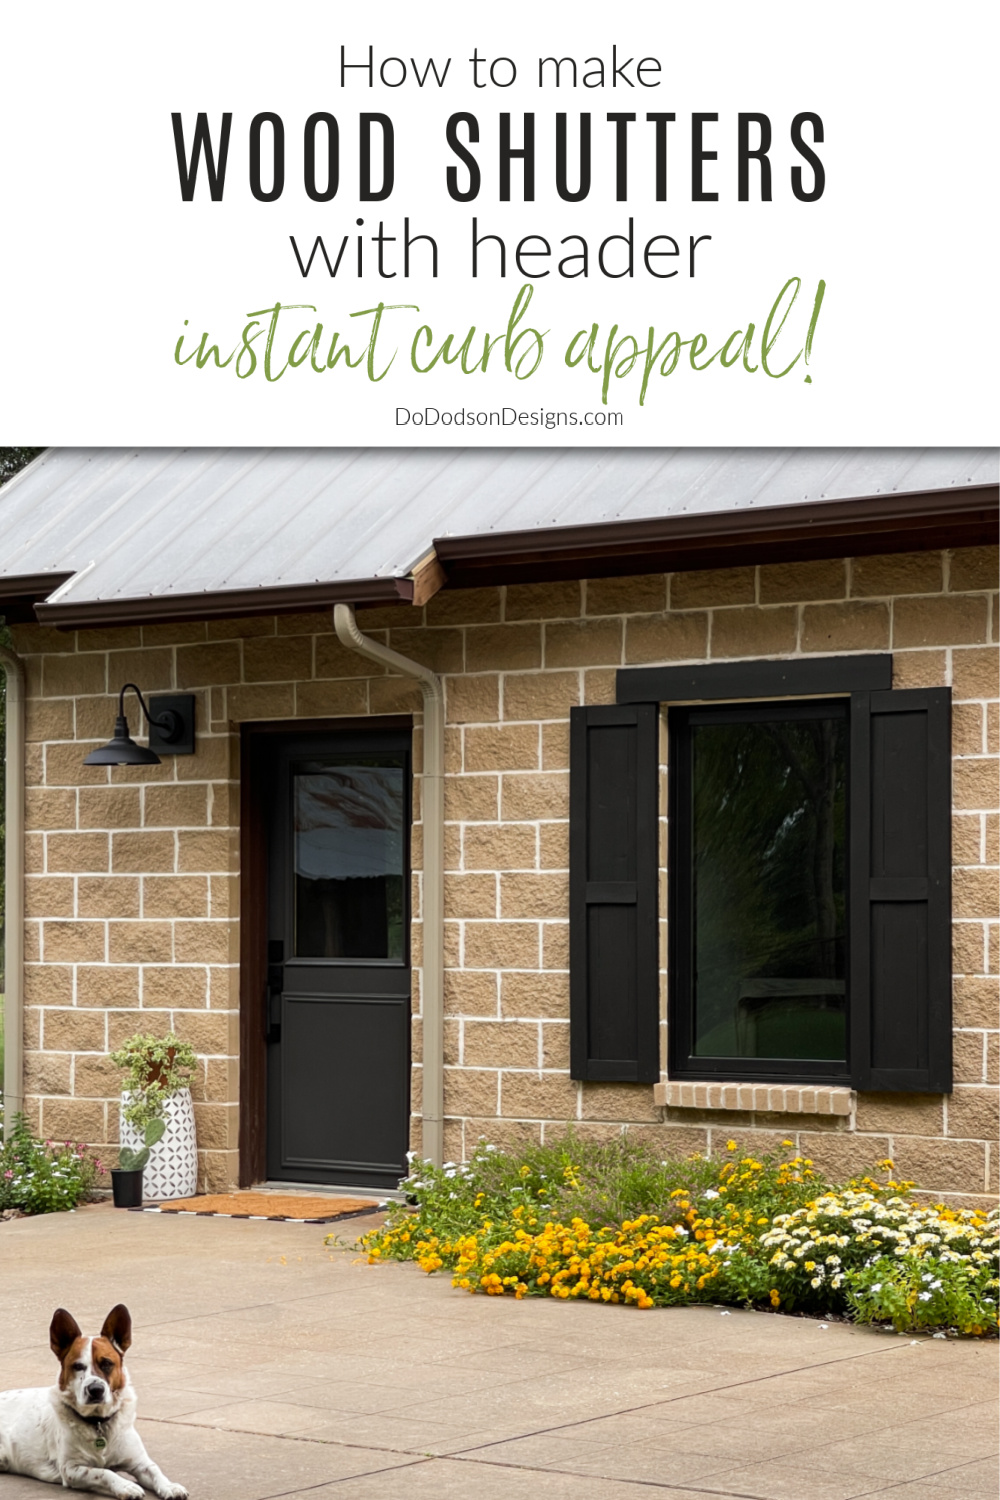
Hey, triple-D friends! Adding DIY wood shutters to a home’s exterior can be pricey, but there are ways you can make them on a budget. Today, I’m sharing how I made mine out of inexpensive cedar fence pickets. I really like how they turned out. There’s just something about shutters on a house that really dresses it up. Especially ours!
* As an Amazon Associate, I earn from qualifying purchases and through other companies as well. You will not be charged extra when you purchase through these affiliate links, but any income I make helps me create more amazing DIY projects to share with you! To see my full disclaimer, click here!
Curb Appeal Is Everything
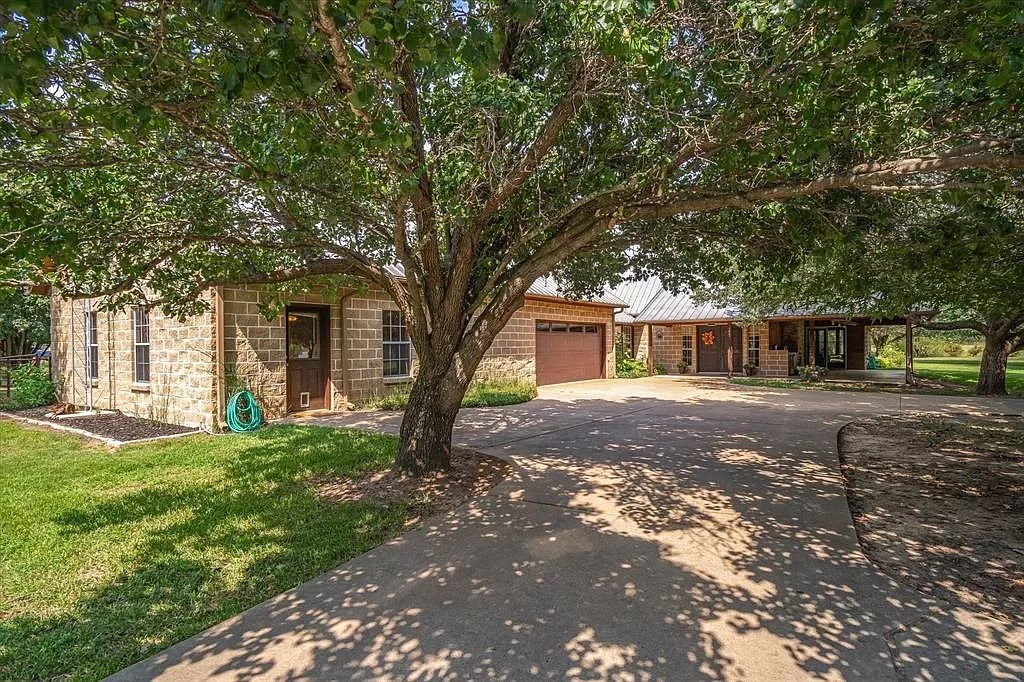
I’ll just come right out and say it. Our home lacked curb appeal. I admit when we first drove through the gate of the property to meet our realtor before signing on the dotted line, I WAS NOT impressed. But I did love the interior.
Long story short, I said yes, and we have been in full DIY mode ever since.
We have made a lot of changes to the interior of our ranch home (CLICK HERE to see phase 1 of the remodel) since purchasing it in 2022. It’s looking pretty amazing if I say so myself, and we have been enjoying the fruits of our labor. Now that things have settled down on the inside, it’s time to give the exterior some much-needed curb appeal.
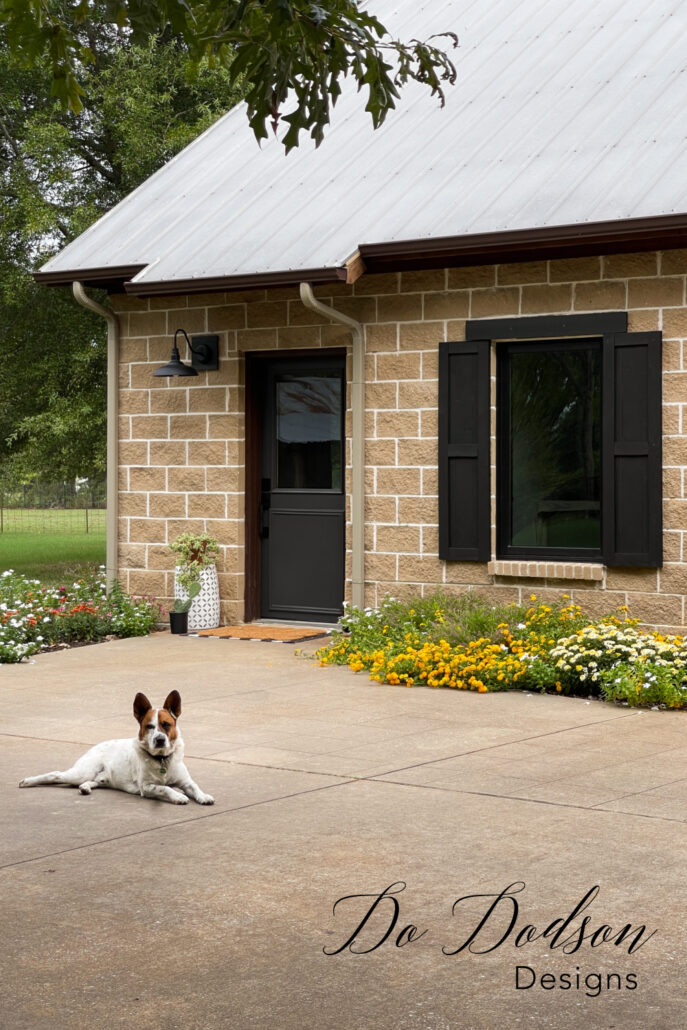
We started on the front/side porch (CLICK HERE) to see that project) and were very pleased with that outcome. We literally live outside during the warmer months, and in Texas, that’s about eight months out of the year. What could be better?
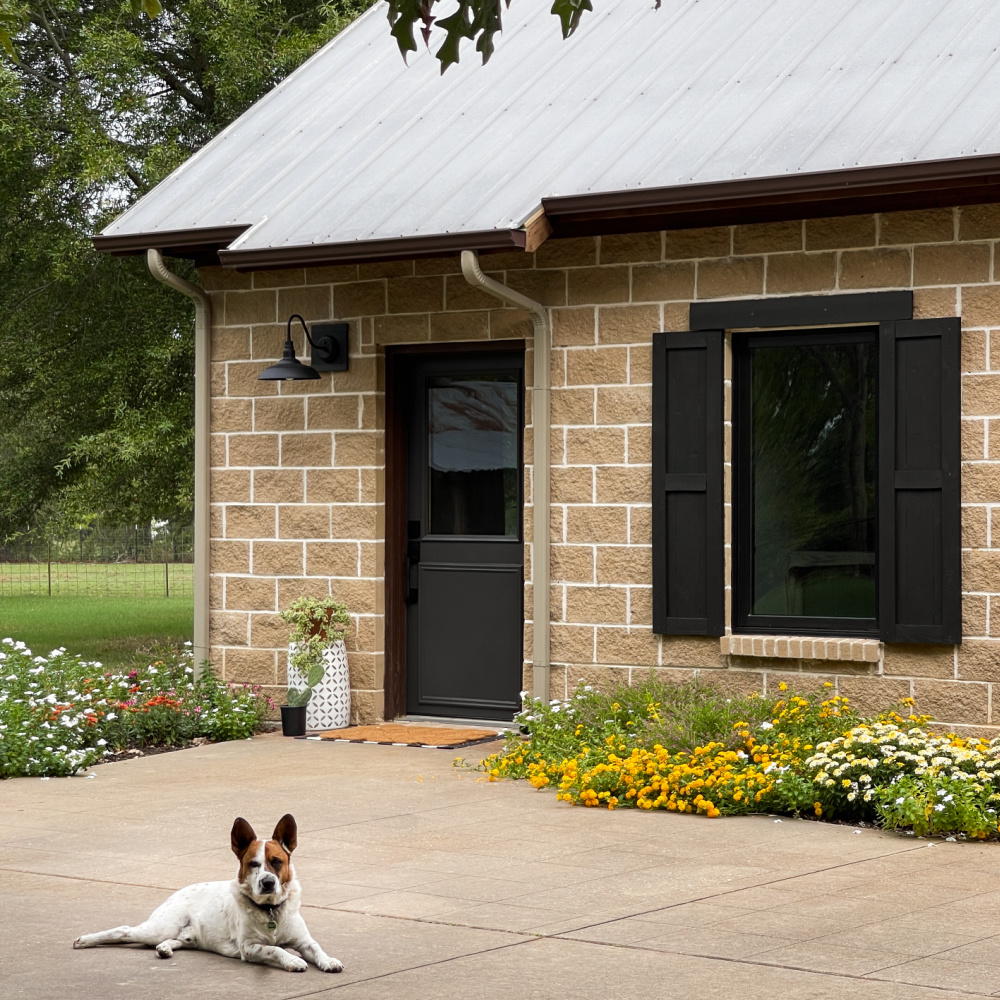
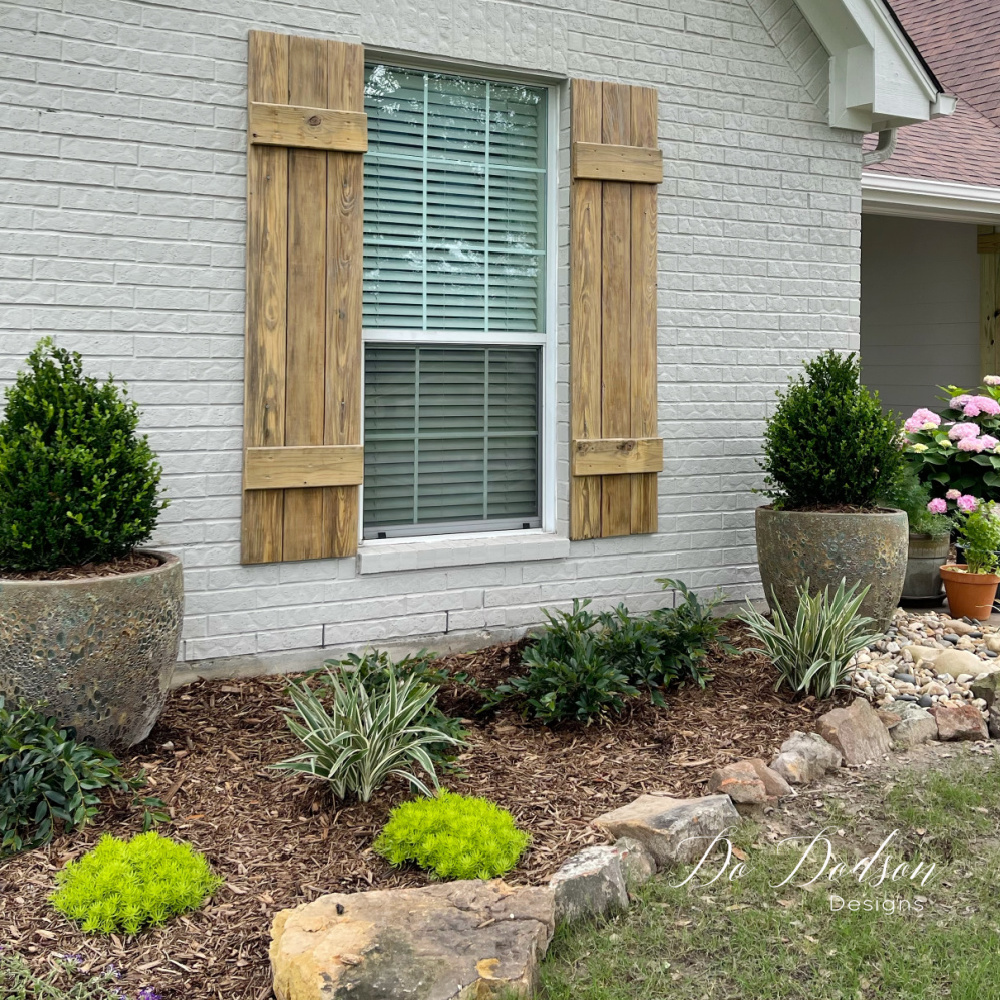
Our home needed a touch of charm and personality to the exterior. One of the quickest ways to do that is to add window shutters. A window without wood shutters is like a woman dressed up without her earrings. LOL, am I right? They’re purely decorative, as we don’t need functional shutters where we live.
Here is a shot of our home before we purchased it. So much has changed since then, and I think you will be shocked to see the after photos.
DIY Window Shutters | Step-by-Step Instructions
Before you can start building your own custom wood shutters, selecting the right materials is important. The materials you choose will determine your shutters’ overall look and durability and impact how they weather over time. Here are a few key factors to consider when selecting the right materials for your DIY wood shutters.
First, you’ll need to decide on the type of wood you want to use. Cedar and redwood are popular choices for exterior shutters due to their natural resistance to decay and insects. Both of these woods have a beautiful grain pattern that adds character to your shutters. However, if budget is a concern, pine or fir can also be used as long as they are properly treated and finished.
In addition to the type of wood, you’ll also need to consider the thickness of the boards. Thicker boards tend to be sturdier. However, keep in mind that thicker boards may also make the shutters heavier and more difficult to install.
Another important thing to think about is the finish or treatment you’ll apply to the wood. A high-quality exterior stain or paint can help protect the wood from the elements and extend the life of your shutters. Choose a finish and color that complements the style of your home.
Measuring for Your Wood Shutters
I chose to use cedar fence pickets for my DIY wood shutter (no vinyl shutters ever!) project. Bonus! They’re budget-friendly and lightweight.
Before you begin building your wood shutters, it’s important to take accurate measurements to ensure a proper fit. This step is crucial in achieving a polished and professional look for your exterior.
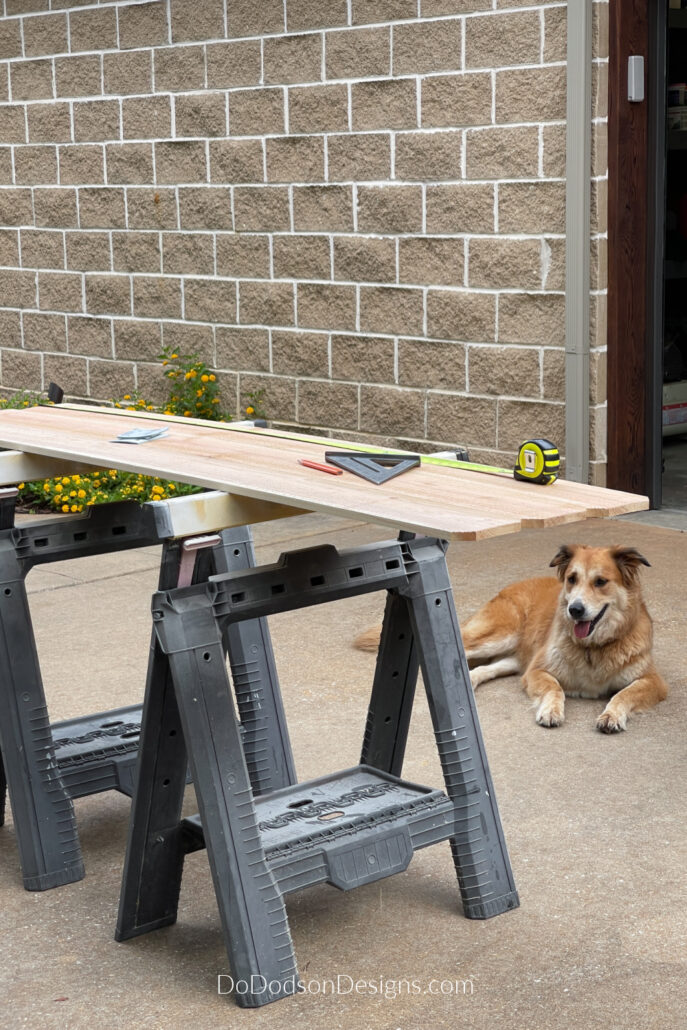
Start by measuring the height and width of your windows. My windows are standard 36×60 inches. Keep in mind that shutters are typically the height and about half the width of the window opening; this creates a balanced appearance. The shutter’s width should be approximate.
Once you have the measurements, it’s a good idea to double-check them to ensure accuracy and write them down! Mistakes in measurements can lead to frustration and take away from the overall appearance of your shutters. Especially if you’re going with black shutters on a light brick like we did.
Keep in mind that if you have multiple windows, each one may have slightly different dimensions. Be sure to take individual measurements for each window to ensure that your shutters fit perfectly and complement the unique characteristics of each opening.
Building and Assembling Your Shutters
Now that you have accurately measured your windows, you’re ready to move on to the next step: building your shutters. With precise measurements in hand, you’ll be equipped to create shutters that enhance your home’s curb appeal and fit seamlessly into the overall aesthetic you’re trying to achieve. Building your own wood shutters may seem like a difficult task, but it surely can be a rewarding DIY project.
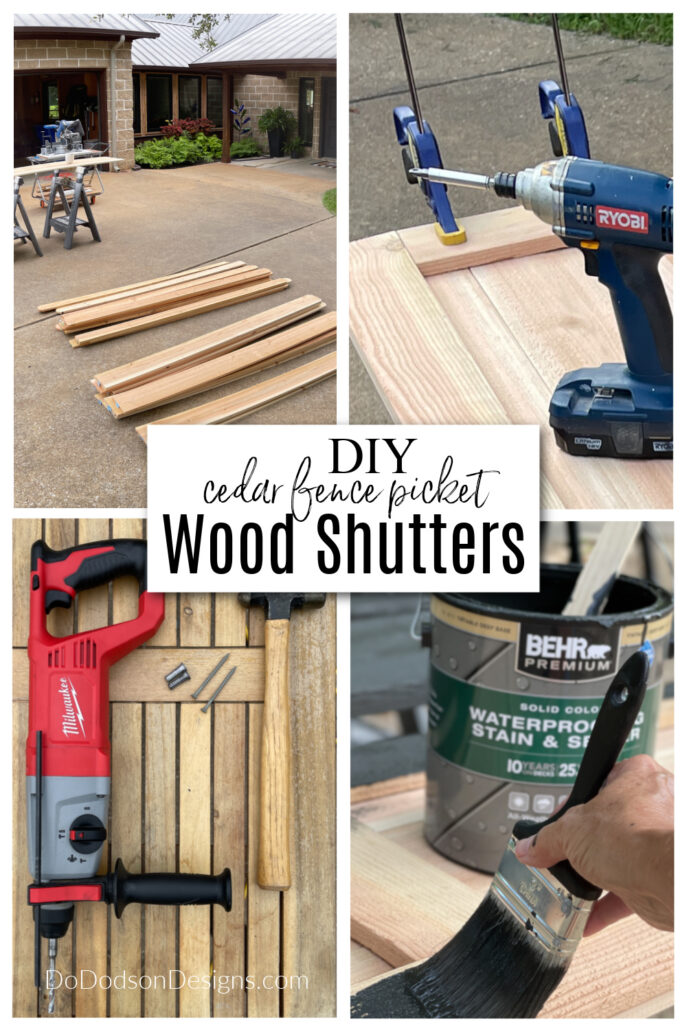
To begin, gather all the necessary materials. You’ll need wood boards, preferably cedar or treated lumber, for their durability against the elements. The size of the boards will depend on your measurements and design preference. Gather screws or nails, a saw, a drill, and a tape measure.
SUPPLY LIST:
Here are the products that I used to create my DIY modern wood shutters.
- fence pickets 5.5 inches wide X 1/2 inch thick
- fence pickets 3.5 inches wide X 1/2 inch thick
- saw horses (to save your back)
- miter saw or circular saw
- pencil
- square
- tape measure
- exterior wood screws (decking screws work well)
- wood glue (optional)
- clamps
- hammer
- level
- drill and wood bits
- hammer drill (if you’re hanging shutters on brick)
- exterior paint or stain (BEHR Premium Solid Color Wood Stain) slate black
- concrete anchors (if you’re hanging wood shutters from brick, concrete, stucco, or stone)
Measure Twice And Cut Once
I can’t stress this enough. Measure twice and cut once. When you’re working with wood, precision matters; it’s easy to get the numbers jumbled up in your head when the measurements are different each time. Do this to prevent multiple trips to Home Depot.
STEP 1: Next, based on your window measurements, cut the wood boards accordingly. Remember to account for any desired spacing between individual pickets if that’s the style you’re going for. I chose to butt mine tightly together.
And it always helps to have a cute doggo to supervise. For my 5 ft windows, I used three cedar fence pickets measuring 60 inches in length. This is the base for one DIY Wood shutter.
Once the boards are cut, it’s time to assemble the shutters. Lay out the boards on a flat surface, ensuring they align perfectly with your measurements. Use a tape measure to maintain consistency and precision throughout the assembly process.
Smooth Rough Boards By Sanding
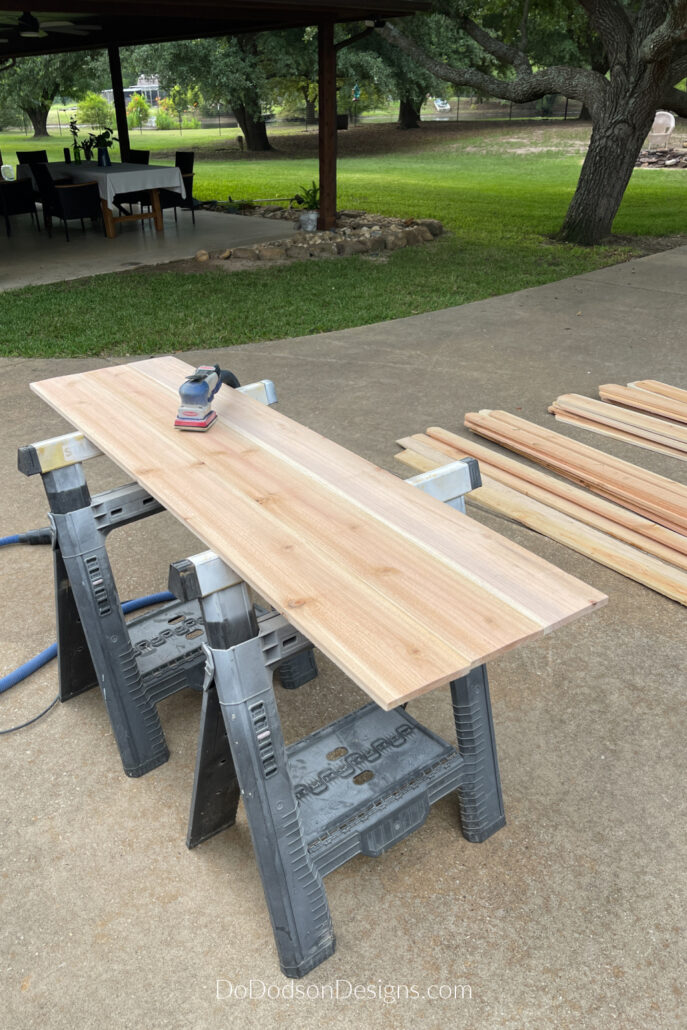
STEP 2: If you choose the cedar fence pickets, it’s best to smooth them up a bit using an electric sander. I guess you could choose to leave them rough if you like the rustic look, but staining or painting will be difficult at best. I used 100 grit and then finished them off with 220 grit.
Also, if the cedar pickets are green or wet, I recommended laying them out in the sun to dry before attempting to sand them. This will make it much easier and keep your sandpaper from getting gunked up. Is that even a word? “Gunked” up?
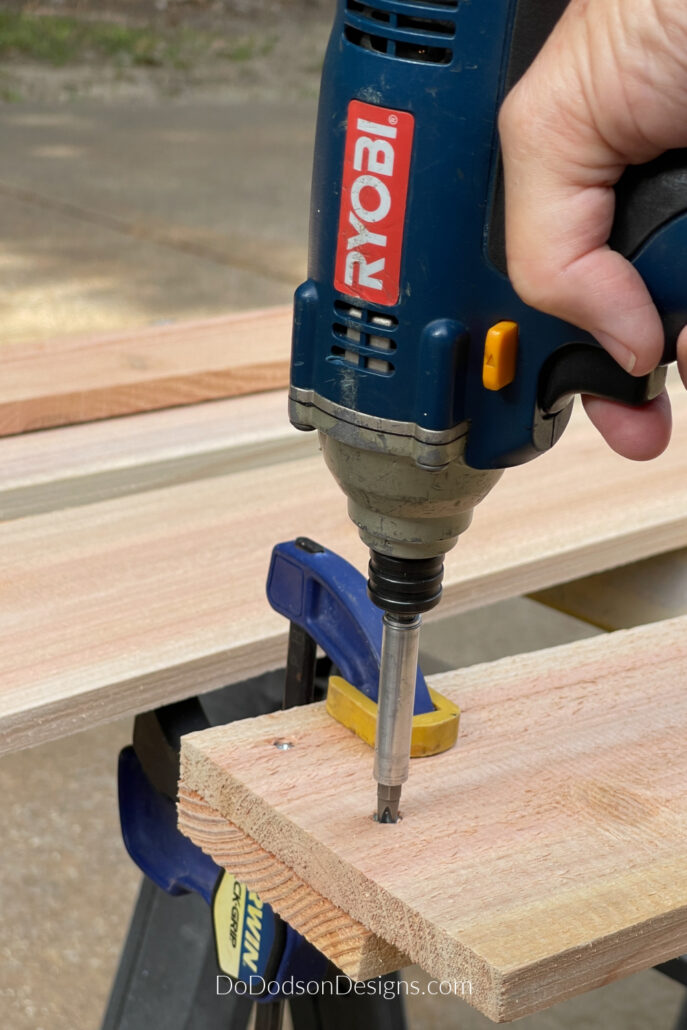
STEP 3: To secure the boards together, you can use screws or nails, but I prefer screws. I feel like it holds better. If you are using screws, be sure to drill pilot holes to prevent splitting the wood.
I built a frame to trim around the shutters and then used crosspieces to connect the frame to give my DIY wood shutters a modern look. Using this method secures all the boards together instead of the three traditional cross-pieces used for a more rustic shutter. CLICK HERE to see another simple DIY shutter I made for our last home in a farmhouse style.
Using clamps is a must when you’re working alone. It’s like an extra set of hands. I started the assembly by clamping one of the smaller boards to the outer boards.

I secured them in place by flipping the board over and using 1-inch decking screws. Once the side pieces are in place, flip the boards over to add the cross pieces.
Adding The Cross Pieces
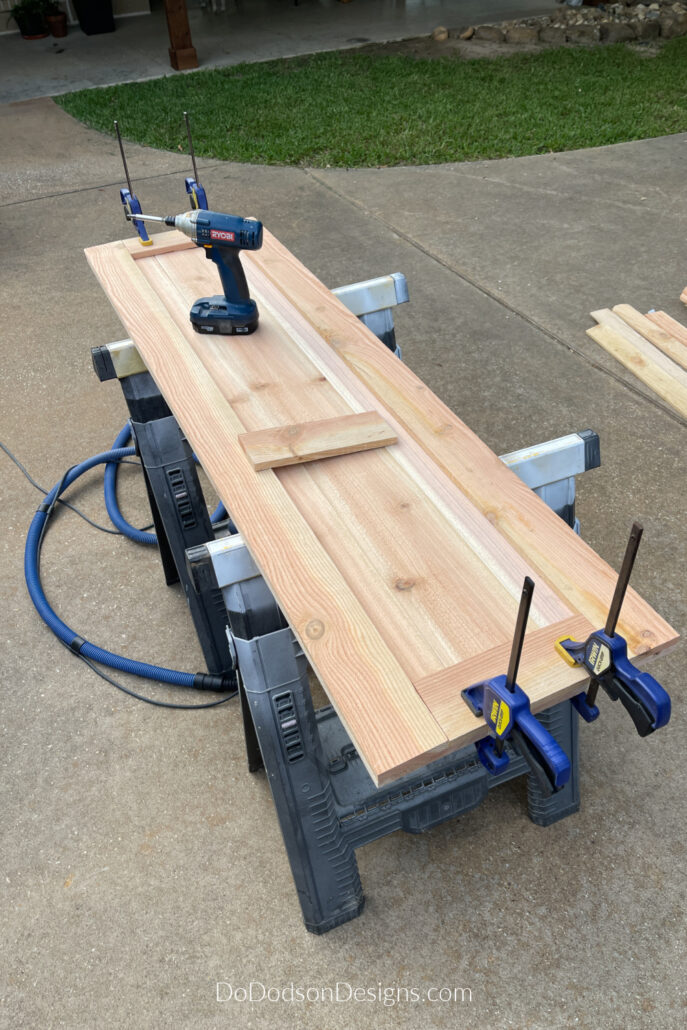
STEP 4: Measure and cut the cross pieces. Again, use those clamps! I have six clamps but could have used more. You need these in your DIY tool kit.
Again, you will need to flip the boards over to screw the cross pieces from the backside. This was a bit challenging, and I had to do some guesswork to avoid missing my mark.
I see no reason why you can’t screw them from the front, but I’ll leave that decision up to you. A clean, modern DIY wood shutter look is what I’m going for here. This is a good way without having to use a pneumatic nail gun and glue. Besides, I don’t trust glue outside.
As you assemble your shutters, remember that attention to detail is key. Double-check your measurements and alignment at each step to avoid any discrepancies. Additionally, take note of any unique characteristics of each window and adjust the assembly process accordingly.
Once your shutters are fully assembled, take a step back and say, I did that! Yay me!
Also, check that the shutters fit snugly against the windows and that the overall design is cohesive with the style of your home. If any adjustments are necessary, now is the time to make them before painting or staining.
Finishing and Painting Your Wood Shutters
After all the meticulous measuring, cutting, sanding, and assembling, it’s time to give your wood shutters the finishing touch they deserve. Finishing and painting your shutters will enhance their appearance and protect them from the elements, ensuring they will have a long life.
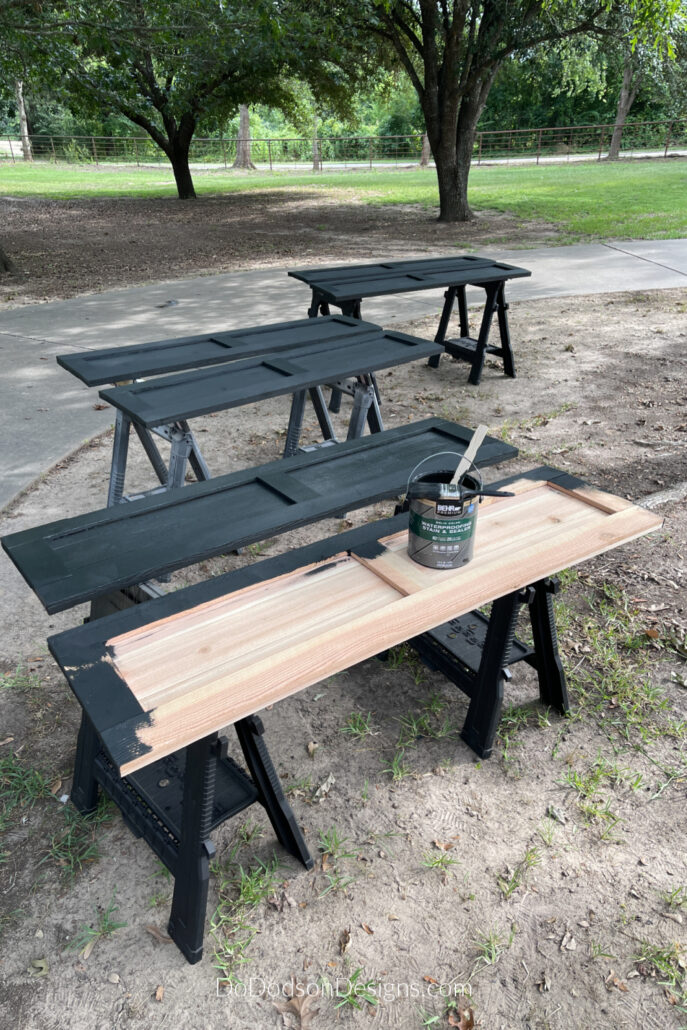
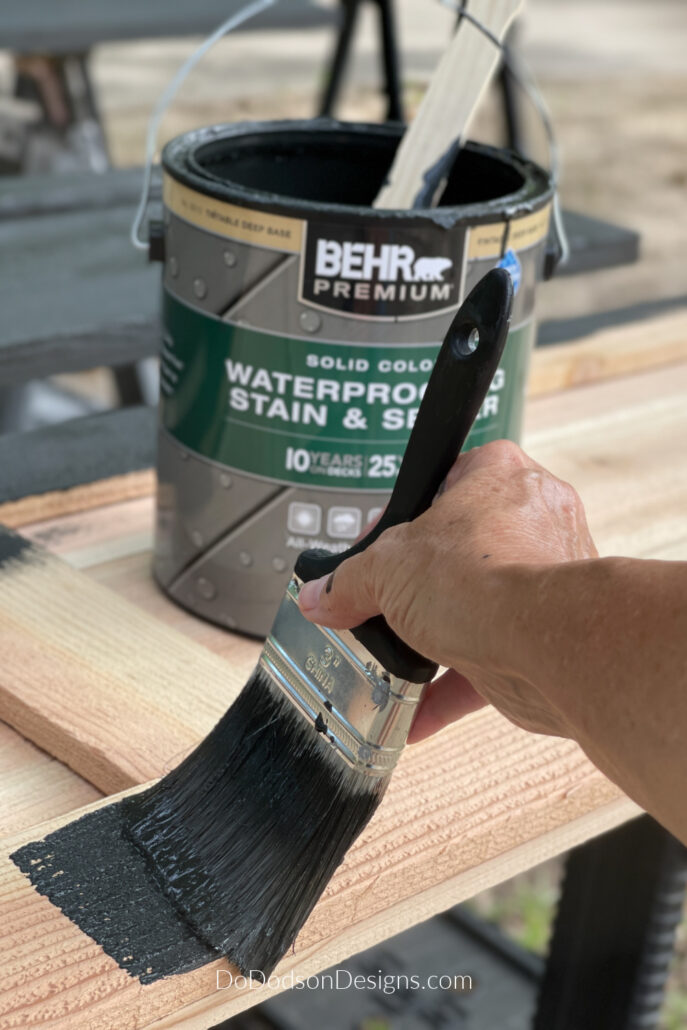
STEP 5: Before you start painting or staining, ensure you have all the necessary tools and materials. This includes primer, paint, brushes or rollers, and drop cloths to protect your surroundings from any accidental splatters. Or just paint the shutters in an area outside that won’t mind if you share a drop or two on the ground—sorry, trees. At least I wasn’t on the driveway.
You may also want to consider using a wood stain if you prefer a more natural look.
Or, if you love the look of paint but hate the prep and priming, I have the answer for you! Use a solid-colored wood stain that is water-based. I wasn’t sold on this BEHR brand product, and this post isn’t sponsored, but after talking to the paint counter attendant, I thought I’d give it a go.
I was shocked at how well it covered. The one-coat by-paintbrush application was all it took. It is quick and easy, and it has weatherproofing within the stain. It dried to an almost matte finish in a few hours, which I loved due to the not-perfectly-smooth cedar that I used.
That’s extra protection. I’m hoping it holds up better than paint, and I’m sure I’ll have a follow-up on this product.
The sales guy did mention that it’s used on decks, so it should hold up nicely.
Installation Of Your DIY Wood Shutters
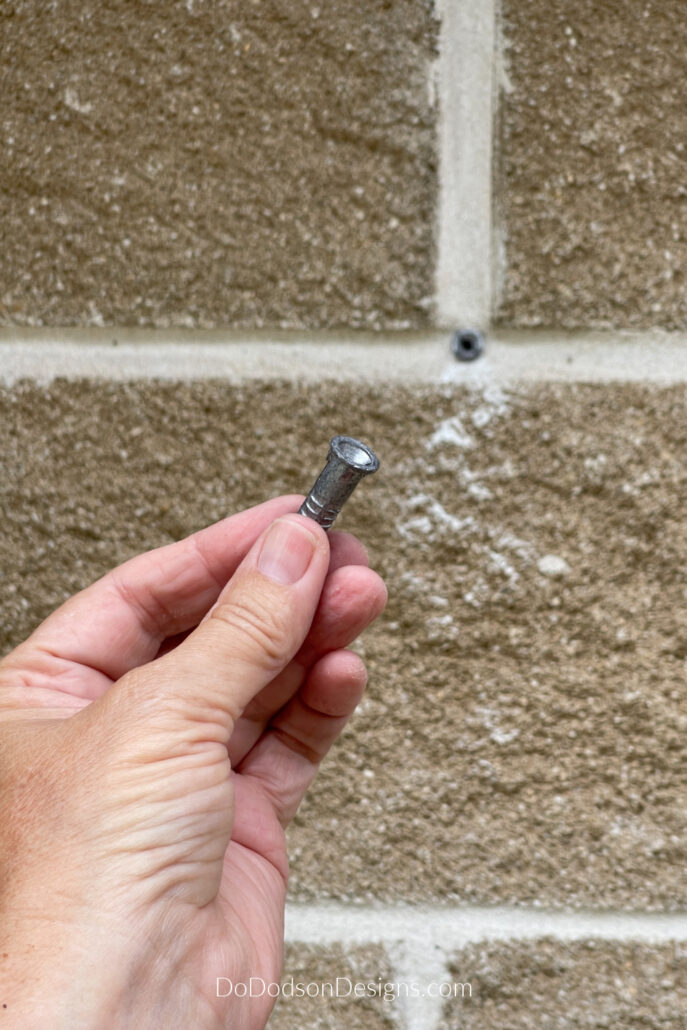
For surfaces like brick, concrete, stucco, and stone, anchors or special screws may be necessary.
Next, decide on the mounting method that suits your needs. There are different options available, including direct screw or nail installation and using shutter hinges. We have a brick home, so we chose to use anchors that can be placed directly into the mortar or brick.
We decided to go with installing anchors into the mortar for this one reason. Weight! It turns out that using fence picks was good for more than one reason.
The general rule is if you’re hanging a lightweight object from a brick wall, it’s best to drill into the mortar. The mortar can be repaired if need be, or if you change your mind about the DIY shutters and want to buy those fancy ones. Trust me, you won’t.
You could also use masonry screws.
Be sure to use a measuring tape and level to ensure the proper placement throughout the installation process. You can’t eyeball this DIY.
Start by attaching the top of the shutter to the desired location, making sure it is aligned with the window frame. Then, proceed to secure the remaining sides, ensuring that the shutters are straight and level.
Step back periodically as you install each shutter (wipe the sweat from your brow) to check the overall look. Make any necessary adjustments before you secure them to the brick. In other words, “get it right.” Can you tell I was stressed?
They say don’t sweat the small stuff. This felt huge to me, and I was nervous they would be crooked and I’d have to start all over. Maybe I was sweating because it was 98 degrees that day, too—life in Texas.
They Turned Out So Good!
The total cost for the fence pickets I used to make these DIY wood shutters was about $86. That did three of my 5X3 ft windows. That’s six shutters in all. That breaks down to about $15 per shutter. That’s minus the paint, of course. Not bad at all!
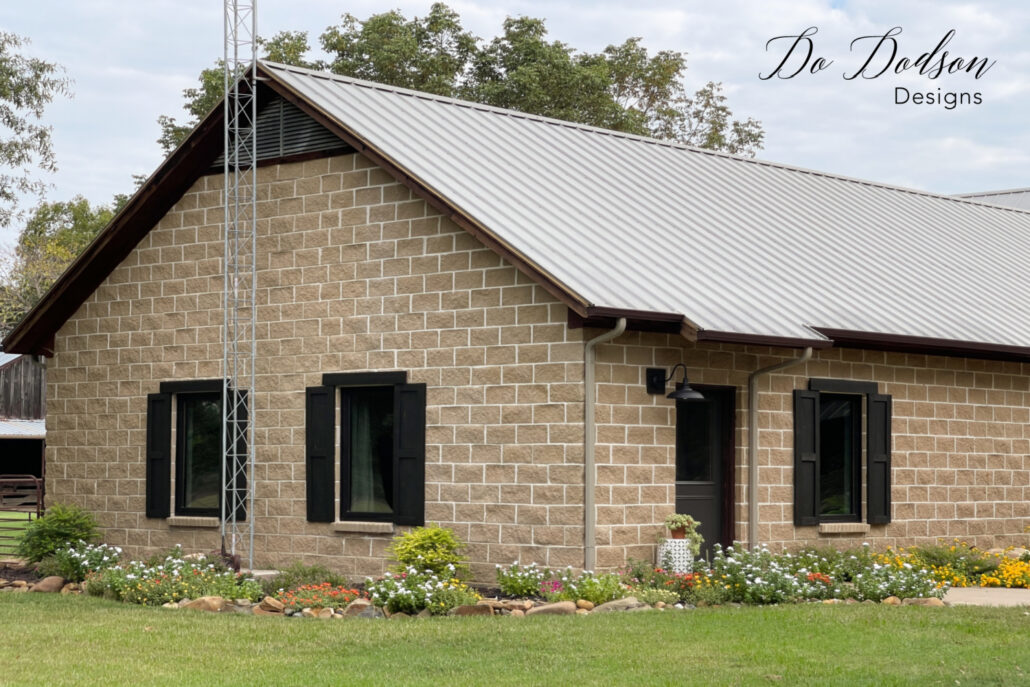
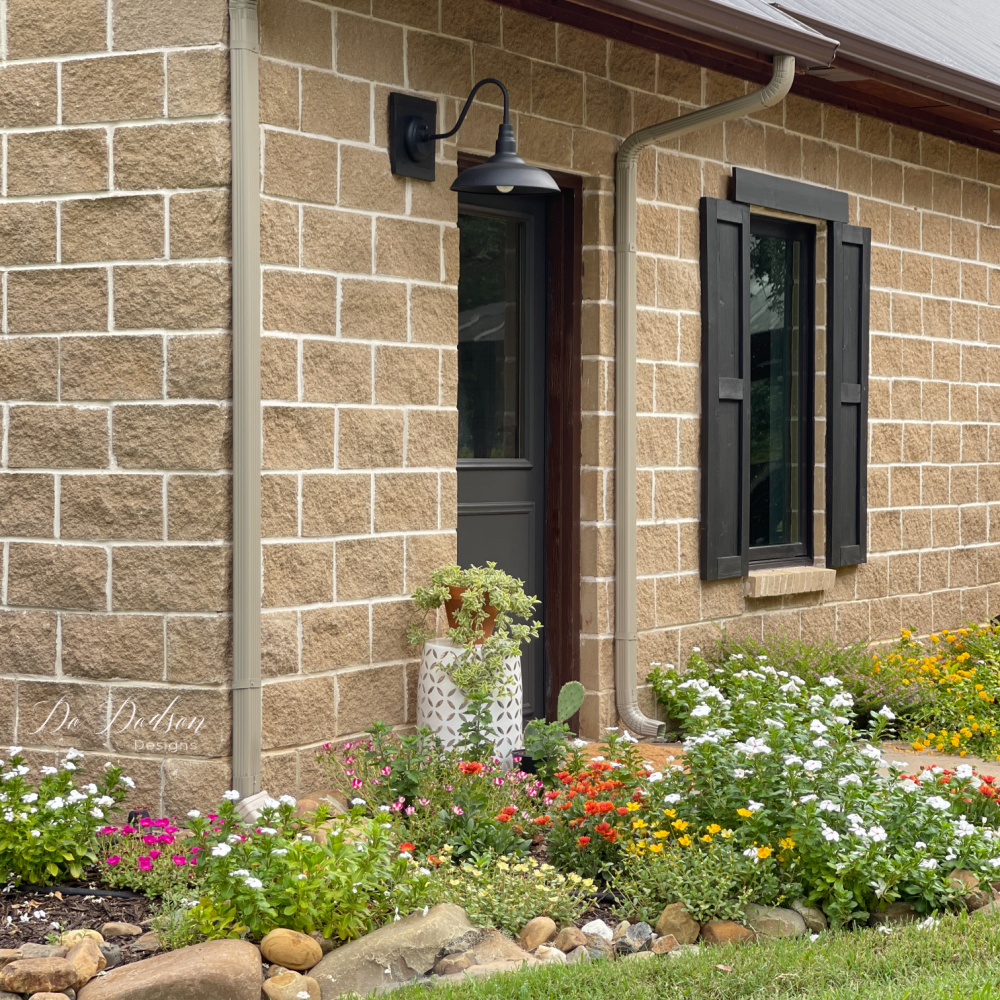
My Office And Studio
This area of our home is my office and studio.
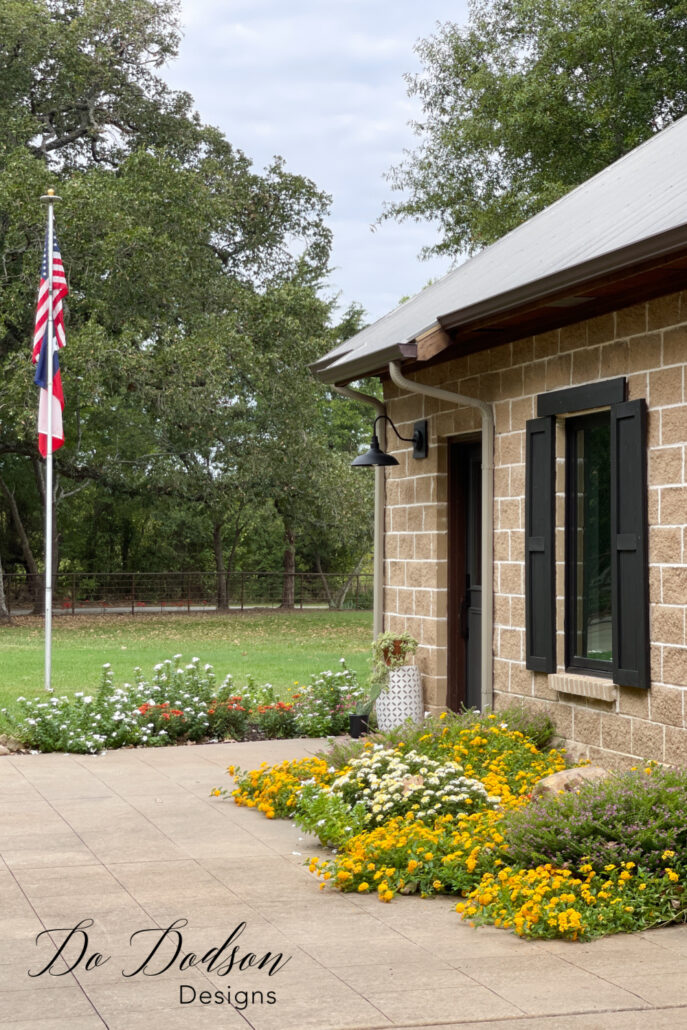
I didn’t take a full frontal view of our home because it’s still in progress. But I promise a big reveal is coming soon!
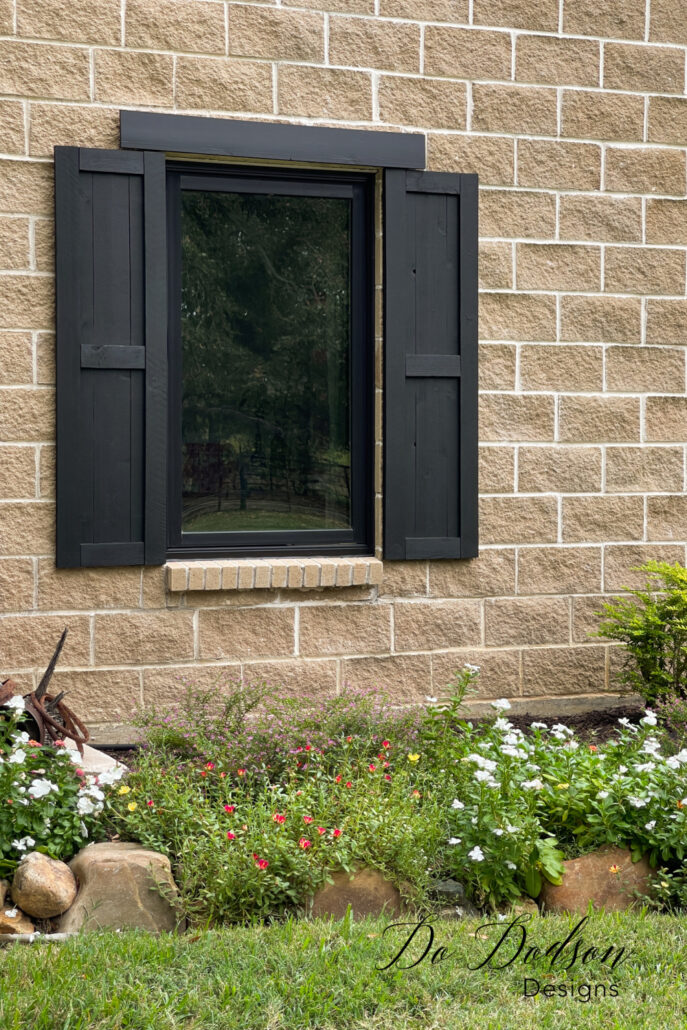
We also decided to add a header above the window using the same material. This gave the windows a finished look with a bit of European charm. We splurged on new windows, and I’ll share that addition soon. We are almost done.
I want to say WE, but seriously, it was ME that did all the landscaping and toting of those “boulders” that were strategically placed.
But I do love how it frames the entrance to my office.
I’d like to think I mastered the art of DIY wood shutters since these were the second sets that I’ve made. And I’d do it again!
It was worth all the sweat equity, and I have to say I have fallen in love with the exterior of our ranch-style home now. It has that modern farmhouse look that I adore, and even better, I did it on the cheap.
Hey, thanks for joining me today, and as always, I’d love to know that you were here. Drop me a comment or your thoughts and any questions on this subject that I may have missed. Have an amazing week and happy shutter-making!
Until the next project… xo, Do
They look AWESOME Do! They dress up your gorgeous windows beautifully! XOXO
Thank you, Denise! We LOVE the new windows. 🙂
Gorgeous as always! You are making it YOURS!
Thank you, Leslie.
We have enjoyed working on these projects. Little by little, we are making it our own. Thanks for reading and have a wonderful week. xo 😘
What a great economic job. Do the shutters actually close for storms etc or are they purely ornamental?
Hi Audrey!
In Texas we would never use the functional shutters so these are purely decorative. One of the reasons why I used inexpensive material. Thanks for reading and have a wonderful week. xo 😘
The shutters make a huge difference Do! The dark color against the exterior is perfect! Another amazing tutorial my friend! Pinned 🙂
Hey Cindy!
Yep, it was a little bland for me. I just couldn’t see spending a lot of money on shutters. Surprisingly enough, the fence pickets are lightweight which made it easy for me to handle. Thanks for reading my friend. xo 😘
Yes !! Such a nice addition. The wood shutters look great – esp w the black windows.
I especially love the added header. I’ve not seen this before – and it really gives it a finished intentional look.
Thanks for sharing.
Thank you!
Yes, I saw the addition of a header on some European homes and decided to add it. I’m very happy with the results. 🙂