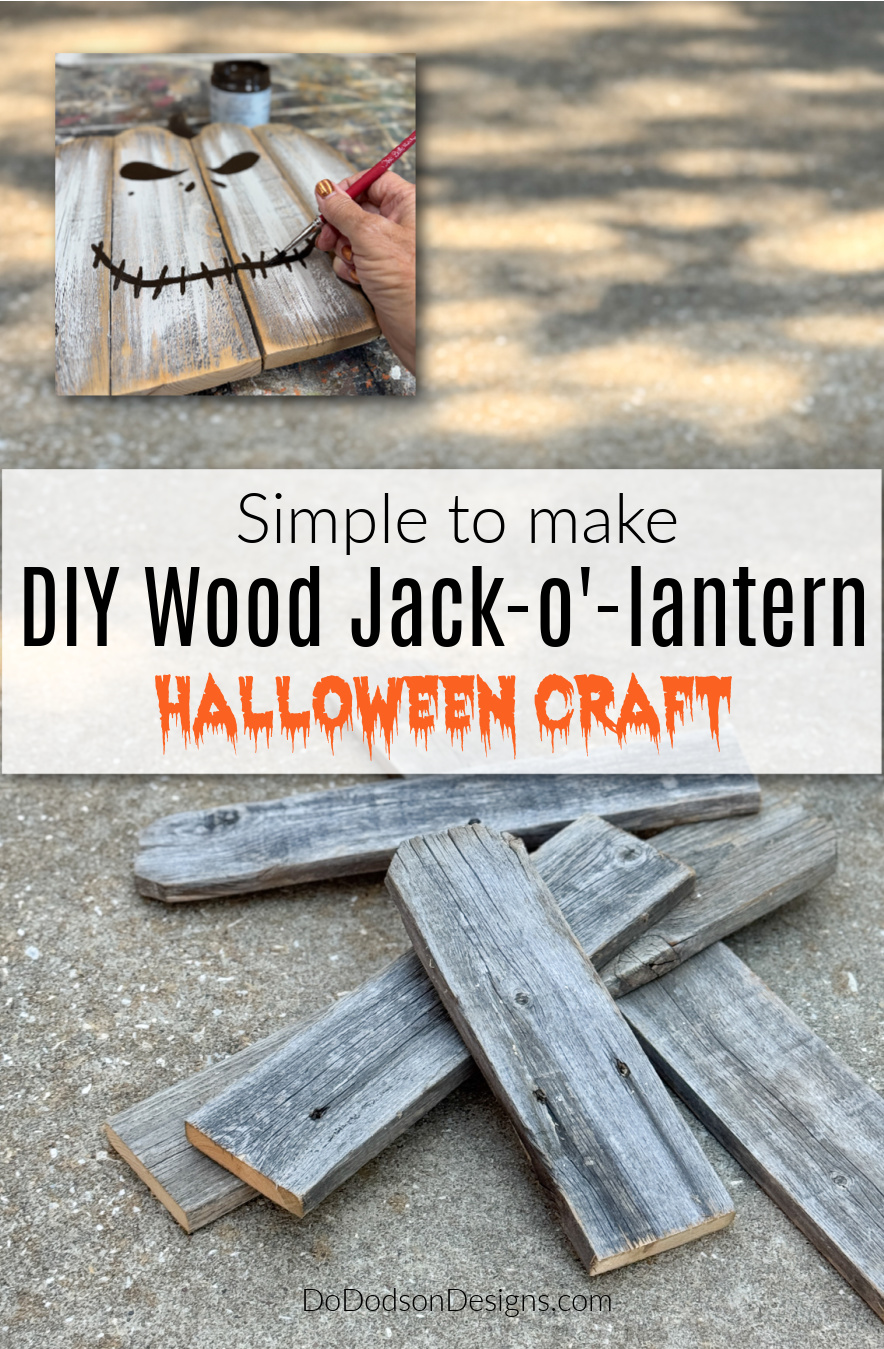
Hey friends! Looking for a simple wood craft for Halloween. Create this spookalicious DIY wood Jack-o’-lantern in no time at all. Grab your scrap wood, paint, and let’s get started!
Thanks to Dixie Belle Paint Co. for sponsoring this post. While I was compensated to write this post, all opinions are my own.
* As an Amazon Associate, I earn from qualifying purchases and through other companies as well. You will not be charged extra when you purchase through these affiliate links, but any income I make helps me create more amazing DIY projects to share with you! To see my full disclaimer, click here!
Simple DIY Wood Jack O’Lantern
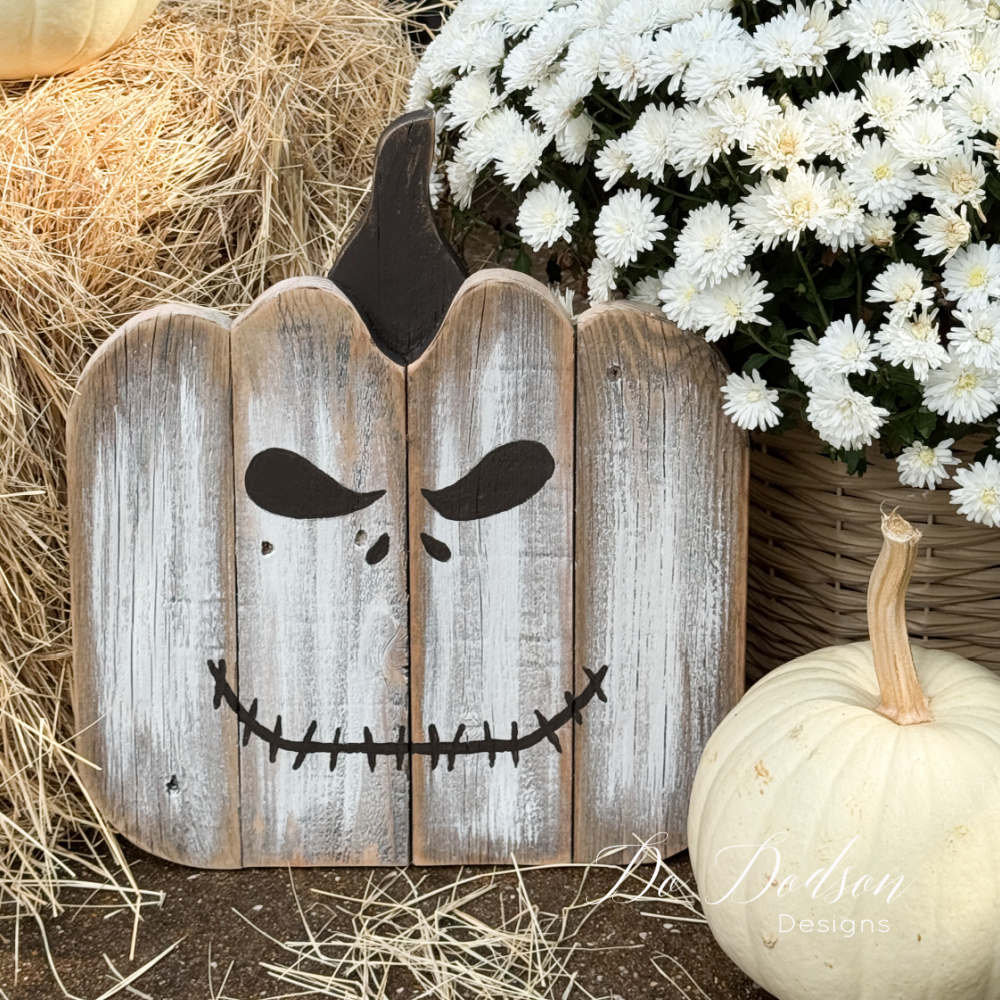
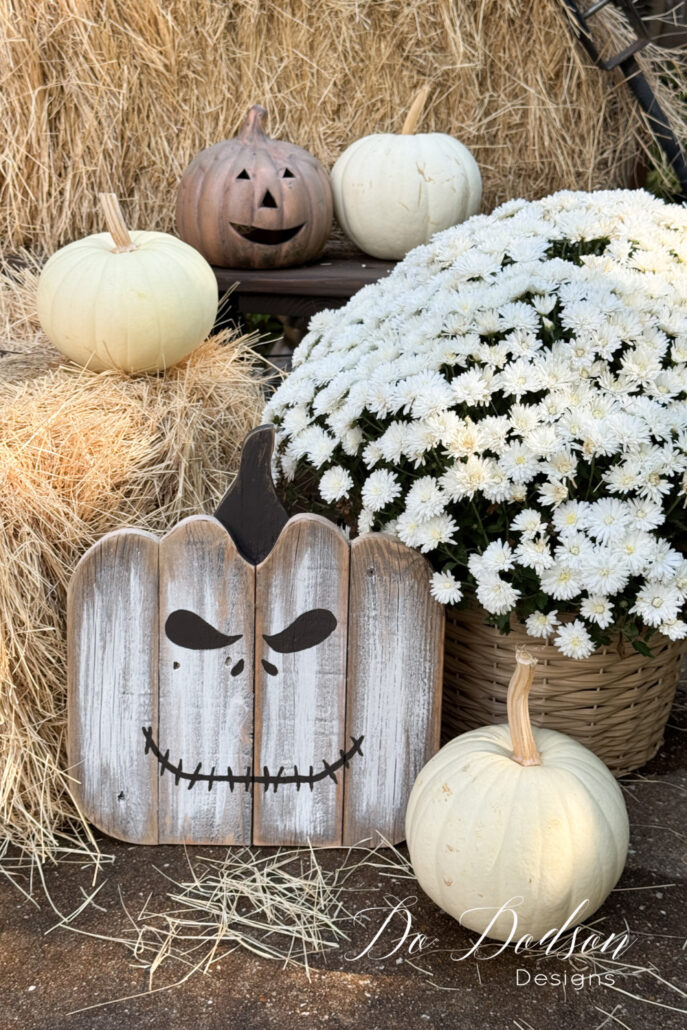
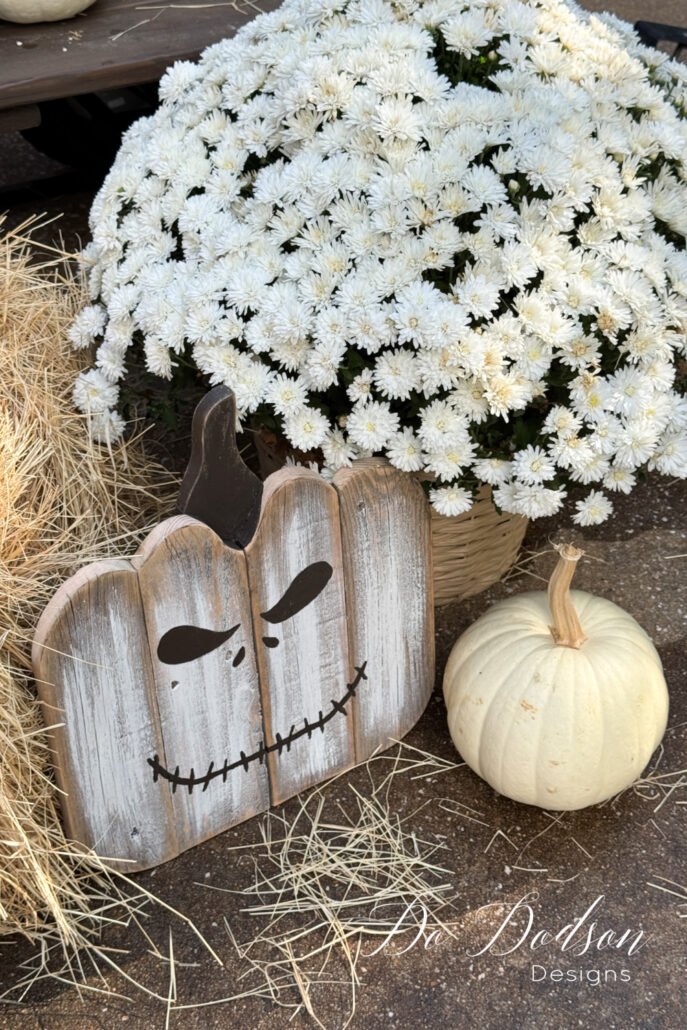
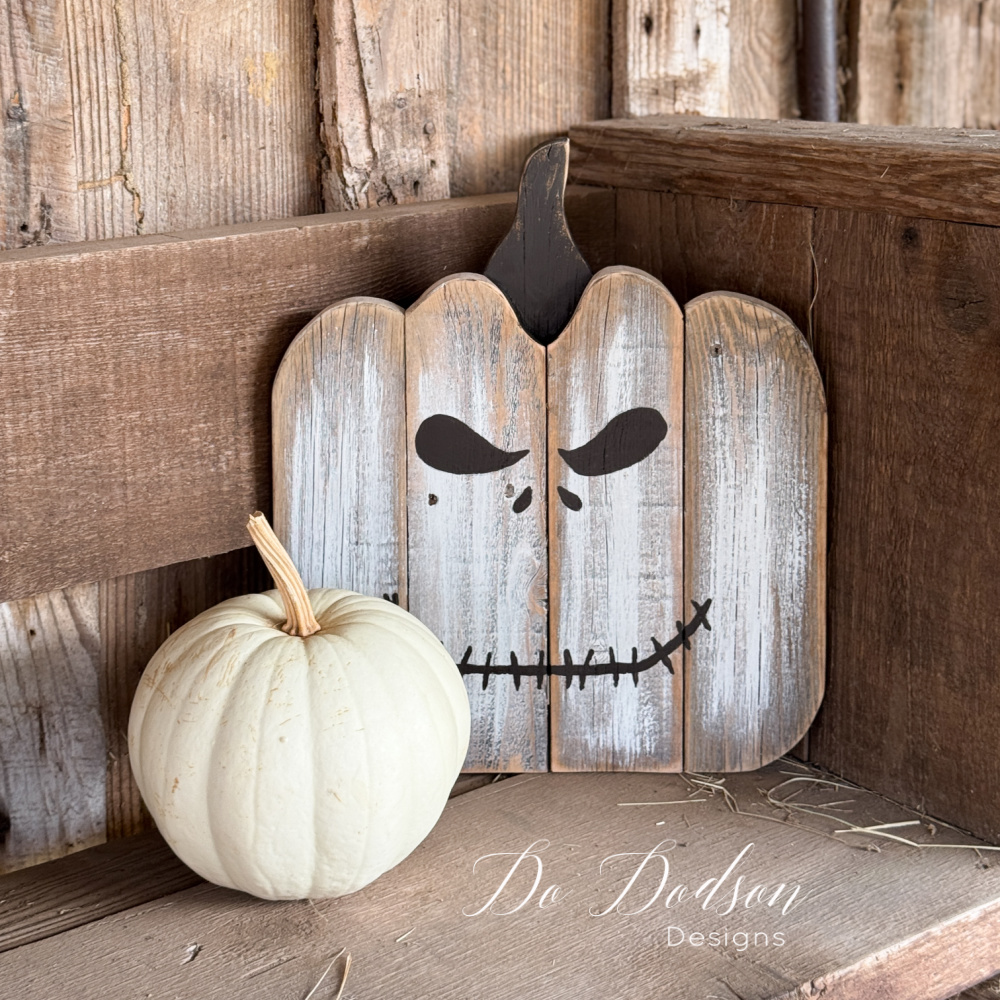
It always happens! I’m always finishing up one last Halloween project right before the deadline. My fall display needed something sweet but a little spooky to complete it. I have tons of pumpkins, but I wanted a “leaning” Jack-o’-lantern. I guess you could call it a wood sign. It’s not the classic candle-lit kind, but super cute, for sure.
It’s the perfect addition, especially if you have little ones. Cute and a tiny bit scary, all in one, for a quick Halloween decor touch.
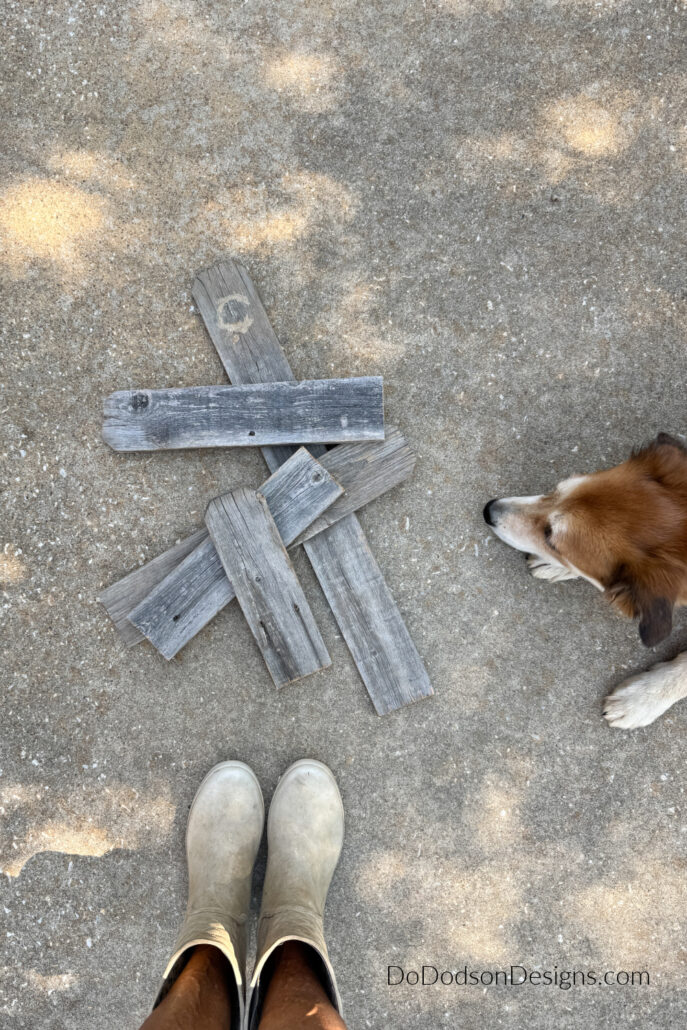
I almost had a helper with this project! My sweet dog, Lexi Louise, started helping me, but then a board and a pencil disappeared, so I decided to go solo. She means well.

SUPPLY LIST:
- scrap wood (standard fence pickets)
- pencil
- jigsaw
- wood glue (exterior)
- wood sander (my fave!)
- sandpaper (180-220 grit) or sanding blocks
- Elderflower SILK All-In-One Mineral Paint
- Umber SILK All-In-One Mineral Paint
- synthetic chip brush
- artist brushes
How To Make A Wooden Jack O’ Lantern Sign
Let’s grab those wood scraps! Weathered fence pickets are awesome, but seriously, whatever wood you’ve got is perfect!
I used five fence pickets – four for the body of the jack-o’-lantern and one for the stem. Just lay them out and see what you get!
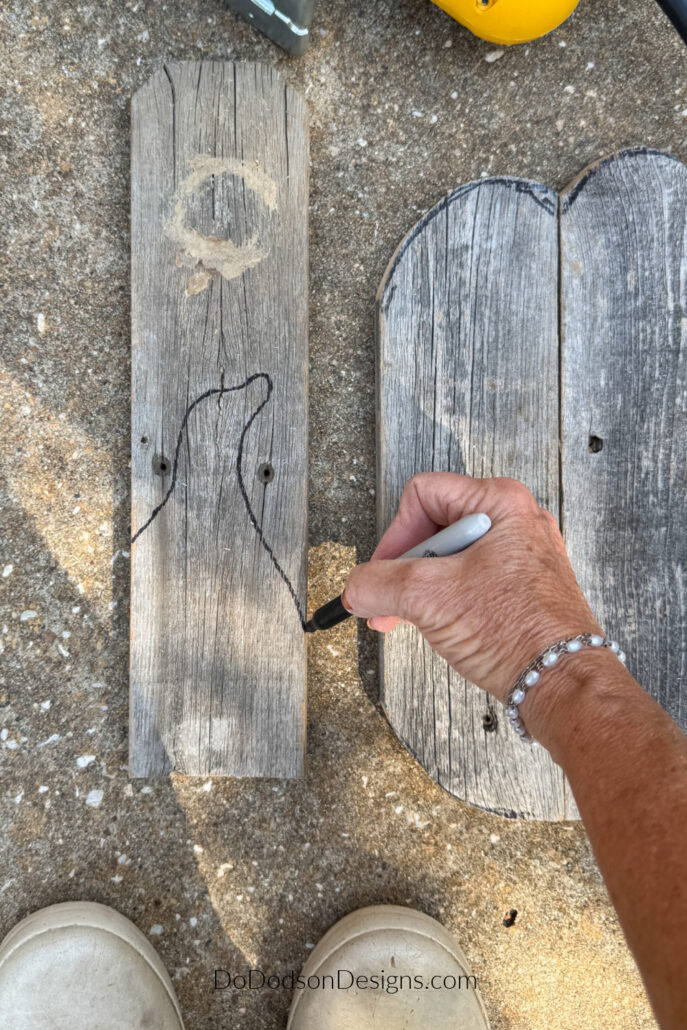
Grab a Sharpie (I’m a Sharpie kinda gal!) or a pencil and draw the rounded top of the pumpkin on each of the four boards. After that, add a curve to both sides at the bottom to make the pumpkin look round.
If you don’t get it the way you want it with your first attempt, try again. You can sand the pencil and Sharpie marks out with sandpaper or paint over them. Don’t sweat the small stuff! I’ve never seen two pumpkins that look the same, so I didn’t create a template for this one. You got this!
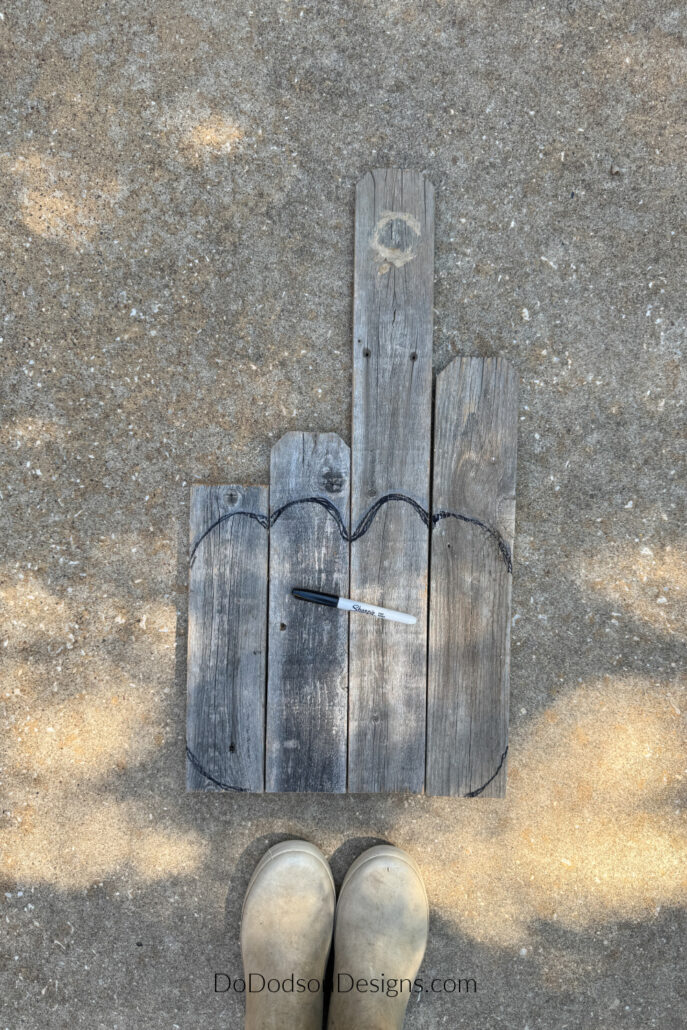
And don’t forget to draw the pumpkin stem! Leave the board a little longer than you will need. You can cut it shorter once you see how it fits. The stem will be attached from behind. Trust the process, as my 13-year-old Granddaughter says. She’s a hotter mess than I am if that’s possible. 😉
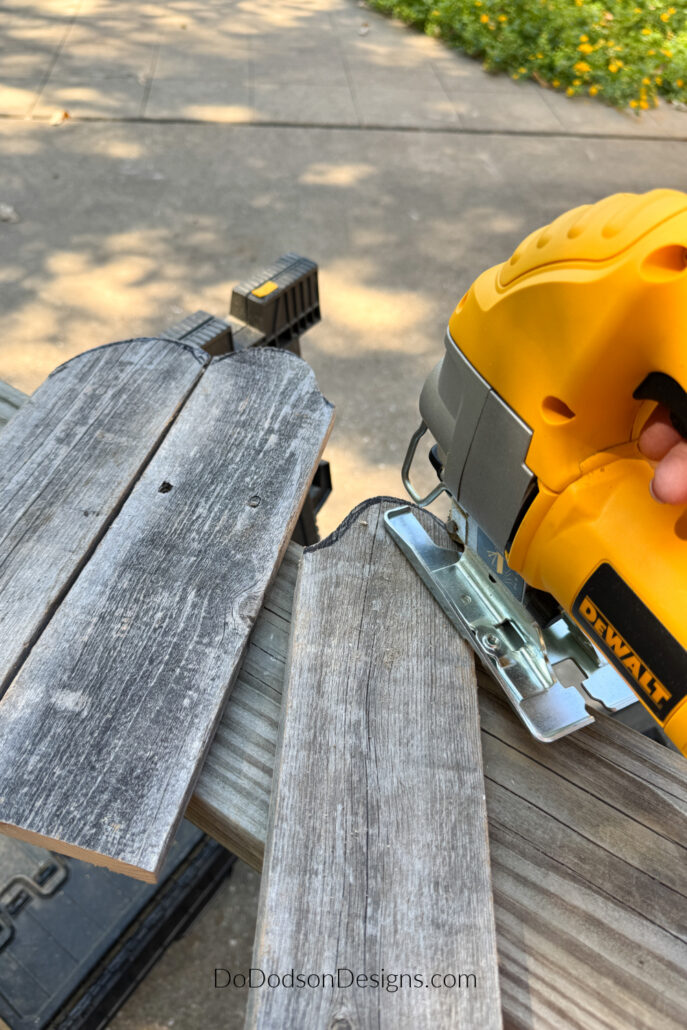
Cutting The Wood Jack o’ Lantern Shape
Using a jigsaw, carefully cut the boards to reveal the shape. If you have never used or been taught how to use this tool safely, seek help. The neighbors’ husbands are sometimes more than happy to lend a hand.
Once all the pieces have been cut, line them up to check for any needed adjustments.
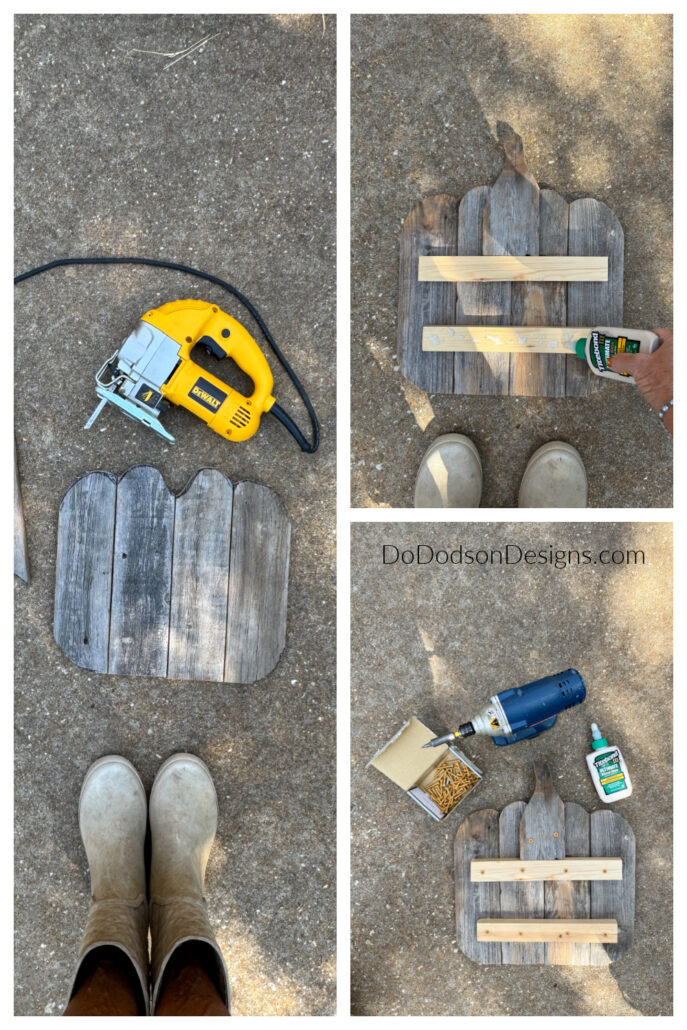
How To Assemble The Wood Jack O’ Lantern
Flip the wood pieces over, keeping them in the desired position. Place the wooden pumpkin stem cutout in the center of the back side of the wood.
Grab two scrap wood pieces (cut about 2 inches shorter than the width of the pumpkin) and glue/screw them onto the wood pieces to secure them together, just above and below the center. You can also use a brad nailer, too, if you like. I think wood screws will hold up better outside, though.
The wooden stem should be sitting on top of the top crosspiece for extra support. Adjust the top cross piece to accommodate the stem before securing it in place.
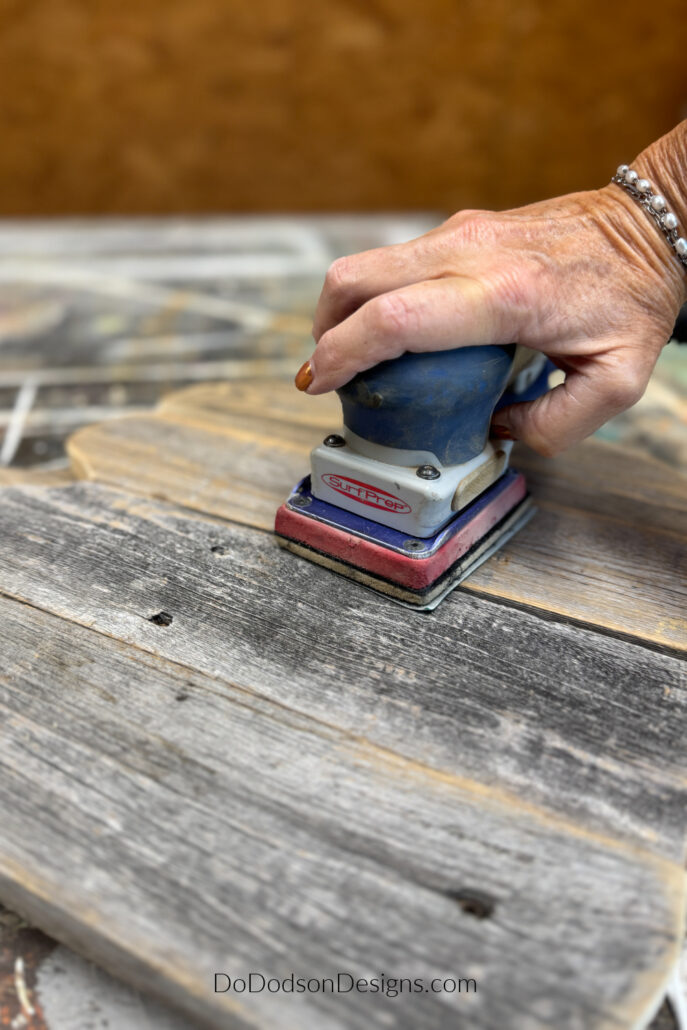
Sanding The Wood For A Smooth Paintable Finish
To prepare the wood for paint, it’s best to sand it smooth. When using weathered wood, such as I did here, start with a 180-grit and finish with a 220-grit.
Remove any remaining wood dust from sanding before painting.
How To Paint A Wood Jack O’ Lantern
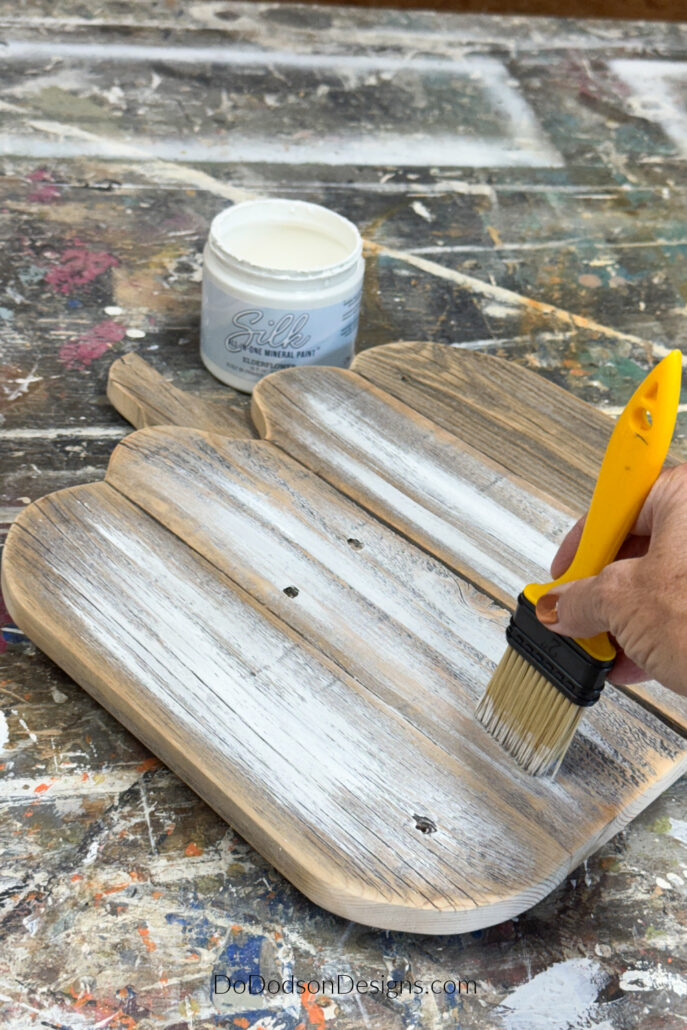
The painting part of this DIY craft project is super simple.
To make my jack o’ lantern look rustic, I dry-brushed on some SILK All-In-One Mineral Paint in the color Elderflower. It gave it that cool, weathered barnwood vibe.
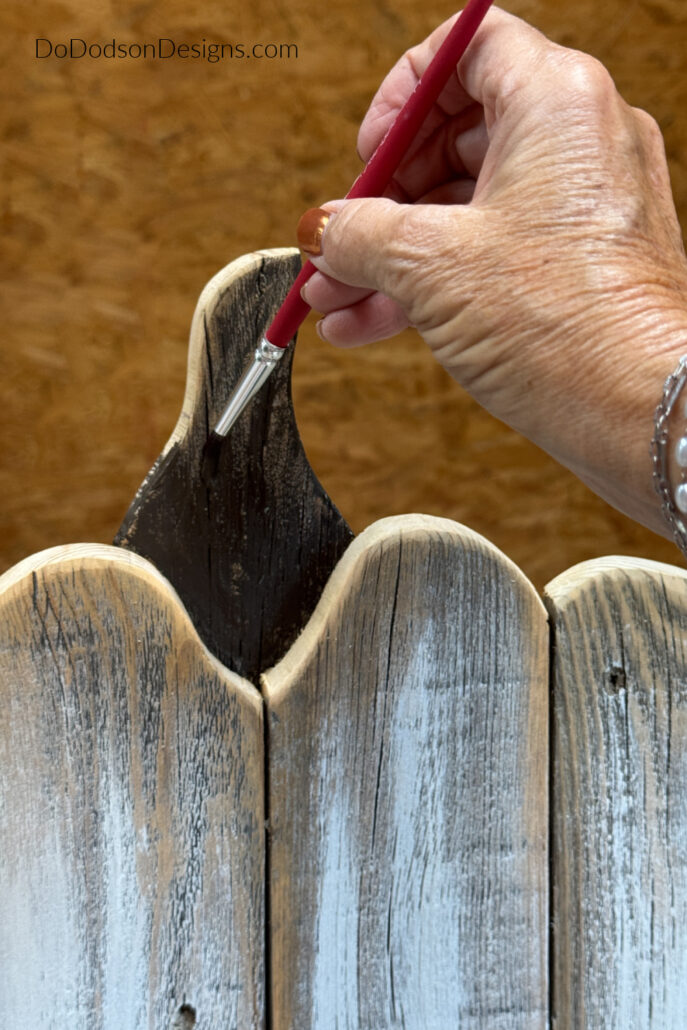
Next, I painted the stem with SILK All-In-One Mineral Paint in the color Umber. I used an artist’s brush to get into the tight areas next to the pumpkin base.
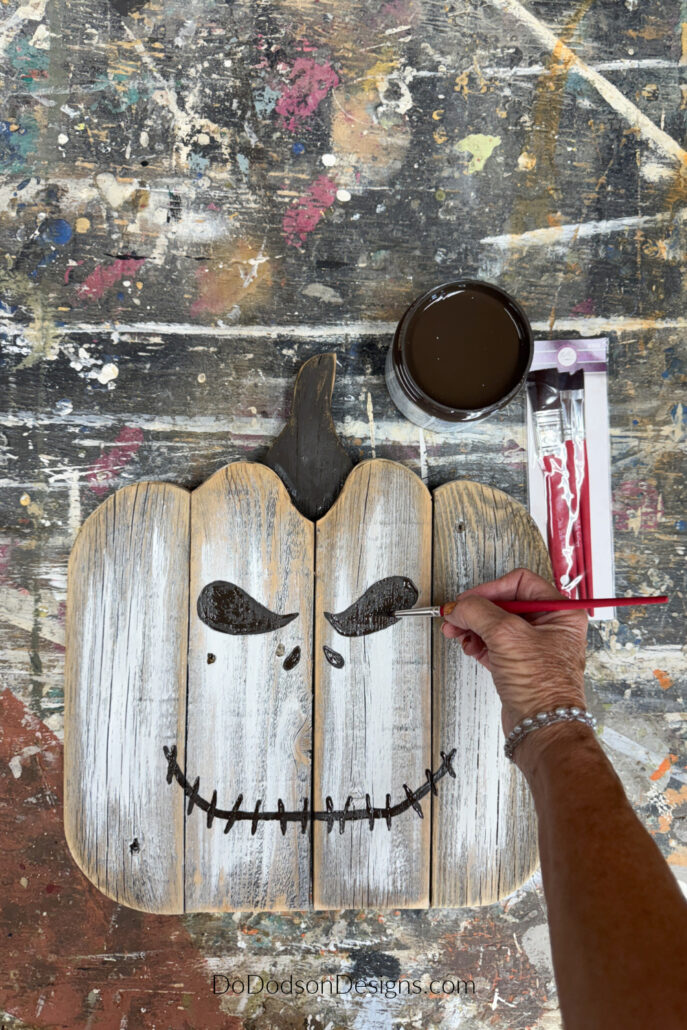
Painting The Jack O’ Lantern Face
Before painting the jack-o’-lantern face, do a quick search on Pinterest for inspiration. I really like this simple look.
Use a pencil to outline the face before attempting to paint it.
To make the jack-o’-lantern look cohesive, use the same color as the stem. An artist’s brush is perfect for fine details and crisp lines.
For more Fall pumpkin inspiration, check out the links below. Can you ever have too many pumpkins?
The Leaning Wood Jack O’ Lantern
If jack o’ lanterns could be adorable, this one would wear the title well. I’m so happy with how it turned out.
Okay, how about this:
And to be honest, I wasn’t even sure this was going to be share-worthy. 😏 Not everything goes according to plan, right? “Trust the process” is stuck in my head, and I’m so thankful for my Granddaughter’s smarts!
Hope you had fun with this woodworking project! I’m always down to use up scrap wood, so give it a shot!
Share this or pin it to your Halloween board for later, and drop a comment below with what you think!
Until the next project… xo, Do