Hey, triple-D friends! I don’t know about you, but I get tired of juggling my recipe books while cooking dinner for my family. I constantly wipe up spills and fumble with torn pages, especially when I use my vintage cookbooks. Well, I found a solution that I think you’ll love too. It’s an easy DIY cookbook stand that has more than one use.
Thanks to Dixie Belle Paint Co. for sponsoring this post. While I was compensated to write this post, all opinions are my own.
* As an Amazon Associate, I earn from qualifying purchases and through other companies as well. You will not be charged extra when you purchase through these affiliate links, but any income I make helps me create more amazing DIY projects to share with you! To see my full disclaimer, click here!
How To Make A DIY Cookbook Stand
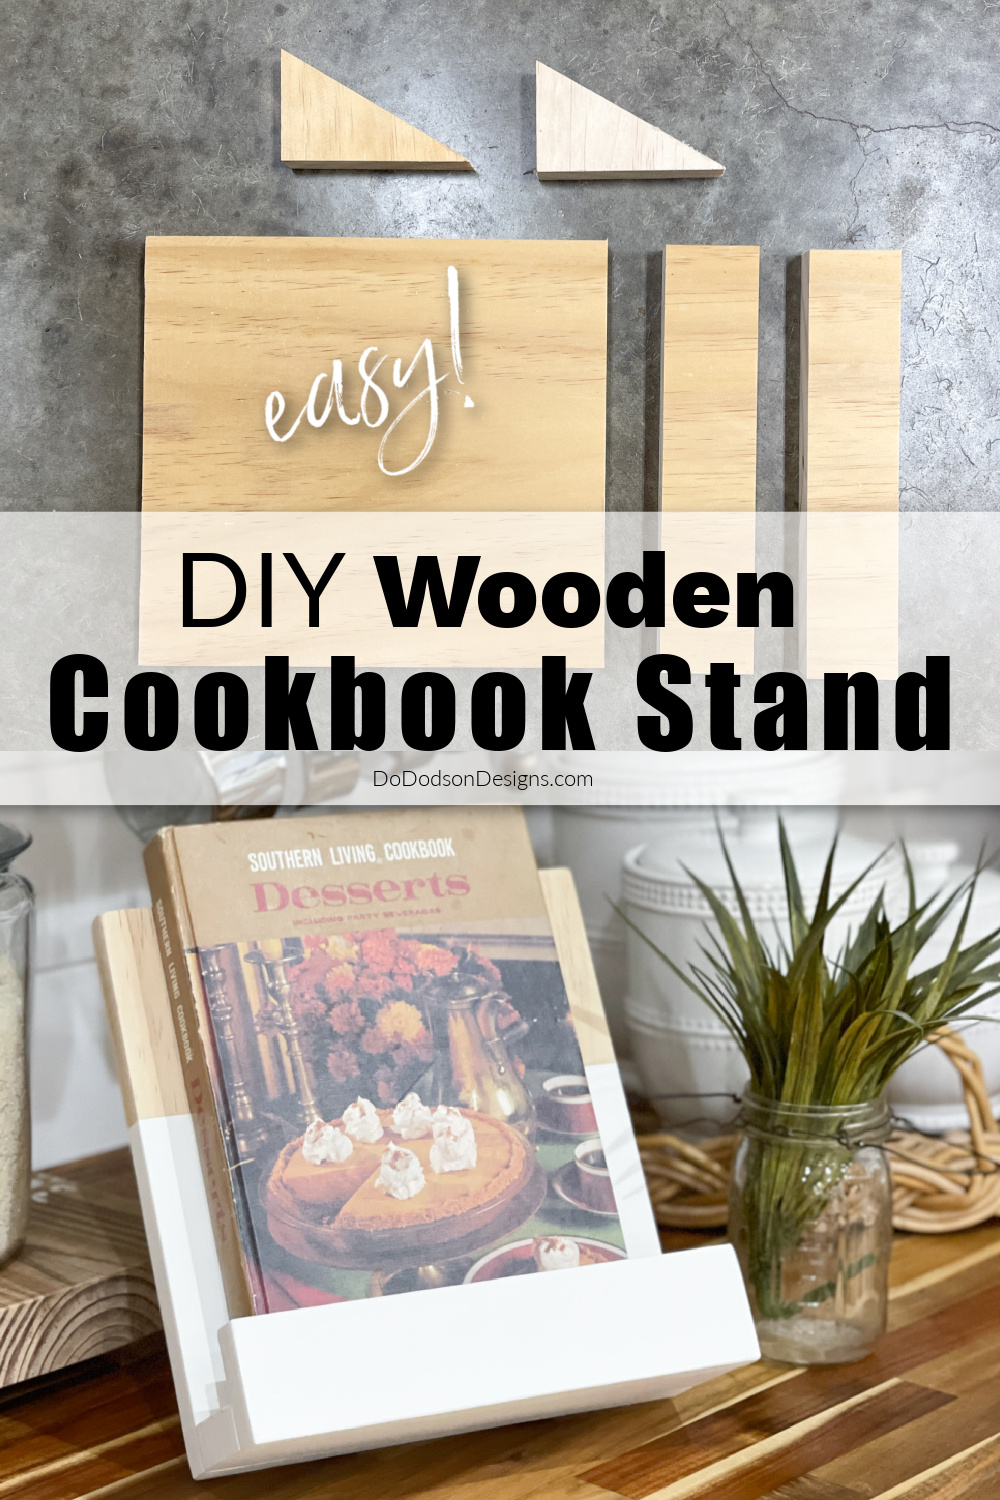
Introducing the easiest DIY cookbook stand you’ll ever make, and it’s made from wood scraps. Imagine your kitchen where your recipe books are neatly propped up on the counter, allowing you to follow your recipes as you cook. No more messy counters or spills. Well, at least not in your cookbooks because they will be neatly elevated and away from harm’s way.
Today, I’m guiding you through the process of creating your own wooden cookbook stand with a beautiful two-toned wood and paint finish.

SUPPLY LIST:
- scrap wood of your choice(1×10 poplar wood)
- miter saw
- 220 grit sandpaper (SurfPrep Sanding System)
- pencil
- speed square
- tape measurer
- wood glue
- wood clamps
- brad nailer or nails
- wood putty
- painter’s tape
- Silk All-In-One Mineral Paint – White Cap
- 2-inch Synthetic Mini Angle brush
Choosing the Right Scrap Wood
The first thing you need to do is look and see what wood you have available and the quality of the wood. You’ll want to select sturdy pieces that don’t have visible damage or rot. Inspect the wood carefully, looking for cracks, knots, or other imperfections. But you might consider using those boards if you want a rustic look. If so, weathered lumber is always a great choice as well. Remember, your cookbook stand will support the weight of your recipe books, so it needs to be able to withstand the task.
Next, consider the size and thickness of the scrap wood. Ideally, you’ll want pieces that are wide enough and long enough to accommodate your largest recipe book with little overhang. The thickness of the wood should provide stability, ensuring that the stand won’t wobble or tip over while you’re in the middle of a hot and heavy cooking session. Aim for a thickness that feels substantial and secure.
Another factor to contemplate is the type of finish you want for your cookbook stand. Think about the overall look of your kitchen and select a wood that complements the existing decor. If you plan to paint or stain the stand, remember that certain wood species take to these finishes better than others.
Table Of Contents
Step-by-Step Instructions
For the DIY wood cookbook stand that I made, I used a piece of 1×10 stain-grade poplar wood (which truly measures 3/4 inch thick and 9 and 1/4 inch wide) that I had remaining from a previous project.
For this simple DIY project, you’ll need four simple straight cuts with one 60-degree angle.
STEP 1: Cut one large piece (back support) measuring 9 1/4 x 11. Or, if you want a smaller or larger stand, alter the measurements up or down depending on your needs and the size of your largest cookbook.
STEP 2: Cut two 2-inch identical pieces of the 9×1/4 board. These will be used for the bottom and front edge of the stand which will secure books, tablets, or iPads from slipping off of the stand.
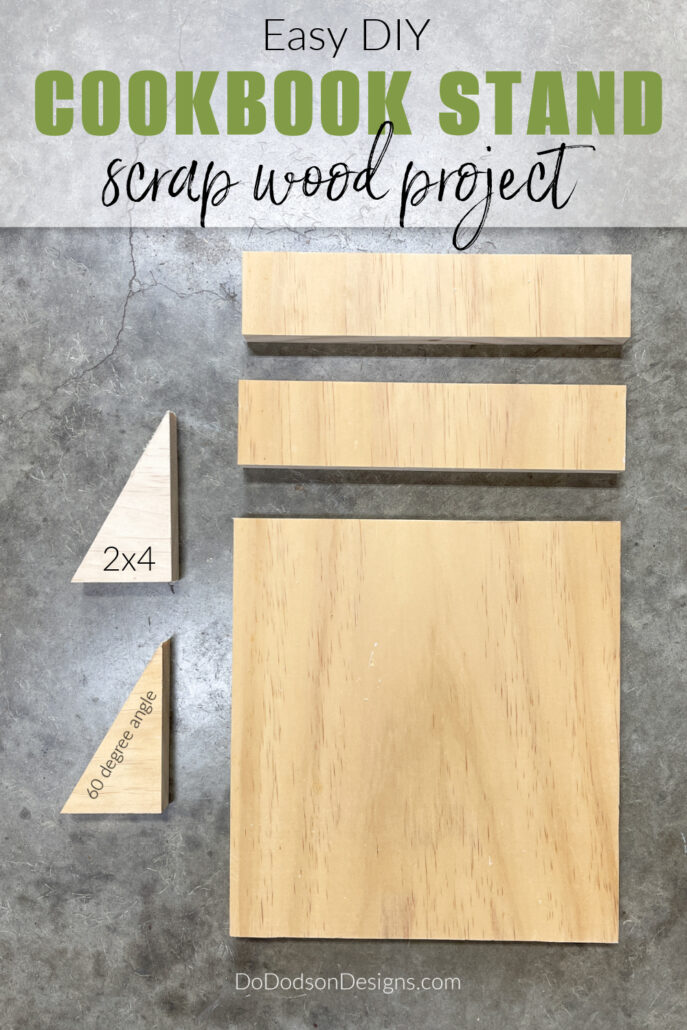
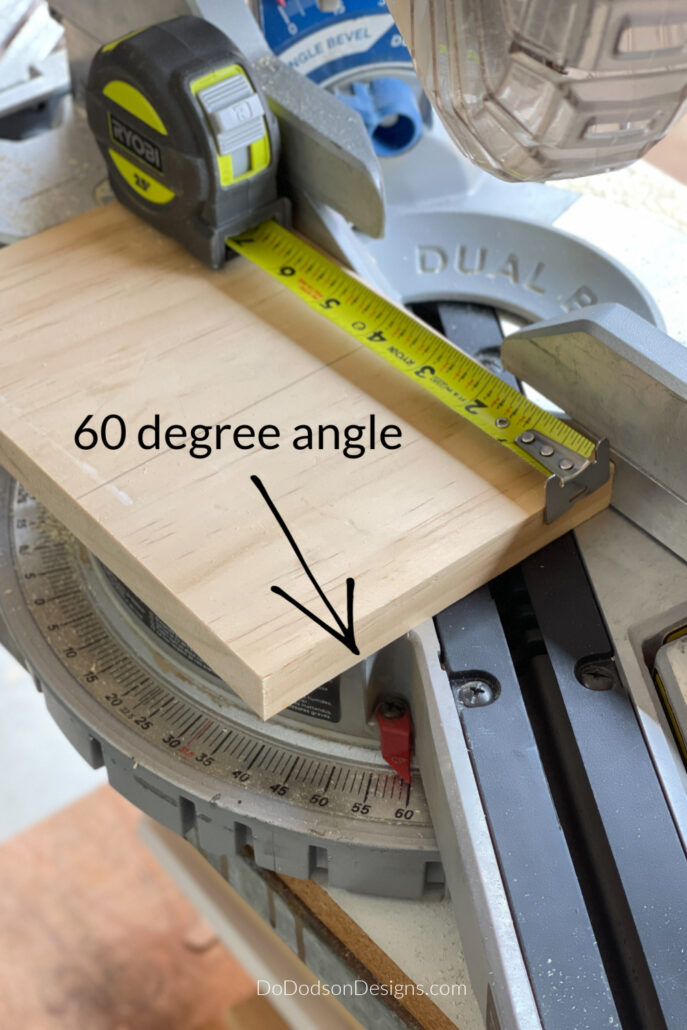
STEP 3: Cut two identical 4-inch pieces of a 9 1/4 in board at a 60-degree angle on your miter saw.
I found the easiest way to do this is to place the board on the saw, set the angle to 60 degrees, and measure 4 inches on the board. You can use a pencil and a speed square to mark the 4 inches. Next, cut a 60-degree angle from where you marked the 4 inches.
This will give you perfectly cut 60-degree angle supports for your DIY cookbook stand that measures 4×2.
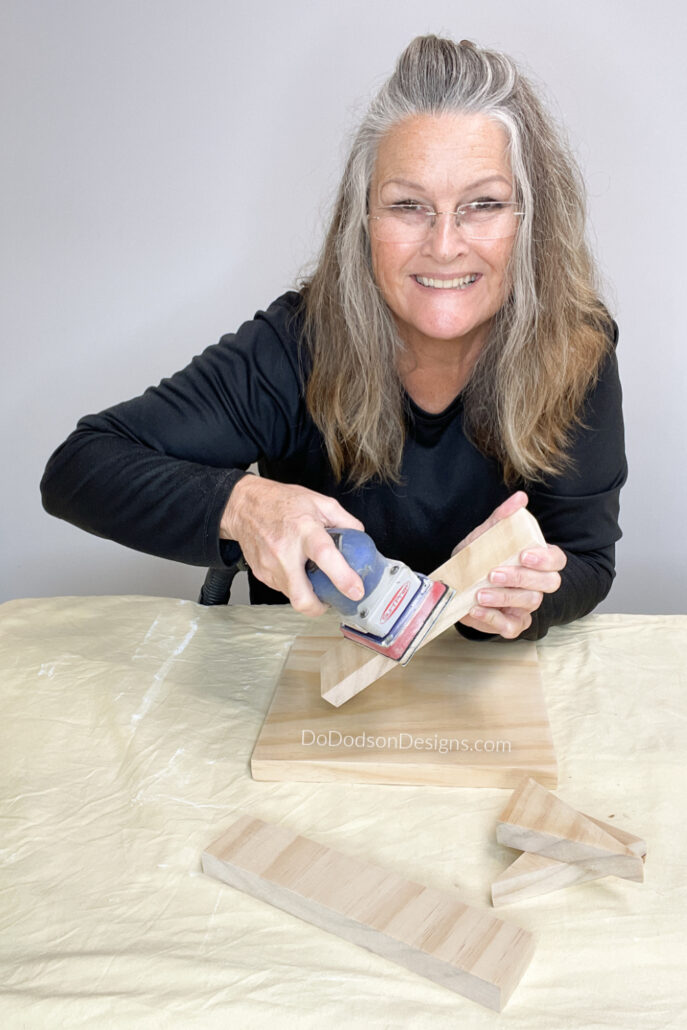
Sanding And Wood Prep
STEP 4: Next, sand all the rough edges with 220 grit sandpaper. This will get the wood ready for paint or stain if you choose. Wipe away any remaining sawdust with a damp cloth.
If you work with wood as much as I do, you may want to invest in a professional tool like the SurfPrep Sanding System.
I love using this closed system with the vacuum attachment. It allows me to sand my projects indoors. No, it’s not 100% dust-free, but working inside during those cold winter days is nice. Hello, arthritis!
Assembling The Wood Pieces
STEP 5: Lay the largest board on a flat surface. Using good quality wood glue, apply the glue to the cut end of one of the smaller boards and secure it in place on the front bottom side of the backboard; with your hands, hold it in place for a few minutes until the glue has had time to grab. The wood glue will absorb into the wood fairly quickly, giving you extra time for the next step.
STEP 6: The next step can be a bit tricky, but if you have patience, you should have no problem.
Glue the second small board to the front to make a lip. Again, hold it in place for a few minutes. Have a set of wood clamps ready to hold these connections together.
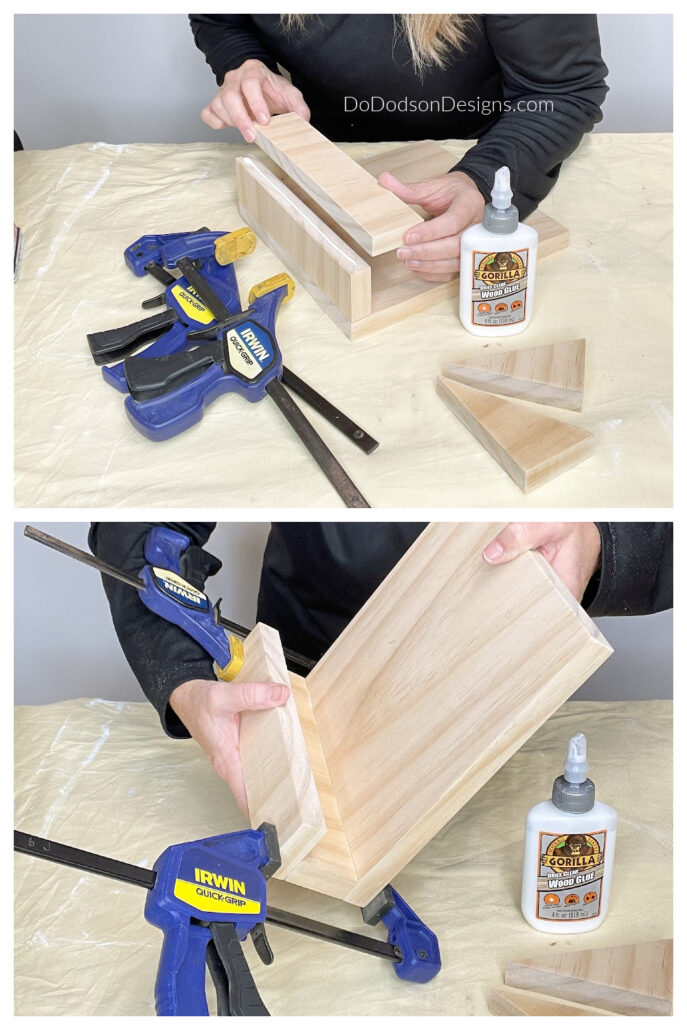
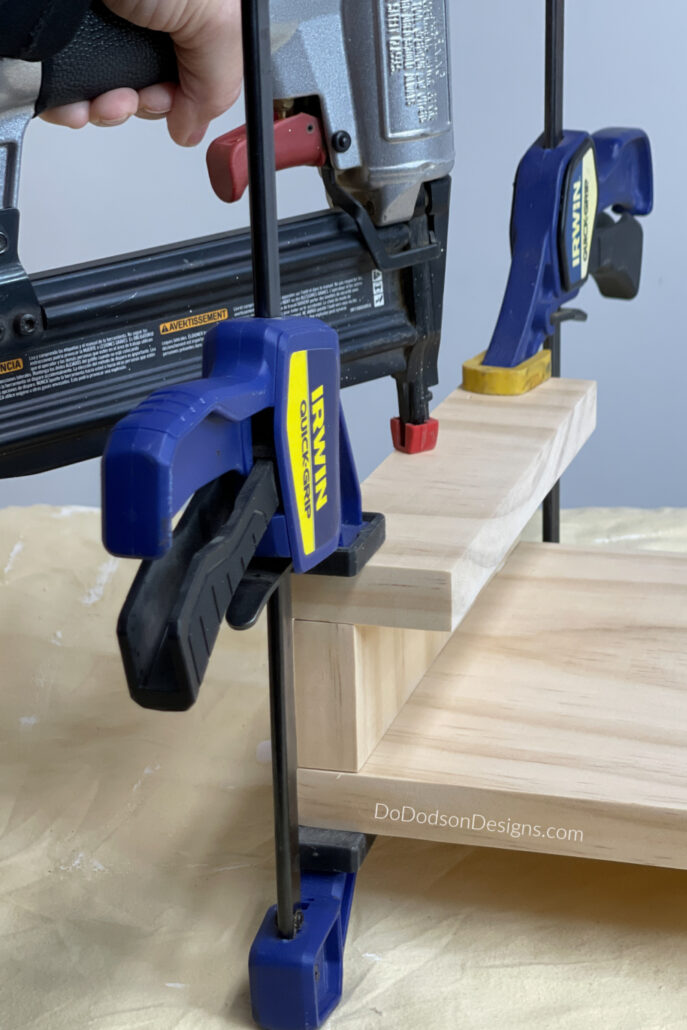
Allow the glue to dry overnight. Use a brad nailer or hammer with nails to secure the connections together.
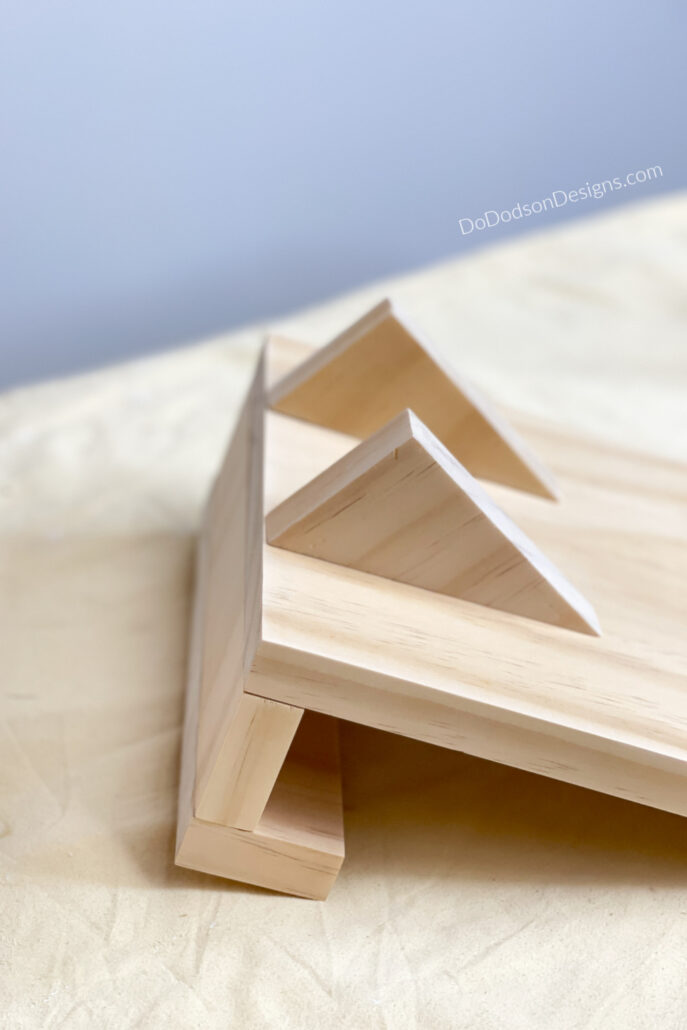
Add The Angled Wood Supports
STEP 7: Flip the DIY cookbook stand over and attach the two 60-degree angled cut pieces to the backboard using wood glue. Nails aren’t necessary for these two pieces as the glue dries strong, but you can if you feel it’s needed.
These wood pieces will give your stand the support needed to handle your book’s weight and keep it stable on your flat surface. It’s the perfect angle for reading a recipe.
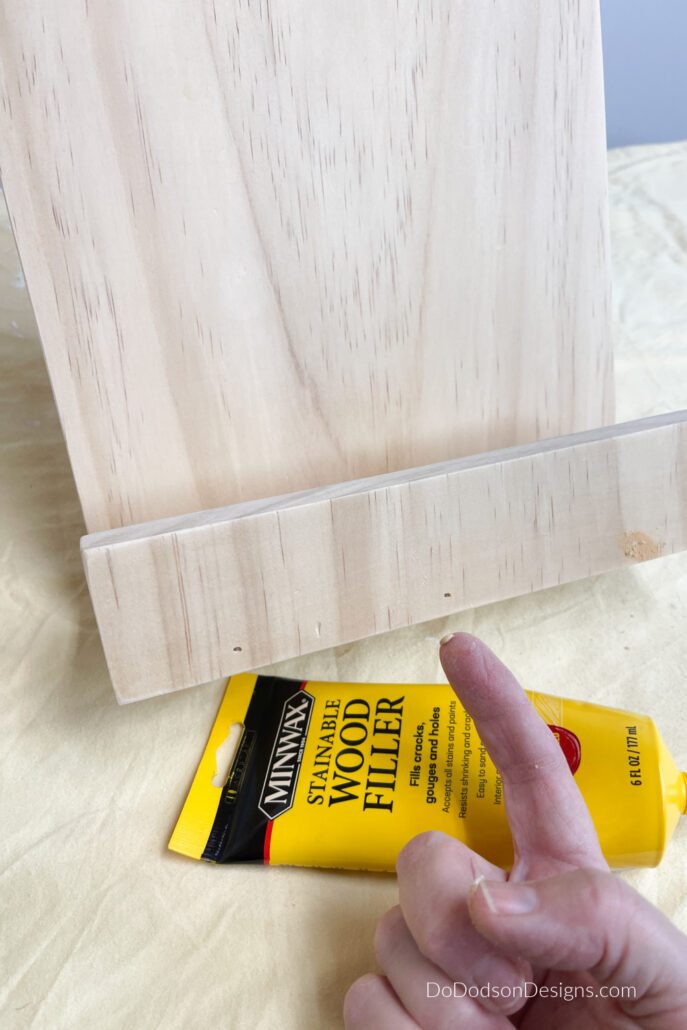
Wood Filler
STEP 8: Next, fill the nail holes with wood putty and sand smooth before painting or staining.
Wood fillers come in stainable and paintable finishes, so choose the type of product based on your wood project.
Add Your Favorite Finish
STEP 9: Once your cookbook stand is assembled, it’s time to think about the type of finish you want to apply. There are many options, depending on your preference and the look you want to achieve.
For a natural and rustic feel, you may opt for a clear varnish that can bring out the beauty of the wood grain. On the other hand, if you want to add a pop of color or match your existing kitchen decor, consider using a wood stain or paint. Whichever finish you choose, make sure to follow the manufacturer’s instructions for proper application and drying time.
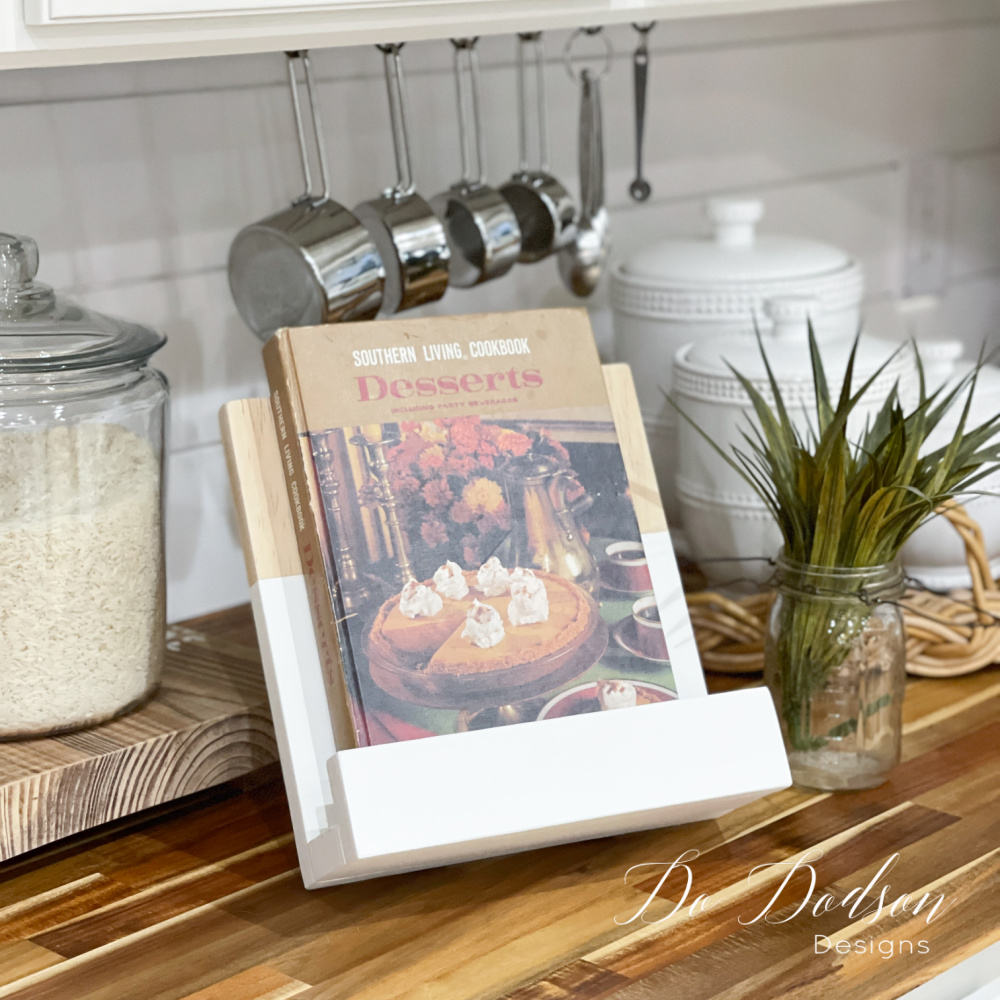
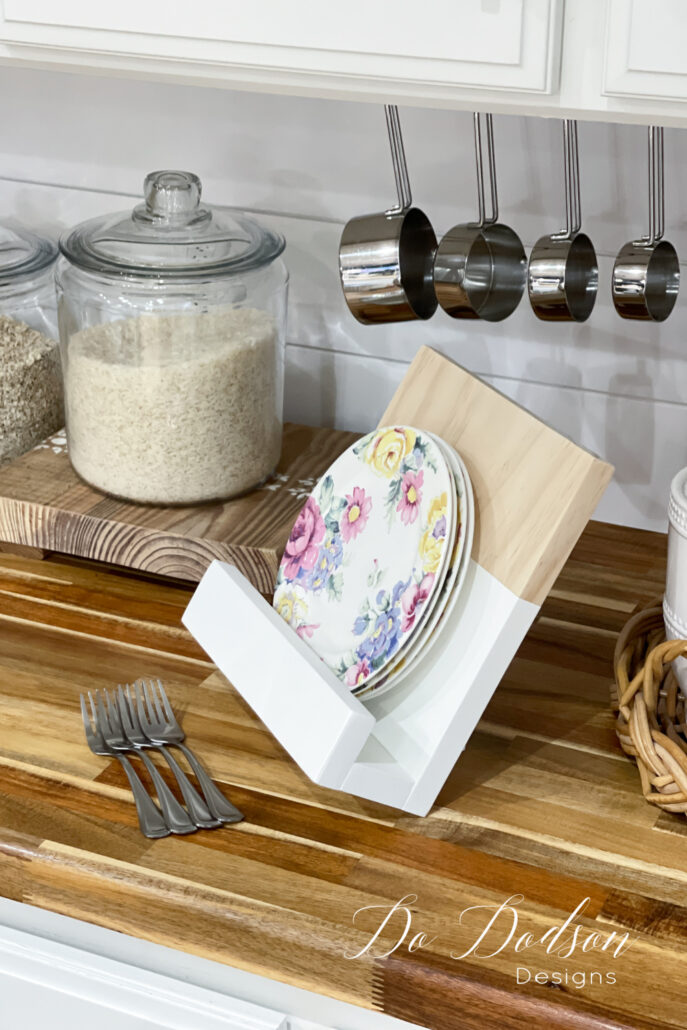
I chose to give my wood recipe stand a two-toned paint and natural wood to compliment my modern farmhouse-style kitchen, and I have the perfect paint for the look I want to achieve.
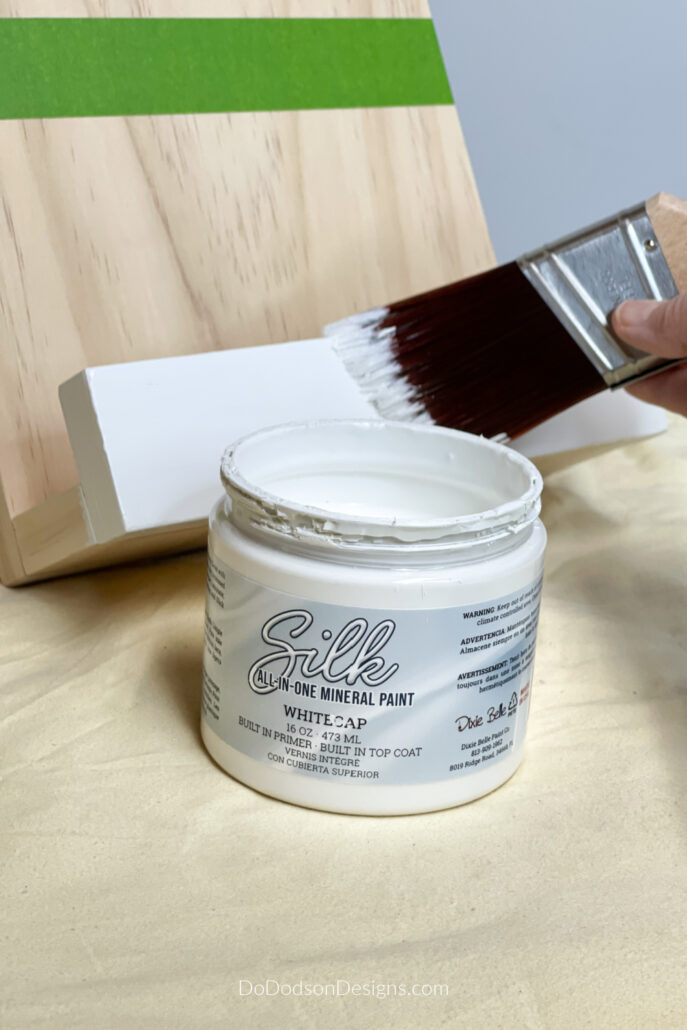
To achieve the two-toned natural wood and paint finish, I used painter’s tape to tape off the top 1/3 of the backboard and painted the lower part with SILK All-In-One Mineral Paint by Dixie Belle Paint Co.
This paint has a built-in water-based primer and top coat, making it perfect for these smaller wood home decor projects. It dries hard and is durable enough to hold up to the knocking around and cleaning that I do in my kitchen.
I painted two coats with the color WHITE CAP. The Silk All-In-One Mineral Paint paint has quickly become my favorite one-color paint finish.
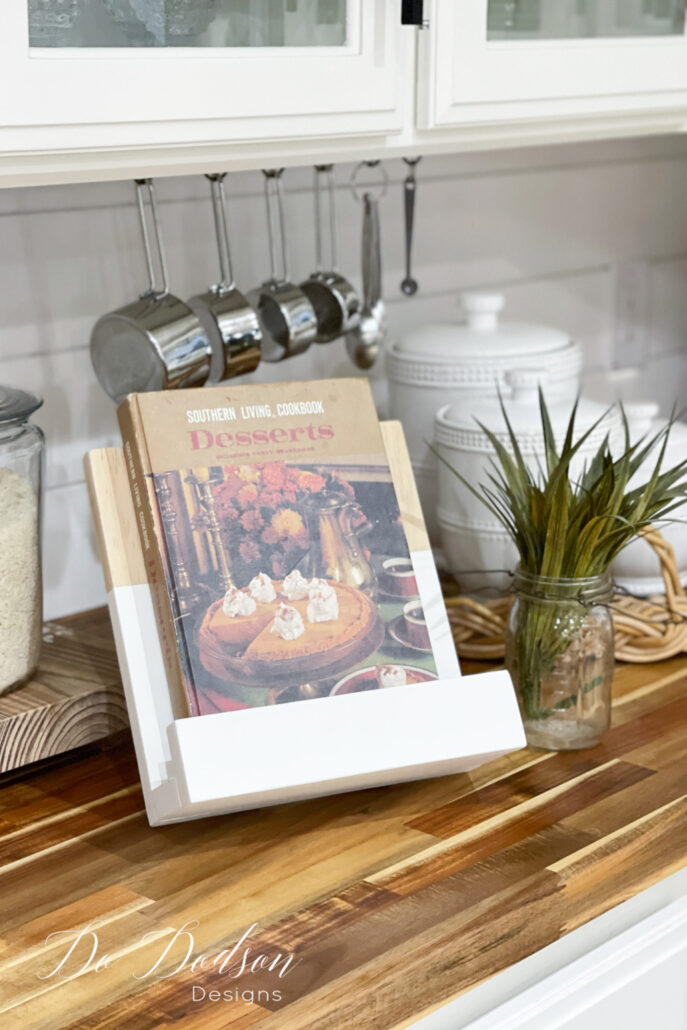
DIY Cook Book Stand Display
I’m obsessed with this vintage Southern Living Dessert cookbook. The recipes inside are definitely from some of the best cooks, and I am having so much fun reading and marking my favorite recipes.
I found this book and a few others at a garage sale for .50 cents each a few years ago. Bigtime SCORE! CLICK HERE if you want to see the other goodies I got that day.
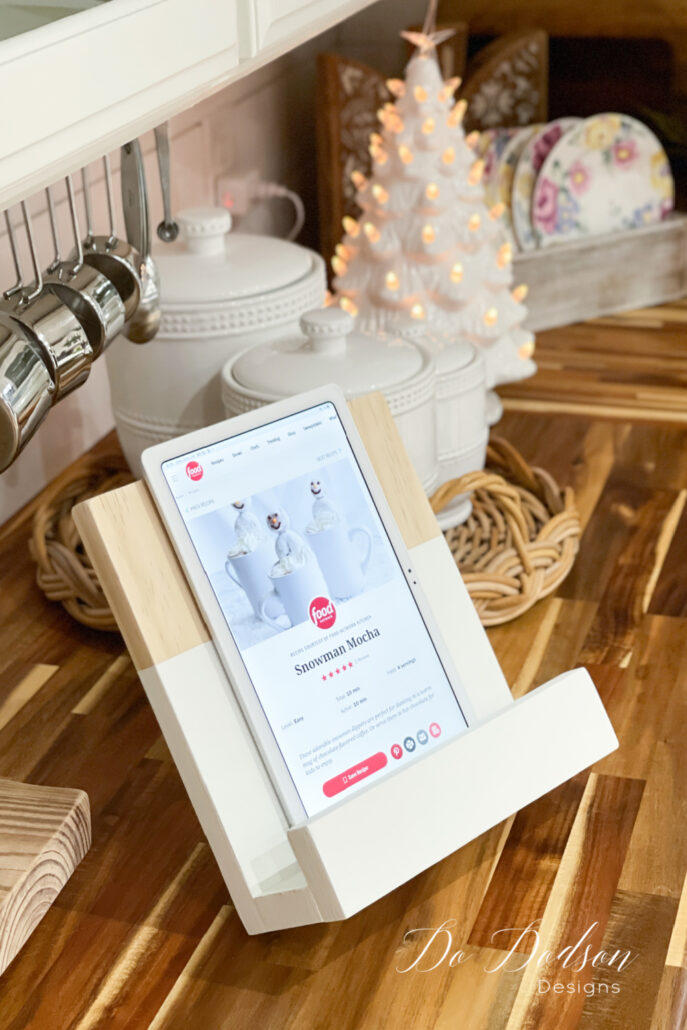
This stand also works great with an iPad or tablet if you’re not a cookbook snob like myself.
Obviously, I couldn’t be happier with the results, so I thought. That wasn’t until I discovered another use for my DIY Cookbook Stand.
Dessert Plate Display | Holder
I’m so excited! Isn’t this the best idea ever? I stacked a few dessert plates inside the stand, which worked perfectly. I think it’s a smart way to set the table for dessert.
All you need is cake! 🙂
I, for one, get great satisfaction when I make something practical and beautiful from materials that would have otherwise gone to waste. It’s a good feeling to turn a board into functional home decor.
Thanks for stopping by, and I hope you have enjoyed this scrap wood project. As always, I would love to hear your feedback and suggestions. Please comment below or say hi so I know you stopped by. It gives me the warm fuzzies to hear from you.
Until the next project… xo, Do
Great idea. Simple and practical. I like that it has more than 1 use.
I am looking forward to the exciting expectation that comes with opening your future posts.
Happy New Year and a blessed 2024.
Thank you, Joanne! Happy New Year to you. ❤️
Omgoodness I love this project Do! I’ve pinned it so I can make it! I have some family members who would love to have one in their kitchen 🙂
Hey Cindy!
I’m glad you found this project helpful. I’ve have been really enjoying mine. Thanks for reading. xo 🙂
I want to make one, it is super handy! It would also make a beautiful homemade gift idea. I always love seeing what you do with scrap wood! XOXO
Hi Denise,
I have really enjoyed mine. It’s stays on my counter year around and I decorate around it for the seasons. This year I added my favorite Christmas cook book. Have a beautiful week. 🙂