Hey friends! I didn’t see this cabinet makeover ever coming to fruition, but for some reason, my hubby did. It was his idea to make this particleboard cabinet into extra storage and a workspace in our kitchen. The end result will shock you. It sure did me!
Thanks to Dixie Belle Paint Co. for sponsoring this post. While I was compensated to write this post, all opinions are my own.
* As an Amazon Associate, I earn from qualifying purchases and through other companies as well. You will not be charged extra when you purchase through these affiliate links, but any income I make helps me create more amazing DIY projects to share with you! To see my full disclaimer, click here!
DIY Particleboard Kitchen Cabinet Makeover
The man had a plan, and when this happens (not very often, thank goodness), I just roll with it. For the most part, I have the final say so in the design of our home with a few exceptions, of course. He has a garage. LOL
It was my birthday, and “my gift” arrived in a large box. I hadn’t mentioned anything I wanted, so this was a total surprise to me. Maybe it’s a latte machine! He knows how much I love coffee, and he always keeps me stocked up with my favorite brands. He’s seen me without my coffee.
Imagine the look on my face when I opened it up and found an ice machine. Oh, but it was a fancy ice machine—the “Sonic Ice” kind of ice maker. I did my best to look surprised. He was so happy with himself until I showed him it wouldn’t fit under our kitchen cabinet. I’m such a buzz kill.
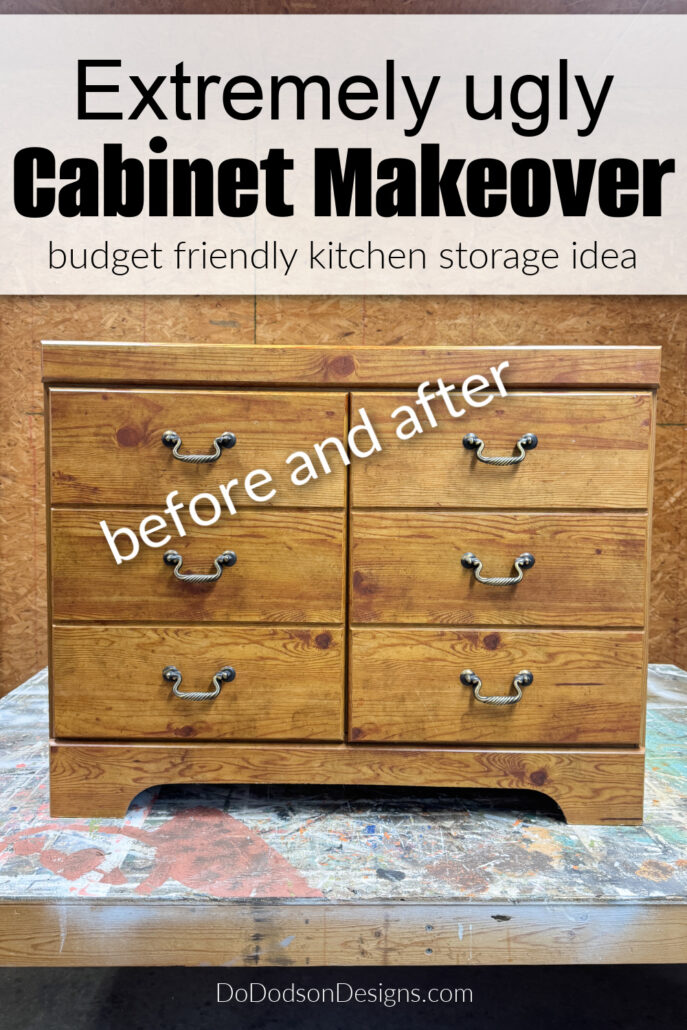
A few days later, he comes home with a 1990s pressboard cabinet (microwave stand) that he purchased from Facebook Marketplace for $40. It looks like a dresser but lacks actual drawers. It has faux drawers, weird. So, his question to me was, “Can you make this match our kitchen cabinets?”
Challenge accepted! The things I do for this man. HIS ice maker needs a place to live in our kitchen, and I needed to make this work. I’ve been putting it off, but I think it’s finally time to tackle the shiplap cabinet makeover! I also need to add a butcher block top to match our current countertops. It turned out to be the perfect little rolling cabinet for our kitchen.

SUPPLY LIST:
- cabinet (pick a style that matches your kitchen cabinets)
- 5-1/4-inch white primed shiplap
- Liquid Nail Heavy-Duty construction adhesive
- 2×4 lumber (base support)
- wood filler
- white painter’s caulk
- 1×6 white primed spruce pine
- Miter Saw
- Pneumatic Nail Gun with Air Compressor
- brad nails
- 1-inch swivel caster wheels
- Bonding BOSS (white) Dixie Belle Paint Company
- Alabaster SW White Emerald Erethane Trim Enamel Paint
- smooth roller kit Dixie Belle Paint Company
- paintbrush Dixie Belle Paint Company
- Butcherblock Counter Top
- cabinet hardware
Cabinet Makeover Reconstruction
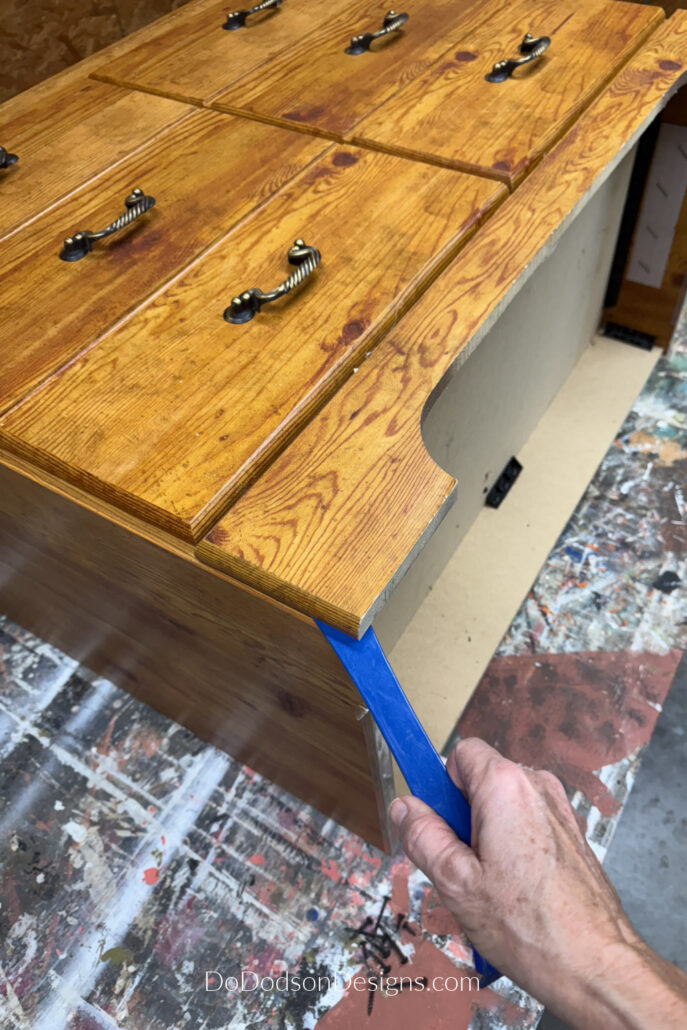
After a closer inspection of this cabinet, it did have some solid wood trim around the base and the top after all. However, the design wouldn’t match my kitchen cabinets. So, I used a pry bar to remove the trim.
The plan? Replace the trim around the base and top with a clean, solid piece of wood that features clean lines without decorative cutouts.
Replacing The Trim
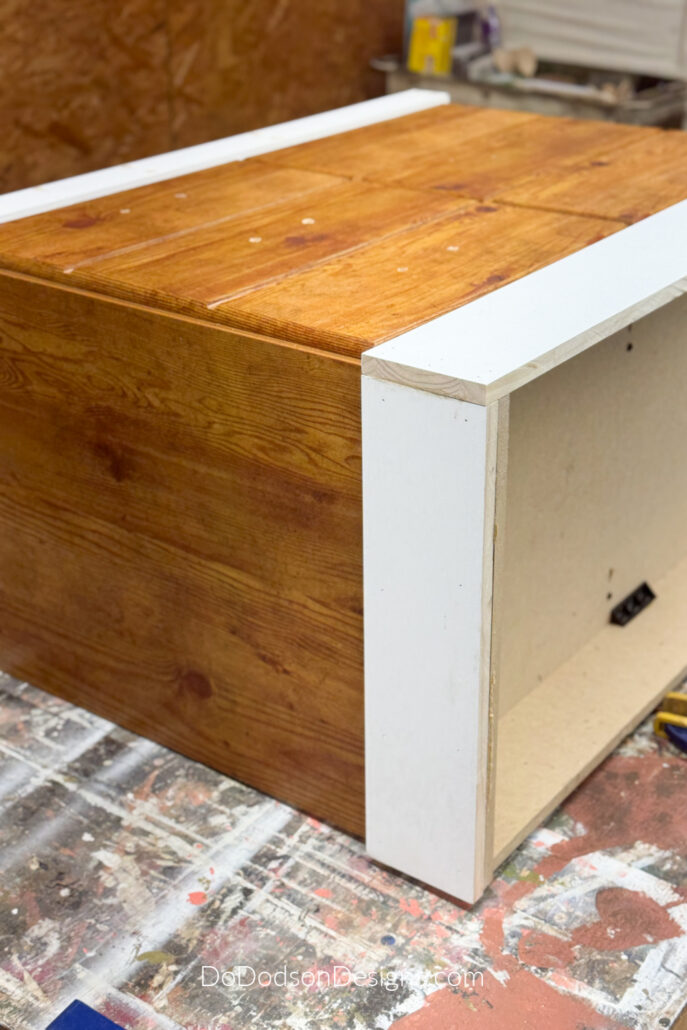
Using a 1×6-inch white primed board, which we had leftover from my office makeover (more on that soon), we trimmed around the base of the cabinet. For the upper, we used a 1×3.
The sides on the ends were also trimmed with a 1-1/2 inch square moulding. This created a recess on the ends of the cabinet where the shiplap will be installed. Why shiplap? Because it will match our kitchen backsplash and the ends of our kitchen island.
The sizes of the trim pieces were determined by the ones that were removed.
Adding Shiplap To The Cabinet Makeover
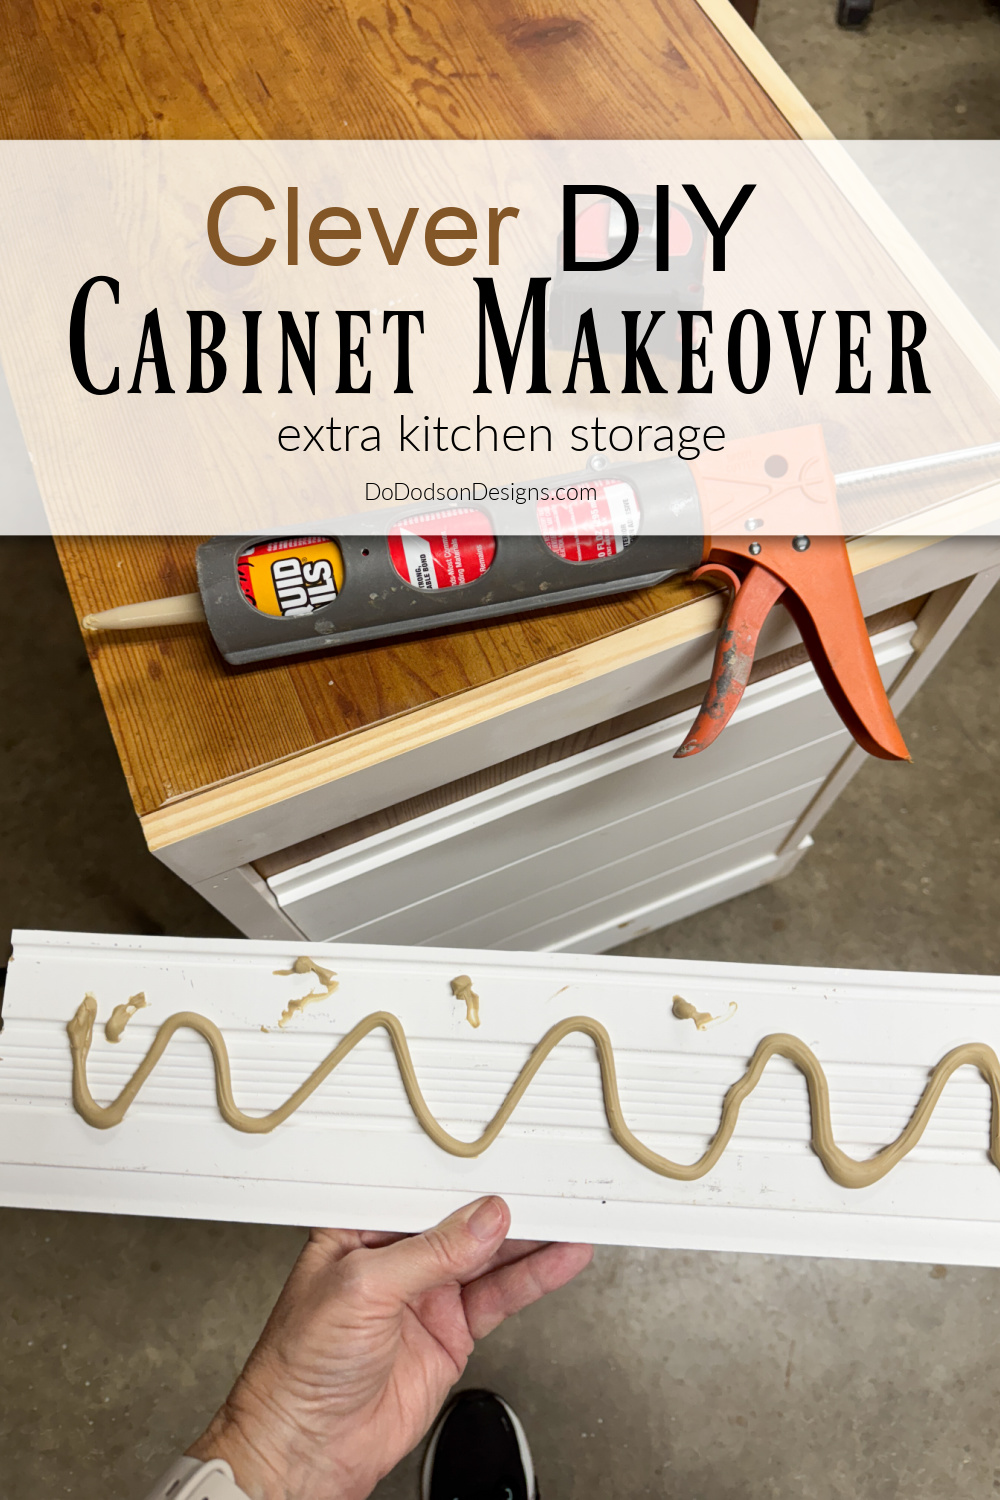
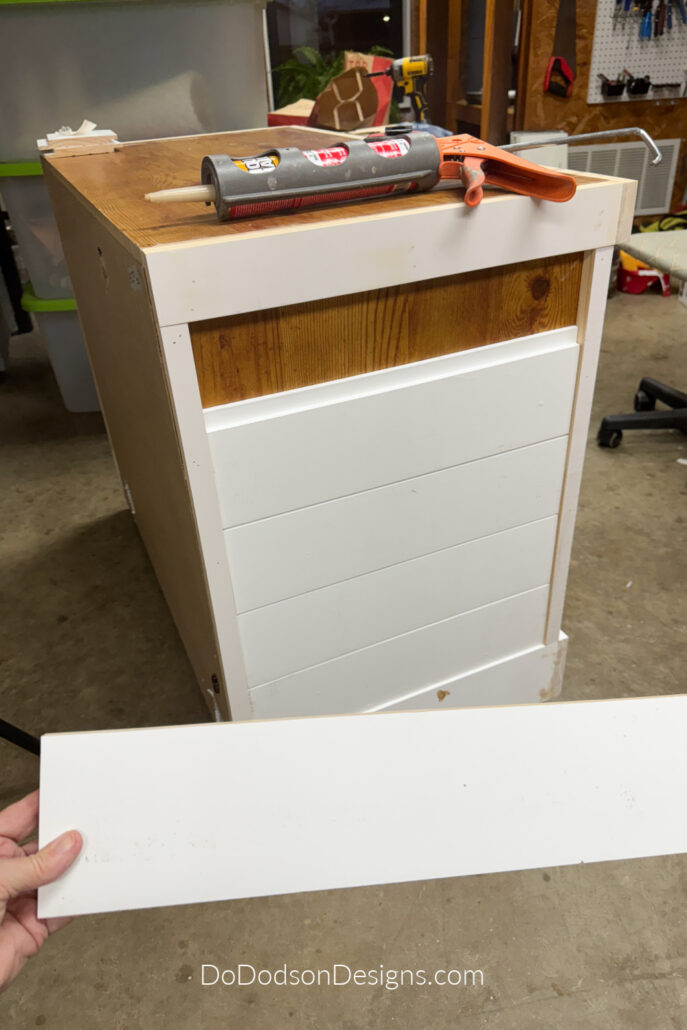
After carefully and meticulously measuring each piece of shiplap, I attached each piece with liquid nail adhesive. Finish nails were added to secure them in place. This cabinet will be moved around frequently, so it needs to be sturdy.
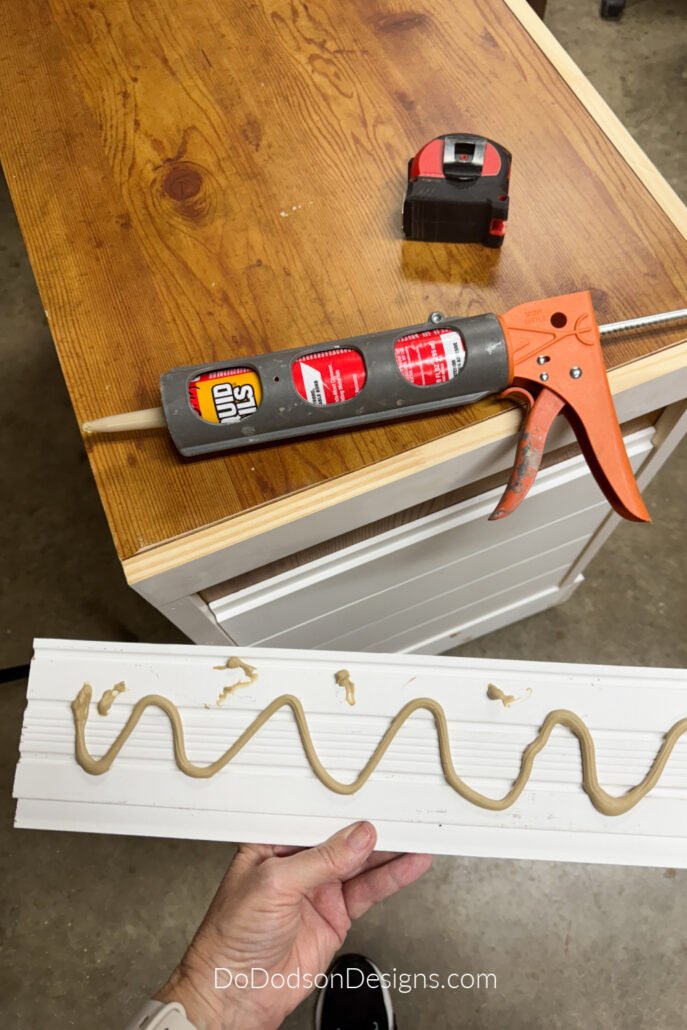
I highly recommend adding the shiplap from the bottom up. If the last piece needs to be cut to fit, it will not be as visible.
The tiny nail holes were filled with wood filler and sanded smooth.
I decided to leave the back unfinished, as we plan to store it against a wall.
However, I do have another cabinet makeover we did, which was made from a dresser I used as a rolling kitchen island. I used it frequently in our small kitchen at our previous home. CLICK HERE to see that upcycle.
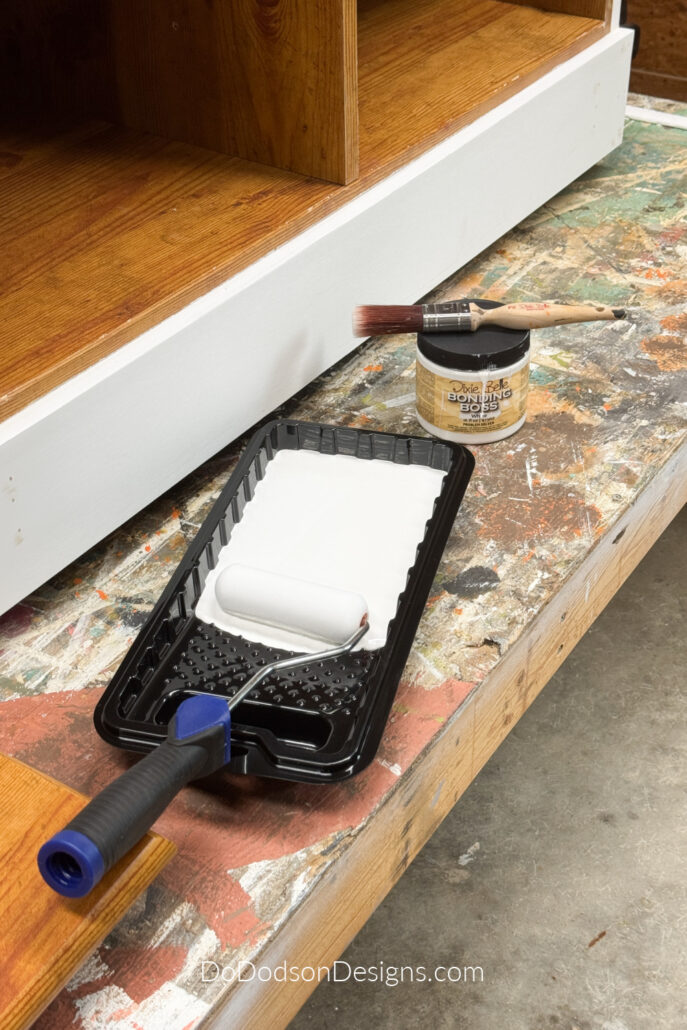
Using a Bonding Primer Before Paint
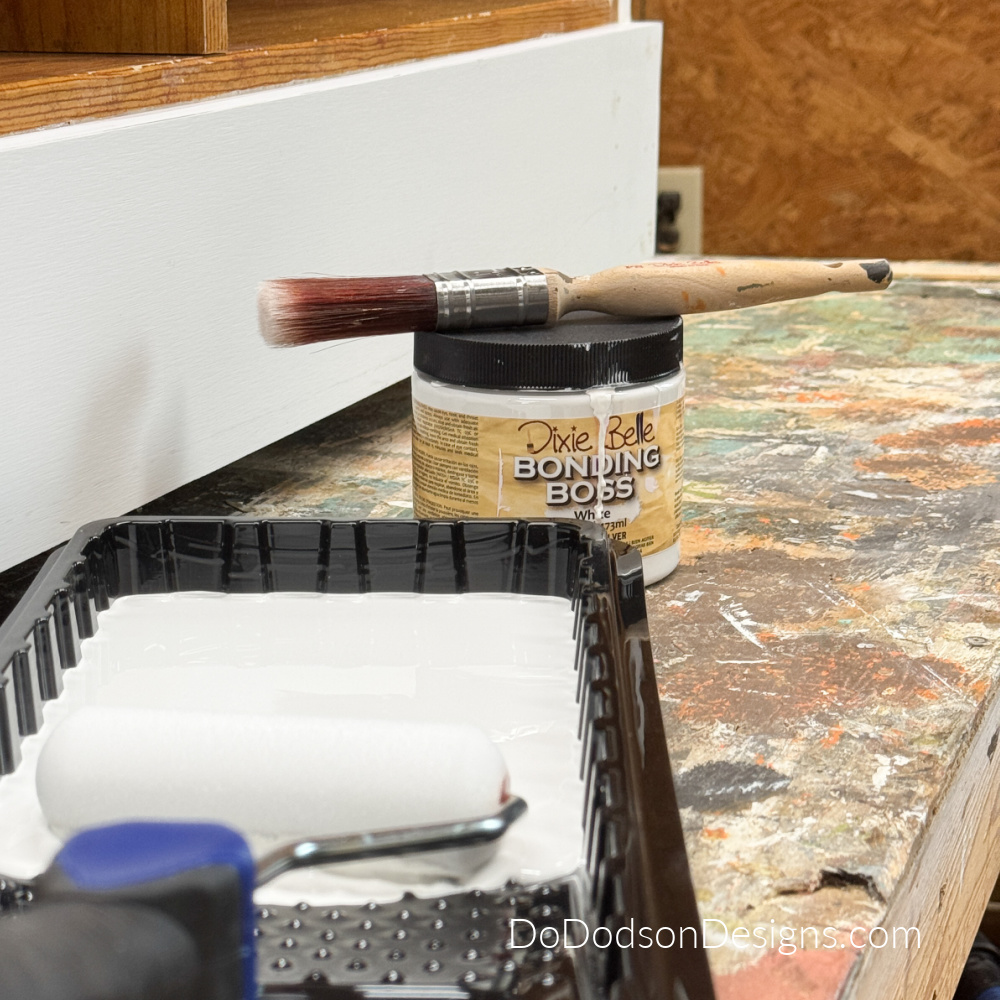
I’m old-school and believe that all painted surfaces need a primer, and this cabinet makeover is no exception, mainly because it has laminate over the particleboard, which makes it shiny and slick.
The Bonding BOSS and a smooth foam roller by Dixie Belle Paint Company were just the right products for this job. Paint will not adhere properly without a bonding primer. This primer creates a surface that allows paint to bond easily to almost any surface, including glass, ceramic, laminate, metal, concrete, walls, furniture, and cabinets.
Always thoroughly clean the surface with White Lightning Cleaner first, ensuring it’s completely dry. Then, apply the bonding primer using a soft roller, and cut in the areas the roller can’t reach with a high-quality synthetic paintbrush. Allow to dry, then apply a second coat in the same manner.
The roller is a game changer when it comes to a smooth finish, and the finished project is only as good as the primer, in my honest opinion. I love using this smooth roller kit for these quick and easy jobs, and Dixie Belle has roller refills, so you’ll always be ready for your next big DIY project.
If you have areas that may have dripped or run during application, use fine-grit sandpaper to smooth them before painting, after the primer has had ample time to dry.
Using Caulk For A Seemless Look
To give this cabinet makeover a seamless look, I applied paintable white painters’ caulk to all the areas where wood meets wood.
Not my favorite thing to work with, but I manage with a ton of wet paper towels. It’s a sticky mess, and it was apparent I needed practice. There’s definitely an art to applying caulk, and it’s one I haven’t mastered.
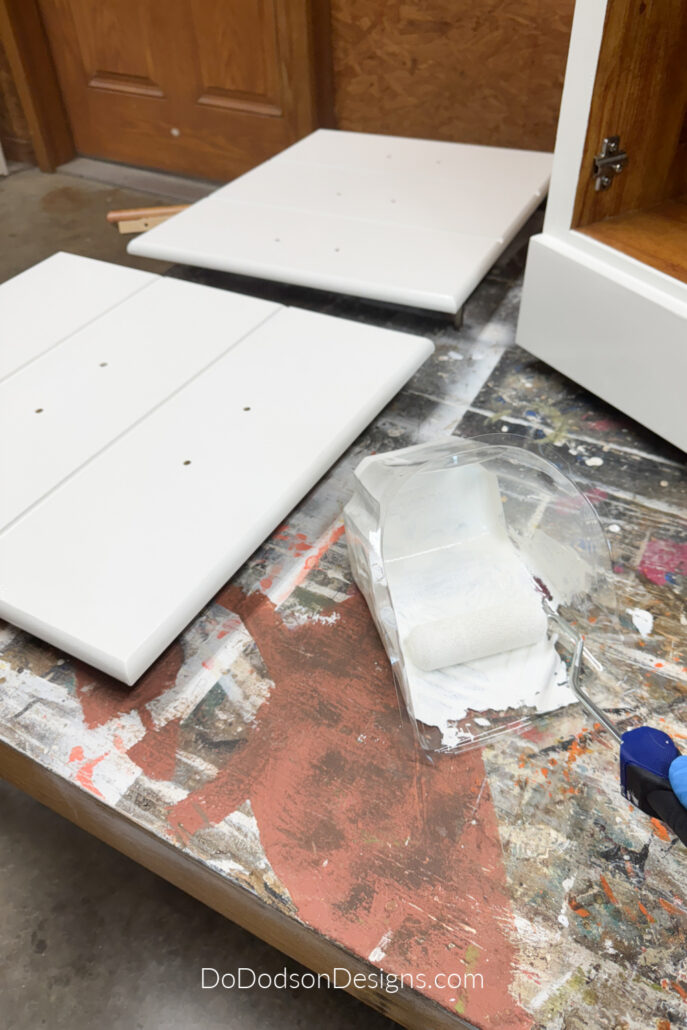
Matching Paint (Kitchen Cabinets)
While the kitchen cabinets were sprayed with a paint gun, I opted to use a 1/4-inch nap roller and a high-quality synthetic paintbrush to apply the paint. The paintbrush reached the areas that the roller couldn’t. For a smaller job like this, it’s the best option in my honest opinion.
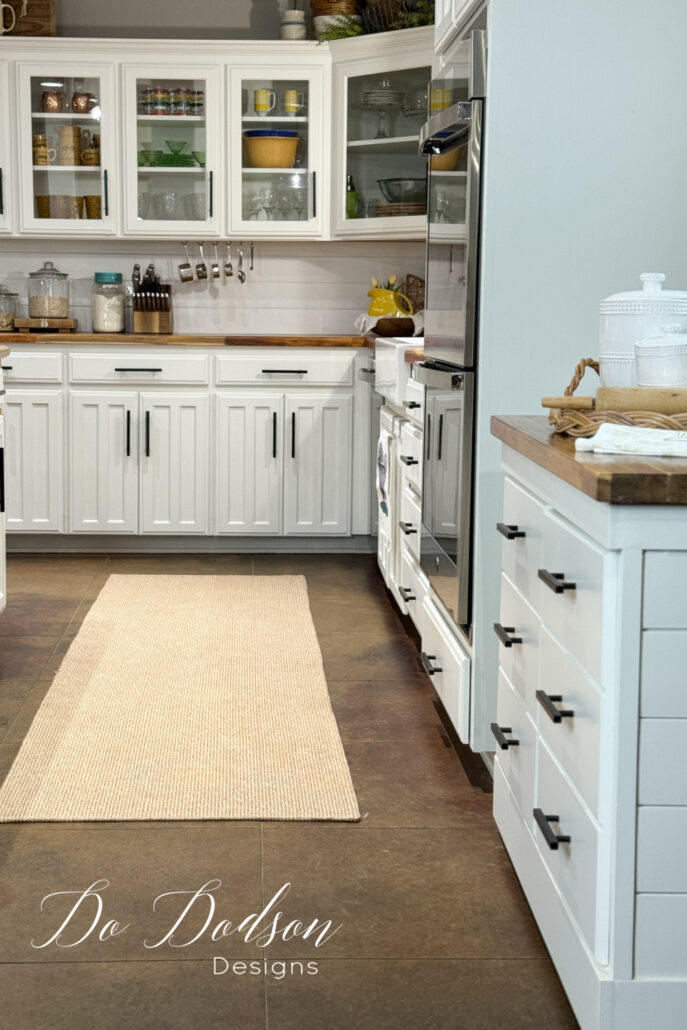
When it was time for my cabinet makeover, I wanted it to match my existing kitchen cabinets for aesthetic reasons, of course. There are many ways to make a cabinet makeover unique, but if you want it to blend in, it becomes more challenging. To achieve a perfect match, the best approach is to use the same paint color and product that were used to paint the kitchen cabinets. The cabinet color I used is SW 7008 Alabaster White. The cabinets are definitely the highlight of my kitchen.
Cabinet color * SW 7008 Alabaster White
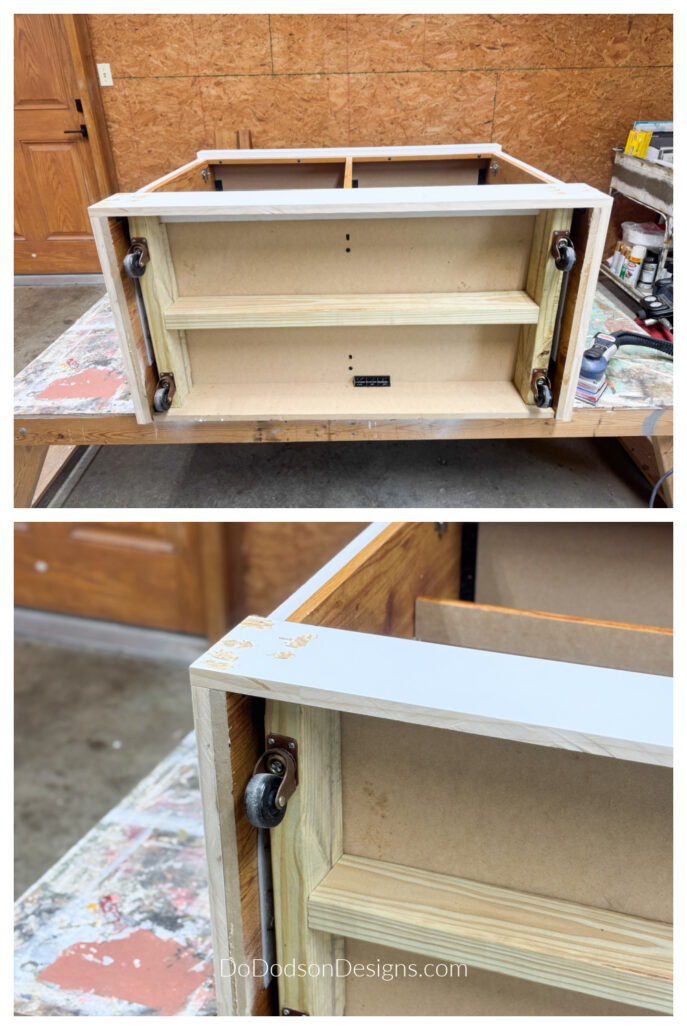
Adding Swivel Rollers
Because the cabinet will be moved frequently (and I’ll need to sweep the dog hair out from under it), adding rollers to the underside was important to me.
This part of the cabinet makeover was not something I had a hand in. Shocker, right? All I can tell you is that my hubby used 2x4s to reinforce the base’s structure. This was needed because we were adding a butcher block top that was leftover from our kitchen renovation.
We added 1-inch swivel caster wheels that are recessed just enough to be hidden from view. Additionally, we carefully selected the hardware to match the kitchen cabinets for a cohesive look.
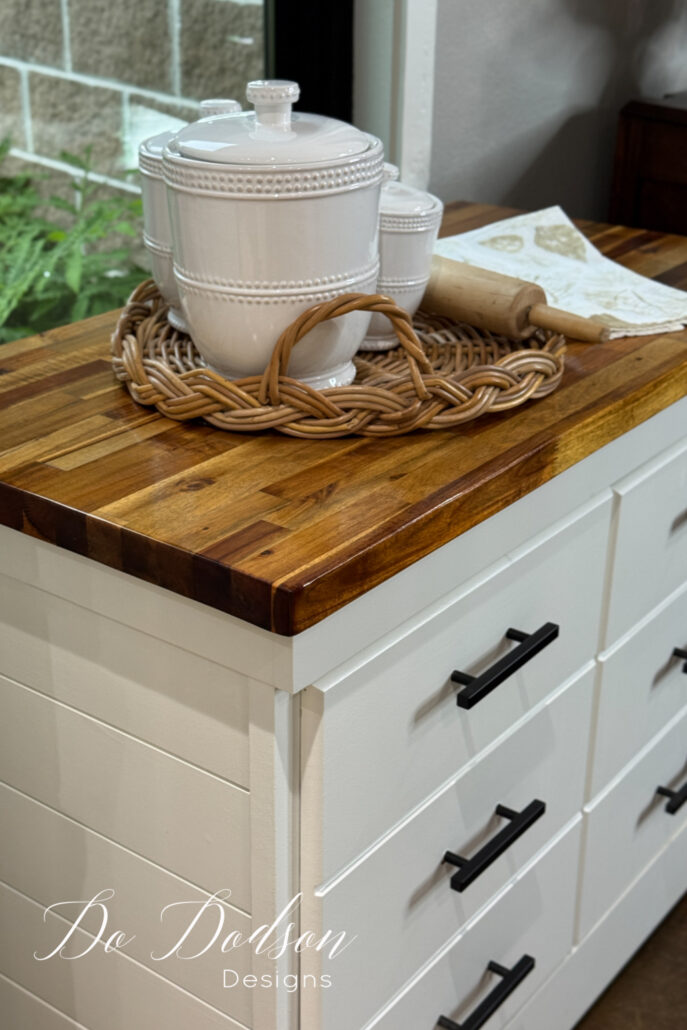
We laid the butcher block on top of the cabinet. It’s heavy enough that there was no need for attachment.
*To add legs and wheels to any piece of furniture, you will need to have enough structural support so that the piece of furniture can hold its weight. The structure will vary depending on the shape of your particular piece of furniture, and the size and placement of the legs and wheels must match the size and placement of the furniture itself.
For more DIY shiplap projects, I’ve listed a few below if you want more inspo.
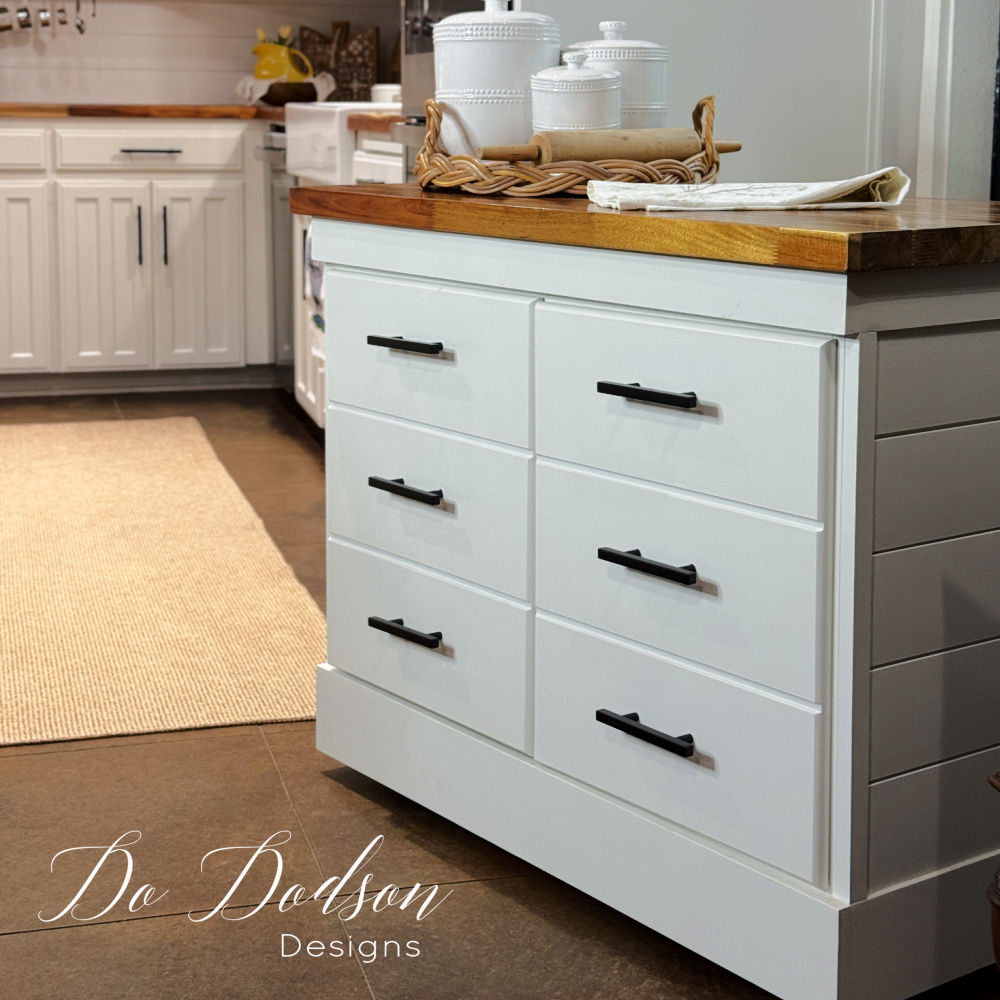
Introducing… The New Shiplap Cabinet
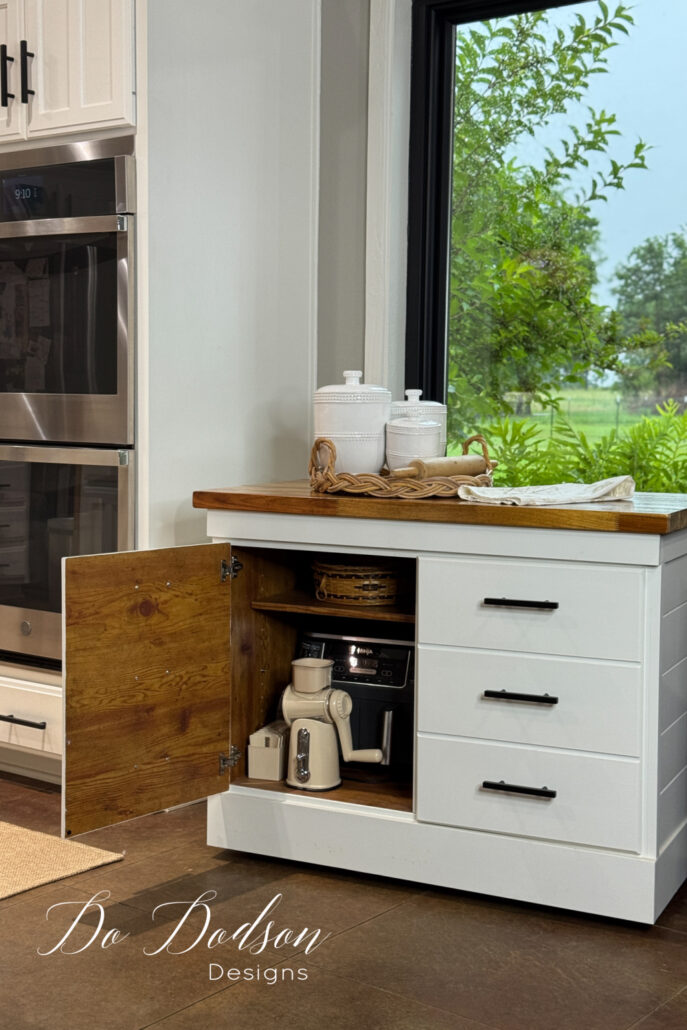
And before I show you the staged and final photos, I must be honest and say that this beautiful cabinet will be used as an ice station for my “Birthday gift”, tucked away in a corner. It looks so lonely and cold.
All I can say is ice, ice, baby. 🎤🧊
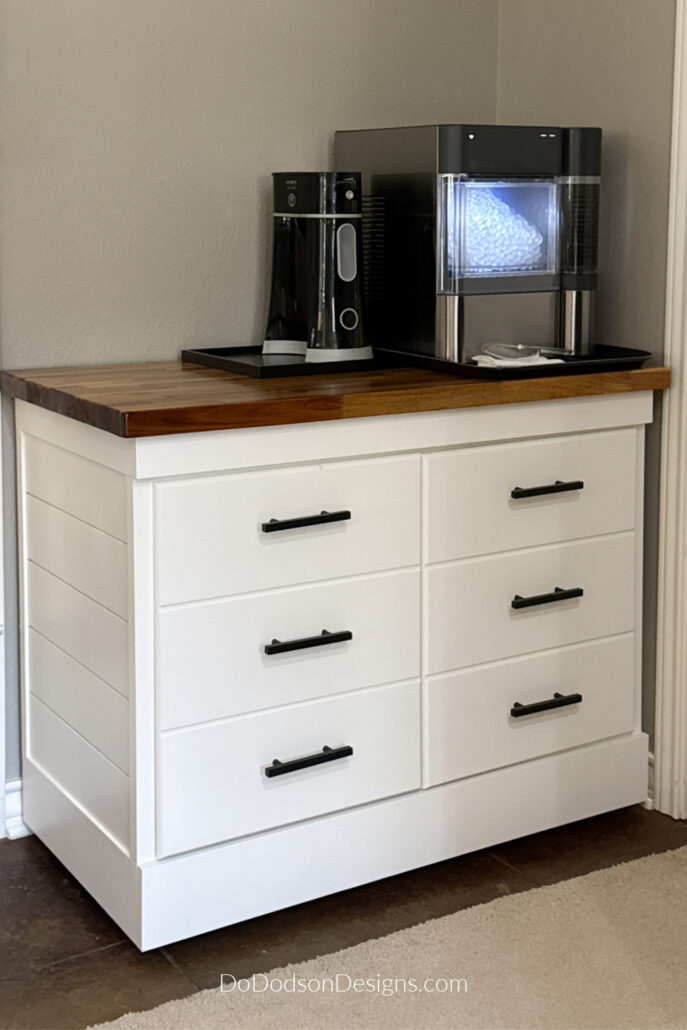
But this! It’s now a charming shiplap, farmhouse-style cabinet with roller wheels, a matching butcher block top, and ample storage space underneath. You would never know by looking at it that it was made with pressed board. Plus, it added extra storage space in our kitchen. Who doesn’t need more space? I love the new look.
I had some serious doubts, but I am glad we tried it anyway. The vision may not have been there, but exploring what could be surprised us both. If nothing else, we got some good experiences from the attempt.
Thank you for joining me today, and I hope this DIY cabinet makeover project inspires you to take on new challenges. Use what you have. Nothing good ever came from not trying. And to think it all started with a birthday gift. 😏 I do like the ice machine.
I welcome any and all comments, suggestions, and critiques. It’s how we learn. Don’t forget to share, save, and PIN this one to your favorite DIY home project board on Pinterest.
Until the next project… xo, Do
This is SO clever and it looks awesome in your gorgeous kitchen Do! You did an amazing job at matching it up perfectly! Pinned XOXO
Thanks Denise! It was a challenge but it works for us. And I get great ice. 😂 Thanks for sharing. Have a great weekend. 🙂☀️
This is beautiful! I have a white cabinet similar that I bought for my kitchen But, yours is so much Better and pretty. Thanks for sharing.
Thanks Lorraine! It’s getting used a lot. Thanks for reading. Have a great weekend. 🙂
Love your new cabinet. Also Happy belated birthday. But, I really love the new cabinet. it just blends right in. If I hadn’t read the post, I never would have known it wasn’t there before.
Thank you, Ellen! I’m pretty happy with it even if it’s particle board. 😂 But seriously, thanks for reading and I appreciate you taking the time to comment. Have a great week. ☀️