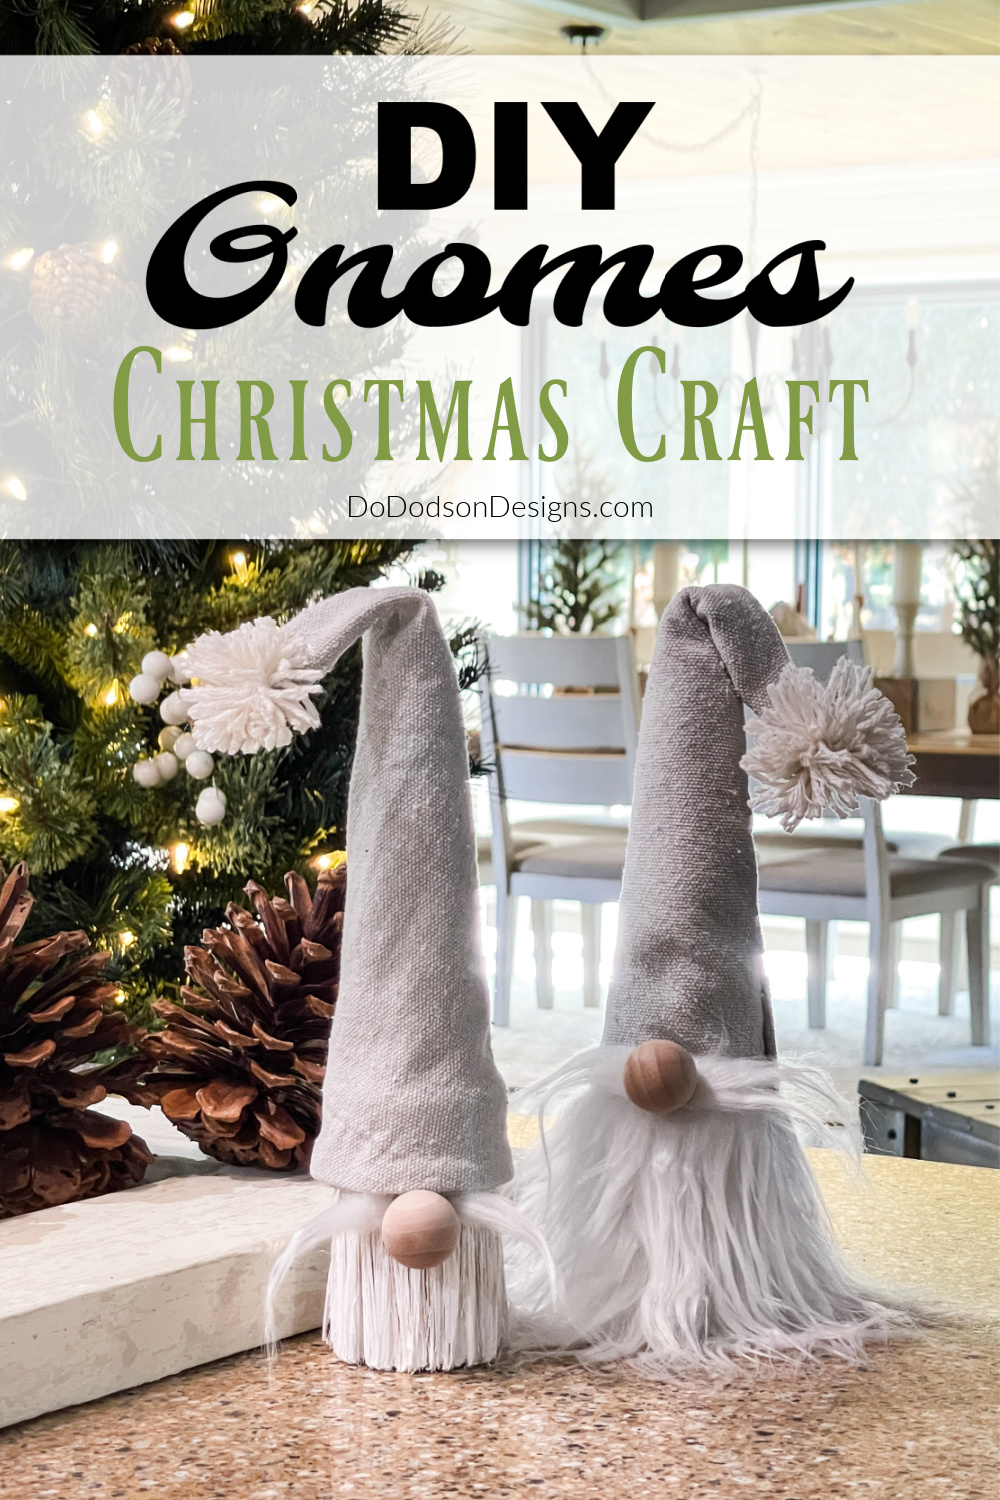
Hey, triple-D friends! Are you looking for a fun Christmas craft idea? How about an easy DIY Christmas Gnome made from leftover paintbrushes? If you’re a crafter like me, you probably have everything you need to make these adorable gnomies. Let me show you how to make a most unusual gnome with my easy-to-follow instructions.
Thanks to Dixie Belle Paint Co. for sponsoring this post. While I was compensated to write this post, all opinions are my own.
* As an Amazon Associate, I earn from qualifying purchases and through other companies as well. You will not be charged extra when you purchase through these affiliate links. I make a small commission that helps me create more amazing DIY projects to share with you! To see my full disclaimer, click here!
What To Use For A Gnome’s Body
When crafting these little guys, you’ll need a body (inside) to make these with white-bearded humanoid creatures. They remind me of gnarly little men. LOL, I still think they make cute Christmas decor.
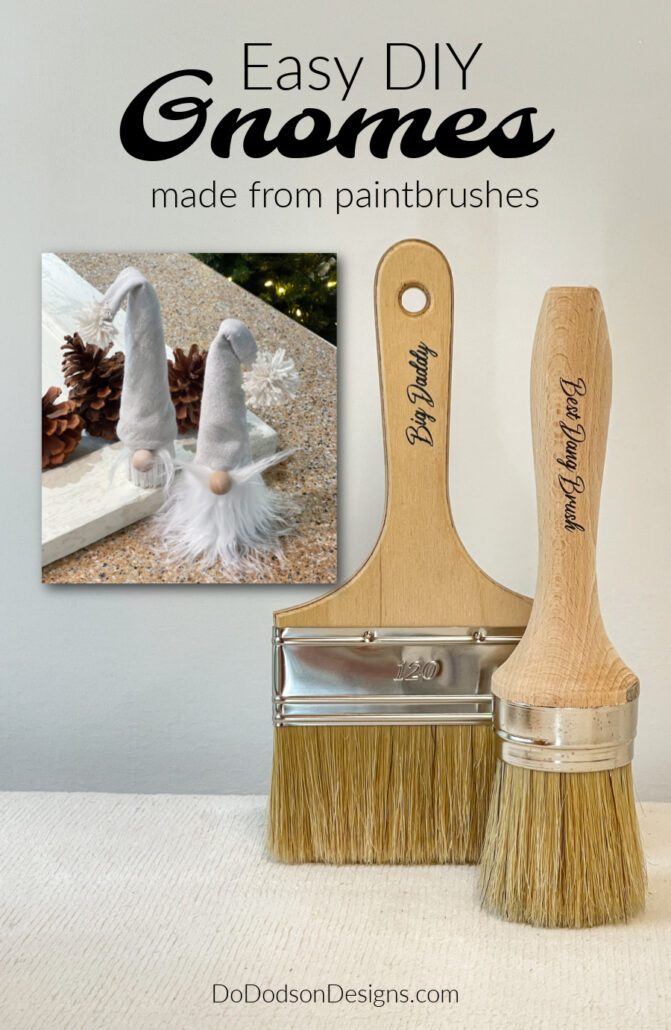
For the body, use old paintbrushes that are no longer in service. I’ll be using new paintbrushes for this DIY project because I cleaned out my studio a few weeks ago and decided to rid myself of all “I might use these someday” items. In those items were old wax brushes that had been well-loved. They would have been perfect for this gnome craft. Do not throw away old paintbrushes again. Note to self.
I KNEW I WOULD NEED THEM SOMEDAY! *sigh
I have seen the use of socks for the body, but I haven’t tried that one yet.
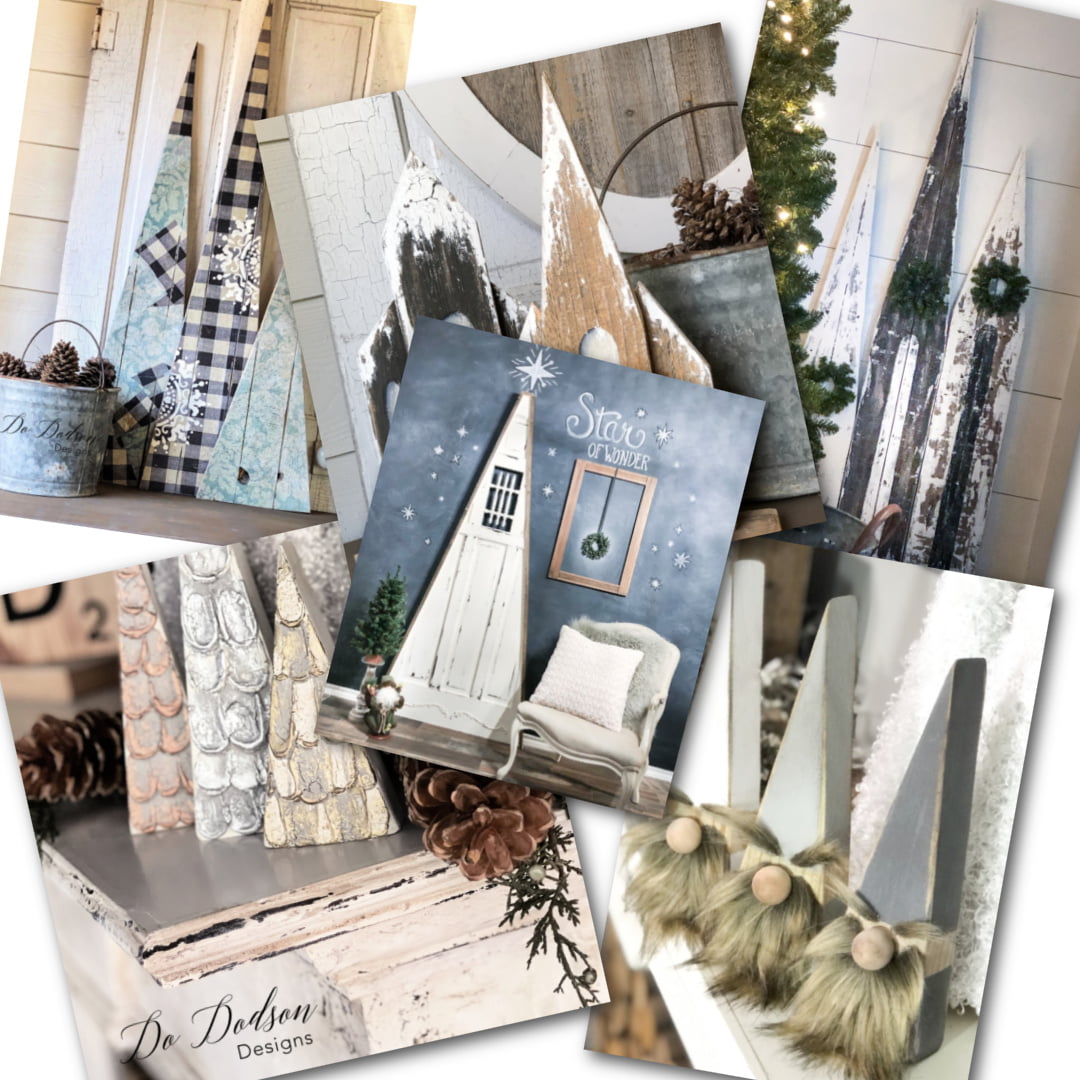
For more related Christmas projects, check out these below for more inspiration.

SUPPLY LIST:
- Best Dang Brush and Big Daddy Brush old paintbrushes/wax brushes
- Cotton (chalk mineral paint)
- Artist Brushes or craft brushes
- Sea Spray (texture additive)
- Fabric (felt, drop cloth, cotton, etc.)
- Faux craft fur (white)
- Hot glue gun and glue sticks
- Craft knife
- Scissors
- Cotton twine or yarn
- Wood balls or wooden beads (for the gnome nose)
How To Make This Cute Gnome
Firstly, you will not need a sewing machine. YAY!
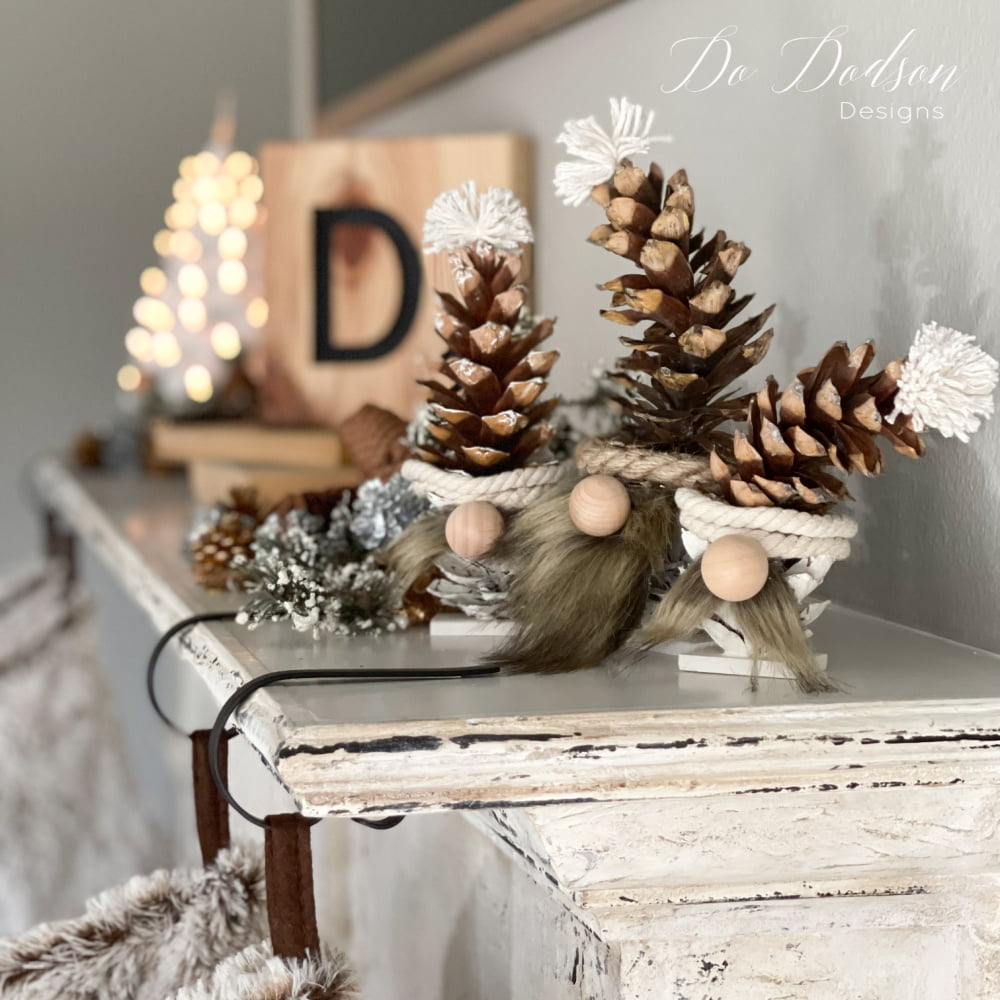
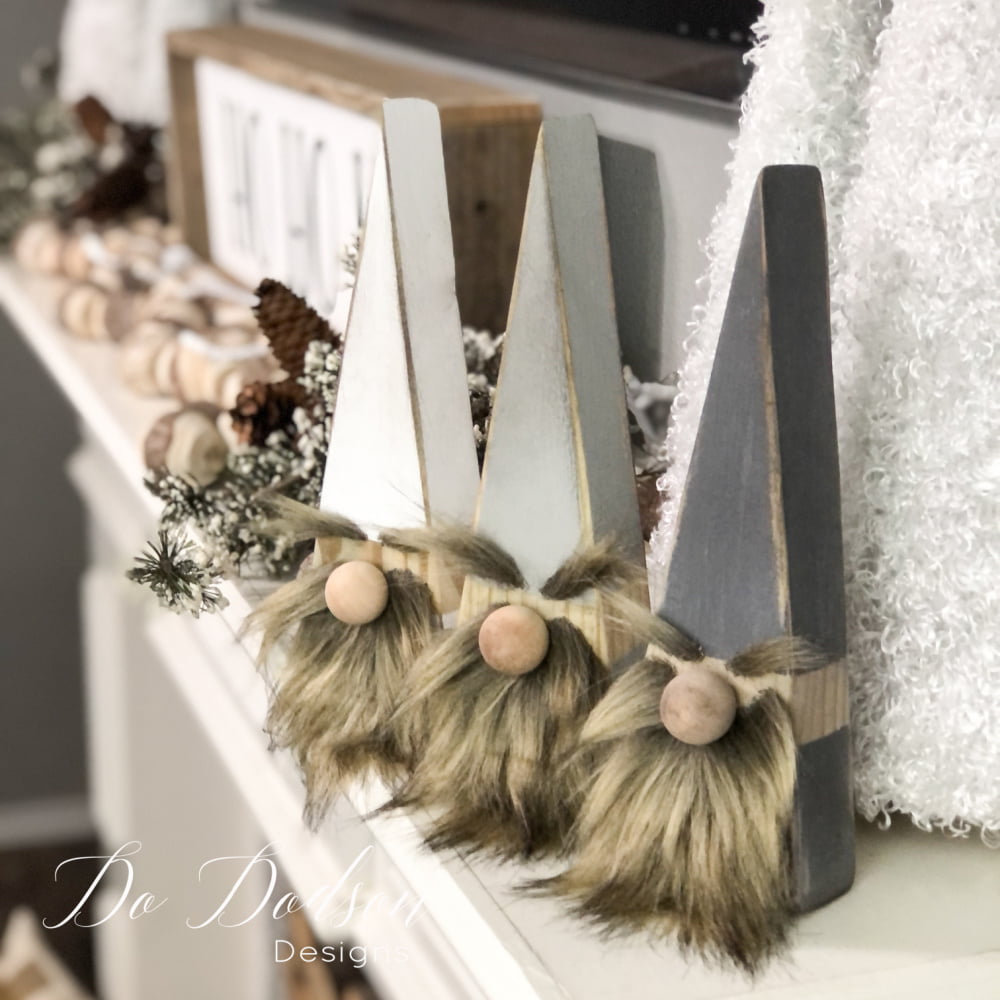
The first thing to do is to grab your old paintbrushes. Almost any paintbrush will do; I happen to like beefy wax brushes. The base is straight, and the bristles are stiff, making it perfect for my stand-alone gnomes.
If the paint bristles are already gummed up with paint, you’re good to go.
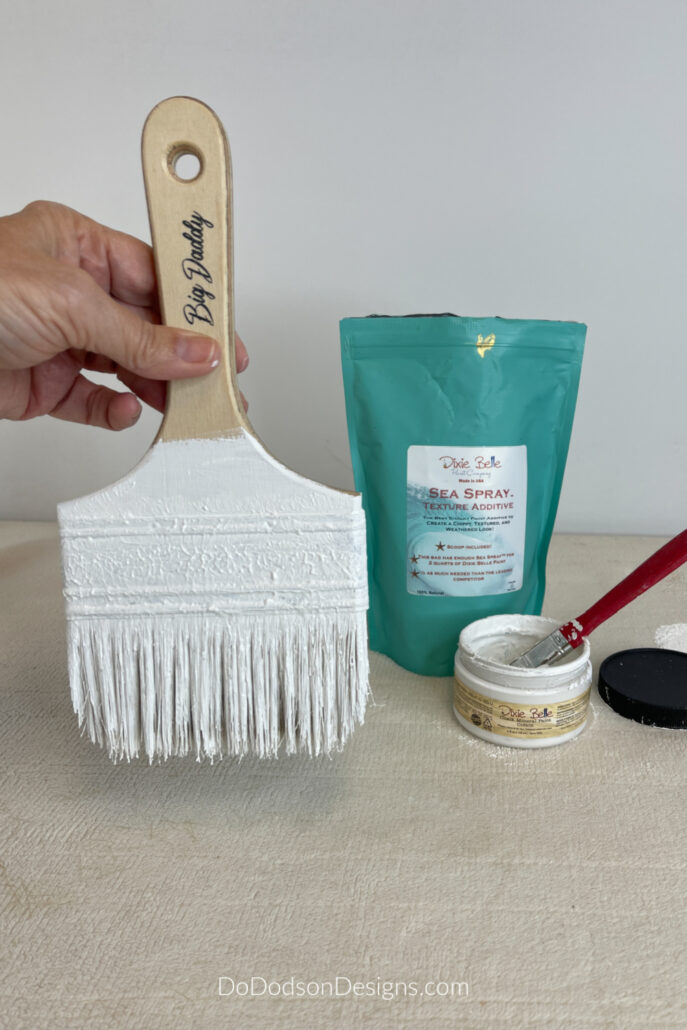
But I had to add paint and texture to new bristles; I used Dixie Belle Sea Spay and added it to my chalk mineral paint. I stirred it well and then applied it to the bristles. It doesn’t take much, and it’s super fun to work with.
You can also use old, chalky type paint that has become thick. For convenience, I added the texture.
I think I got carried away and painted and got it a little above the bristles, but I wasn’t sure exactly where to stop on the Big Daddy brush.
There’s no need to paint the handles as they will be covered with fabric.
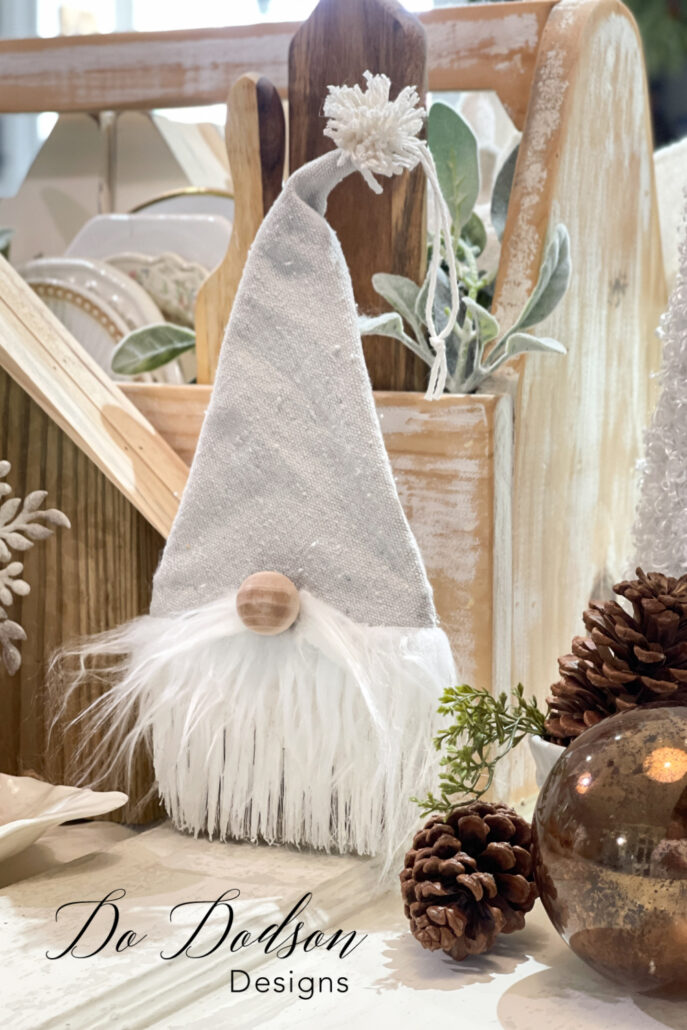
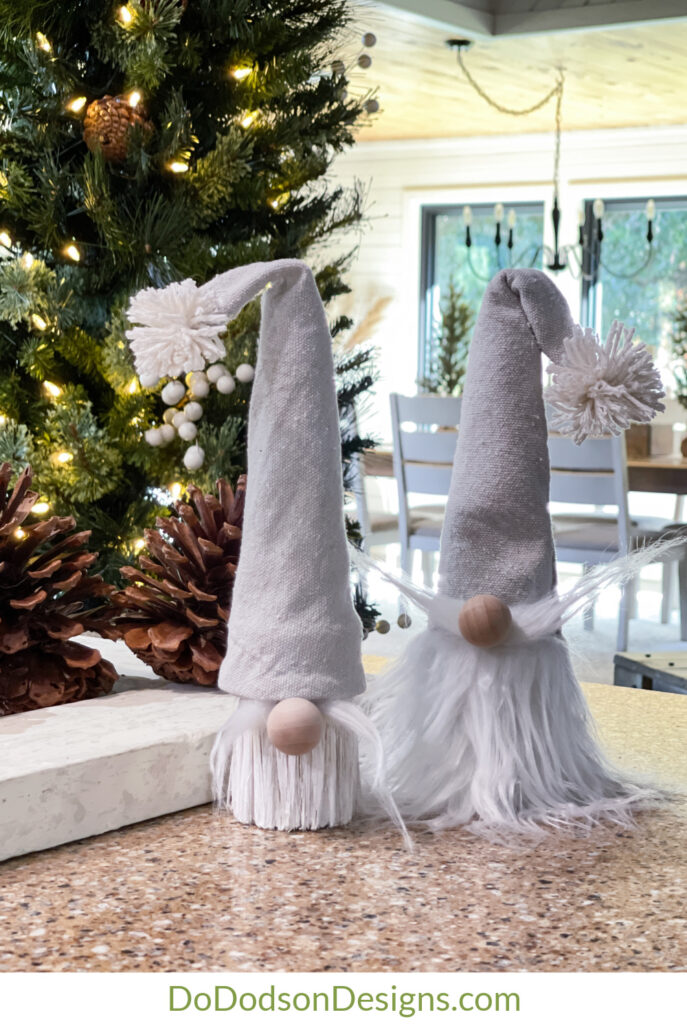
How To Make A Gnome Hat
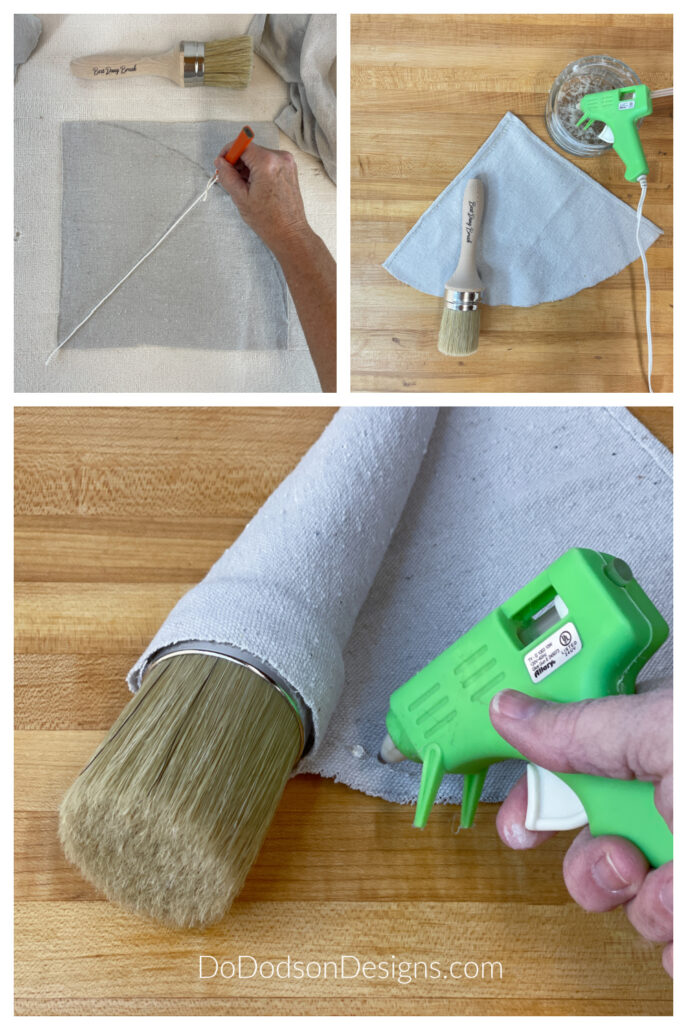
I had some leftover drop cloth fabric, which I’ll use to compliment my neutral farmhouse style. Of course, you can use any fabric you have. Felt is also a good option.
Start by measuring squares of your fabric that are a few inches taller than the paintbrush handle. If you don’t want your gnome hat to flip to the side, the measurement should be the same length or a bit longer than the handle. This isn’t an exact science. It’s just crafting.
Once your square is cut out for your DIY gnome, draw a quarter moon with a string and a pencil.
This piece will make a cone-shaped hat once rolled around the base of the brush.
Use hot glue to secure it in place.
*See the photo below for an example.
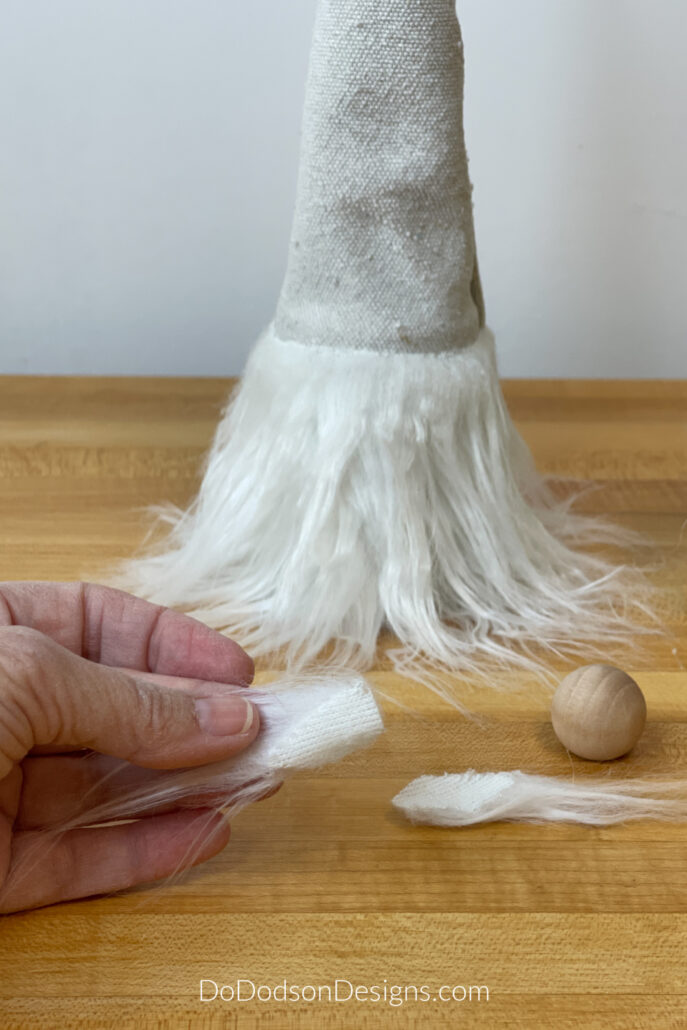
How To Make Gnome Beards
Making gnome beards is quick and easy. All you need is some faux fur and a sharp cutting utensil. Lordy, I couldn’t find my craft knife, so I grabbed hubby’s knife.
Start by measuring the amount you will need to wrap around the paintbrush.
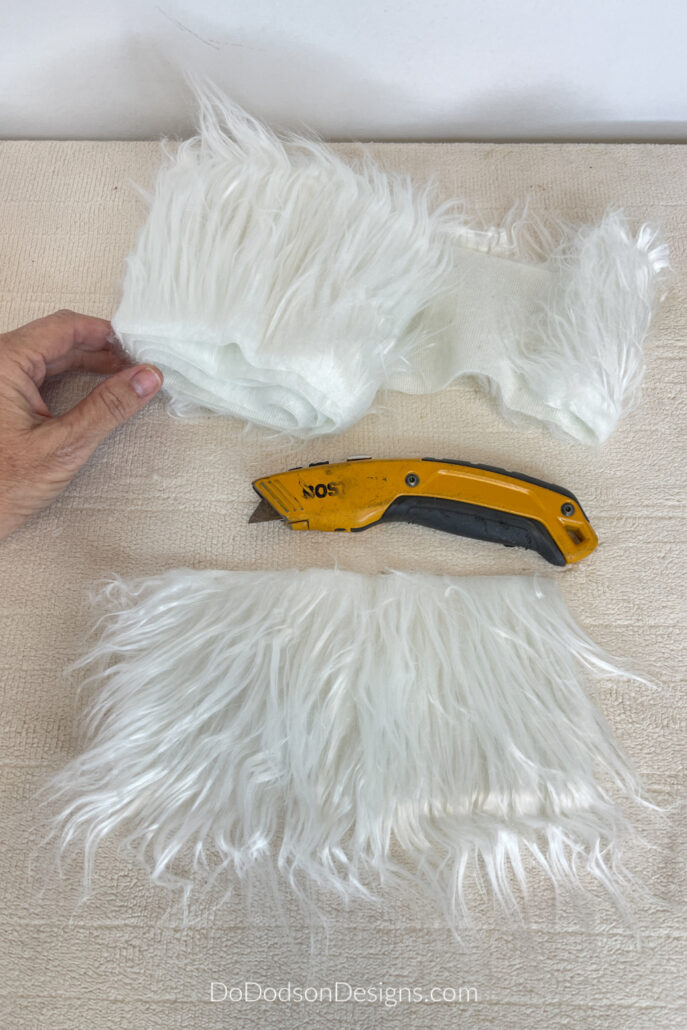
Cut the fur from the back using an exact knife or craft knife. DO NOT cut faux fur with scissors. Cutting from the back of the fur will prevent disturbing the fur on the front side without damaging or cutting into it.
Trust me! Using scissors will give your little gnomie a bad haircut, kind of like the one you may have given yourself as a small child. Funny but not cute.
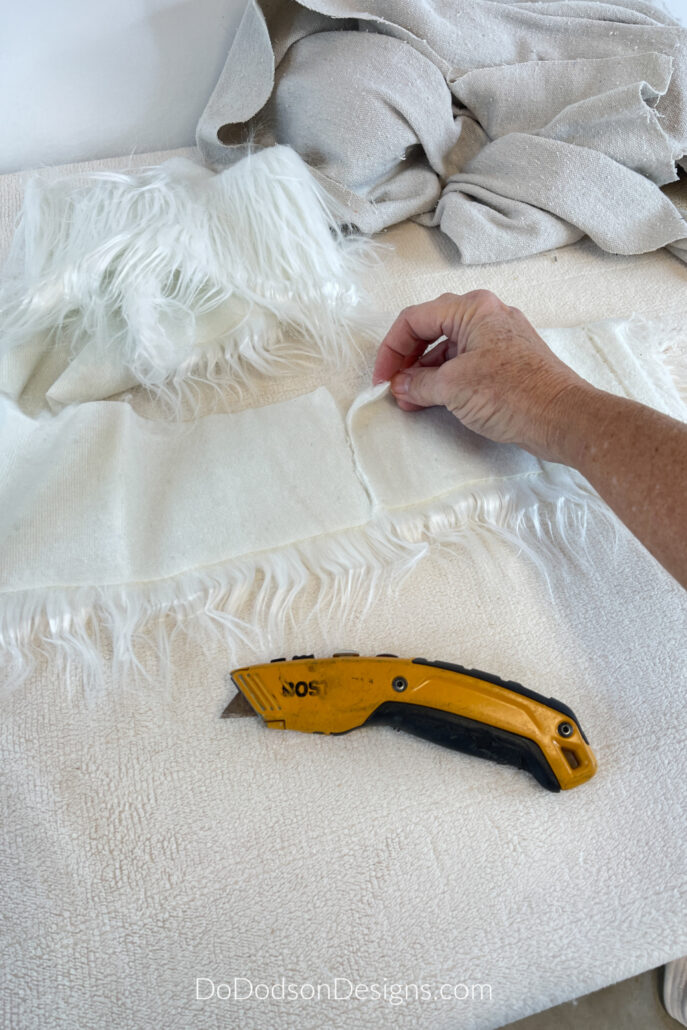
Wrap the fur around the base of the paintbrush, overlapping the fabric, and secure it with a hot glue gun. Ensure the fur’s backing doesn’t go past the paint bristles on the brush.
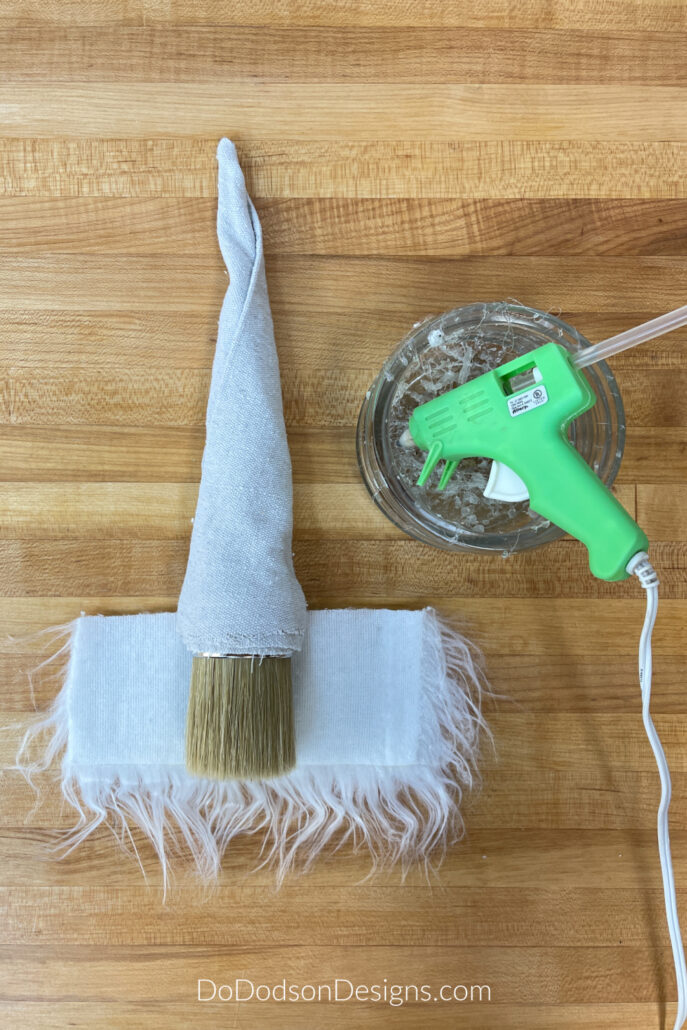
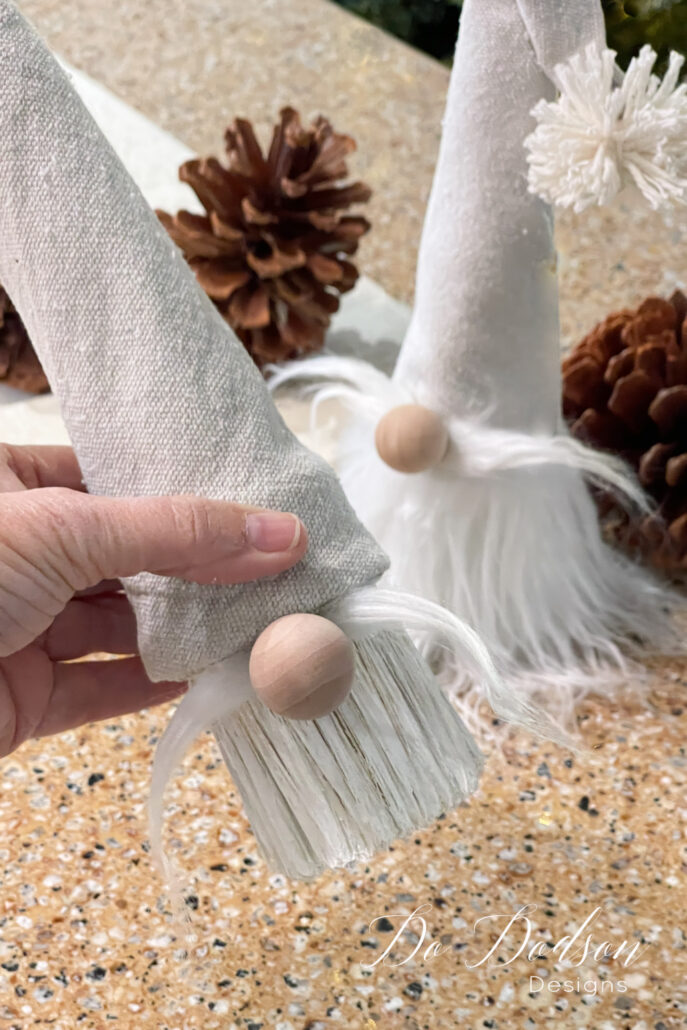
Next, cut out two small pieces of fur for the mustache and secure them right above the beard, leaving a small gap for the gnome’s nose placement. This is where you can get creative with the mustache. Up or down, it’s up to you.
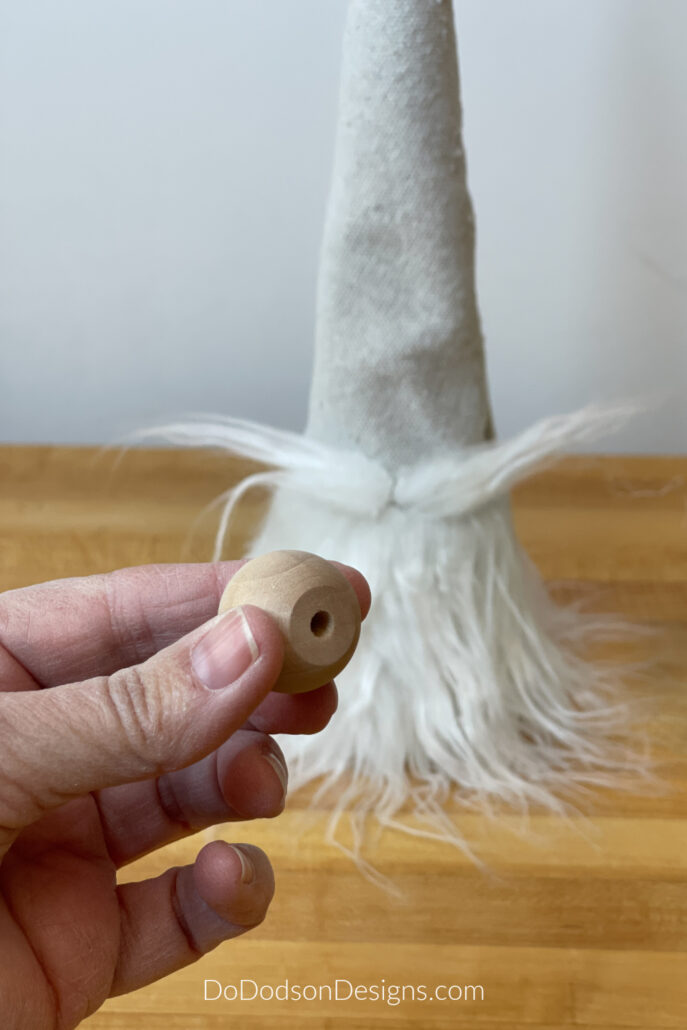
Adding The Gnome Noses
Using a simple wood bead or these unfinished wooden ball knob pulls and a bead of hot glue between the mustache will give the gnomies a quirky look that only these little guys can sport.
But I’ve known a few cowboys in my day that could pass for a gnome with a cowboy hat. Only in Texas. 🙂
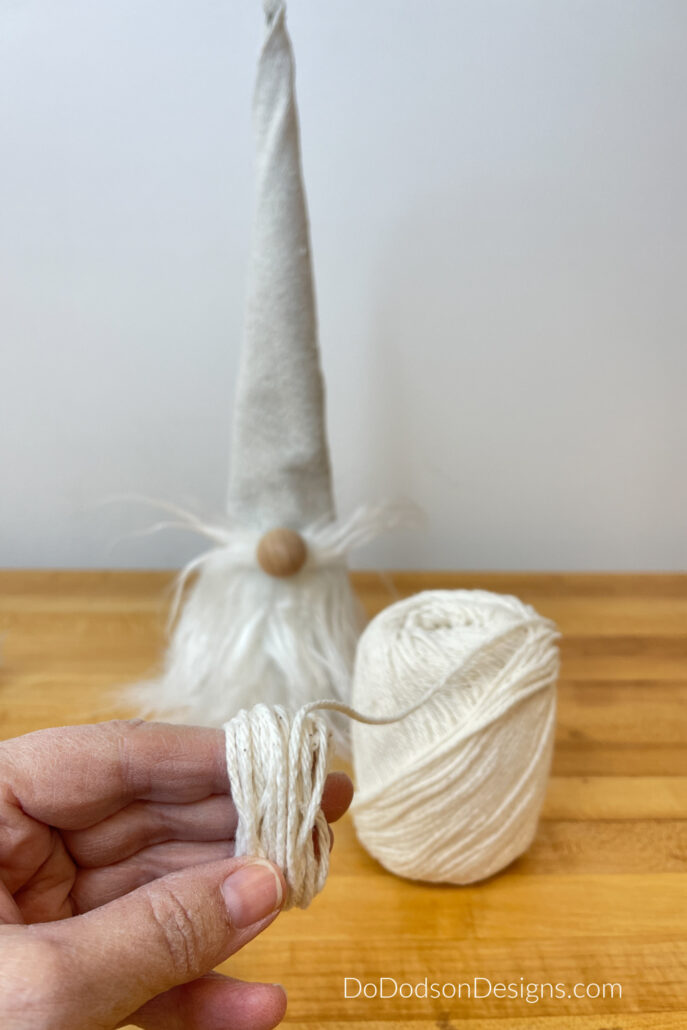
How To Make A Pom Pom
Okay, so pom poms are usually made with yarn (which I didn’t have), but you can use any string-type material. I used a cotton twine I found in my stash. Thank goodness I didn’t throw that out, too.
Using your fingers, wrap a good amount of the string around two to three fingers, depending on how large you want the pom pom. I’m guessing I did about 15- 20 wraps.
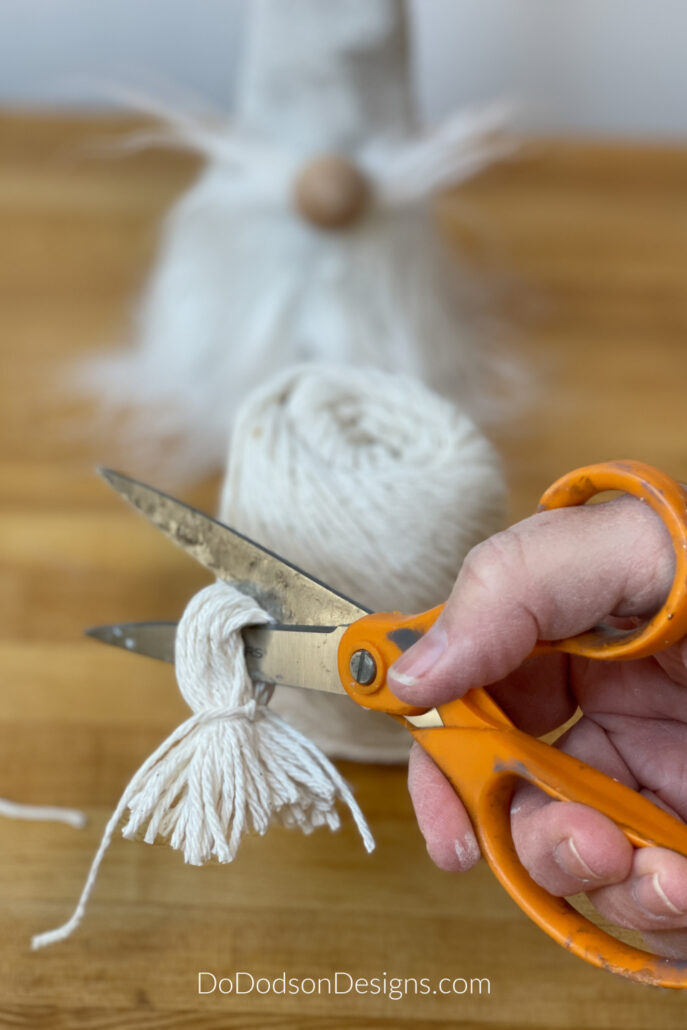
Cut the string after you feel like the pom pom is the thickness you need.
Next, use a separate piece of string to tie the strings together in the middle of the wrap. Use a double knot so that it’s secure.
Lastly, insert a pair of scissors between both ends of the string bundle and cut.
Fluff the pom pom and trim any longer pieces to make it more uniform. Secure it to the top of the gnome hat with glue. See the photo example below.
*You can also purchase ready-made pom poms from the Dollar Tree in a pinch.
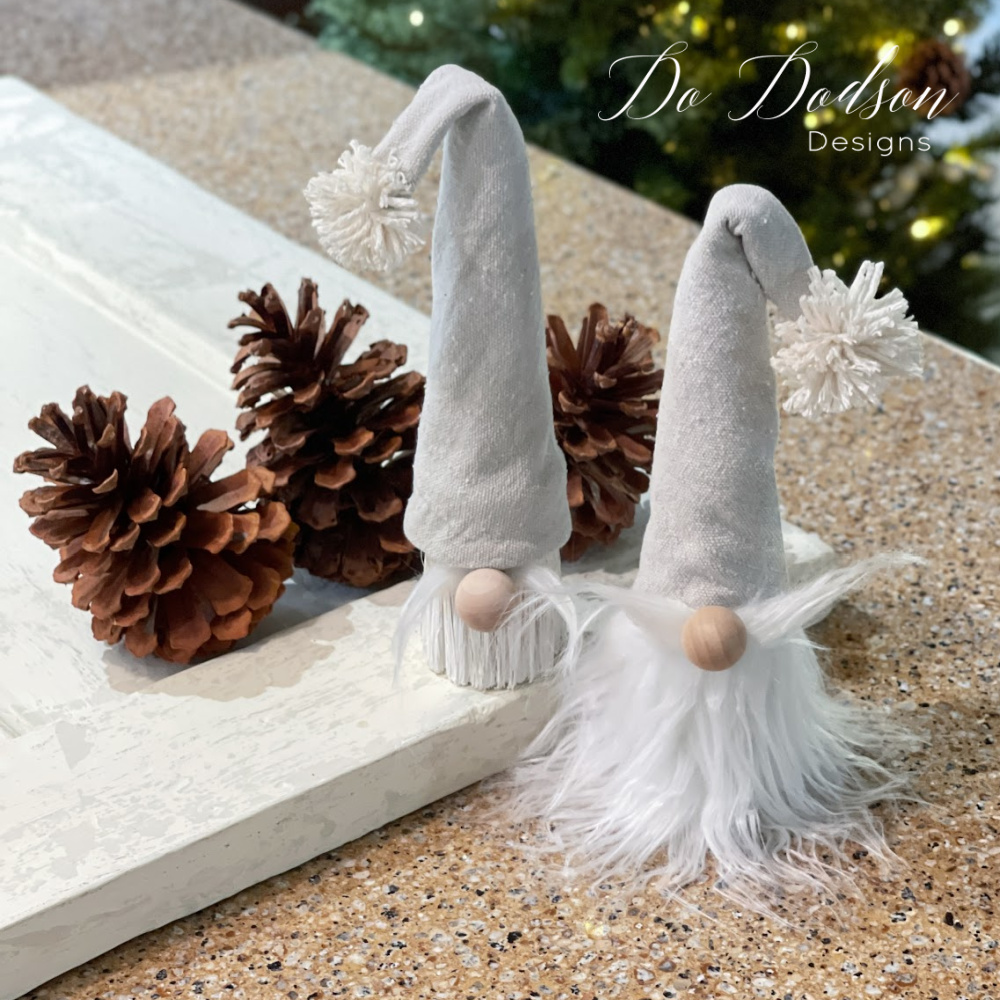
Adorable Holiday Decor Christmas Gnomes
Here’s the fun part! These paintbrush gnome ornaments can be used as door hangers, embellished on a front door wreath, hung from a doorknob inside your home, or tucked alongside your other holiday decor.
They’re not just for decorating the Christmas Tree.
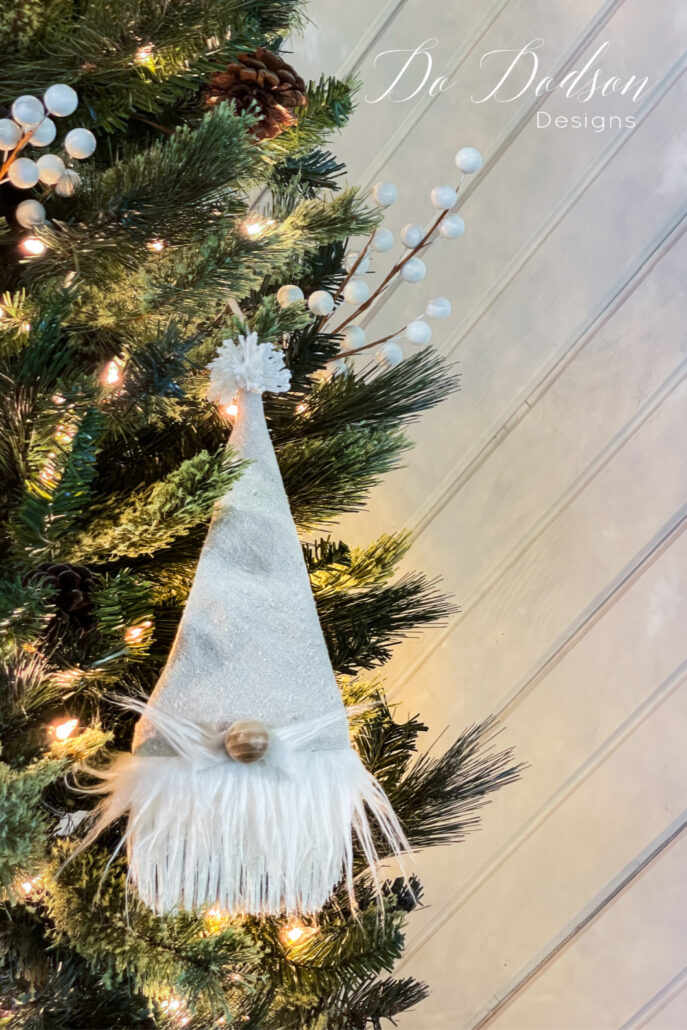
Use the big, beefy brushes that stand alone and display them on a shelf or mantle.
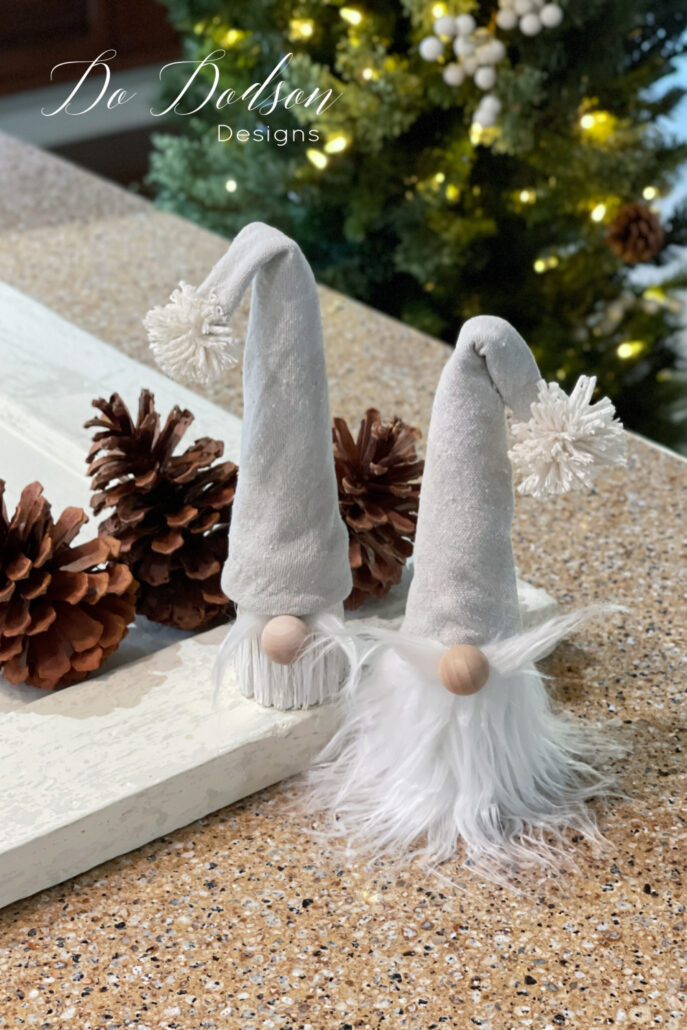
Feel free to add your own embellishments. The sky is the limit!
They also make great gifts for those who love to paint and flip furniture. It’s a gift in a gift. Wrap a new brush in a gnome outfit! I promise you’ll win the gift of the Year award.
Thanks for joining me today while I share my DIY Christmas gnome idea. I have to say I think this is my favorite DIY gnome craft to date.
Did you like this idea? Got something to add that I may have missed. I’d love to hear from you in the comment section or say hi so that I know you stopped by.
Merry Christmas, and happy crafting!
Until the next project… xo, Do
