
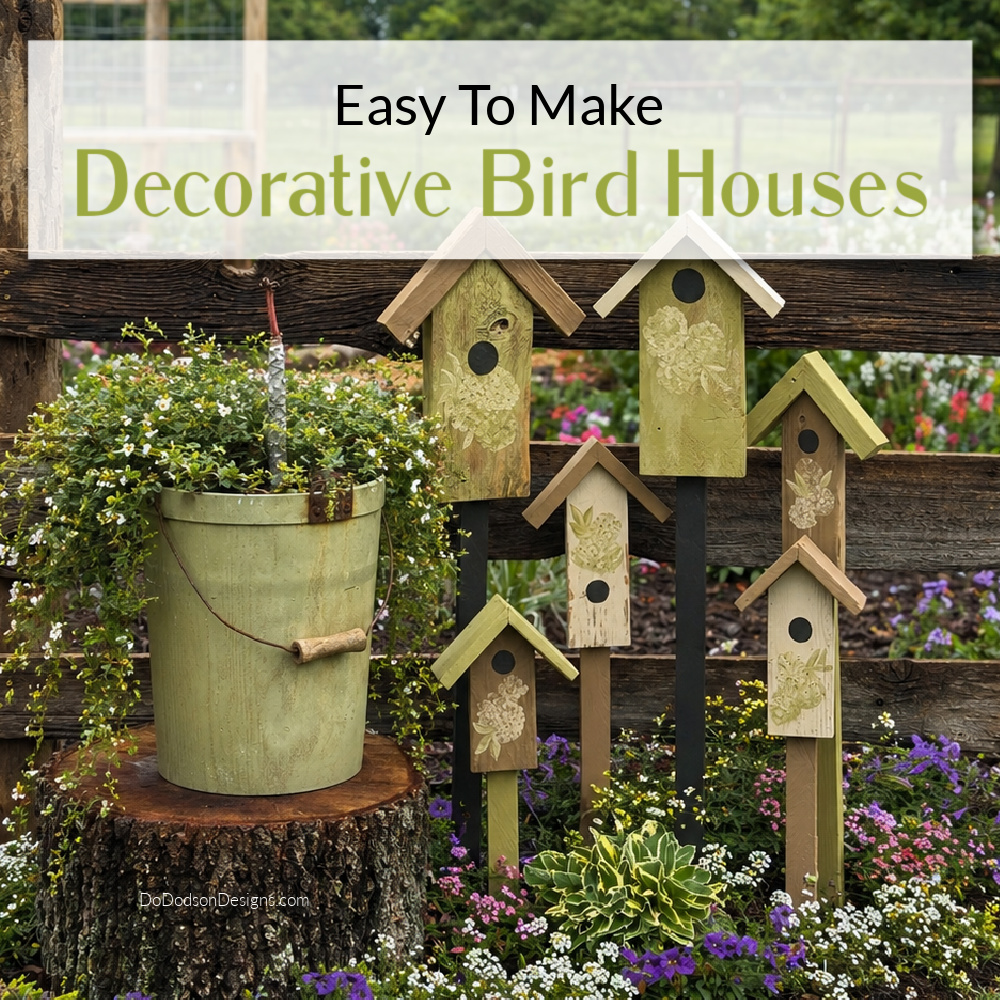

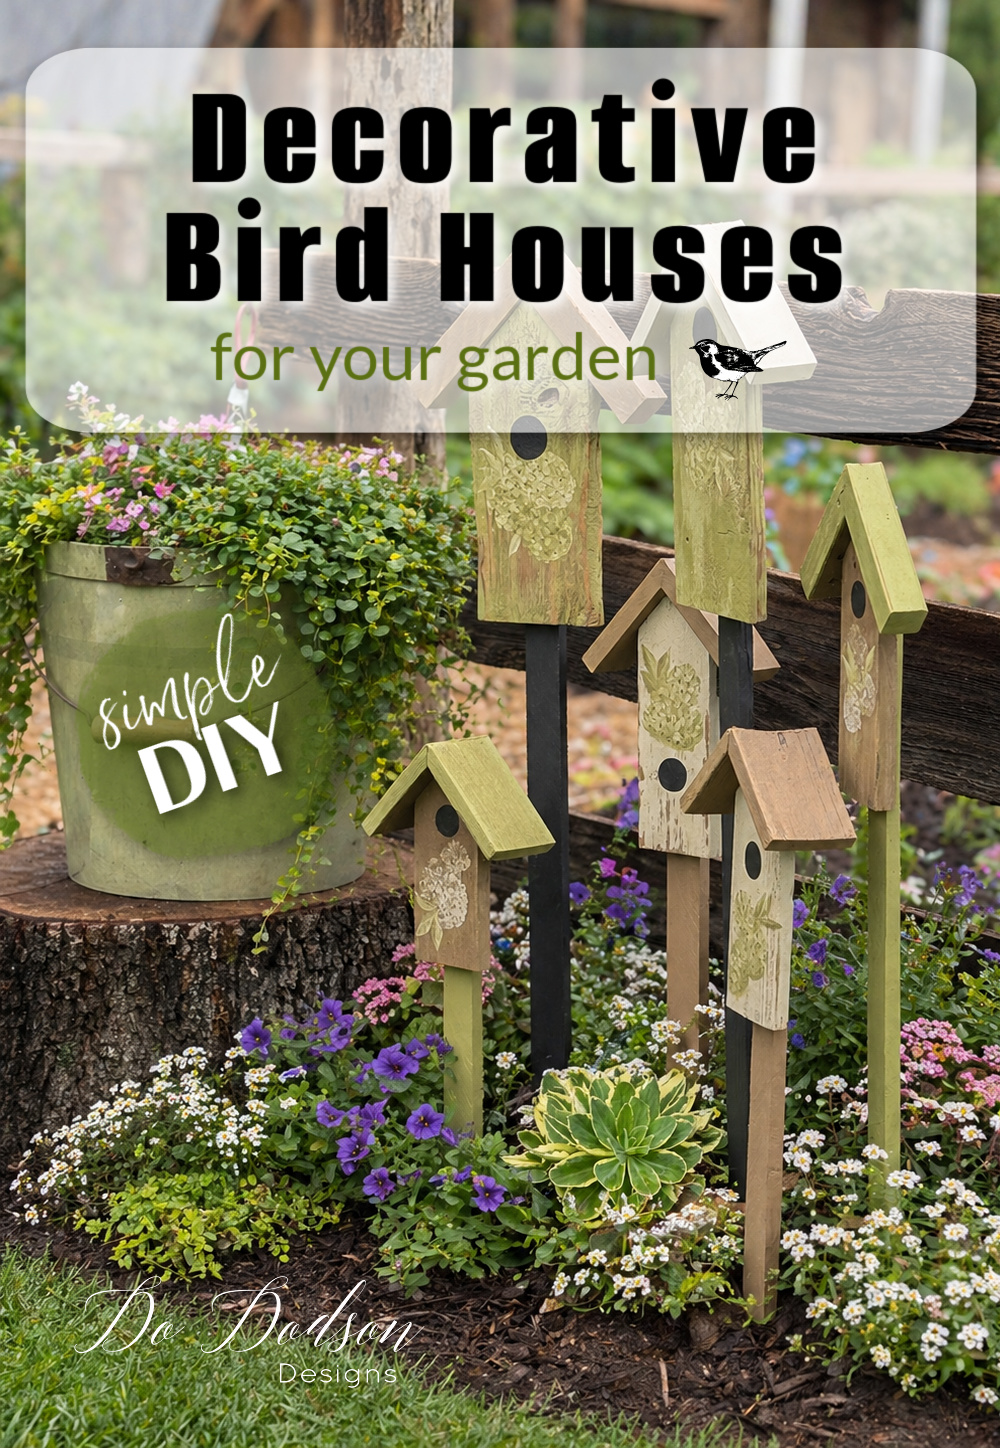
If you’re looking to add charm and personality to your outdoor space, these DIY decorative bird houses are such a fun project. They’re simple to make, budget-friendly (hello scrap wood!), and they add the charm every birdhouse garden needs. Whether you’re going for rustic farmhouse vibes or soft cottage style, these cute bird houses can be customized any way you like.
And the best part? You can make multiples in one afternoon using small leftover pieces of wood.
Thanks to Dixie Belle Paint Co. for sponsoring this post. While I was compensated to write this post, all opinions are my own.
* As an Amazon Associate, I earn from qualifying purchases and through other companies as well. You will not be charged extra when you purchase through these affiliate links, but any income I make helps me create more amazing DIY projects to share with you! To see my full disclaimer, click here!
SUPPLY LIST:
Here is what you will need to make these adorable decorative bird houses for your garden.
- random scraps of wood (all sizes)
- Miter saw
- Wood sander (sandpaper or sanding block)
- Wood glue (exterior)
- Brad nailer or hammer and nails
- Butter Cream Chalk Mineral Paint
- Pine Cone Chalk Mineral Paint
- Holy Guacamole Chalk Mineral Paint
- Coffee Bean Chalk Mineral Paint
- Painbrush Synthetic Chip Brush
- Artist Brushes
- wood garden stakes 1×2 36-inch length
It all Started With Saving Scrap Wood
You see, I have a problem. I cannot, for the life of me, throw away a piece of salvageable wood. No matter the size, I can find a way to make it into something.
This is one of the ways I like to use up all those random wood scraps I’ve been (hoarding 😉) saving! For this DIY wood craft project, I mixed up some new and old wood pieces from my stash to give my birdhouses a little extra charm.
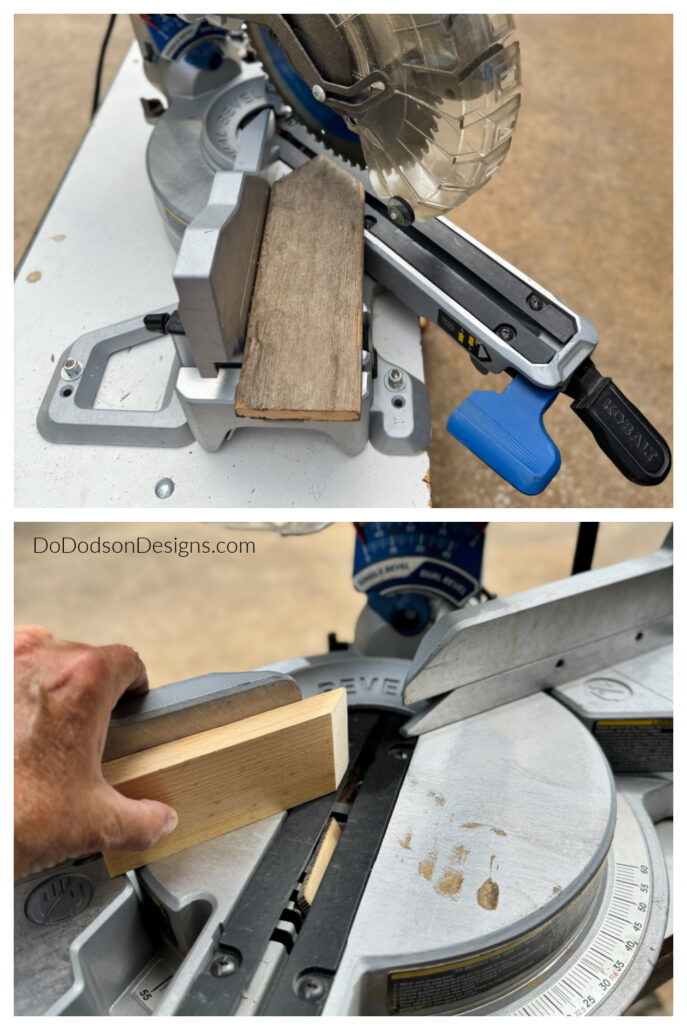
STEP 1: Begin by cutting your wood scraps into small, rectangular pieces of varying lengths. I used 1x4s, 2x2s, and 1x6s, along with anything else I had available. Essentially, you’ll make two cuts for each decorative bird house.
To form the main structure of each house, you’ll need to make two precise cuts on each wood piece. First, create a clean, straight cut along the bottom edge. Then, for the roofline, make a 45-degree cut to give your birdhouses that sloping roof pitch.
Then, cut the two roof pieces at a 45-degree miter on the top edges so they fit together. Don’t worry about perfection – slight variations actually make your handmade birdhouses look more rustic and organic.
Give The Wood A Good Sanding
STEP 2: Grab your 180-grit sandpaper and give those wood pieces a good smoothing. Get rid of any rough edges or anything that doesn’t look perfect. It’s super important, even though these birdhouses are for outside. A smooth wood surface makes a HUGE difference for painting – you’ll get a way better, longer-lasting finish that really makes your birdhouses pop!
Assemble the Decorative Bird House Shape
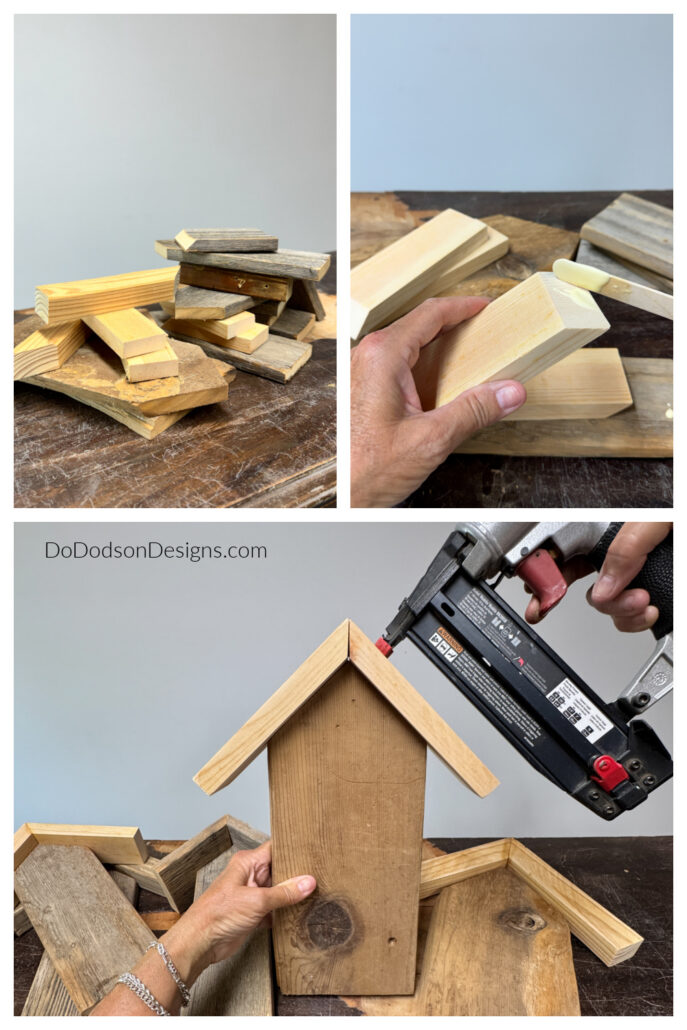
STEP 3: Once your pieces are cut, it’s time to bring your DIY birdhouse together.
Start by attaching the two roof pieces together. A little exterior wood glue goes a long way, and you can reinforce it with a brad nailer for a sturdy hold. Then attach the birdhouse’s main body to the roof and glue it in place. Add a few more brad nails to secure the roof to the bottom part of the house.
Okay, you guys! This is where it gets fun – watch that cute little house pop into place super fast. It’s like magic! Seriously, these are the easiest DIY birdhouses ever!
Painting Decorative Bird Houses
STEP 4: Now for the fun part—paint!
Before painting, give the wood a quick once-over with the sander for any last-minute fixes. And hey, those nail holes? Just embrace the character. Paint usually takes care of them!
My paint colors are almost always going to lean to the neutral side of farmhouse because that’s my style. But you do you!
I chose soft, muted tones to create that relaxed rustic cottage feel. Think warm whites, sage greens, and earthy browns. Camouflage colors! These colors work beautifully in a birdhouse garden and blend right into your outdoor space. Nestled in perfectly with nature!
This is where your painted birdhouse style comes to life. You can go subtle or add a little personality by layering paint and or distressing the wood.
I began by applying a different color to the base of each birdhouse. Pine Cone, Holy Guacamole, and Burlap. Apply two coats for full coverage, or just one for a peek-a-boo wood look.
I’m so excited to show you how the colors look together – wait and see!

Hand-Painted Three-Color Floral Design
The birdhouses were cute after painting, but I thought they needed a bit more to make them feel like they were straight outta the garden, so I went with florals!
I’m no artist when it comes to painting flowers, but I do have a few designs I like to use, playing with different color combos. Hydrangeas are my favorite!
STEP 5: Using the three color combinations, I started with the lightest (first color) color and painted three circles. Don’t skimp on the paint. Lay it on thick! Now, while the paint was still wet, I grabbed the green paint (the second color) with an artist’s brush and started making small C-shaped strokes from top to bottom (blending the two colors together) to create a single pedal. Some of the pedals got a little more green paint than others. This is a great way to blend colors without having to double-load your brush. You’re gonna feel so artsy fartsy! 🎨
But seriously, the flowers won’t look like flowers until you add this final touch: After the flower petals have dried, go back and dot the inside of each flower with (the third color) brown. Somehow, this makes everything work.

STEP 6: Next, paint a dark circle to create the illusion of an entrance – it really enhances the decorative bird house’s appeal!
*TIP: I used a lid from a water bottle to create a circular pattern for the opening and marked it with a pencil. I can’t draw a perfect circle freehand! Go figure.

Instant Birdhouse Garden Stakes
STEP 7: Cut the garden stakes (1X2 36-inch) to whatever length you prefer. You can choose to paint them or leave them natural. Attach them to the back of the birdhouses using exterior wood glue first, then secure them with exterior wood screws or decking screws.
The best option for wood stakes is, of course, cedar, but it can get pretty expensive, so I use what’s cheapest or more scrap wood.

ALTERNATIVE: Instead of wood stakes, you could use rebar and conduit clamps for a super sturdy base for your birdhouses. Plus, they’re way easier to stick in the ground! The steel will definetly outlive the birdhouses. 😉
Why I chose This Color Scheme
Did you know birds are drawn to color?
Based on what I’ve read, many birds are, although there are probably exceptions. I’ve included some interesting information on the topic below, even though I’m not entirely convinced. My bird houses are purely decorative (fake), so there’s that.😁
Copied from Google. “While some bird species may prefer certain colors in birdhouses, the overwhelming majority of nesting birds prioritize camouflage and safety, opting for natural tones that blend into their surroundings rather than vibrant, attention-grabbing hues. Interestingly, although bright colors, such as red, are highly effective at attracting birds to feeders, especially hummingbirds, these same colors can pose a significant risk to nesting birds in birdhouses. The vibrant hues make the nests far more visible to potential predators, thus compromising the safety of the young and the overall success of the nesting process. This concept resonates as completely logical and sensible.”
I seriously geek out on this stuff. I find this fascinating! Interestingly enough, I built a birdhouse last year and painted it neutral with a floral design. It’s protected by an awning over the garden shed.
I was shocked! One day last week, while I was watering the garden, I looked up to see a bird fly out of it! I was like no way! Yes, way! CLICK HERE to see the birdhouse that may bring some validation to this color theory.
Styling Your Decorative Bird Houses
Set a few of these cuties together on a potting bench, or sneak them into your flower beds – they’ll blend right in!
Attaching them to a wooden garden fence is another option – they really stand out! These cute creations bring so much character and make your outside area feel very special.
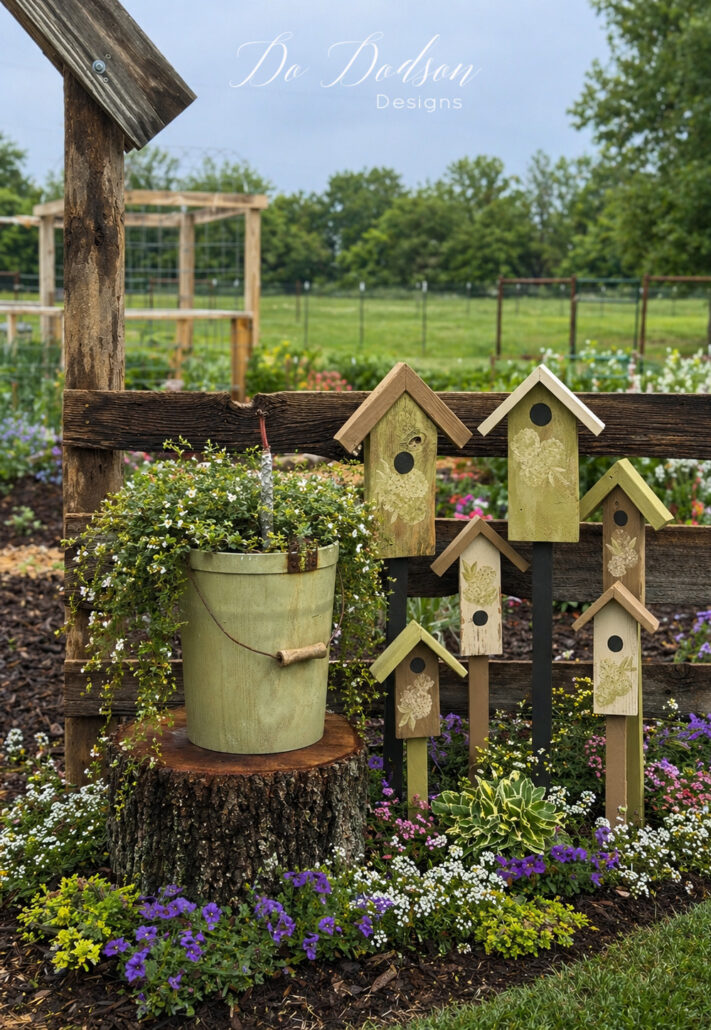
Here’s what I did with my decorative bird house garden stakes! I chose to use them as garden stakes so that I can move them around as my garden grows.
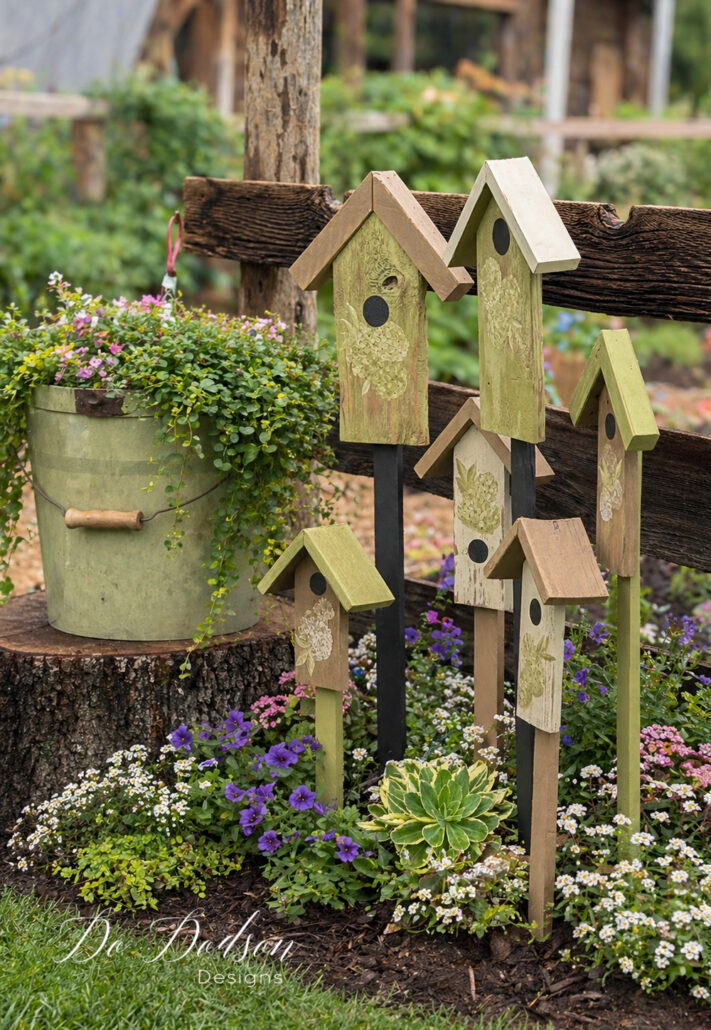
I just can’t get over how the three color combo worked out! Subtle and not taking away attention from my garden. My flowers will always be the star of the show!
What do you think? Would you use different colors for your decorative bird houses? 🩷🧡💛💚💙🩵💜🤍
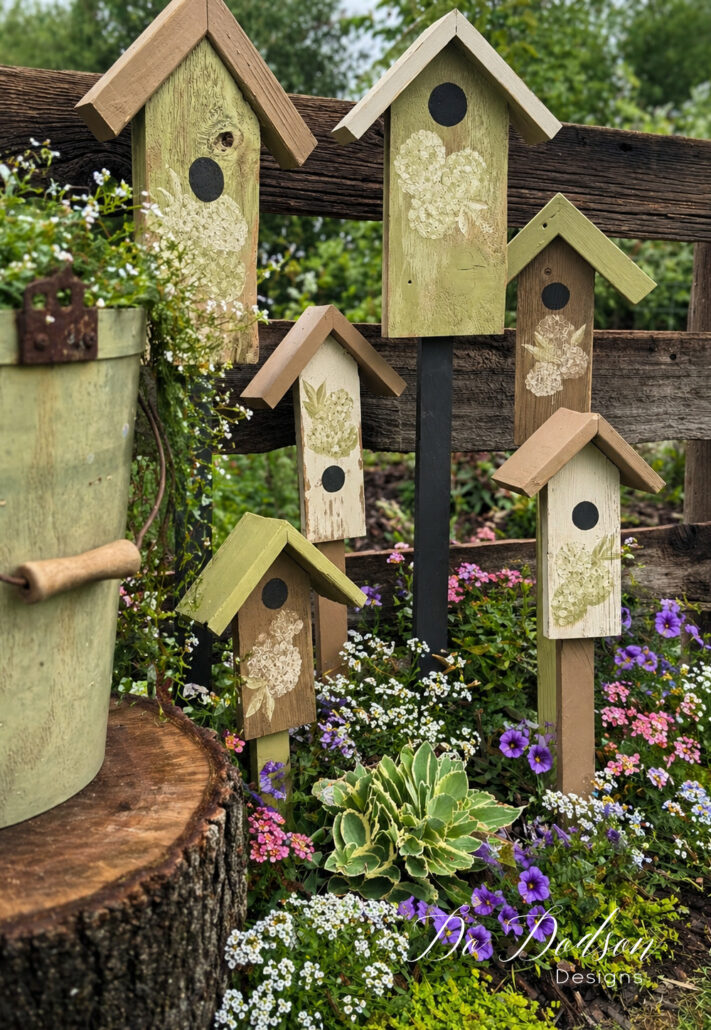
The garden fence was made from salvaged barnwood. The vintage ice cream bucket was found (FREE) in a pile of garbage on an old homeplace down the road. I can only imagine how good the ice cream tasted back then.
More DIY Inspiration
And if you would like to learn more about using scrap pieces of lumber to make beautiful things, I’ve listed a few more ideas below. ⬇️
What I Think About Decorative Bird Houses
After you have made some of these birdhouses for yourself, I think these would make awesome gifts for your gardening family and friends, or even to sell, especially if you’re just getting started in your DIY craft business. Or maybe you teach painting classes! 💡 Wood crafts sell very well!
This simple DIY project is such a satisfying way to turn those scrap wood pieces into something meaningful. And it only takes a few cuts, a little wood glue, and some paint to create these beautiful, small wooden accents that can add character and style to your garden.
Whether you call them wood birdhouses, cottage garden birdhouses, decorative bird houses, or just your next favorite weekend project, they’re a perfect mix of creative and practical. Sustainable wood decor!
And honestly… once you make one, you’ll want to make a whole birdhouse garden! I sure did.
I’m so glad you showed up today. Thanks for stopping by, and I’d love to hear what you think of this scrap-wood project. Leave a comment below, or just say hey, so I’ll know you’ve been here!
Until the next project… xo, Do
I will definitely need to make some of these, I also save all sorts of scrap wood. My husband thinks I’m a little obsessive about it at times but…I have caught him looking through my scraps for a piece he needs! Thanks.
You go girl! Save those scraps! See, he knows but like my hubby, he won’t admit it. Mine does the same. 😂 So many fun projects can come from discarded items. Have fun making your bird houses and thanks for reading. I hope you have a great weekend. 😁
These are so darn charming, and the hand-painted florals bring them to the next level, Do! 💚 I LOVE the color scheme you used, perfect for a garden b/c (imo) you don’t want them competing against your beautiful florals/plantscape. I also think they would make the PERFECT gift for anyone into gardening. 🧑🌾 Such a great project and thanks for sharing! Pinned XOXO
Thanks friend! Yes, I agree about the competition with the florals. For sure I want them to stand out! $$$ I’ve spent a small fortune on plants and making projects for FREE allows me to buy more plants. 🪴(😜justification) I collect plants like scrap wood. Enjoy your weekend and thanks for reading. xo 😘