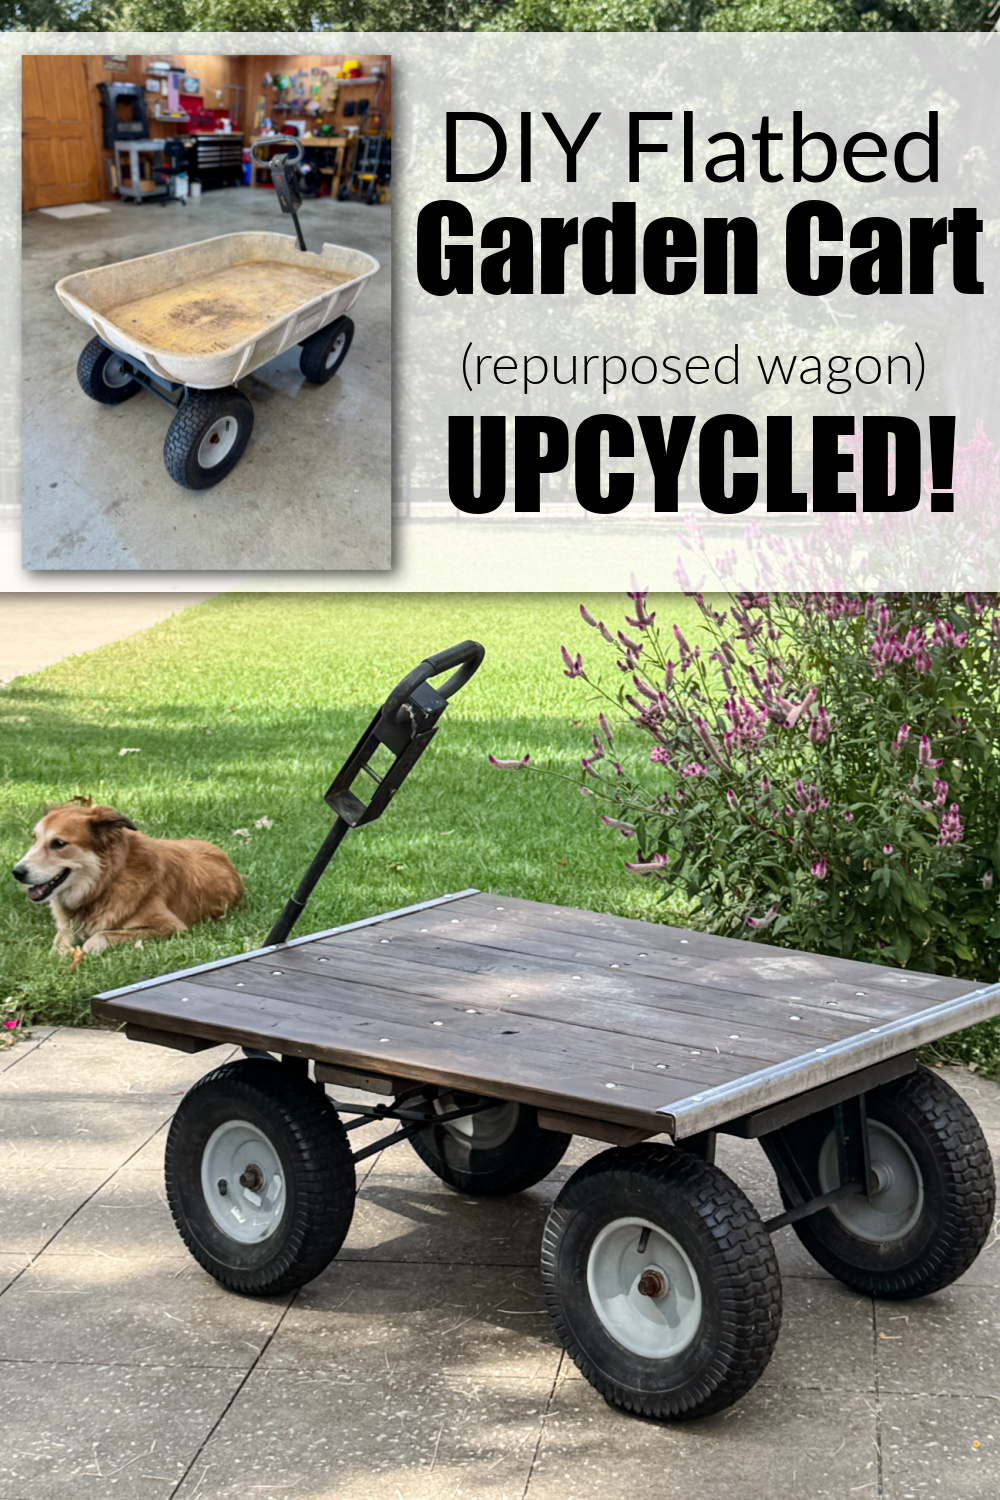
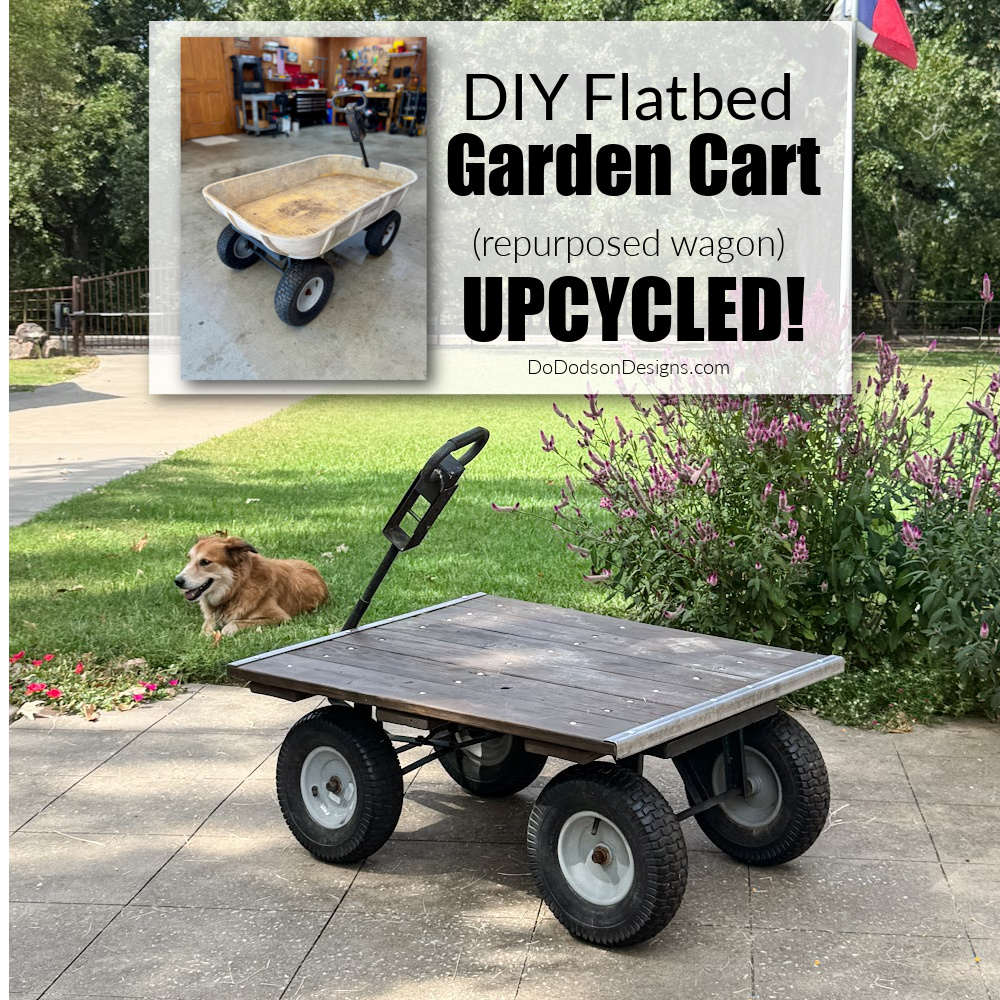
Hey there! I’m so stoked to share this project, which I’ve been wanting to do since forever. Today, I’ll show you how I transformed an old garden utility wagon into a functional DIY flatbed garden cart. It’s so good!
Thanks to Dixie Belle Paint Co. for sponsoring this post. While I was compensated to write this post, all opinions are my own.
* As an Amazon Associate, I earn from qualifying purchases and through other companies as well. You will not be charged extra when you purchase through these affiliate links, but any income I make helps me create more amazing DIY projects to share with you! To see my full disclaimer, click here!
It Had Garden Cart Possibilities
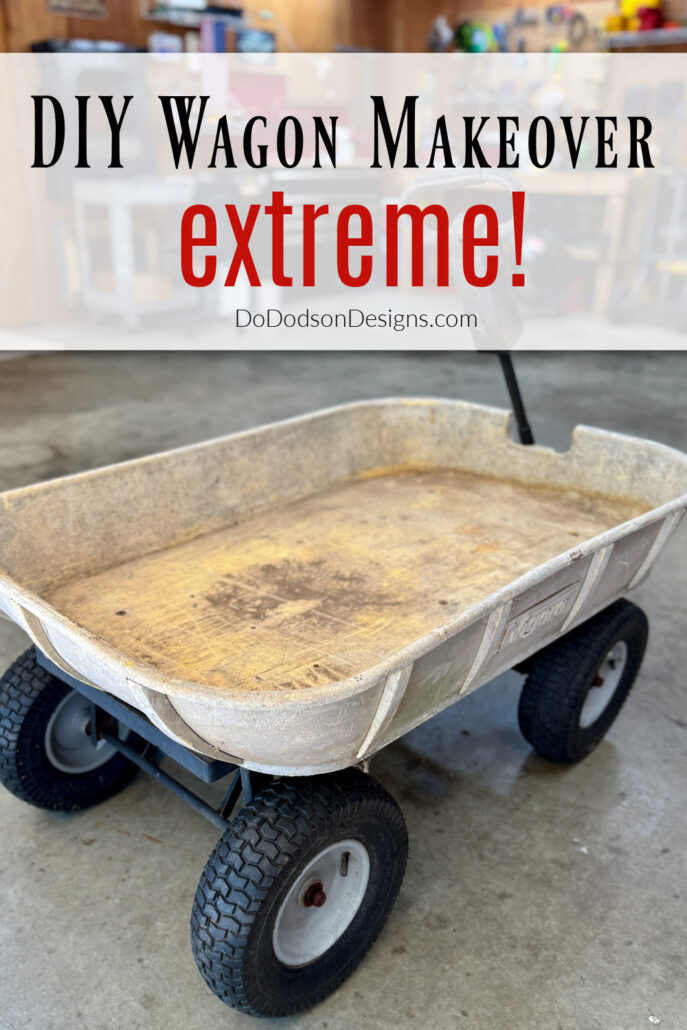
I’ve had my eye on this wagon that sat quietly beside our barn for quite some time now. It was replaced by a new one earlier this year.
This old wagon definitely saw better days, but it gave us 18 good years, hauling everything from our first pumpkin to our grandkids. It even carried a few adults at family get-togethers. Horseplay! And don’t forget the dogs!
It has a cool dumping feature, making it super easy to haul dirt and all my gardening stuff!
It felt like an old pal, so I knew I had to give it a second chance. The wheels were in good condition, and I had a plan in mind.
I had been wanting a flatbed cart to haul things around in the yard, so I decided to give it a go. Here’s how I created a DIY flatbed garden cart from an old wagon base.

SUPPLY LIST:
- wagon base (undercaggariage with wheels)
- scrap wood lumber (pressure-treated pine decking boards 5/4 in.)
- drill and necessary tools
- carriage bolts and nuts
- wood sander (my favorite!)
- Golden Ash (Dixie Belle No Pain Gel Stain)
- synthetic chip brush
- cotton cloth
- Gator Hide
- synthetic paintbrush
The Smart Way to Repurpose a Wagon
First, let me say that not all wagons are created equal. This wasn’t just your average Radio Flyer Little Red Wagon. This was a heavy-duty model designed for real work. The metal undercarriage was still in good condition and had a dumping mechanism. It was a garden dump cart I called my wagon.
For this DIY garden cart project, I had to call in the big guns. My hubby! He’s the metal expert in the family, while I usually handle the woodworking stuff.
The first step was to remove the deteriorated and crumbling fiberglass tub.
The bolts were very rusty, and the nuts wouldn’t budge when we tried to remove them. So, we ended up cutting them off with a reciprocating saw with a metal saw blade. Before I could even get a picture, he swooped it up and had it done. I’m not mad about it!
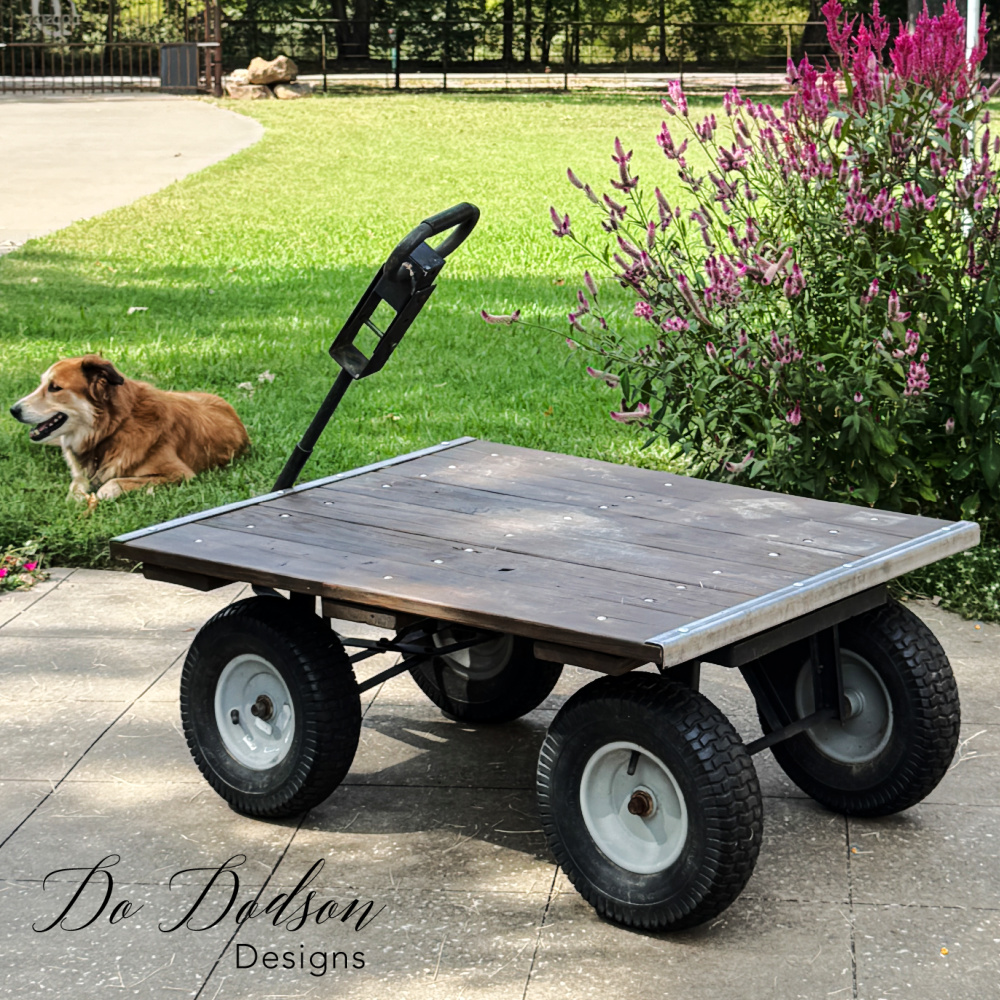
Next, I started planning how I wanted to rebuild the top, and I decided to make it into a flatbed cart. We do a good amount of hauling around the ranch with all my chores, and it has a handle that attaches to my mower for heavier loads.
Of course, the plan included using scrap wood from the famous “wood pile” in the barn, and I had just the right boards. This is why I say, “Save those scraps of wood.”
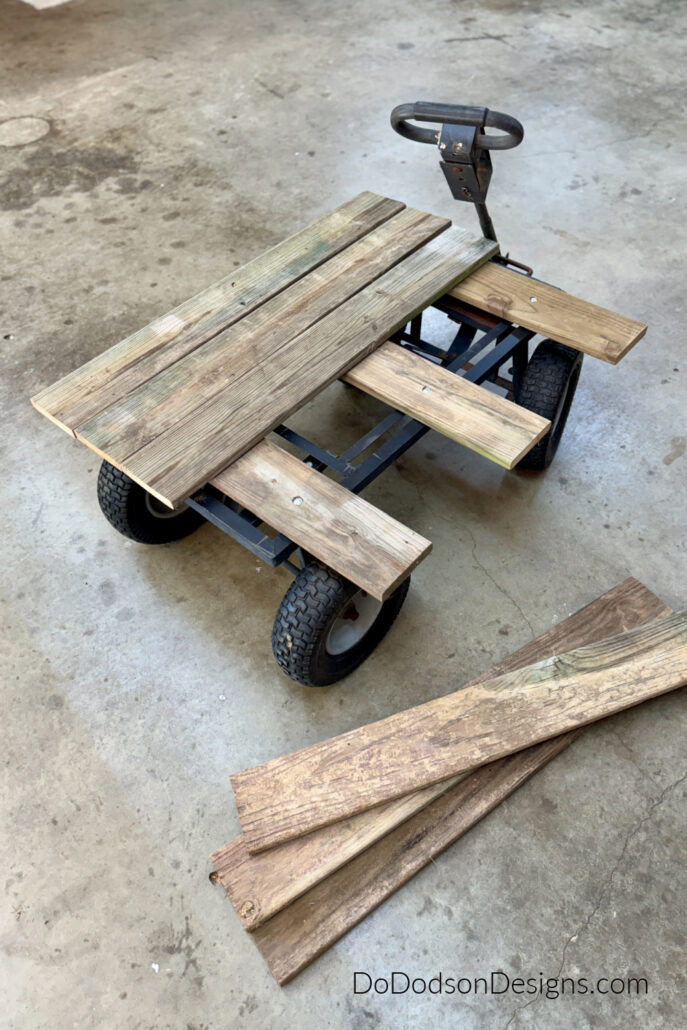
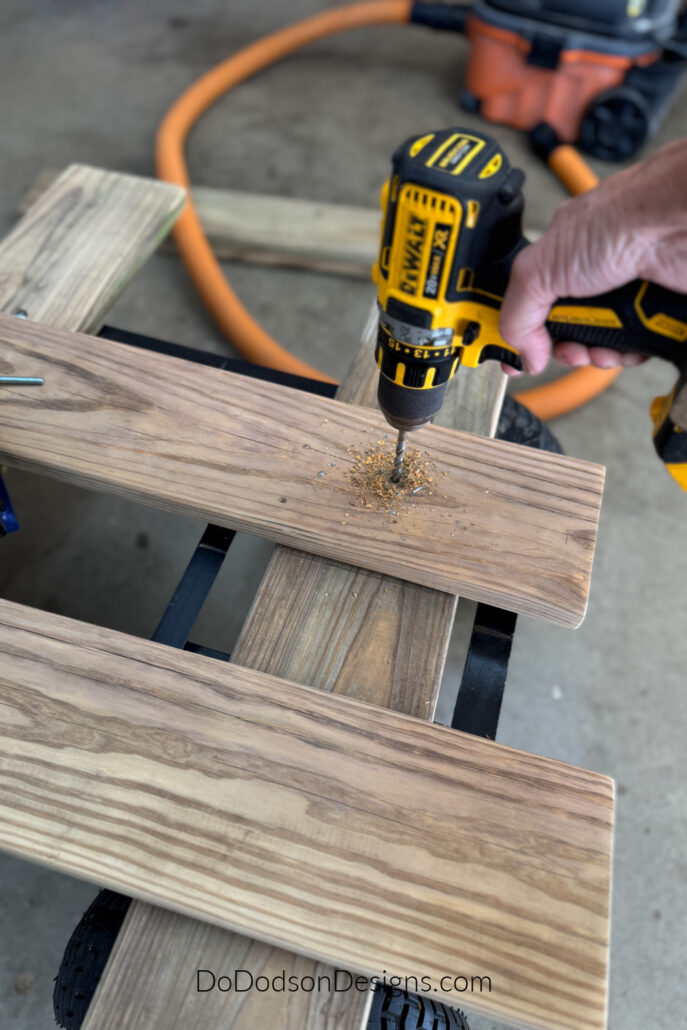
Using 5/4 in. pressure-treated decking boards, I attached three pieces (cut to the same length) to create a base. A bit wider than the wheel base to give it a little overhang.
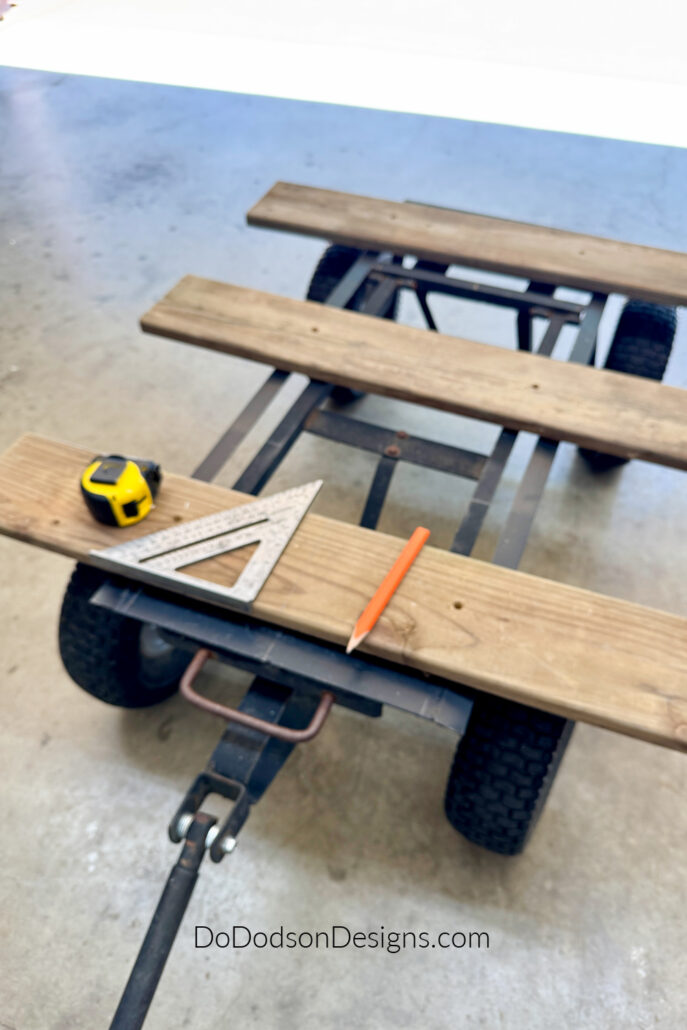
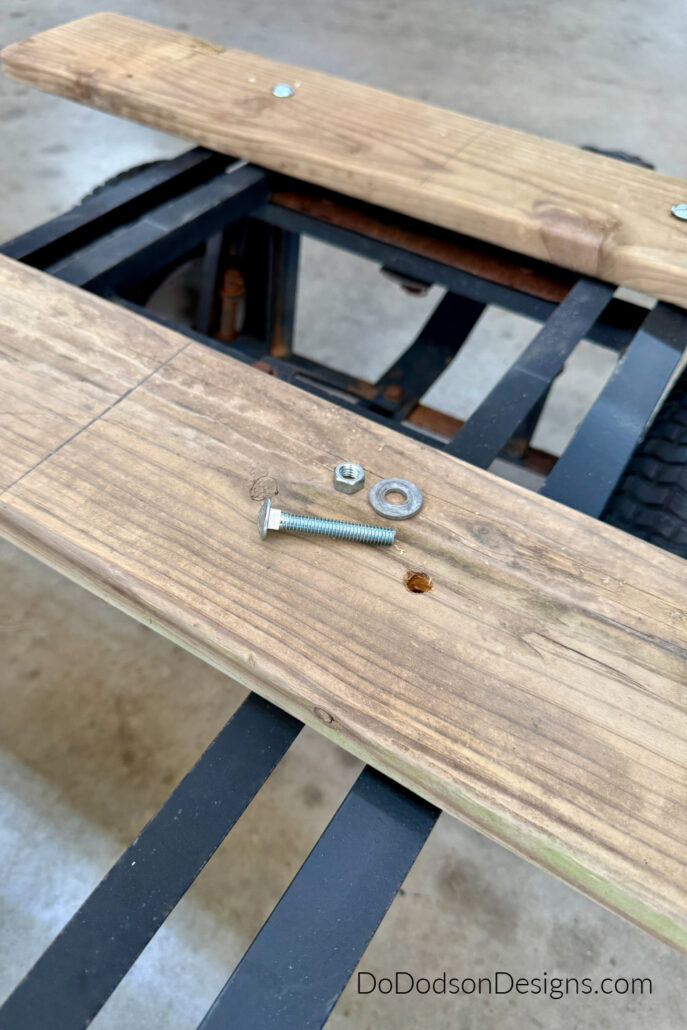
We lined up the boards with the metal base and marked the locations of the holes before predrilling them.
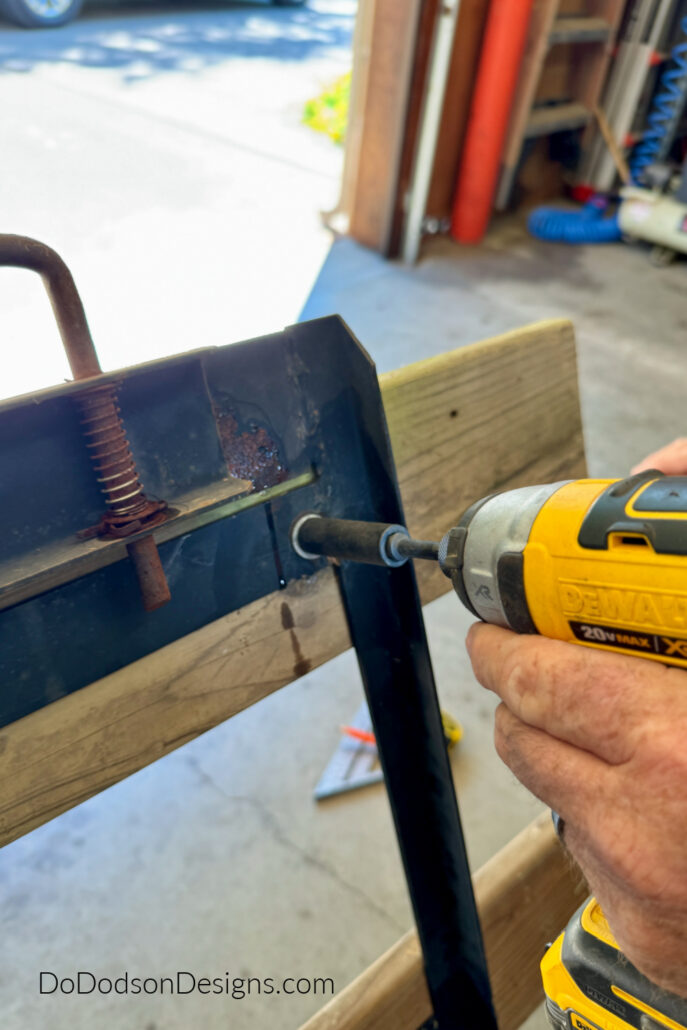
We used carriage bolts, washers, and nuts to attach the boards to the metal frame.
Building The Wood Flatbed
I could see the DIY garden cart taking shape now, and I knew my vision was coming to life.
Before diving in, I always do a quick dry fit of the boards on the base – it helps avoid any mix-ups. Start with the middle board, then work your way to the outside ones. Once they’re in the desired position, mark the holes and pre-drill them too before attaching.
Adding the top is relatively straightforward.
A quick sanding of the wood is recommended if you want to add a stain and topcoat for added durability. Of course I do. I want my DIY garden cart to be both pretty and functional.
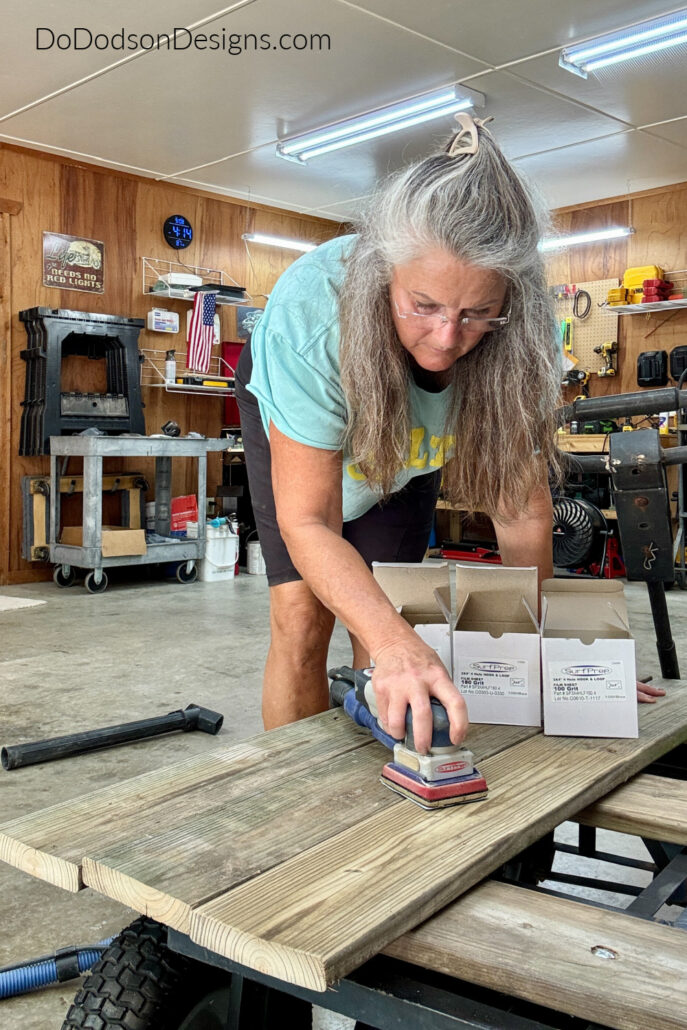
After sanding the wood, pre-drill the holes and attach them one by one, starting with the middle board.
Adding Beauty And Durability To The Wood
It may seem counterintuitive to stain pressure-treated wood, but I feel the wood needs to be stained (to make it pretty) and protected.
While the chemical treatment from the pressure treatment protects the wood from insects, rot, and decay, it doesn’t protect it from the elements.
That’s why I chose to use an oil-based gel stain and a water-resistant top coat.
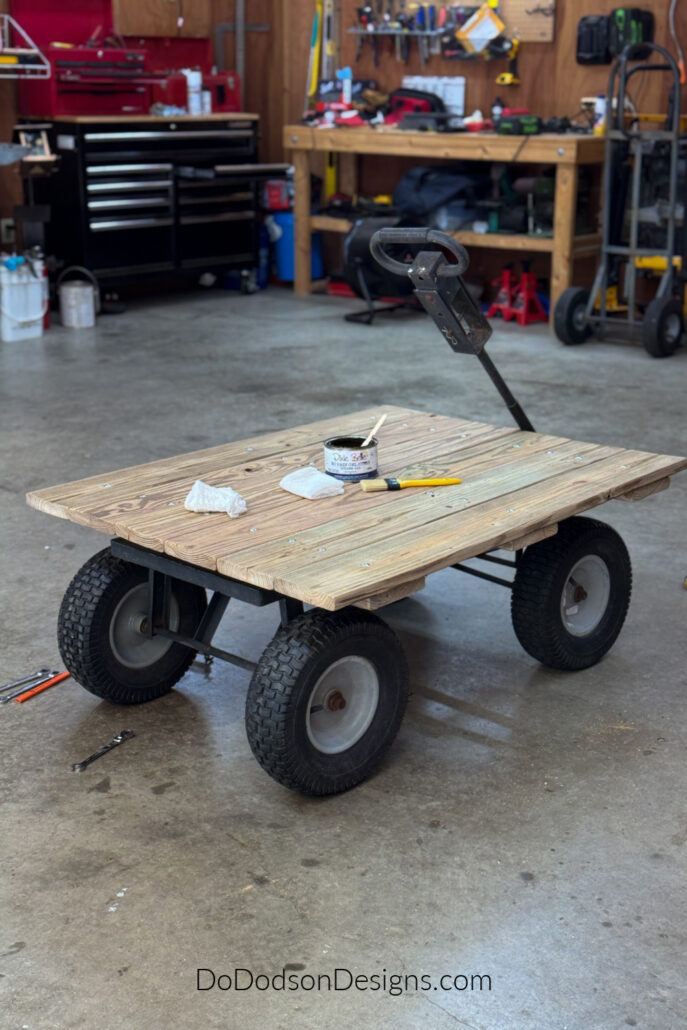
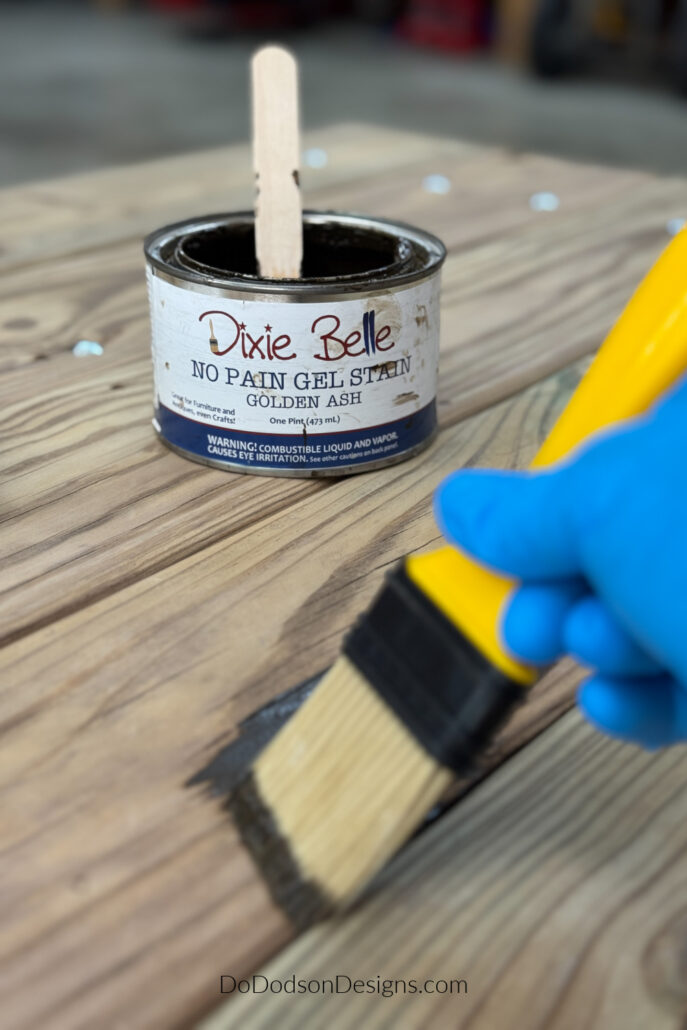
I used Dixie Belle Paint Company’s No Pain Gel Stain in the color Golden Ash. It’s super easy to apply and even more so to this old lumber.
Using a chip brush, I simply painted it on. The old wood soaked it right up.
After applying the gel stain, I rolled the cart out into the sun and allowed it to dry overnight.
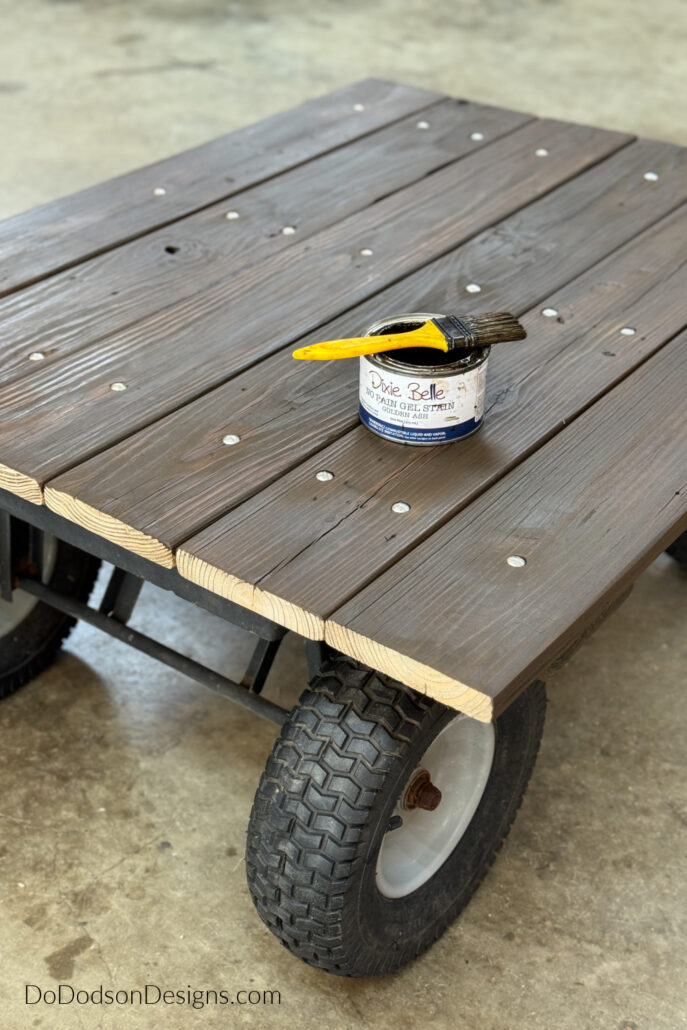
The next day, I applied two coats of Dixie Belle’s Gator Hide with a good-quality synthetic paintbrush. A water-resistant topcoat for even more added protection from the elements.
The ends and front of the wood base were covered with galvanized steel, attached with carriage bolts to repeat the design. Sorry, another quick swoop up from my hubby that I didn’t get a picture of. That man is fast when it comes to my DIYs!
The metal was added because we both know that, even if this DIY garden cart will be used for hauling dirty barn and gardening items, it still needs to look good, and the metal also protects the ends of the boards from damage.
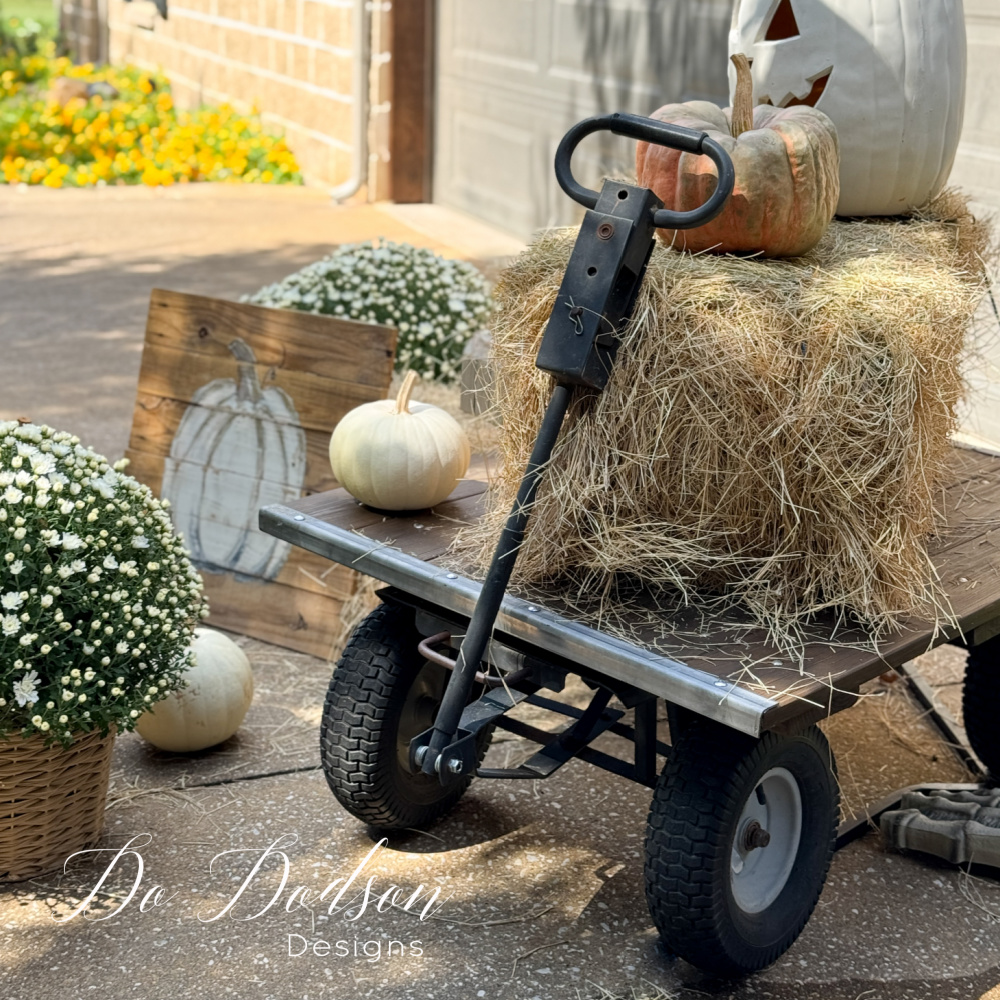
To illustrate my point of being pretty, I incorporated it into my Fall display. 😁
If you’re interested in more DIY garden projects, here are a few of my recent posts. Enjoy!
The DIY Garden Cart | Wagon Makeover
Wow, it looks amazing! I’m so glad I finally got around to this project. Hauling hay from the barn to the porch for my Fall display was the perfect first test, and it worked like a charm!
Yeah, so that’s why it’s kinda dirty… the camera and I weren’t always on the same page during this project. HA!
I can tell you right now that this will be my favorite tool around the mini ranch with Jack and Diane, and it will be well used.
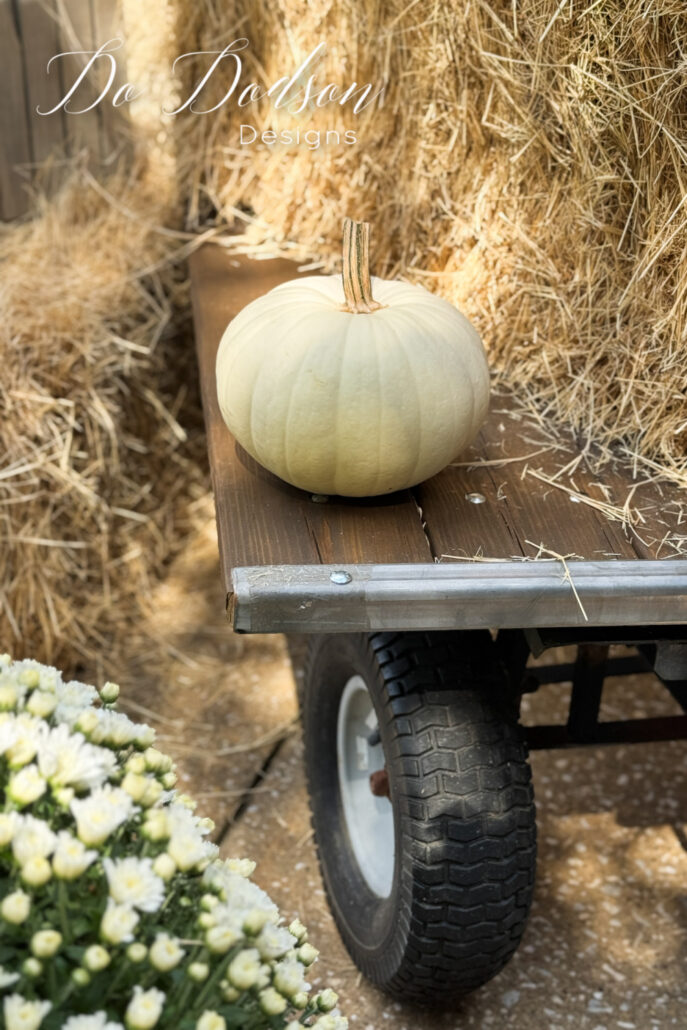
It’s beautifully rustic and rugged, if that’s an appropriate term for a pull cart.
I always enjoy sharing my projects with you, and I hope you find value, learn something new, and get a few laughs along the way. My honest opinion? I believe that DIY is fun and can be humorous at times, even when you feel like giving up.
Remember, it’s a journey, and you should learn something with every project. I know I DO!
Let me know what you think about this upcycle. I’m open to suggestions; I’m all ears. Drop me a note in the comment section below, or simply say hello, so I know you’ve stopped by. It’s the best part of my day.
Until the next project… xo, Do
Awesome Do! I’m sure you’ll get many more years of use out of that cute wagon, and it looks adorable staged for the fall season.🎃🍁You and your hubby make a wonderful team! Have a great week. XOXO
Hey friend! He’s great when I get in a pinch. We do make a great team and I’m so glad he came to my rescue on this DIY project. Happy Fall! 🍂 🍁
I love this! You are awesome. Hubby too!
Thank you, Kathy!
We do make a good team. Have a beautiful week and enjoy the Fall weather. 🙂 xo