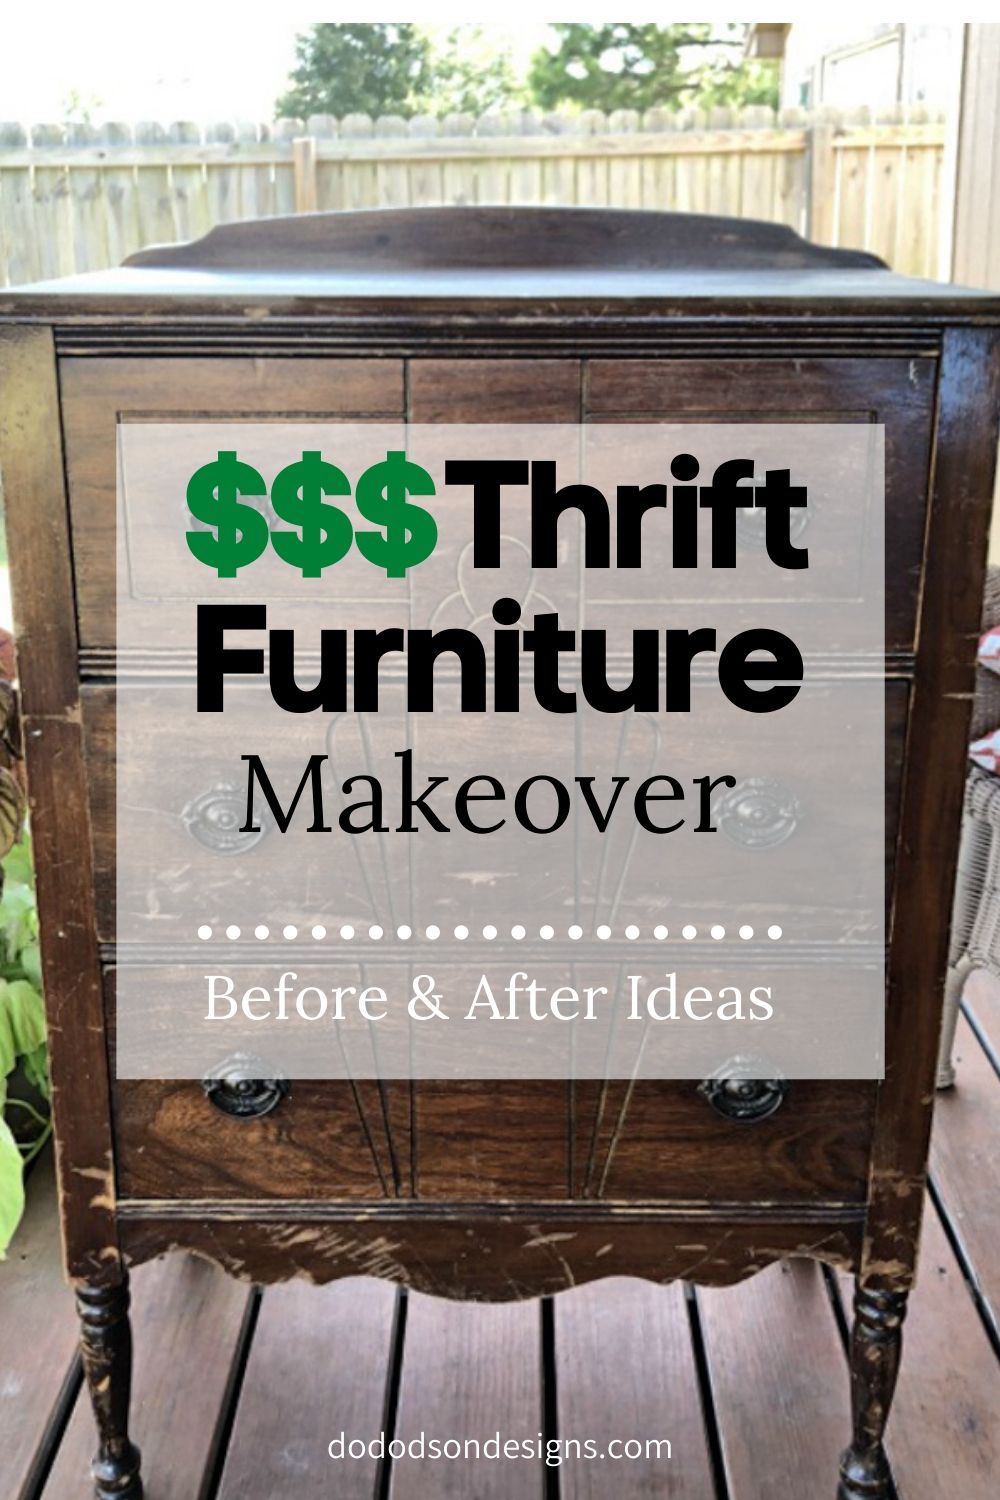
Thrift furniture makeovers are my LOVE language! It can be hard to find the perfect piece when you’re on a budget, but this one was… $5! Read on…
This post contains a few affiliate links to help you find the products I use. You are not charged extra to use any of the links, but any income I make will be used for more fun projects! To see my full disclaimer, click here.
How To Find Thrift Furniture
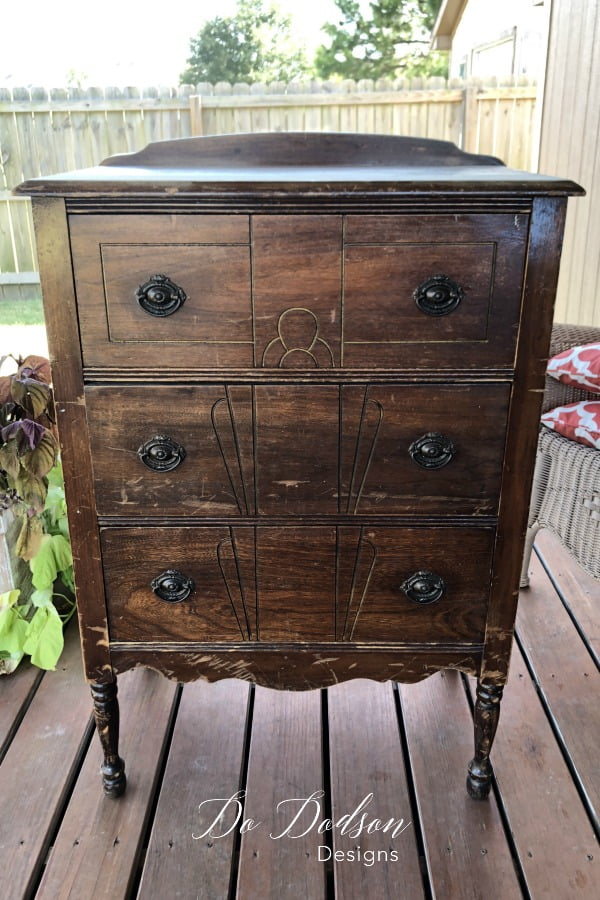
I wished I could tell you that I have a secret place to find these $5 SCORES. The truth is, I don’t find many with this price tag. However, I do find some terrific bargains at thrift stores, estate sales, etc. Even a freebie on the side of the road at times, but that’s a rare treat. This chest came from a garage sale. The sweetest little older man had been storing his TOOLS in it. I asked him if it was for sale. He commenced kicking it and said, “this old thang?” “I use it for a toolbox.” My eyes got so BIG! The next thing I knew, I was loading it up in the back of my truck. I almost felt guilty for taking it, but he insisted it wasn’t worth anything. I’m still feeling a little guilty.
Click the products below to learn where you can purchase these products for your next amazing makeover!
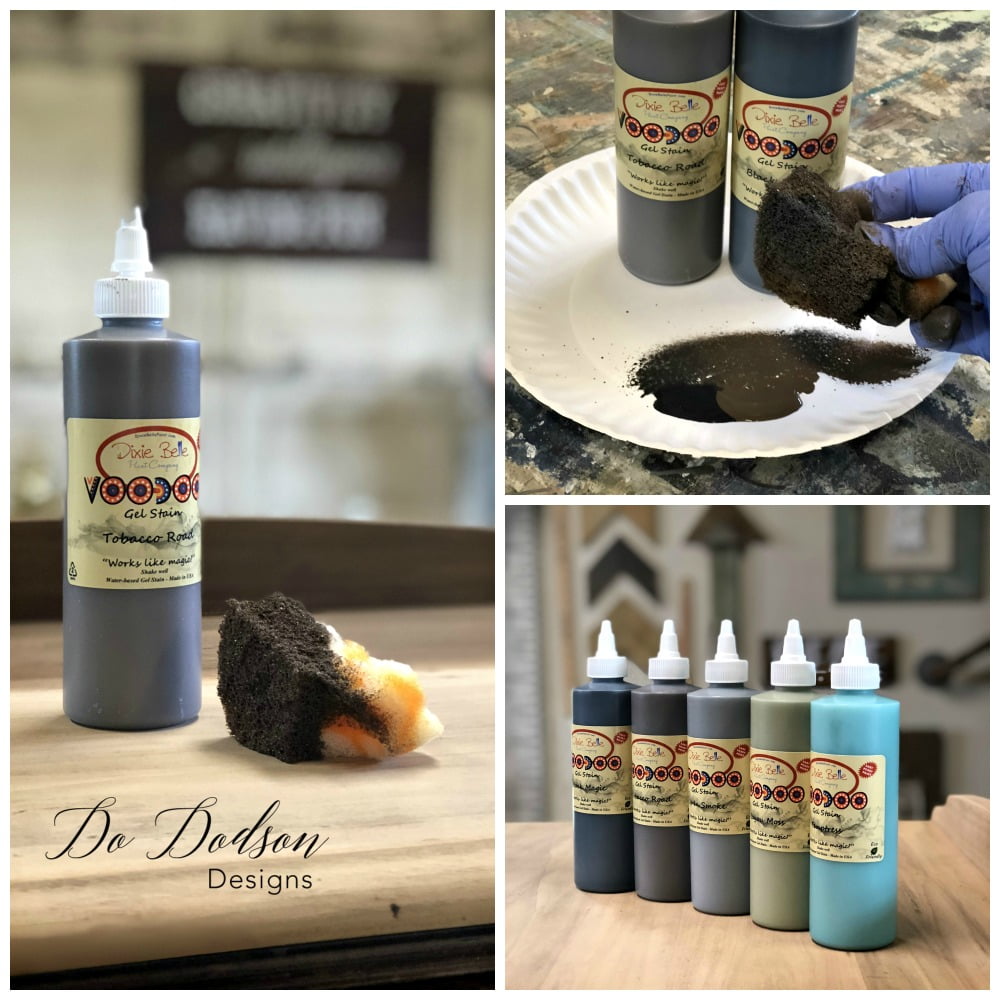
- VooDoo Gel Stain tobacco road
- VooDoo Gel Stain black
- Applicator Pad or sponge to apply the gel stain
- Terracotta chalk mineral paint
- Buttercream chalk mineral paint
- Copper Metallic Paint top coat
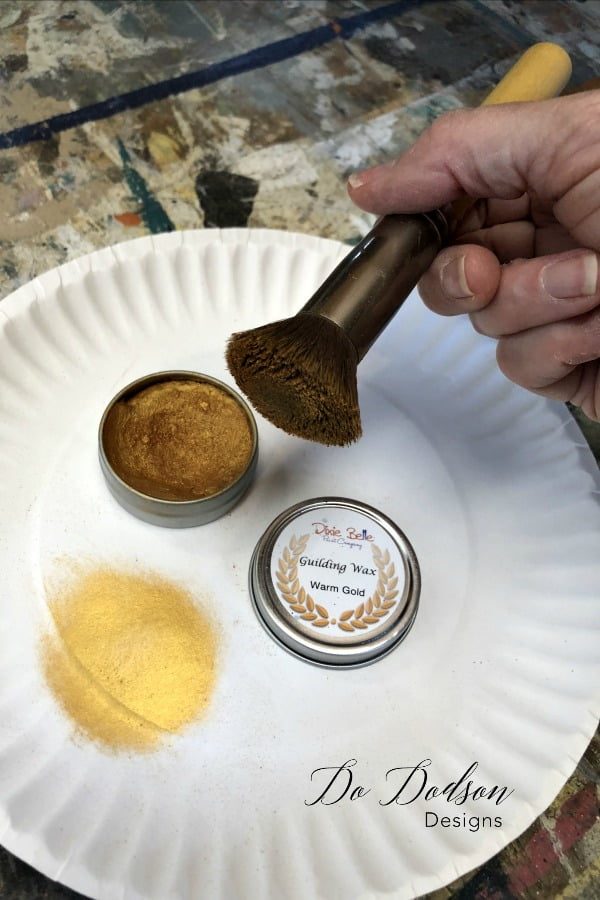
- Warm Gold Gilding Wax
- Dixie Dirt
- Gator Hide
The Makeover Begins
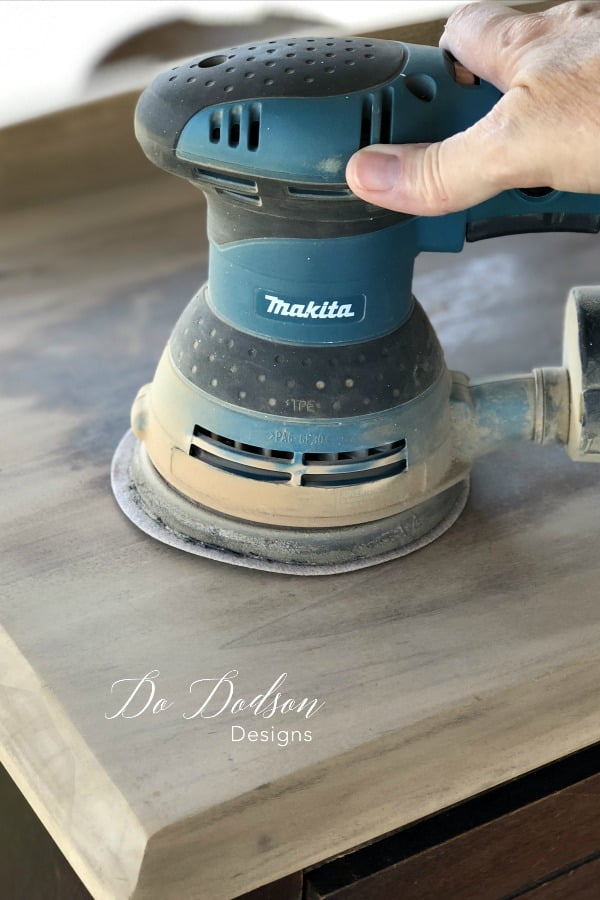
This old chest had been sitting in my spare bedroom for no less than 15 years. I was waiting on the right time and inspiration to tackle it. It was in great shape other than the finish. The old varnish was dry and flaking off. It was super easy to remove. I used my rotary sander and 220 grit paper to sand it down to the bare wood. Gosh, it was so pretty. I can’t paint that!
Staining The Wood On My Thrift Furniture Find
Dixie Belle has a wonderful water-based gel stain that I love. It’s so easy to use. It also comes in multiple colors. For this project, I chose two colors. Tobacco Road and Black. Yep, you can custom mix your stain color just like you can customize your own paint colors. I LOVE this about their products! After staining, I allowed it to dry overnight. I used Gator Hide to seal the stained top and gave it a hard and durable surface.
Choosing Colors For My Thrift Furniture
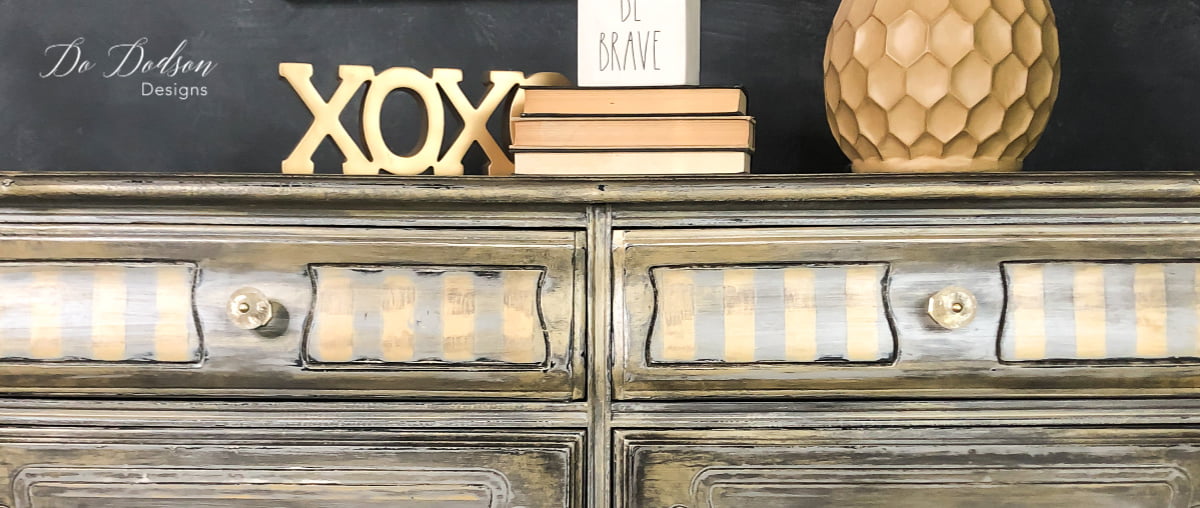
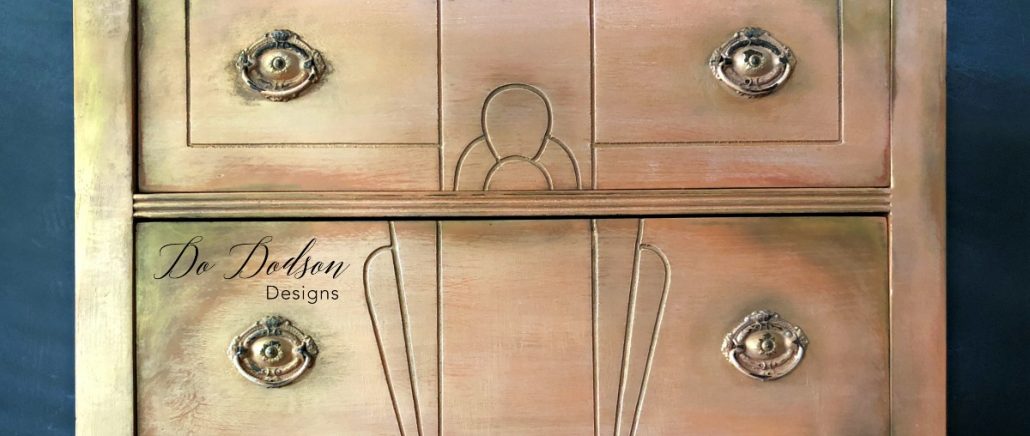
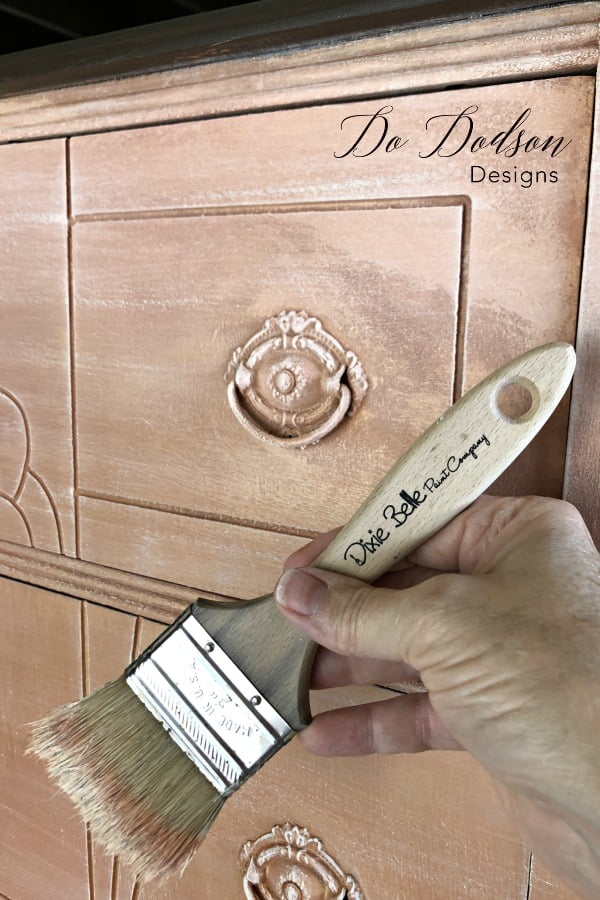
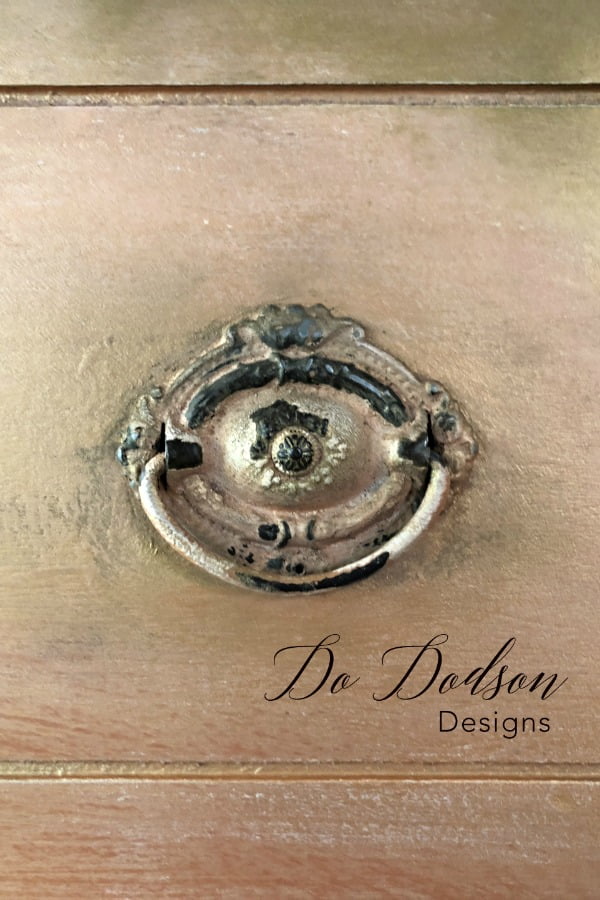
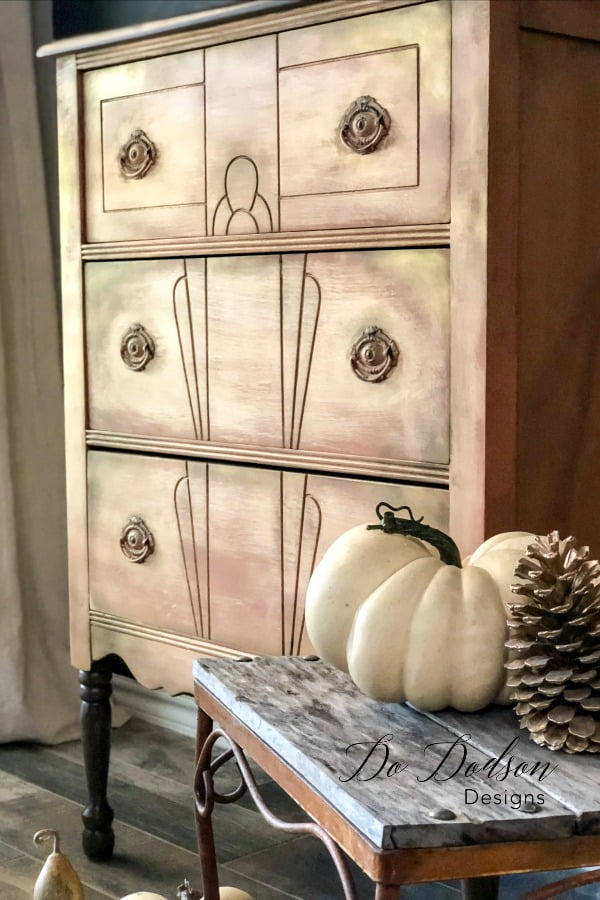
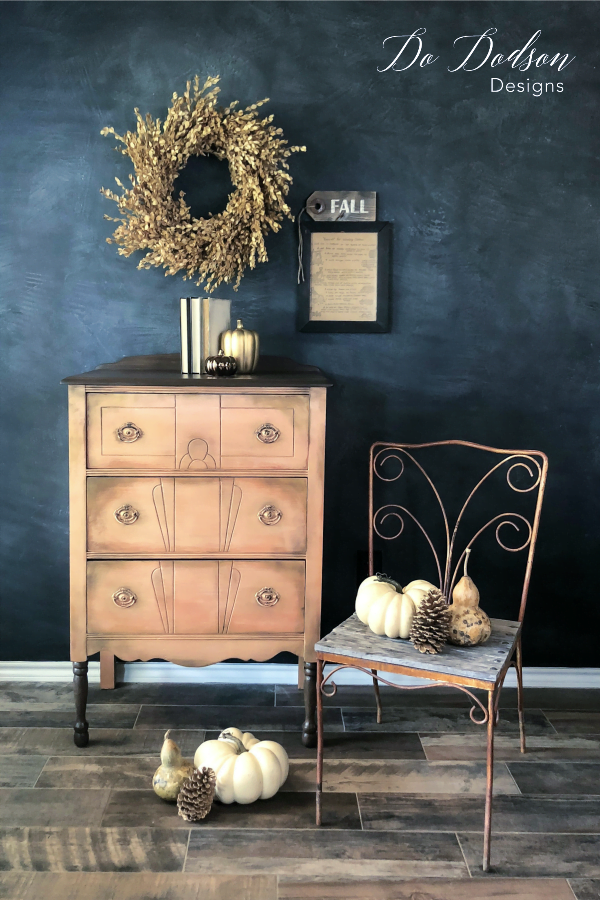
OMG… I love this part! Here is where the biggest transformation starts. One coat of Terracotta chalk mineral paint was quick and easy to apply. I even painted over the hardware! I know it’s sacrilegious to paint over such beauty, but it will be worth it in the end. Next, I dry brushed Buttercream over the Terracotta. This was a beautiful finish, but I had to do more. Ha! Then I applied one coat of the Metallic Copper top coat. After the paint had dried, I took my rotary sander and went to town… scuffing the surface to give it that aged, worn look.
Using Gilding Wax On Thrift Furniture Makeovers
I wanted a subtle blended look, so I used my makeup brush to apply the gilding wax. Ha! It worked. I’m sure other brushes would have worked too, but use whatcha got, right? I load up my brush and offload it on a paper plate. In a circular motion, I add to the areas that need a little flare. The handles and the corners of the drawers are where my vision leads me.
What Is Dixie Dirt?
Isn’t that AMAZING what paint can do?! Sorry no pics of this application, but it’s super simple. I used a chip brush and dusted over all the areas where I had added wax too. The dirt/dust sticks to the wax and bonds when it’s dried. It’s perfect for adding years of dirt and age to a thrift store makeovers without it actually being dirty.
Thanks for joining me for this makeover. I hope this has inspired you to keep your eyes open and your hands on the wheels while you search for your second-hand, thrift furniture finds. G A R A G E S A L E!
Until the next project… xo, Do