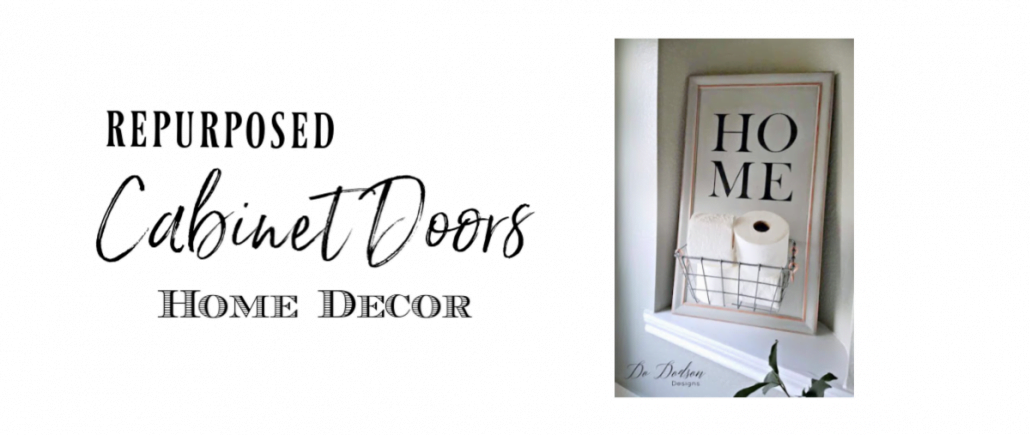
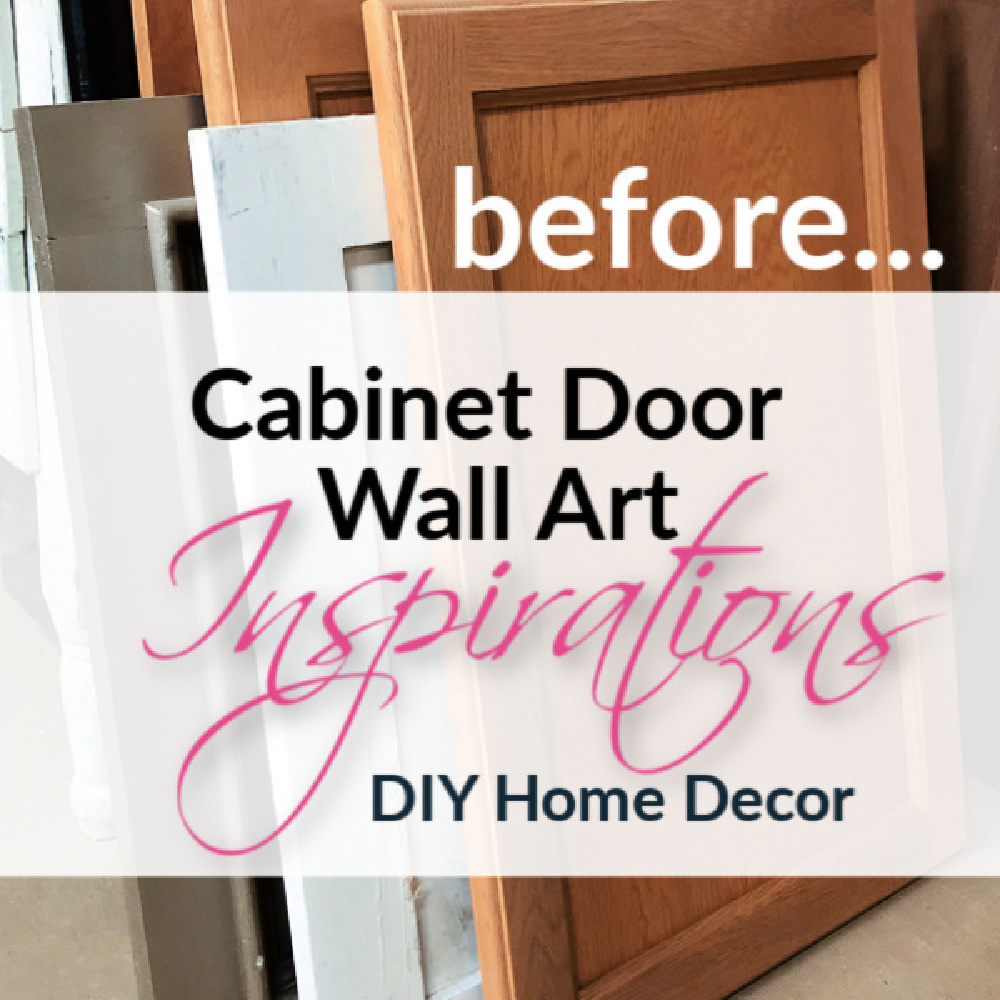
Old cabinet doors are a great way to create functional home decor. Recently I visited a ReStore with Habitat for Humanity and got super motivated to create something functional and pretty for my bathroom. The doors were affordably priced, and it was also giving back to the community. That’s a win-win in my book! Searching through an ocean of cabinets doors was actually inspiring at the ReStore. Let’s say it stirred up my creativity.
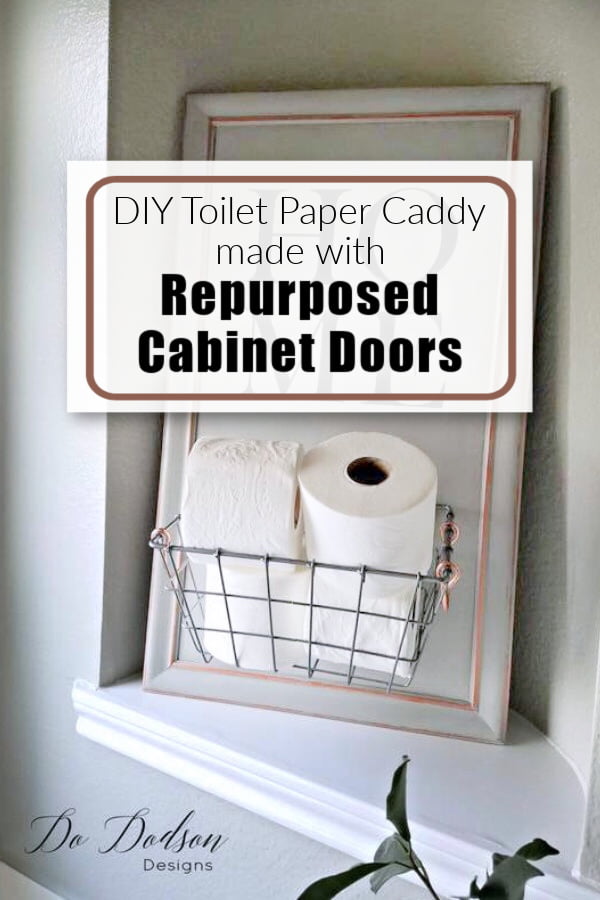
Today I’m sharing how to make a toilet paper caddy out of a repurposed cabinet door. Let’s DO this!
Estimated reading time: 5 minutes
This post contains a few affiliate links to help you find the products I use. You are not charged extra to use any of the links, but any income I make will be used for more fun projects! To see my full disclaimer, click here!
Supply List: Toilet Paper Caddy
Products List:
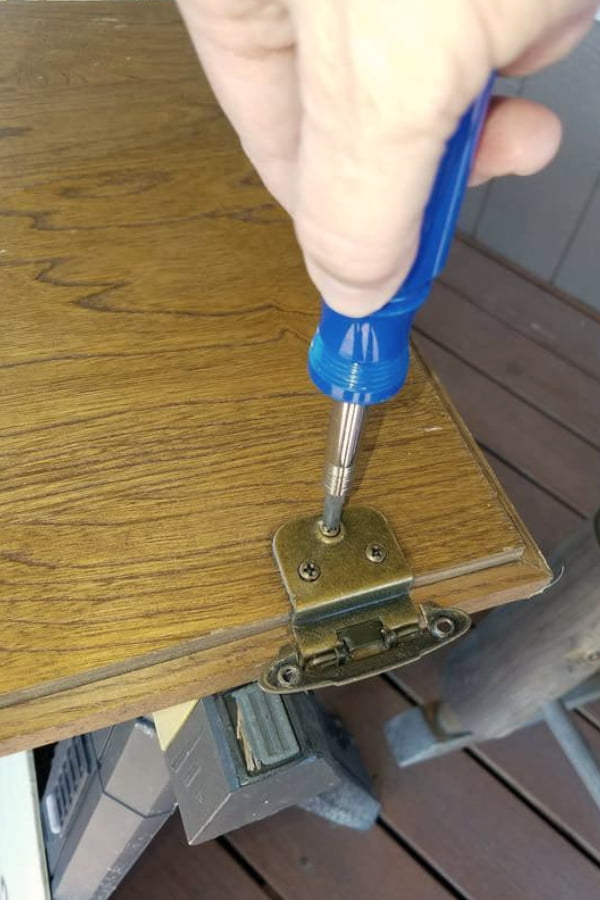
Step 1: Remove Old Hardware
For this project, the first thing I did was to remove all the hardware. A simple screwdriver is usually all you will need.
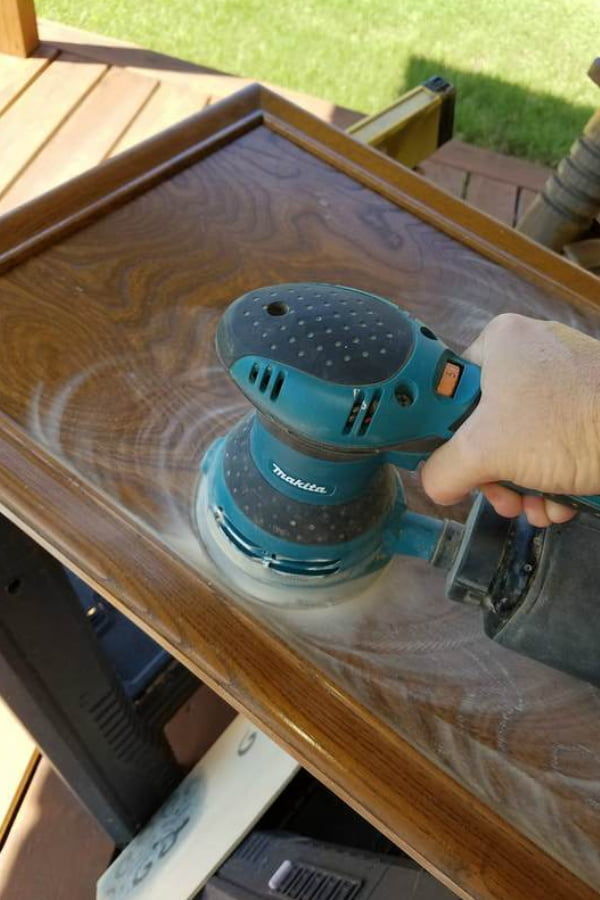
Step 2: Clean And Scuff Sand
Repurposed cabinet doors are usually filthy, so a good cleaning is needed. I cleaned them well with a soapy water solution (Dawn dish detergent) and rinsed them with water. The Dawn will help cut the grease that most cabinets have. Most cabinet doors will have a shiny surface, and for the paint to adhere, you will need to scuff up the surface (lightly sand) with sandpaper. I used 220 grit paper with my orbital sander to speed up the process, but you can do this by hand.
Fill holes left over from the hardware with wood filler and allow to dry. Sand smooth before painting.
Step 3: Painting The Cabinet Door
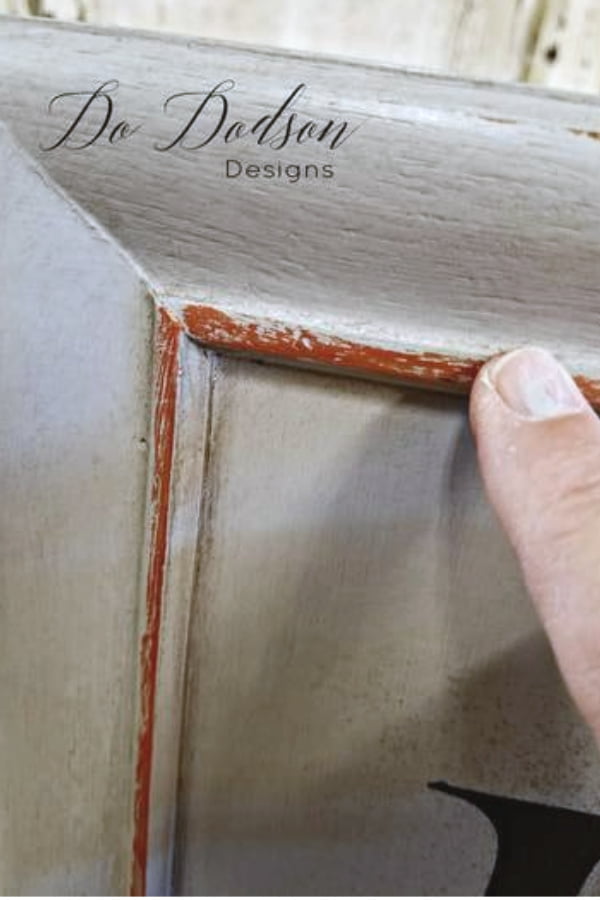
Next, paint the cabinet door with chalky type paint. For this project, I used a beautiful color called Driftwood by Dixie Belle Paint Co. AIt took 2 coats for full coverage, and after it had dried, I added a black wax over the whole door buffed it with a soft cloth. This gave the cabinet door an aged finish and sealed the paint for a durable finish.
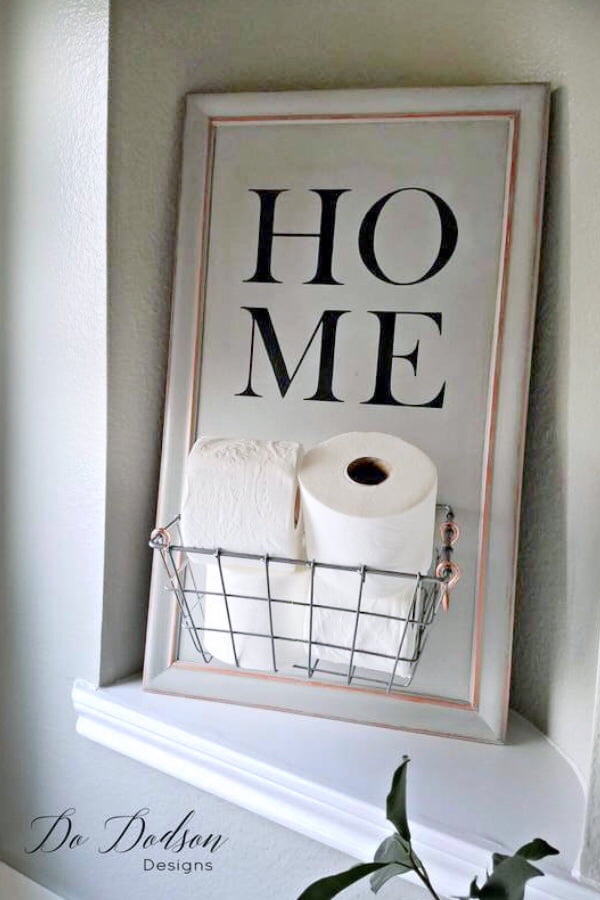
I chose to add a stencil with the words H-O-M-E on my repurposed cabinet door. Of course, you can do anything you like. A few other options would be to add a decor transfer or a stencil design. Make it match your home decor.
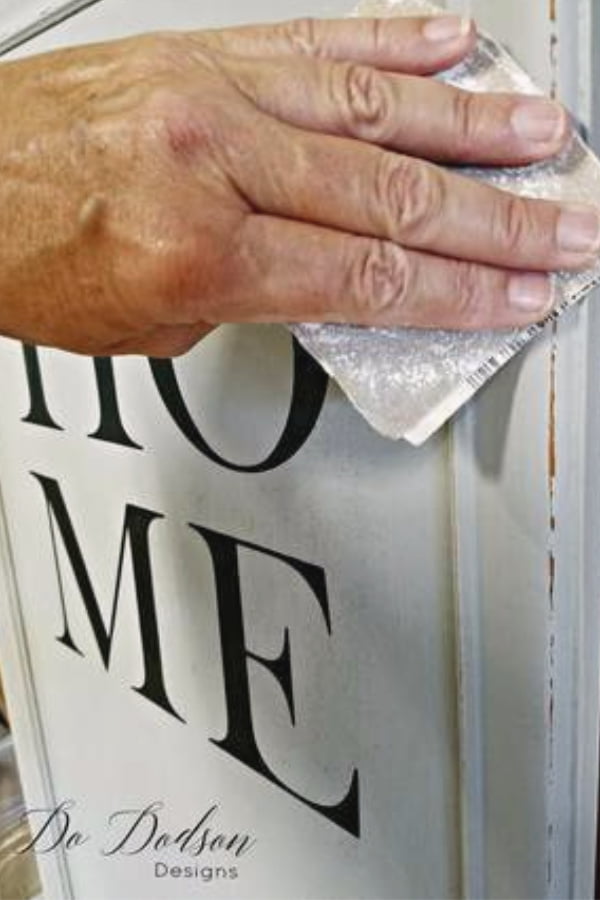
If you like the distressed look, use 220 grit sandpaper to scuff the edges for a rustic look. This always works well in my home with my boys.
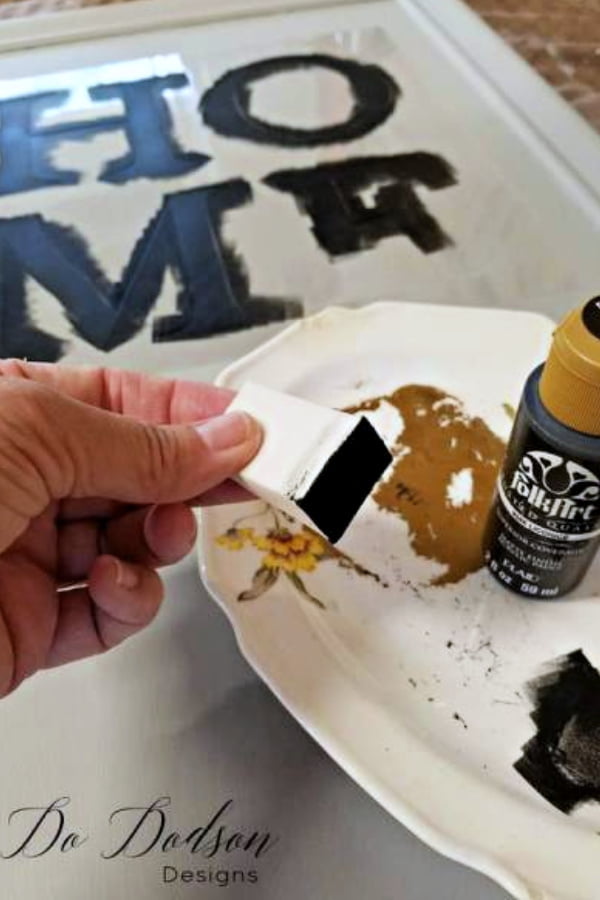
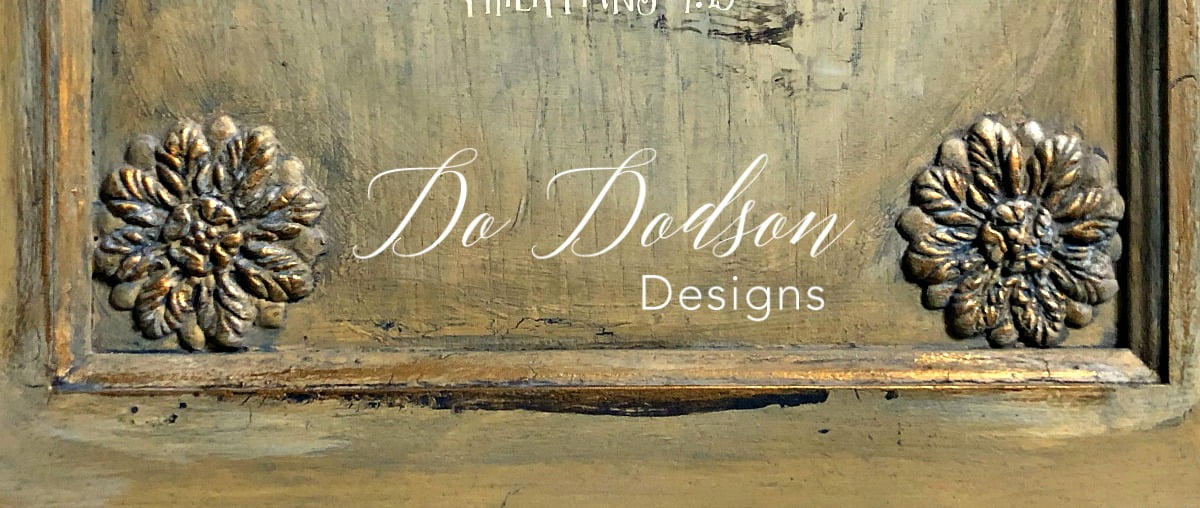
Because this cabinet door has some trim on the inside, I chose an accent color (Copper gilding wax) that matched my basket. It’s easy to apply, and you don’t have to seal it. Once it dries, it’s permanent! It’s best applied by finger but be sure to clean your finger after use. It sticks to them too. 😏
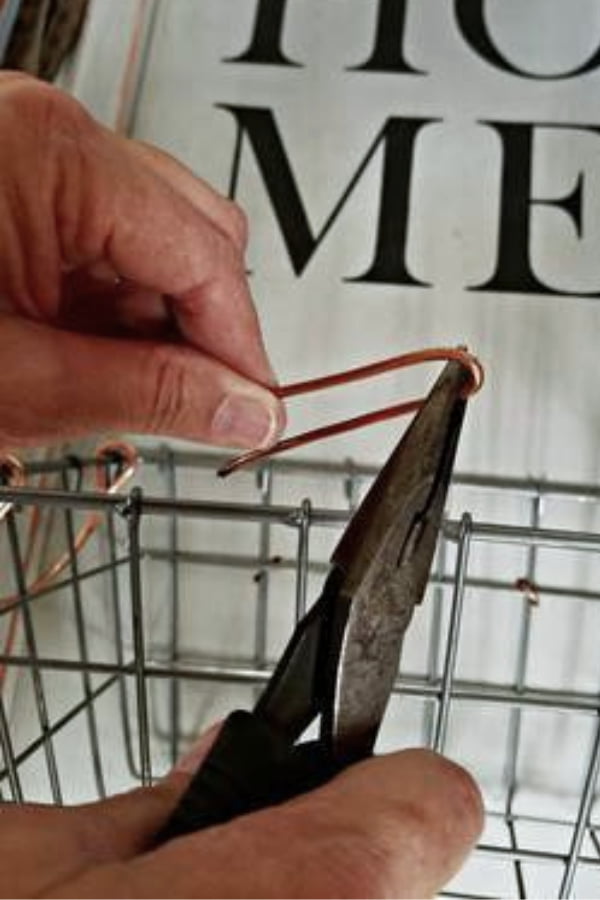
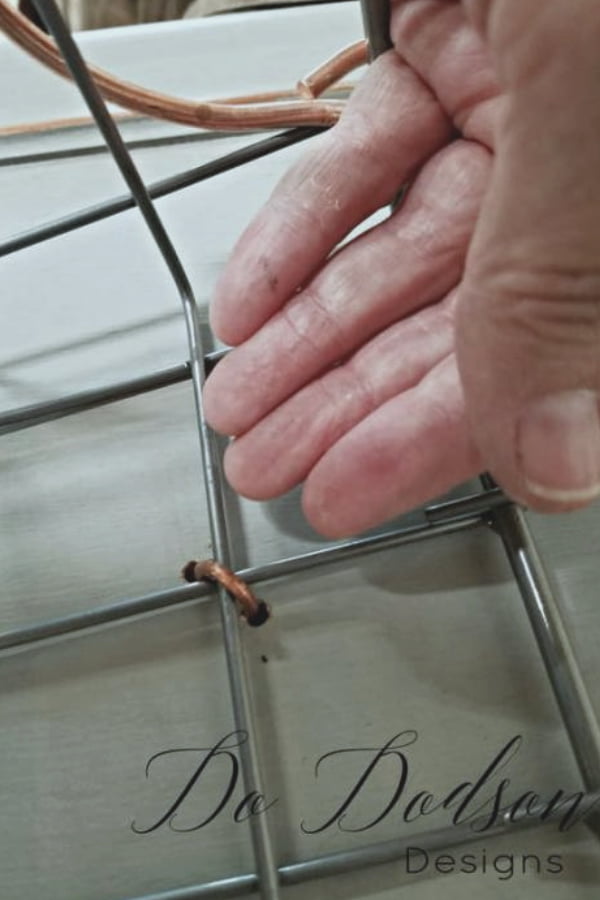
Step 4: Adding The Basket
Drill 2 holes into the cabinet door and use wire (I used copper) to secure the basket from the backside.
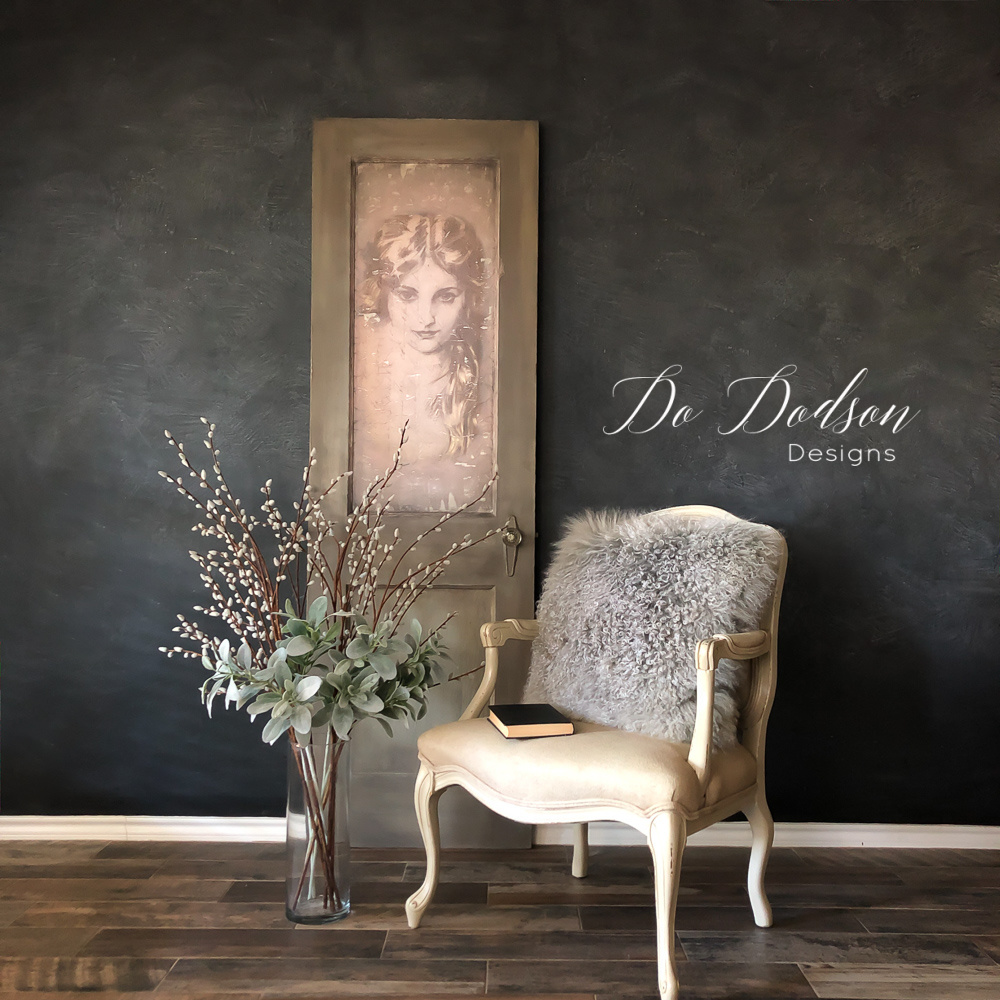
Toilet Paper Caddy Made From Repurposed Cabinet Door
I hope this has inspired you to consider using those repurposed cabinet doors and develop useful ways to use them in your home. And that my friend is functional and pretty home decor on a budget. I L O V E using these old cabinet doors!
Thanks for hanging out with me today. I hope you will come back often as I’m always making something pretty and I love to share. Check more of my DIY home decor projects below.
Until the next project… xo, Do

Love your work…. I’m thinking of redoing a pair of plaster-of-paris jug style lamp. They are beige, with some rough texture and I want a hammered coppery, burnished look. My thought was to paint them dark brown , highlight with ??? for the metalic look, maybe rub something over that for a more subtle look. can you recommend any products or help with ideas . They are quite large so gold leaf would be to costly I think. I love the shape, they are leftovers from the 80’s- mauve-powder blue era.. to good to toss…. I’d rather redo.. Keep sending projects love’em….
Wanda Sinnema
Hi Wanda! Sounds dreamy! You might want to try a gilding wax. Dixie Belle has a copper gilding wax that can be applied with your finger. Well that’s how I do it. It’s super easy and it sounds like what you’re wanting. Here is my affiliate to find it easily. https://dixiebellepaint.com/shop-dbp/waxes-glazes-and-finishes/?aff=80
Let me know how it works out. I’d love to see them when you’re done. xo, Do 🙂