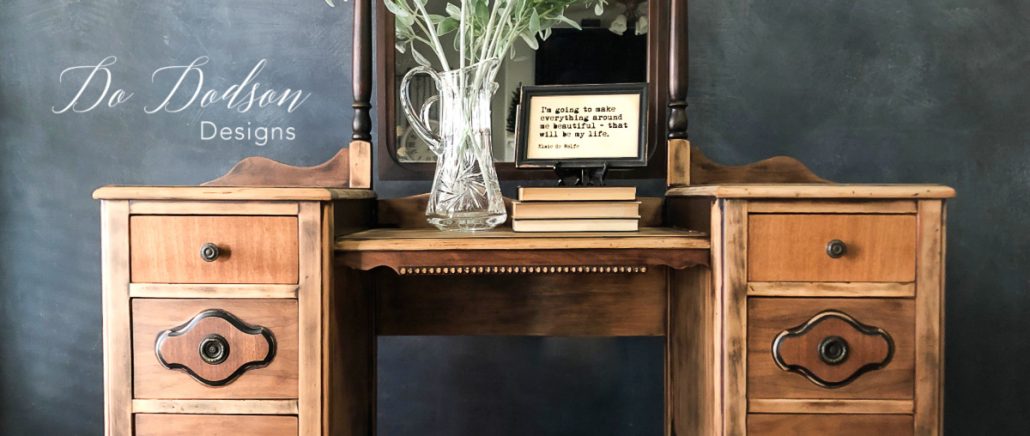

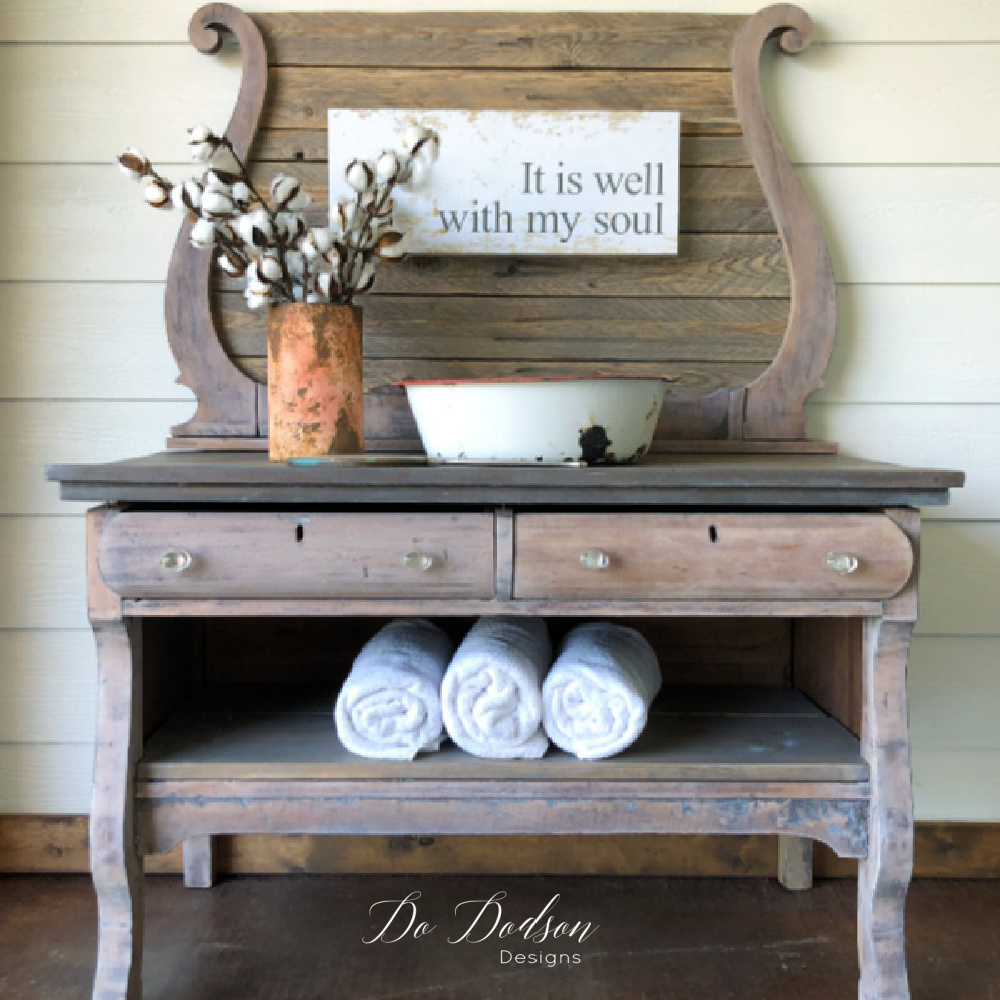
I’ve always loved the look of natural raw wood furniture and the charm of the farmhouse look. With a little elbow grease, you can turn your antique pieces into a style you can incorporate into your farmhouse style and preserve the wood’s beauty without painting. Read on…
This post contains a few affiliate links to help you find the products I use. You are not charged extra to use any of the links, but any income I make will be used for more fun projects! To see my full disclaimer, click here.
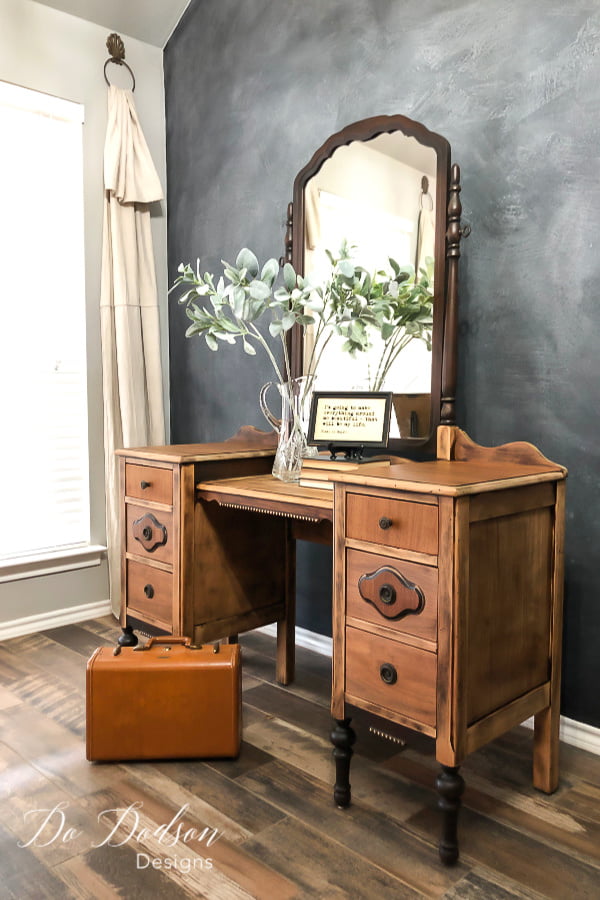
How To Get A Raw Wood Furniture Look
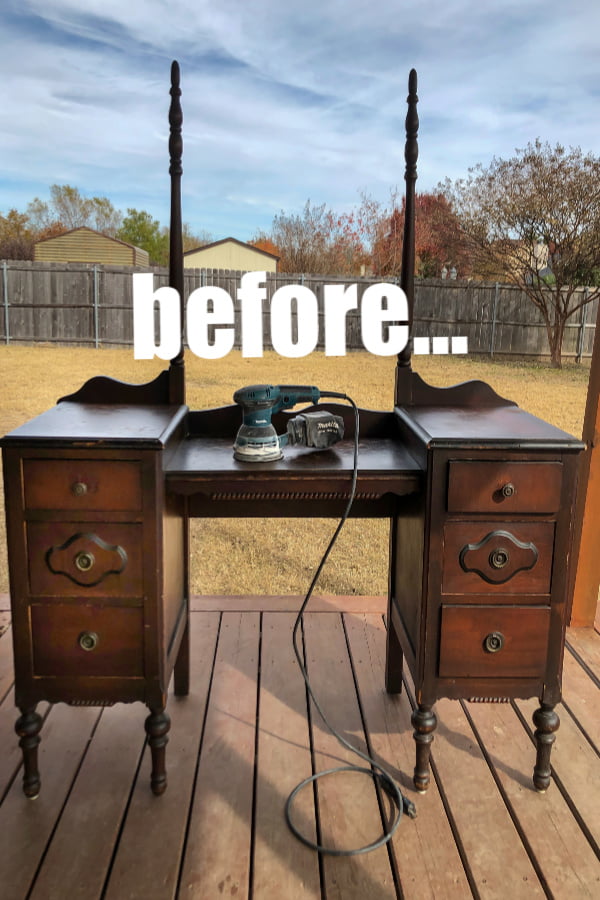
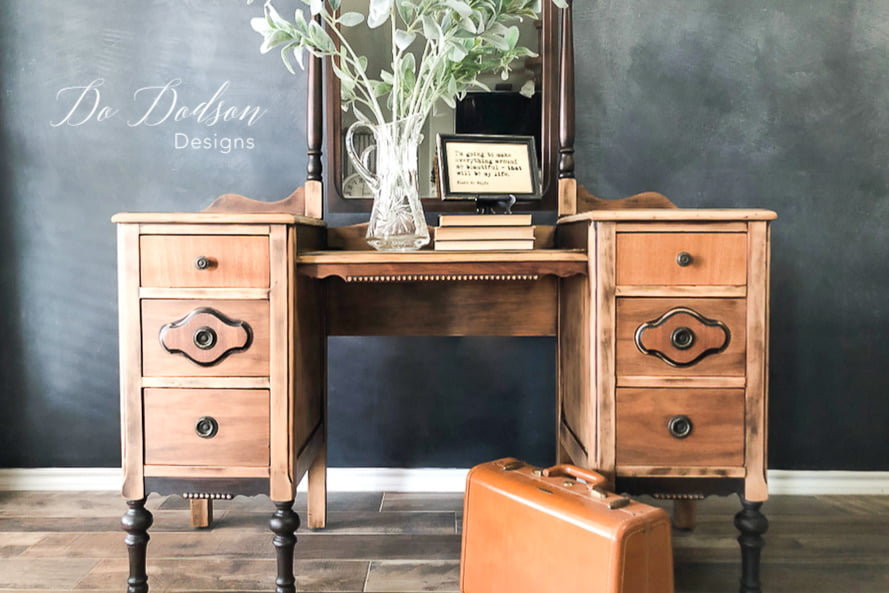
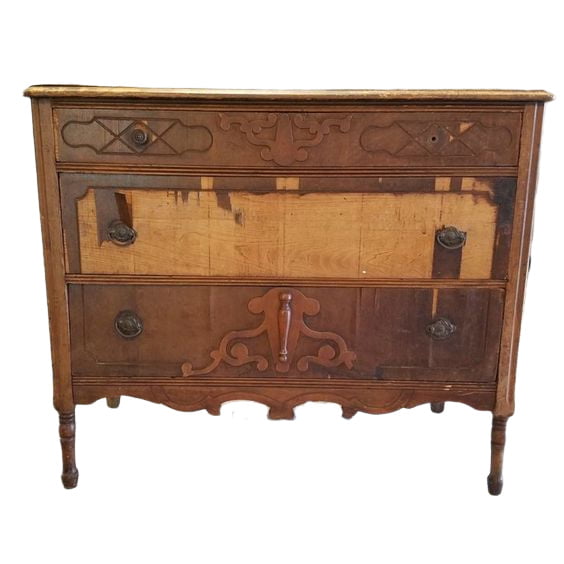
It’s been 38 years since my Mom purchased this for me. I was 16 years old at the time, and the furniture bug had already bit me hard. I begged Mom to buy this for me. I’m sure it shocked her that I had even asked. The price tag was $75 (that was a lot of money back then), and I just knew that Mom would say no. To my surprise, she said yes, and I was a happy girl. I was the proud owner of my first piece of furniture. It has followed me from home to home through the years, and it has lived in the guest rooms where I knew it would be safe. I’ve always wanted to paint it, but for some reason, it didn’t happen. Now I know why.
GATHER YOUR SUPPLIES
- Orbital Sander
- 180 grit sandpaper disks
- Dremel Tool
- Paint Brush (Dixie Belle mini)
- Gator Hide (sealer)
- Denature Alcohol
- Cotton clothes/paper towels
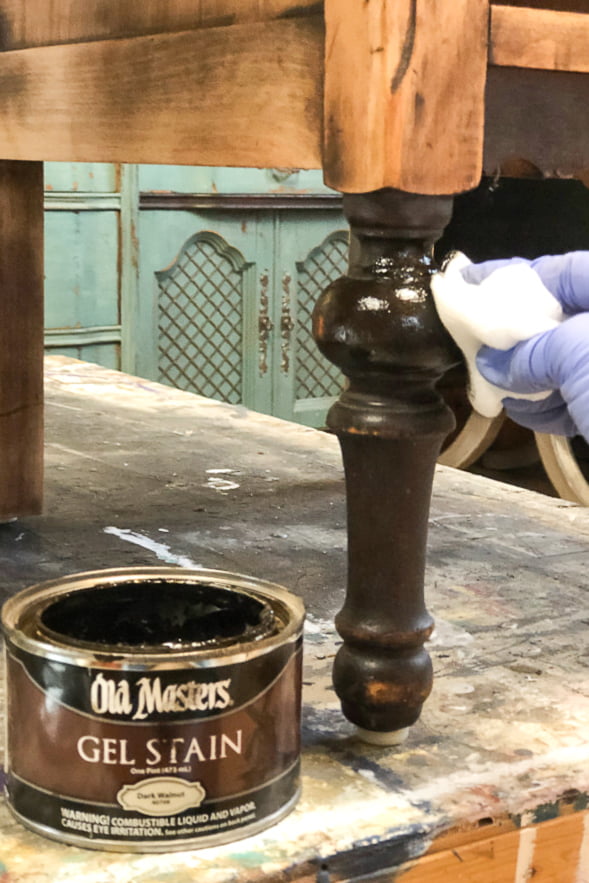
- Old Masters Gel Stain (Dark Walnut)
- Low Lint Cheesecloth
Getting The Raw Wood Furniture Look
I had done this raw wood furniture finish once before on an old armoire, but it had a painted surface, and that piece involved using a paint stripper. That involved stripping. This was way easier! I didn’t even know how old this piece was, but the varnish had turned almost black. That’s a sign of an old piece. The drawers were dovetailed, and it was as solid as it was 35 years ago, and it was old then. This was the perfect piece for this makeover.
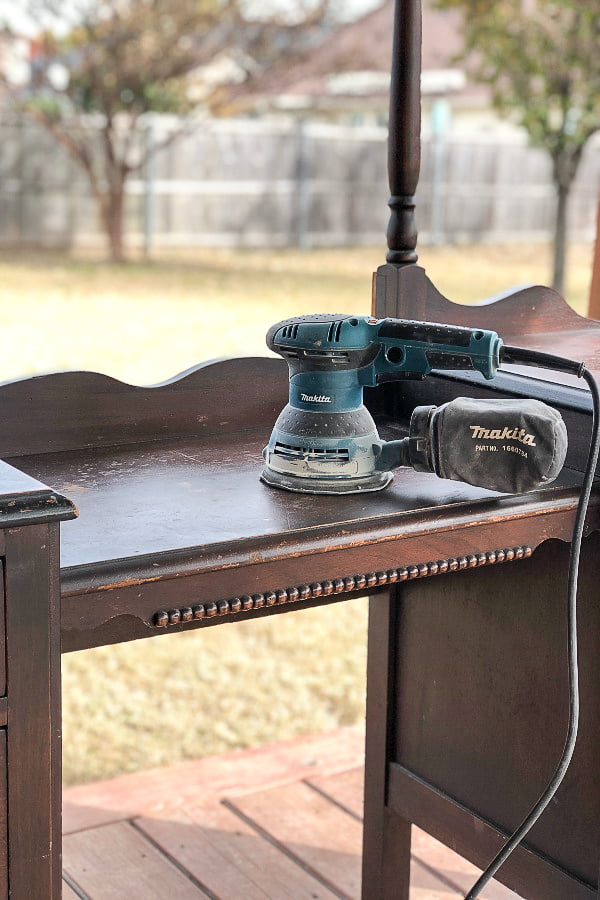
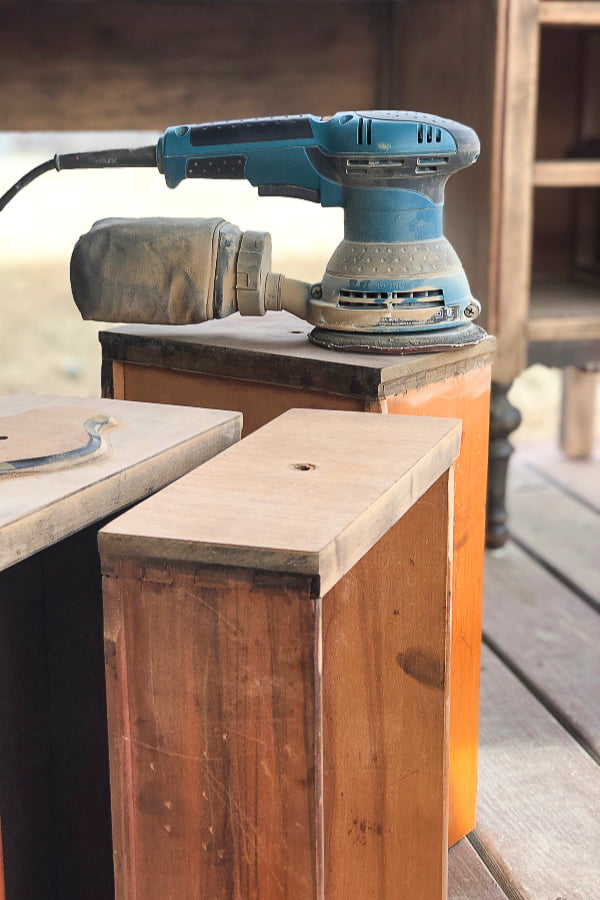
I started my project with my electric Orbital Sander and a 180 grit sandpaper. Carefully I sanded all of the surfaces that I could reach. The old varnish sanded down easy on the top surfaces, but underneath, it was more protected and harder to remove.
I changed out the pad frequently to keep it from gumming up on the pads. When sanding, I was careful not to sand all of the old varnishes off. Just enough to see the raw wood. I left some areas with the old varnish to add a character that only an existing aged finish could give.
Using The Right Tools For A Raw Wood Furniture Finish
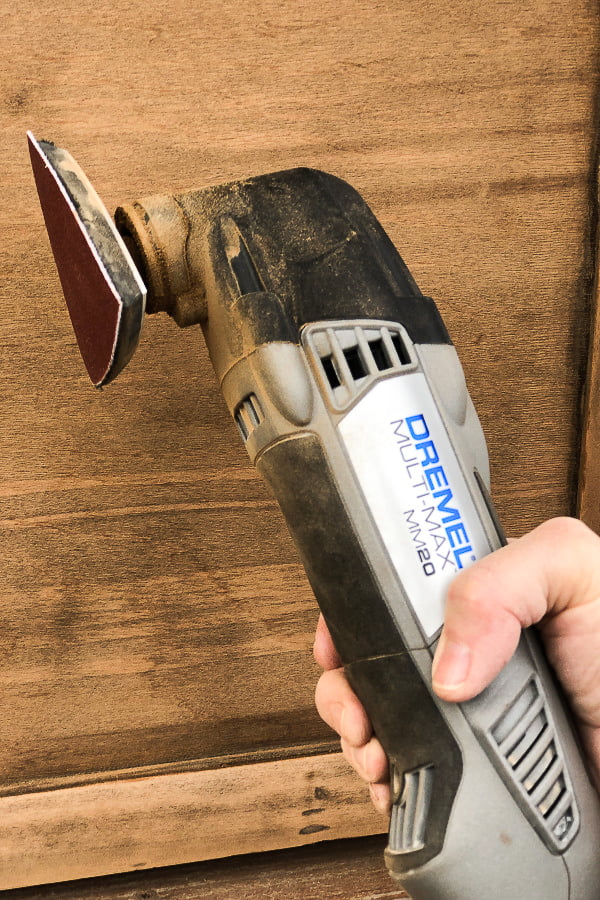
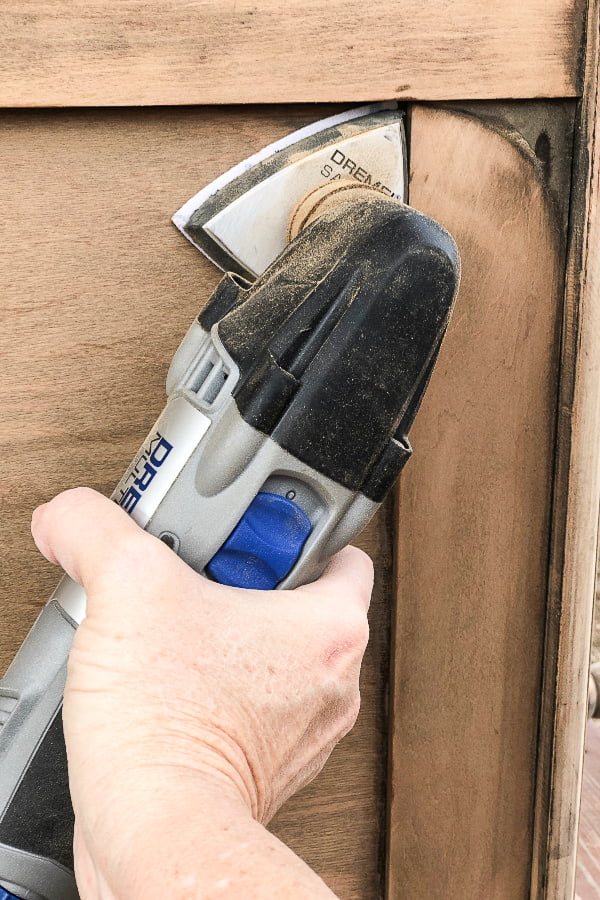
The corners and tight areas would have to have another tool to get into those tight areas. For these areas, I used my Dremel Tool. It came with a triangle sanding head and pads. It worked like magic. The raw wood furniture finish was starting to come together! I left a bit of the old darkened varnish in the cracks and around the inside of the corners. It almost looked like someone had glazed it in the corners. Nice!
Cleaning The Raw Wood After Sanding
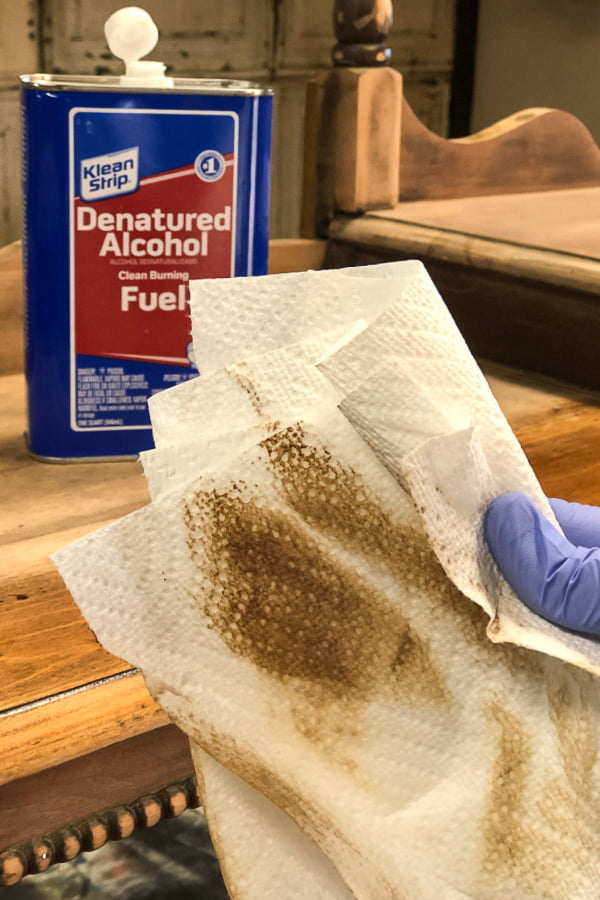
The surfaces were carefully cleaned with denatured alcohol. The alcohol evaporates quickly and doesn’t add moisture to the wood. This was necessary to remove all the leftover dust from all the sanding. I used a paper towel but probably should have used a cotton cloth.
Touching Up With Gel Stain
I added Old Masters Dark Walnut gel stain with cheesecloth on the areas I chose not to sand. It covered all the scuffed areas on the existing finish beautifully.
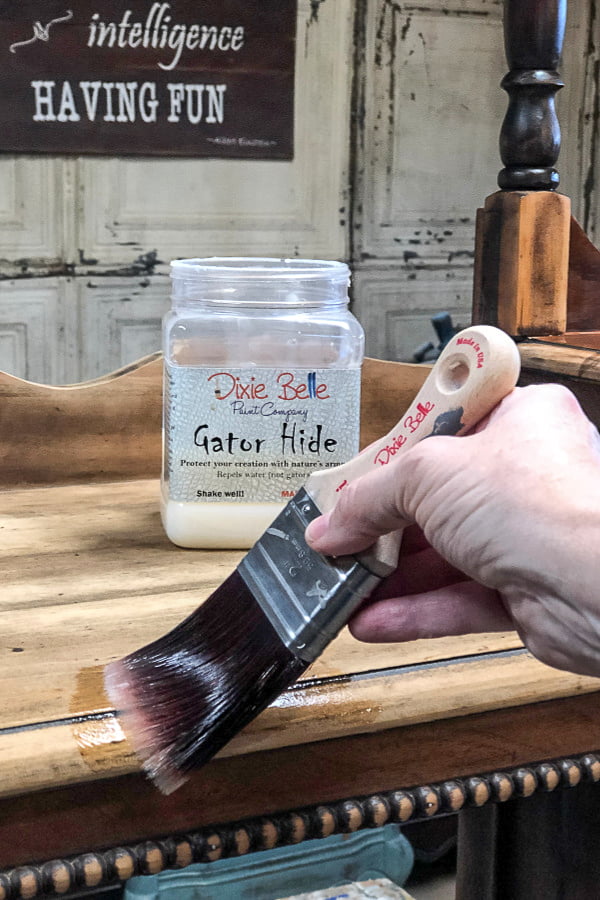
How To Seal Raw Wood Furniture
I used Dixie Belle’s Gator Hide to seal the raw wood furniture finish and protect it. Typically I would use this product over painted surfaces, but it worked great on the raw wood. Brushing it on with a soft paintbrush and not overworking it was key as it dries quickly. The wood drank up the Gator Hide, and when it had dried, the finish was smooth and beautiful.
The Natural Beauty of Raw Wood Furniture
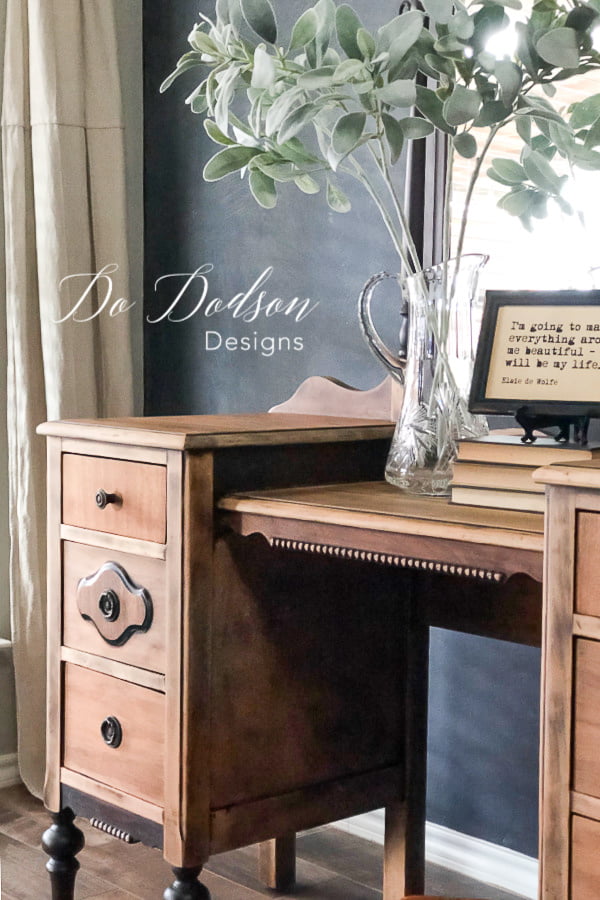
It’s funny how things play out over time. This project could have gone; another direction had I not just waited for the right time. Although I love to paint, not everything needs paint. I hope Mom likes it. 🙂
Hey, thanks for stopping by! Would you try this Raw Wood Furniture Finish on your antiques? Let me know your thoughts in the comment section below. I’d love to hear from you.
Until the next project… xo, Do


so good I love this!!
Thank you sweet friend! 🙂
You really did an awesome work ! Congratulations!
Thanks so much for stopping by Val! I’m so glad you enjoyed it.
xo,Do
It’s so nice that you’ve kept this sentimental piece for all these years. It looks beautiful Do… and I’m sure will be in great shape for another 38 yrs! 🙂
Thanks Denise! I’m gonna try to keep it as long as I can. I feel a room makeover coming soon. All because I did a furniture makeover. It’s how we roll, right?
xo, Do
Love your horse! The pic just makes you want to love on him! Love the piece. Nice job!
Thank you Ms Sandi! He’s pretty awesome! The furniture aint bad either. Thanks for stopping by.
xo,Do
It turned out beautiful!
I agree, not everything needs stain or color.
So glad you agree. Thanks for stopping by and happy painting? Happy staining? Ha! Happy makeover!
xo, Do
Dear Ms. Dodson,
Your work on the piece is wonderful – I can literally see the shine even in the photo. So PLEASE, this question isn’t a criticism, it’s ignorance looking for information. Let’s say the piece had been a valuable antique. Does the kind of work you did on it destroy its monetary value? It was altered rather than cleaned/restored? When I ask this question, in the back of my mind is family lore about the day my father found an extremely valuable bronze statue… except it had been stripped of the bronze finish, and gilded. It was then worthless. And my in-laws are antiques dealers, and my parents collect some kinds of antiques. Best wishes, Lauren
Hi Lauren!
Excellent question and one to ponder. Had this piece been in great shape, I would not have painted it. However I do understand what you are saying. My customers want painted furniture and pay the value of the antique piece even after it has been painted. With that said, I can’t speak on the behalf of other furniture painters, but not everyone sees value in these antique pieces. Styles have definitely changed and these antiques will become ever rarer as time goes on.
I have refinished many pieces but even that from what I know depreciates the value of the original finish. So what do you do? In my heart I know we can’t save everything forever, so why not enjoy it painted, refinished, or in it original skin as long as we can. It’s like my Grandma’s old quilts. She told me to use them and not to let them go to waste. A few of them are beyond repair, but I am re-purposing them into other pieces of home decor so that I may continue to enjoy them and pass them down to my children and grands.
I hope this helps and I appreciate you asking me. I really love what I do and do my best to save these old pieces so they don’t end up in the landfills.
Blessings to you and yours. 🙂
This is absolutely beautiful. Wonderful job!
Thanks Cindi! I was very pleased with the end results.
I saw your post on hometalk and noticed you are from Canton – I am from Bossier City, after 46 years moved to Salem, Oregon area in 2005. 1) you are beautiful 2) I have fun memories of going to Canton flea market and have friends in the area.
Hi Karen! So nice to hear from you. It’s my home and the Flea market… well, you already know how fun it is. Look me up if you’re ever in town.
Blessings,
xo Do
I really enjoy your work. I follow you on Pinterest and love it when you post something new.
I am wondering why you go to all this sanding trouble to get a raw finish, when all you need is a good, thick application of Citristrip, water, and some dark paint BASE?
I’m stripping antique doors. 15 of these buggers! No joy in that, other than the end result.
With Citristrip, I found that one coat will take all the paint off. Up to 7 layers in my experience so far. A 2nd coat will remove any varnish left over, plus suck the stain right out of the wood. Which is what you’re achieving here with a lot more work. Neutralize Citristrip with water, not alcohol, and a 220 to smooth any raised grain once dried.
My Go-to top coat is BM’s paint base for black/navy/charcoal/dark colors, i.e. a 4 or 5. Paint base is the can that the pigment is added into, so it has no color to it at all. I use the exterior latex FLAT finish, which dries absolutely invisible, but has the water and UV resistance we look for in high use finishes. Like kitchen cabinets, bathroom areas, etc. No wax in the world will stand up to that much water, nor any household cleaners! Anyway, All my doors look like they’ve never had a speck of paint on them.
Just thinking as innovative as you are, you might like these tools for your toolbox. Citristrip makes stripping almost fun with its quick results. If I can contribute anything to your projects, I’d be a proud mama! 🙂 Thanks for sharing all your hard work!
Thank you so much for sharing, Christine. I do use Citri-strip when I feel it’s the right choice. This piece was very brittle and I was afraid to saturate it with water. I love that we have so many options.
Keep up the good work. 🙂 xo, Do
Love seeing your makeovers!
I sanded my antique kitchen table down to the raw wood..the look I wanted.
Cleaned it and sealed it with 2 coats of gator hide. Typically when I seal painted furniture with DB top coats there are no issues with water from cups. But with the raw wood and gator hide as the top coat I’m still getting water rings. I even sanded it down twice and redid the gator hide. adding 3 new top coats and still… water rings show.
I know I can use coasters for drinks… but just seems that raw wood may be harder to find a top coat that really protects.
Your advice?
Thank you!
Hi Laura,
I always use a table cloth and extra protection on my table. Even the best topcoats won’t prevent water damage. Especially if they are water-based products. You may have to go with a polyurethane product, but they tend to yellow over time. My best advice is to cover it well and use coasters. Hope this helps. 🙂 Do
I’m new to refinishing furniture and found that I love the raw wood look and you have helped me tremendously with this information. I love the finished peice! Also want to know where you got your flooring from thats in your after photo?
Hi Sara! I’m so glad this helped you. The flooring is a ceramic tile from Home Depot. It’s so forgiving and doesn’t show dirt like most tile floors. I highly recommend it.
xo, Do
I have been debating what to do with my grandmother’s jacobean style dining room set. Because the China hutch has lots of missing veneer and the veneer on the table has buckled in a few places all I could think of was paint. But this changes my mind entirely. Forget the paint I think the raw wood will make my heart sing… And that’s what it’s all about ?
Oh, that sounds perfect, Glenda! Yes, I agree… it’s about making your heart sing. So glad you found the answer. 🙂
I have an oak table that I have sanded to the raw, love the look of beach wood. It seems clear coat, or even water makes it look like golden oak color. What product can I use to keep the raw wood appearance.
Great question, Eva! And you are right. It does bring up the tones of the wood. Try adding a white wax over the raw wood. I did this dresser a while back. https://dododsondesigns.com/white-wax-furniture-makeover/
Some furniture doesn’t needed to be painted. This turned out beautiful. I have a mirror from my grandmother that I refinished back to wood and I love it! Your piece is gorgeous!
I agree, Nancy! What a beautiful way to remember your Grandmother. Blessings to you. xo, Do
I absolutely love your makeovers!!! I’m currently working on bleaching a kitchen table. Would you recommend the gator stuff for a top coat and sealer on a kitchen table?!!! I haven’t used it but am in love with Dixi Belle paint…. any advice would be welcome!!!!
Hi Rachel! I totally recommend it. But like any topcoat, you still have to protect the table from sitting water or wetness. I did leave a glass on it once and it left a white ring. I was so bummed… but after a few days, it was gone. It’s a waterbased product but super durable. I just refinished my dining table and sealed it with 2 coats of Gator Hide. Here is the blog post about that makeover. https://dododsondesigns.com/how-to-whitewash-wood-table-top/
Have fun with your table. xo, Do
This is just beautiful. I am refinishing an old armoire that I got from a yard sale for $10. It has a little detail, but the best part is s that the inside of the closet and all five huge drawers are lined with cedar. I have had a boot fetish during COVID, and my walk-in closet smells like old shoes! I began sanding the piece (it was covered in ugly mahogany stain) and just fell in love with the wood underneath! It has different directional grain on the drawers. I love what you did and am torn between adding old grey stain or the clear sealer you called Gatorhide. It won’t be shiny will it?
Hi, Kelley!
Isn’t it amazing how beautiful wood is after it’s been cleaned? Here is what I have discovered when working with raw wood finishes. Different woods have different undertones, and when you use a sealer over the wood, it will bring out the undertones of the wood. For example, mahogany or cherry wood will have a pink tone. A transparent gray stain may be your best bet. Gator Hide has a satin finish. 🙂
I love this piece. It is always difficult with an old or antique piece to decide whether to restore it or give it a new lease of life, but sometimes giving it a make over ensures the piece goes to a home where it will be used and appreciated and continue to be loved.
Exactly. I think it’s better to update and keep living. Kinda like a hip replacement. LOL which I have.
Hi Do,
I love what you create. You are a talented lady😊 Could you tell me if you put the denatured alcohol right on the rag and wiped it down? When the alcohol dries, it wouldn’t affect the paint, stain, topcoat, etc . that would be put on the piece of furniture would it?
Thank you
Hi Lisa, Great question!
Thanks! No, it will not harm the finish as alcohol dries quickly and evaporates on the surface. Just be sure that you allow it to dry thoroughly overnight. Good luck with your project. 🙂 xo
How did you manage to process the beaded strip?
Hi Audrey,
I have a sander with a padded abrasive that works well sanding and stripping of detailed area of wood furniture. It’s my go to sander. You can read more about it here. https://www.dododsondesigns.com/best-sander-for-furniture-refinishing/