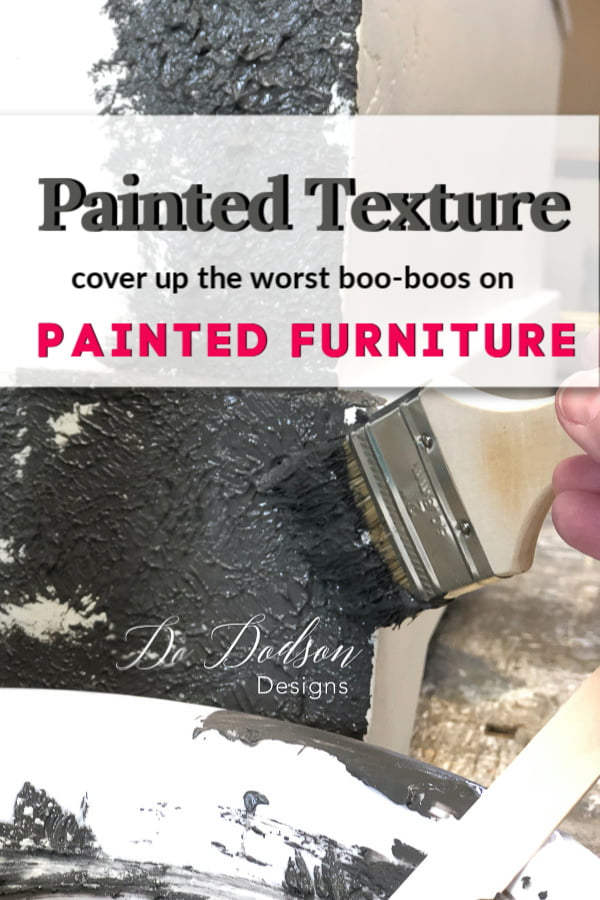
Have you seen all the cool painted texture furniture out there lately? My friend Stephanie with Re-hab To Fab inspired me with her amazing texture technique, so I thought I’d try it for myself. I’ve always had this thing for old buildings where the plaster had fallen off with exposed bricks. For this makeover, I have a specific look and a deep meaning behind it—Hanky alert.
This post contains a few affiliate links to help you find the products I use. You are not charged extra to use any of the links, but any income I make will be used for more fun projects! To see my full disclaimer, click here.
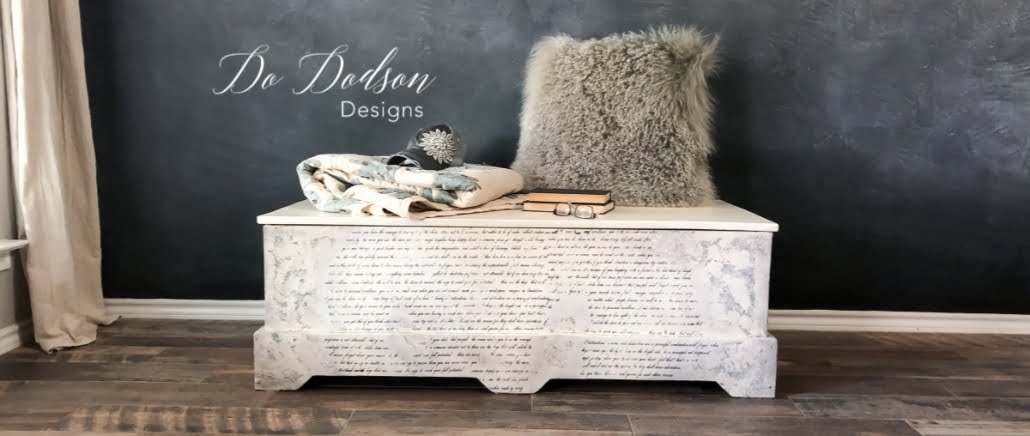
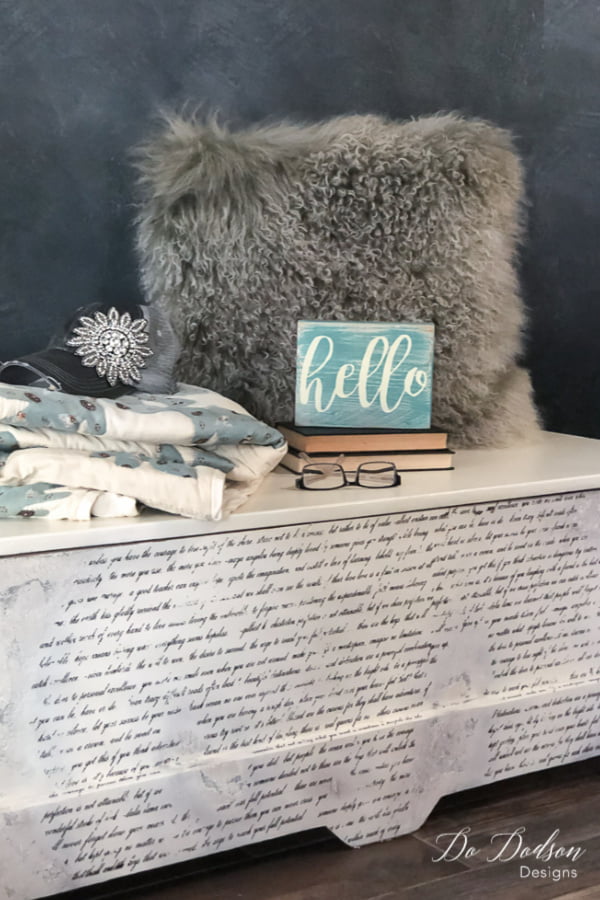
How To Add Amazing Painted Texture To Furniture – Before
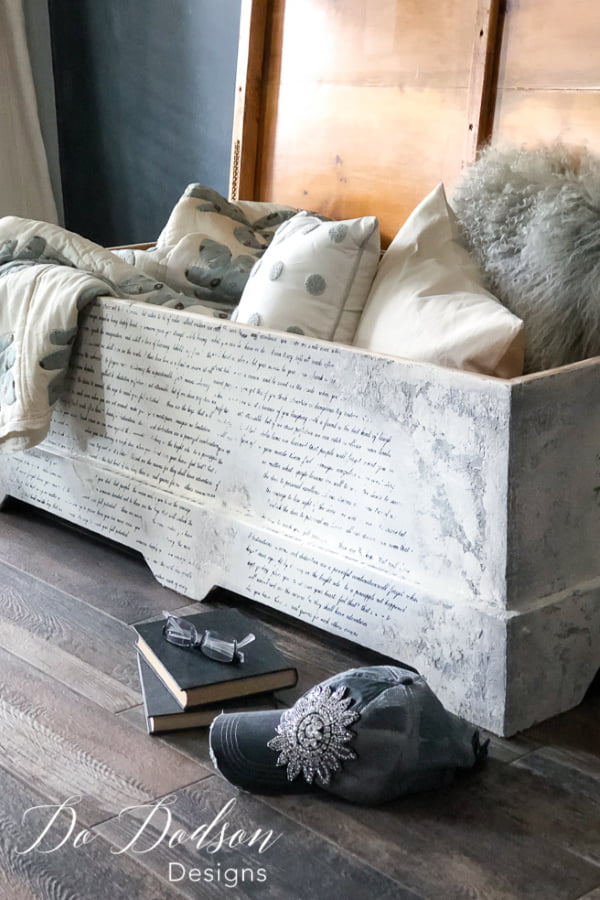
No, this isn’t a cedar chest. That would be sacrilegious. This was a custom build by someone local, and a friend purchased this on Marketplace for $40. Score! It’s in great shape and perfect for my idea of painted texture and a never-ending story.

SUPPLY LIST:
- White Lightning (wood cleaner)
- Paintbrush (Dixie Belle Mini)
- Chip Brush… disposable
- Paintbrush (Belle Brush) for blending
- BOSS (clear)
- Butter Cream (chalk mineral paint)
- Gravel Road (chalk mineral paint)
- Sea Spray (texture additive)
- Plastic Spreaders (for spreading texture)
- Spray Mist Bottle (for water)
- Top Coat (clear matte)
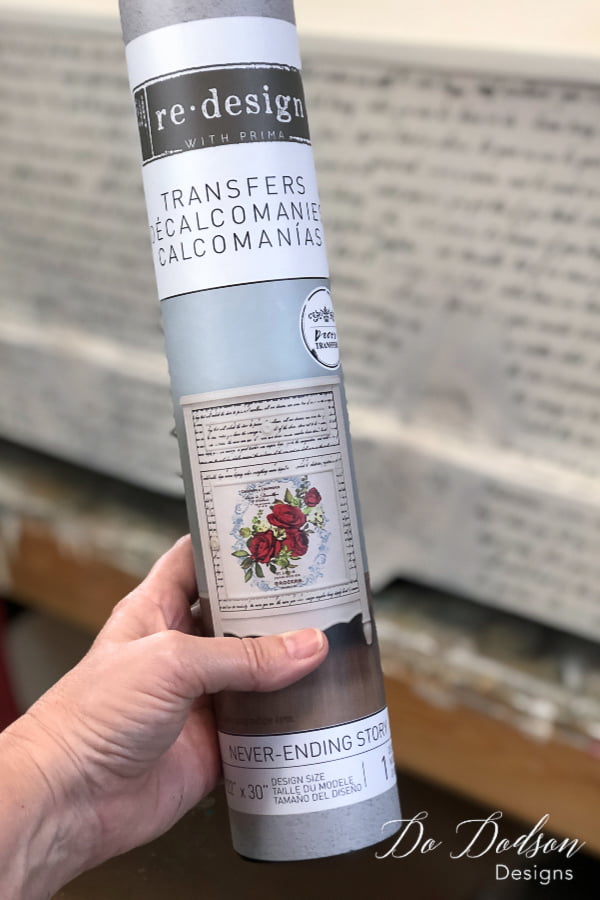
- Decor Transfer (Never-ending Story)
Prepping The Furniture Before Painting
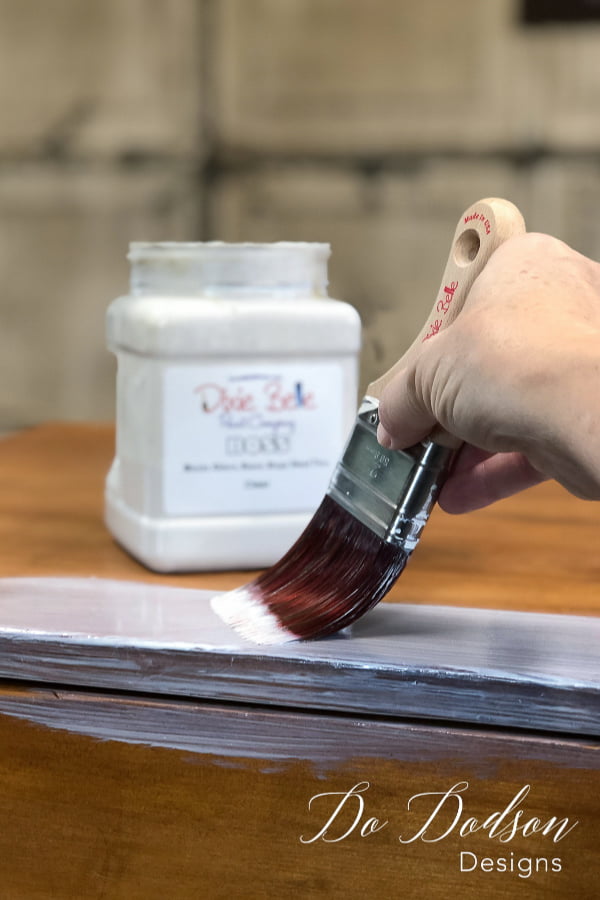
Before you start with any makeover, you must clean and prep the surface before you paint. I use White Lightning (cleaner) to make sure to remove the things you can’t see with the naked eye. It may look clean, but you really don’t want to guess this part of a makeover. There could be hidden grime and or oils on the surface that could cause the finish to fail. After cleaning, apply a water-based stain blocker/primer. I used the BOSS on this piece.
Adding The Painted Texture
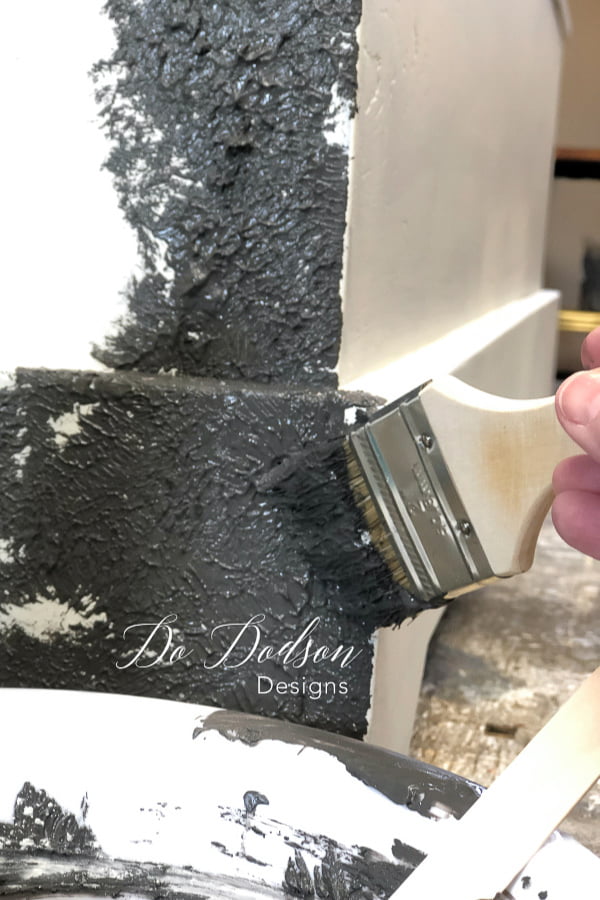
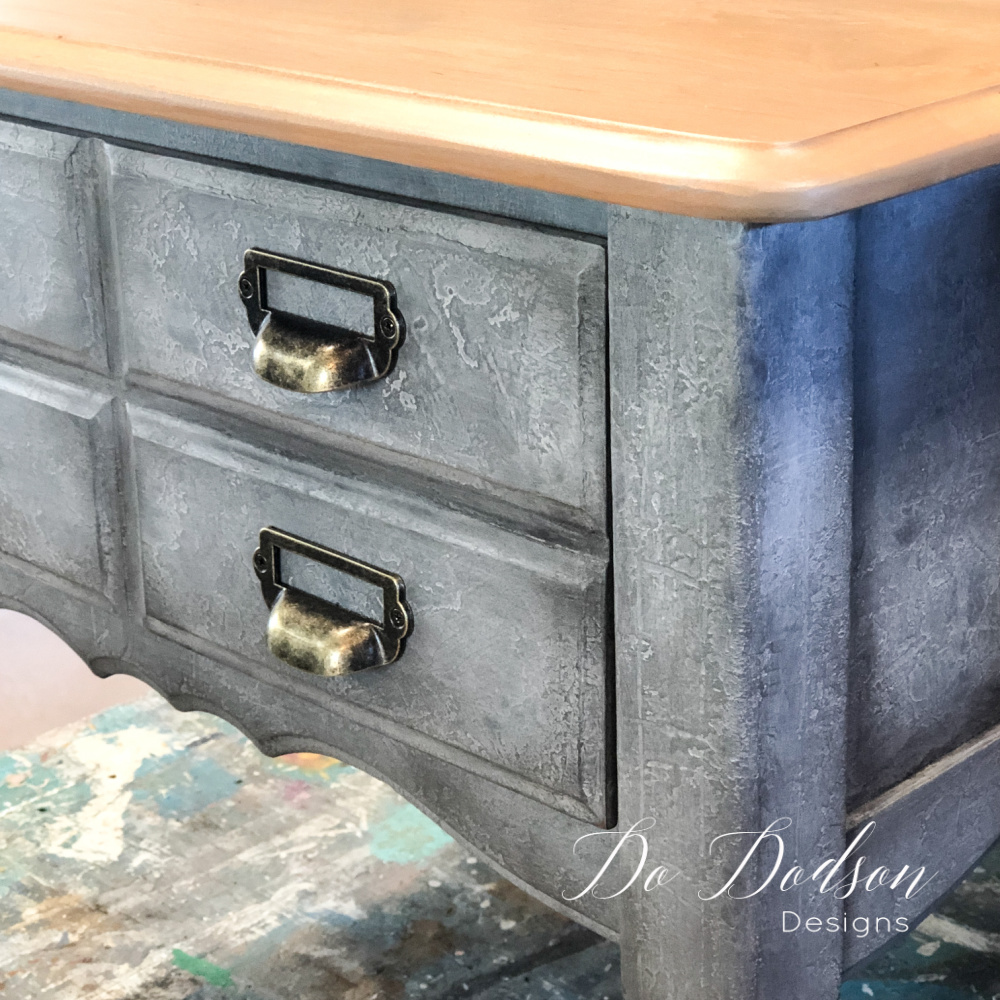
I started with a neutral base color called Butter Cream. It’s one of my favorites. I painted 2 coats over the entire chest and allowed it to dry overnight. Next, I mixed a texture additive to Gravel Road (Gray) to a consistency of peanut butter.

I applied the Sea Spray with a chip brush with the end of my paintbrush, leaving peaks and rough texture. I used a plastic spreader to rub over the texture lightly. Use a light hand when doing this. You aim to knock down the peaks and leave as much texture as possible.
The Second Layer Of Painted Texture
After the first layer of texture has dried (overnight is best), mix up a second color of the texture paint in a lighter color. I used the base color Butter Cream. This will create depth in the texture. Apply the Butter Cream texture paint over the first layer in the same fashion and smoothing down the rough peeks with the plastic spreader. Again, this may take another night to dry before proceeding to the next step fully.
Blending Paint
I added a little paint blending with the Butter Cream and Gravel Road around the areas of texture to create a depth look to the texture.
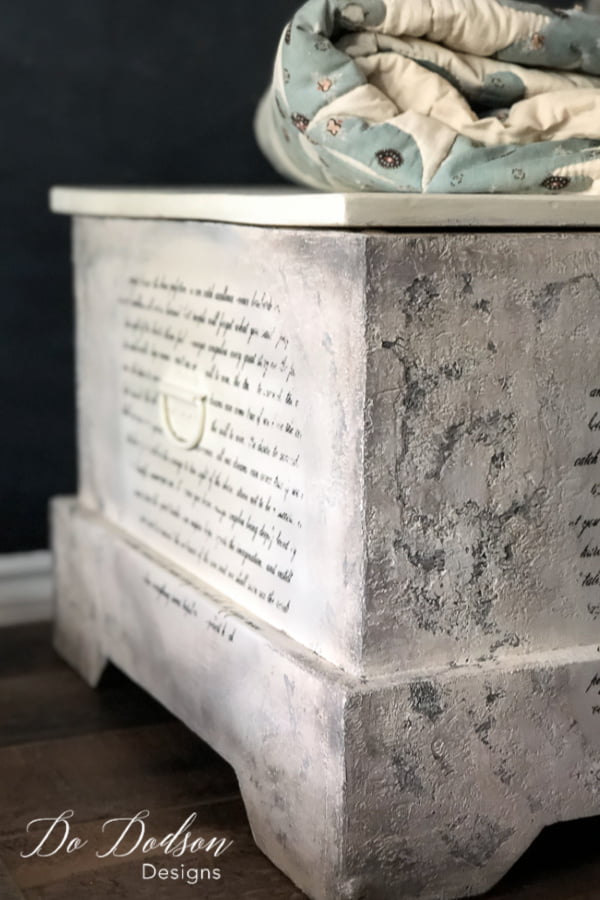
The Decor Transfer For The Win
Now here’s the kicker… find a decor transfer and add it to the areas where the texture wasn’t applied. You can also customize these transfers. Most of them come in sheets, so I cut them out with a pair of scissors to fit where I want them to go. After applying, I seal it with a topcoat. Make sure your painted surface is dried well before the application of the transfer. I will not adhere well if the paint is still damp, even if it’s dried and cool to the touch. Paint dries from the surface first, so it can take a while to dry fully.
The Never-Ending Story
Recently I visited my Mom, who is an avid quilter. Ya, it’s a lost art for sure. She does all her quilts by hand. Every stitch!
We pulled all of her quilts (a lifetime of work) out of a dusty closet where they have laid in silence for so many years. I know I counted at least 20. We laughed and marveled over the beautiful patterns, materials from old clothing (some from my childhood) and talked about all the women in the community (that are now gone to be with their Lord) that had helped stitch these amazing artistic creations. AKA The Quilting Club. A weekly gathering of ladies who share their passion for the all-mighty needle and thread.
My Mom The Artist
I told Mom she was an artist, and I’ll never forget the look she had on her face. She smiled. It’s one of those moments that you know you’re witnessing something great. A gift from God and the talents she was given to share. Even if it was just with me at that very moment.
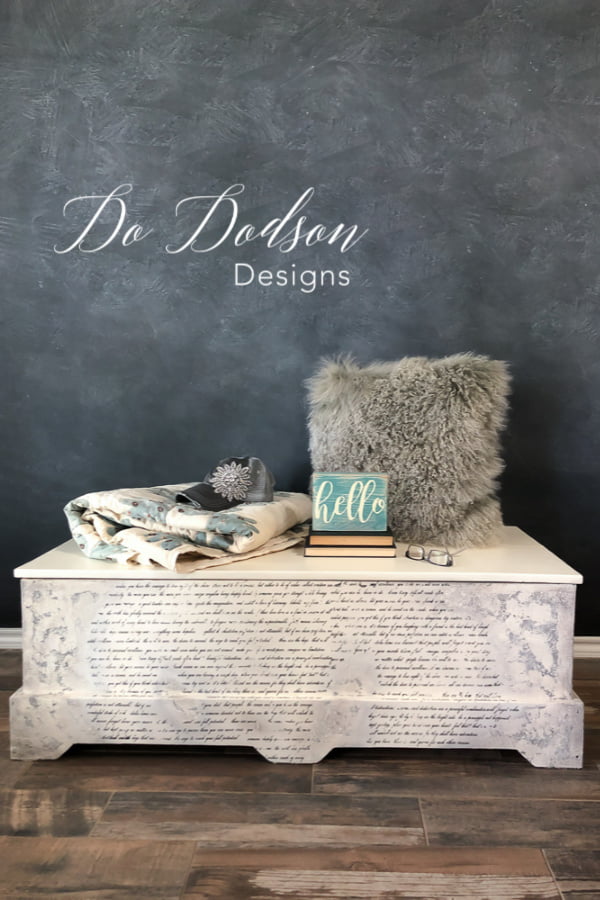
I take great pride in my work and the work of another artist. One thing for sure is, the world needs your talents. Whatever it may be. This is my never-ending story.
Until the next project… xo, Do
I take great pride in my work and the work of another artist. One thing for sure is, the world needs your talents. Whatever it may be. This is my never-ending story.
Until the next project… xo, Do
Do, this is by far my favorite Never Ending Story. It is beautiful and yes, you are an artist.
Thank you so much, Cheryl! xo
Do, what a beautiful transformation!! I love the words on the chest. I got my first curbside piece a few months ago & used chalk paint on it. But I’d like to photocopy letters my husband & I exchanged over 50 years ago & decoupage them onto the top of this little dressing table.My question is: do I have to have to have them professionally copied onto a special paper for decoupaging?
Victoria! That would be amazing! I have not done this but would assume you need to have them copied on a high-quality inkjet printer first. I would be so honored if you would share with me when you have completed your special project. Pinterest is a great resource for info on this subject as well. Best wishes.
xo, Do
Love the chest AND your Mom’s quilts! Gorgeous makeover. XO
Those quilts get me every time! Thanks for stopping by, my friend. 🙂 xo
Do you really out did yourself with this one. Stunning. I love it
Thank ya, my friend! xo, Do
Loved what you did with the glass and furniture was not able to hear your presentation I do not know it it was my phone or what. I really want to learn how to do this. I have a old china piece that use to be my mothers RIP would like to something like what you did
Well poo, I’m not sure what was up with that. I’ll take a look on my end. In the meantime, I do have a video tutorial of this process with a full products list in The Art Of Painting Furniture. It’s a private group and you can learn more about it here. I’d love to have you. xo
CLICK THE LINK BELOW
https://dododsondesigns.com/the-art-of-painting-furniture-private-subscription-group/
Absolutely love this! The memories are what gets me❤ Sadly I’ve had to end a toxic (for me & my family) with my biological mother just this past week. But God gave me so many mothers & fathers… grandparents, aunts, uncles & inlaws! My heart & memories are so full❤ As soon as we arent traveling so much to Houston with the grandbaby ( she is doing great! Our little miracle) I have to try this technique! You make it look so easy? Thank you for sharing your talents & memories? Hug your sweet mama extra tight❤
Bless your heart, Kim! I’m so sorry but you are right. We have great memories and no one can take those away. So happy to hear the baby is doing well.
Merry Christmas to you and your family. xo, Do