Hello, my creative friends! I’m so excited that you’re joining me today, and I think you will love this easy DIY hairpin leg desk project. I have to admit I’m pretty dang proud of how it turned out too. This is the perfect project for a DIY beginner. It’s as easy as 1, 2, 3… but you only have two steps.
This post contains a few affiliate links to help you find the products I use. You are not charged extra to use any of the links, but any income I make will be used for more fun projects! To see my full disclaimer, click here.
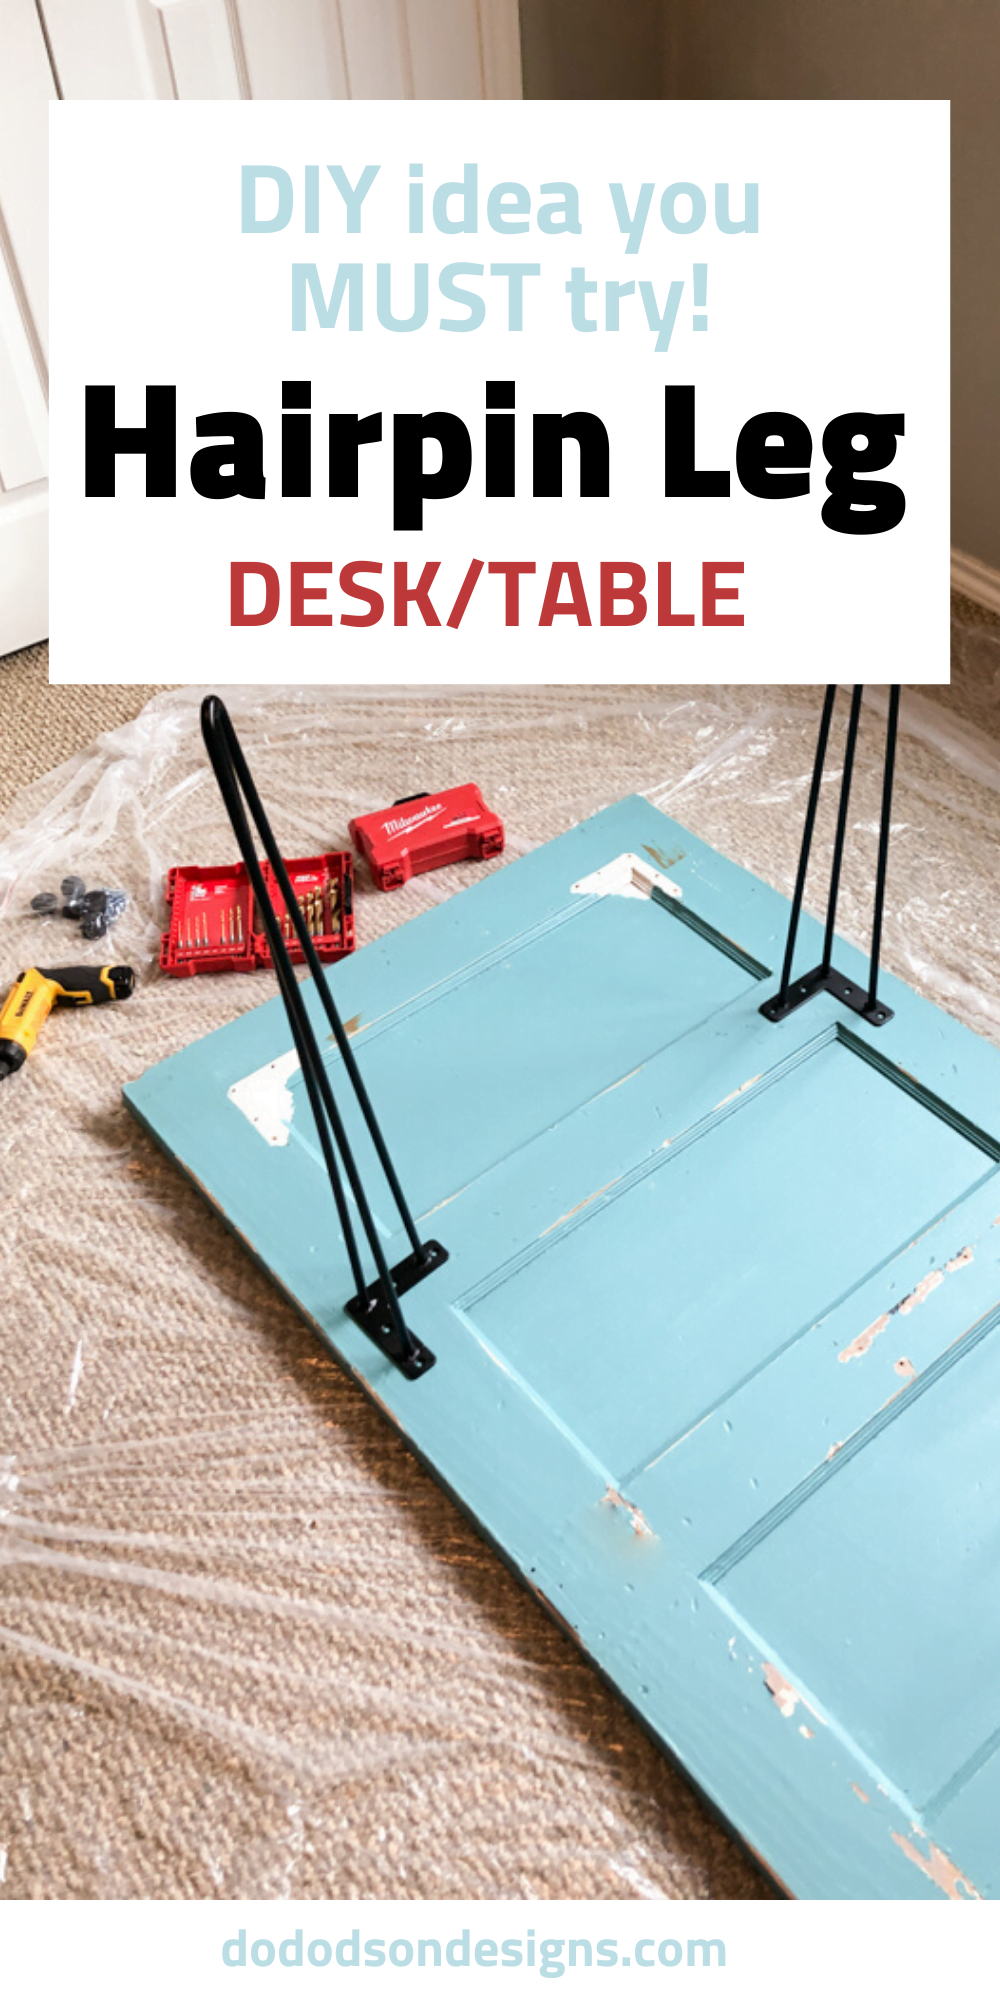
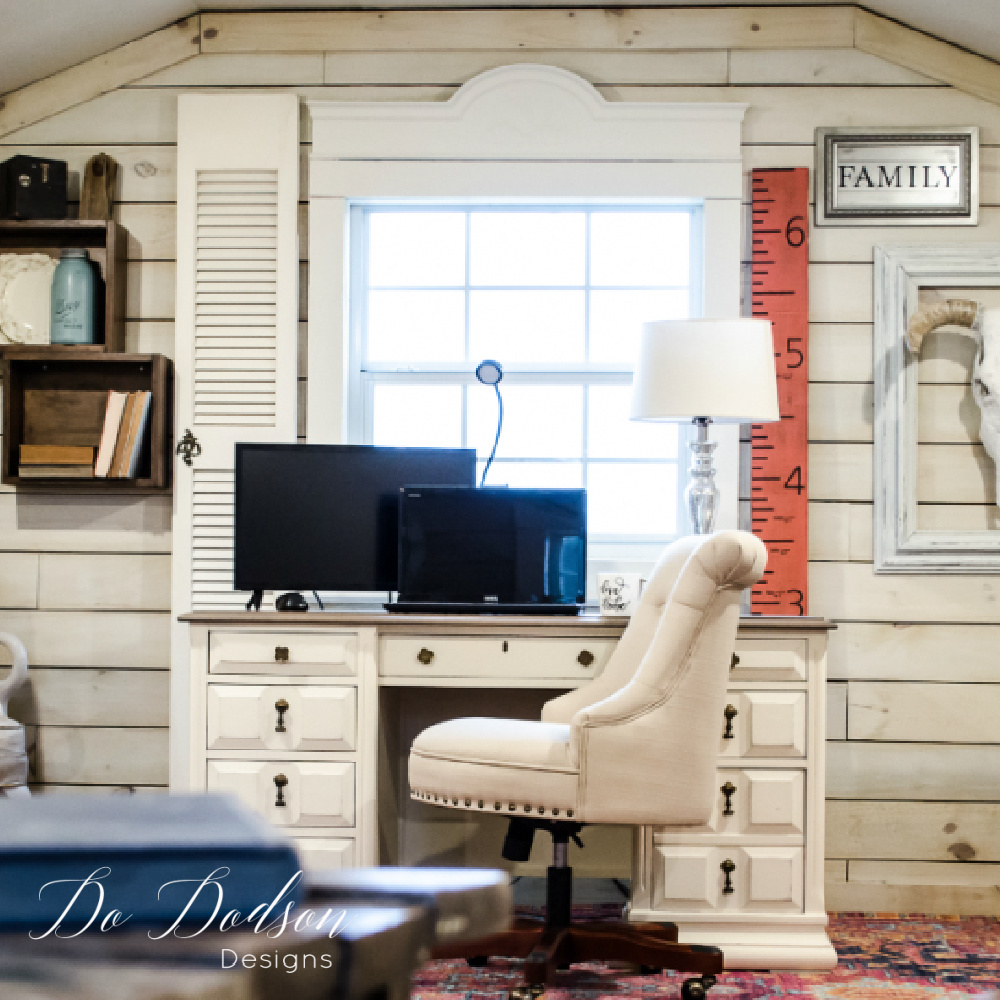
DIY Hairpin Leg Desk That Anyone Can Create
Here is what you’ll need to recreate your very own DIY Hairpin Desk/Table. This is so cool!
SUPPLY LIST:
- Old Door
- Chalk Mineral Paint (Drop Cloth)
- Paintbrush
- Hair Pin Legs Set of 4 (28 inches table or desk)
- Screwdriver
- Drill / Drill Bits
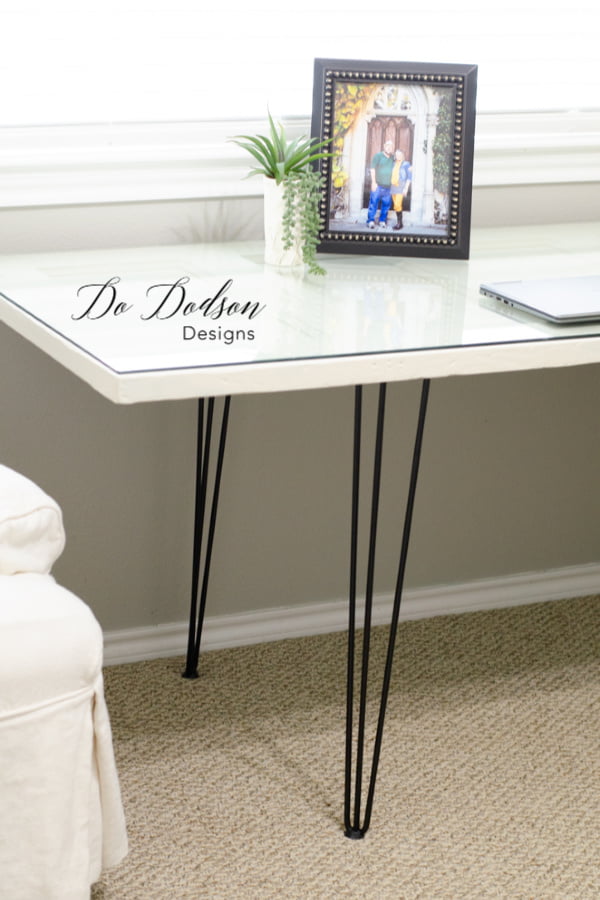
- Glass Top (optional)

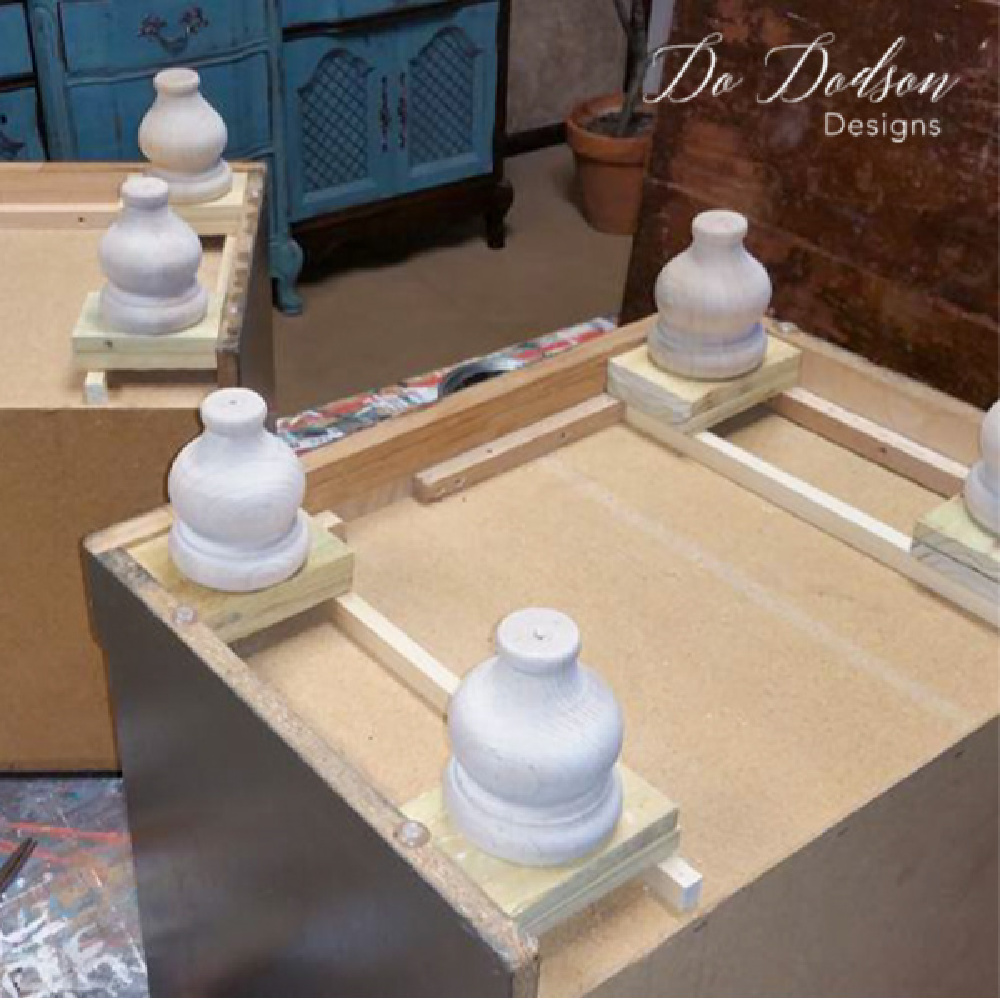
Adding The Hairpin Legs
Step 1
Old doors are perfect for this project, but you can use any wood for a DIY hairpin leg desk… or table. Get creative and look around and see what unique idea you can come up with. Maybe even an old pallet? Woah! How cool would that be?
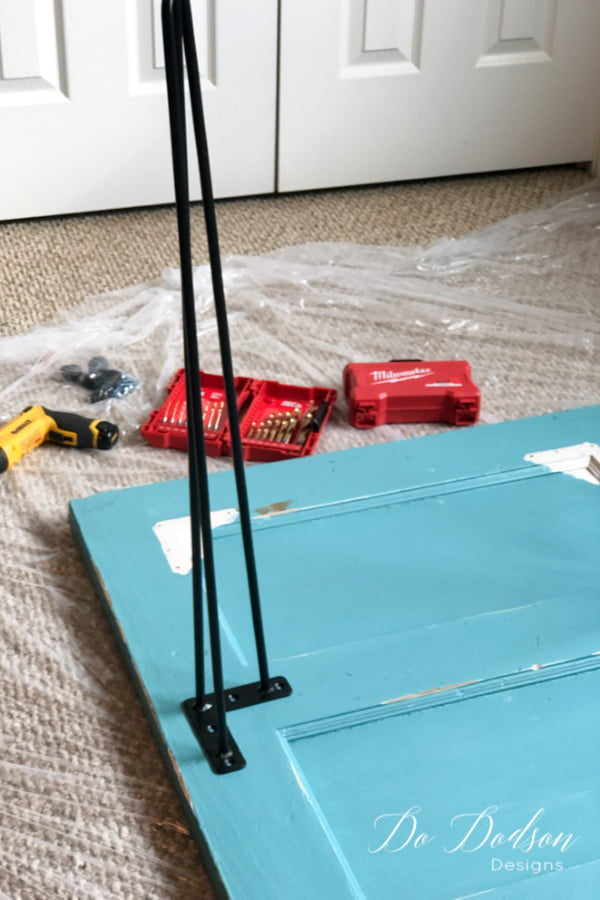
When attaching the legs to your DIY hairpin leg desk/table, be sure to space them out evenly. Because I used a door, I chose to bring the legs somewhat to allow even weight distribution. This solid wood door is cumbersome, and I didn’t want it to bow in the middle. If you look closely at the picture, you can see where I used this door as a desk a few years ago. My leg placement was not good, and it did bow in the middle. There ya go! Please don’t do what I did. Learn from my mistakes.
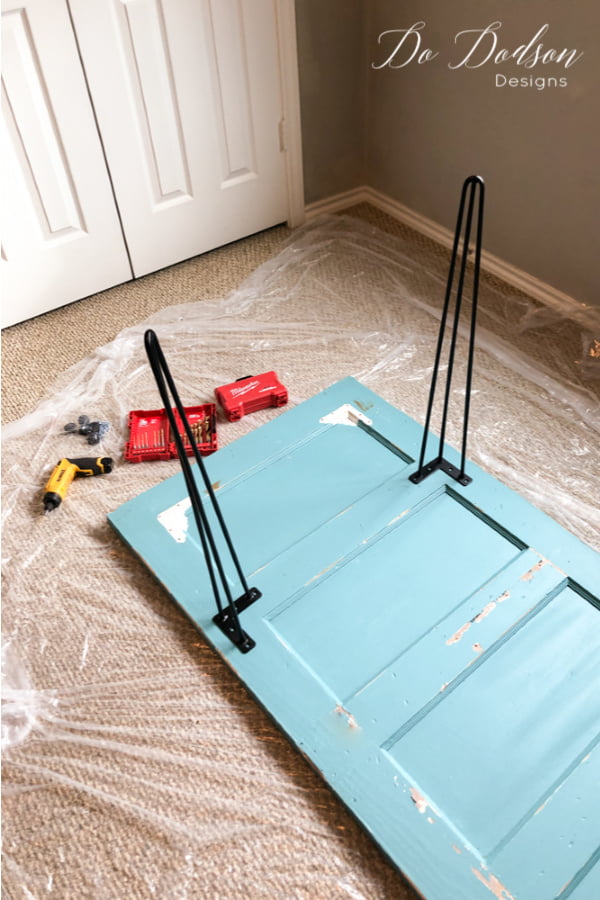
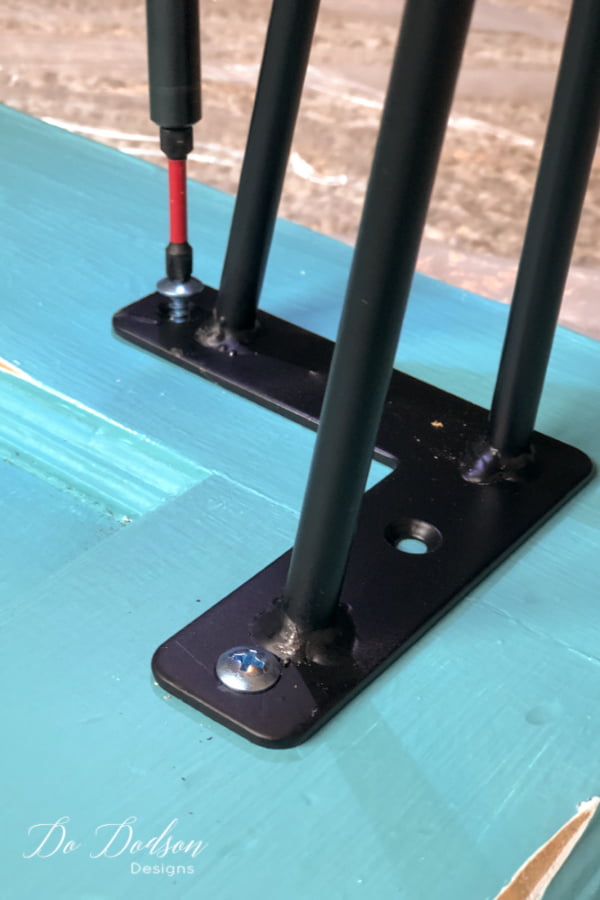
Pre-drill Holes Before Attaching The Hairpin Legs
Be sure to predrill the holes, especially if you’re using old wood that is brittle to prevent splitting or cracking your wood before you secure the legs with the screws.
The set of hairpin legs comes with 4 screws per leg. Use them all! I plan to add a glass top to my DIY desk, and hairpin legs will ensure that the base is secure. Who wants a wobbly desk??? Not me!
Add Your Personal Touches To Your DIY Hairpin Desk
Step 2
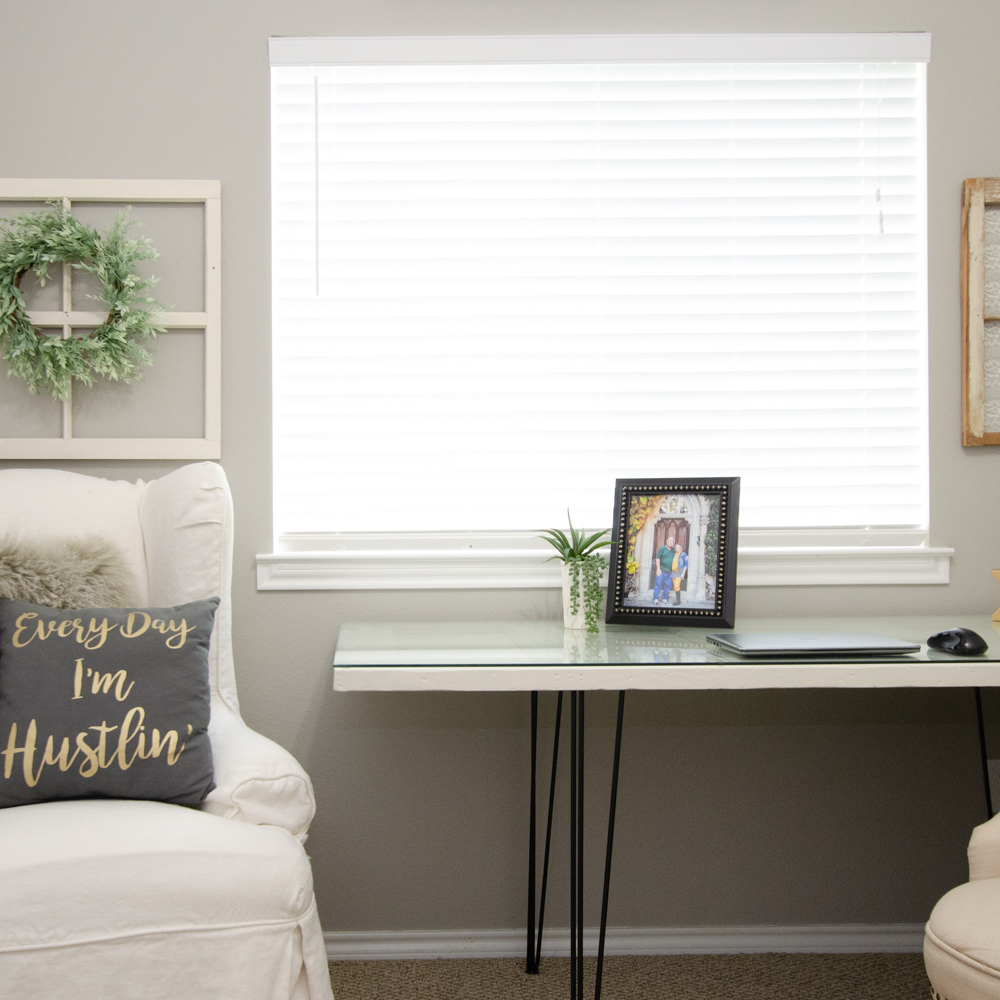
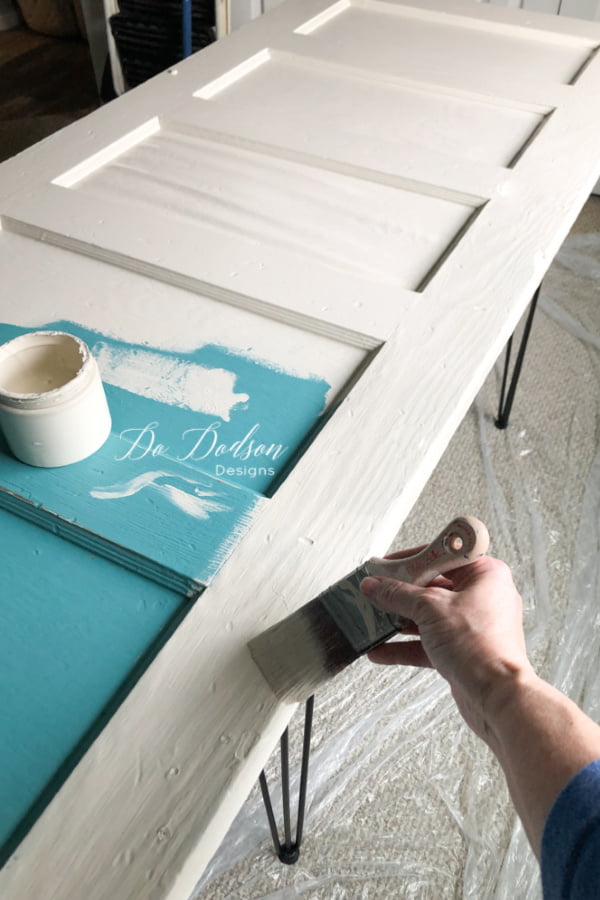
Here’s the fun part… paint it, refinish the wood… whatever your style is! I chose to paint because I wanted a clean, fresh look for my room. Here’s what I love about this DIY hairpin leg desk project. It can also be used as a table! So, when (and I will) get tired of it, I’ll move it to my dining room. For now, it will live in my guest room as a second office space—a great addition to this room for when family or guests come to stay.
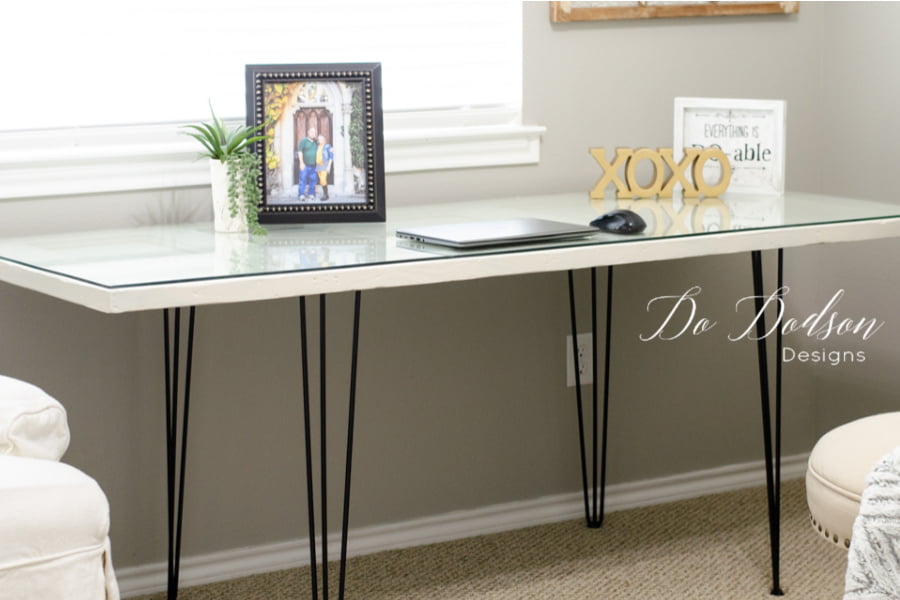
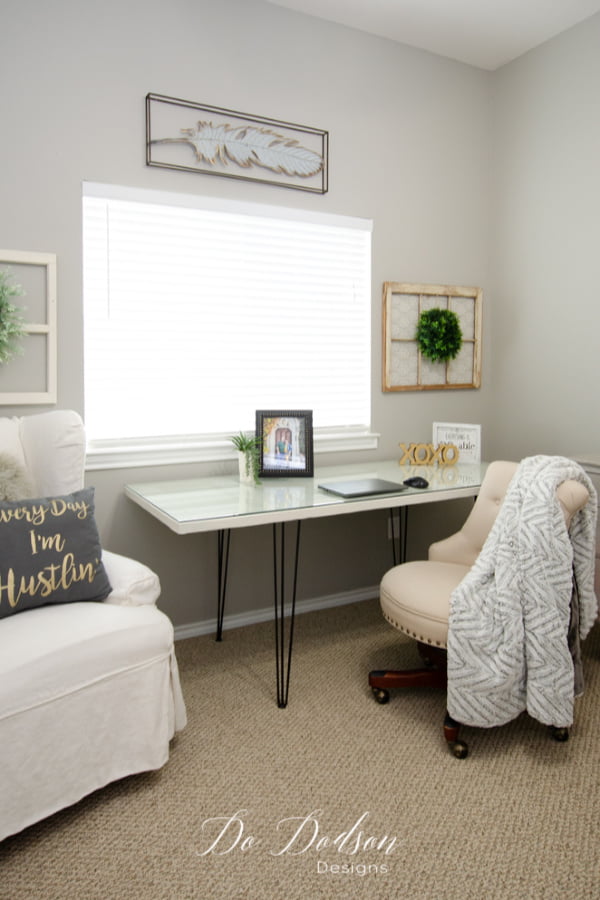
I LOOOOVE how this DIY hairpin leg desk turned out and especially loved that this door belonged to my Grandma. Being able to salvage a piece of her makes me more than happy. Call me a hoarder of good junk, but I will NEVER part with this door. It may morph into many projects in my lifetime, but it’s mine for now and a little piece of her.
I’d love to hear what you think about this project. Please, don’t be a stranger. It only helps my blog grow when you leave a comment, and I love connecting with DIYers like myself.
Grandmas hold our hands for a short time but hold our hearts forever.
~unknown
Until the next project… xo, Do

Hi
It looks awesome. About 15 years ago my Mom and I did an old door. It was meant to be her coffee table. I lost her some time later.
However, I still have it.
This would be a great desk now!!
Where do I find the tall hairpin legs????
Please and thank you.
Yours looks lovely finished!!! ?
Thank you,
Jamie
Thanks, Jamie!
So glad I could inspire you to use your special treasure and I understand what a special memory that door holds for you. The hairpin legs are available on Amazon. There’s a link in the post under the supplies list. Wishing you the best.
xo, Do
Turned out great, love it! I made a desk for my son a few months ago and I want to share a “whoopsie” I made on the project…it has to do with the placement of the desk legs. Take into consideration how far the legs will “stick out” into the surrounding area (I used metal saw horses on the first desk I made), and make sure there is enough room to comfortably move one’s legs around as well as the feet of the chair in the area where you push the chair up to the desk and sit at the desk (the “foot well” I guess you call it?). My son is 6′ 3″ and all legs…I put the legs too close together the first time around and he could not comfortably sit on a computer chair at the desk, and the legs stuck out under the desk at the floor area just enough for them to be bumped into/snub barefoot toes.
Great tip, Amy! You are absolutely right. The best way to learn is through “whoopsies” I’ve had my fair share too. Stay safe my friend.
xo, Do
I saved the wood doors when we bought our OLD farmhouse, over 30 years ago (does that make me a hoarder, or a smart creative person). They were stored in a protective space, good as the day they were stored. I now know what to do for the kids and grands for Christmas. This gives them an antique from the farm and me, with a more modern twist with the metal hairpin legs, which they like. And who can’t use an extra desk or table Thank you, yours is not only lovely, but useful ( old school thinking sneaking in ). Mine will be for my plants, if I drizzle water, no problem with the glass top. Wish I had thought to do this ages ago. Bless you and stay healthy.
Thank you, Theresa! Old school is always the best in my opinion. What a great gift with so much meaning. I’m so happy you found this useful. Blessing to you and stay safe.
xo, Do
I love your table from Grandma’s door. It is beautiful. Thanks for sharing. Where did you get the legs?
Thanks.
Thanks, Lori! I got the legs from Amazon. Check the products list on the blog post. There’s a link there.
xo, Do
This is going to be perfect, if I can find the glass? Where did you get yours? I don’t know where to start looking! I’m in the UK. 🙂
Hi Tracey! Try searching for a custom glass company in your area. They can custom cut you what you need. 🙂
I’m so excited to make this for my office makeover, now that I’m working from home! I have an old 3-panel door in the garage, so this is perfect. The only question I have is how do I fill in the hole where the doorknob is? Thanks! (:
Hi Michelle.
I’m so happy you found me. I’m sitting at my door desk as I type this reply to you. It’s my happy place and even better knowing the door belonged to my Grandmother. As for the hole, I would use Bondo if you want to fill it. I didn’t fill mine because I knew I would have plenty sitting on my desk to cover it up… and I do. Here’s a blog post about how to use Bondo. https://dododsondesigns.com/how-to-repair-chipped-wood-furniture/
Have fun with your project. xo, Do
Could you tell me the size of your door? We love this idea for a desk for under my daughter’s loft bed, but the old door I have is 80″. Too big. Are there places you suggest to look around for old doors or reclaimed wood? Thanks!
Hi Linda,
The door I used measures 74 inches. A standard door is 80 inches. You can always trim a solid wood door down if needed. I find a lot of old doors on Facebook Market Place vintage stores and flea markets. I love mine! Good lunch with your project. 🙂 Do
LOVE the customization options with this idea! Did you use anything to secure the glass on top to keep it from sliding around if bumped?
Hi Jill,
Yes, I did. Sorry, I should have mentioned that. I found small clear rubber cabinet pads and spaced them out around the edge of the table. It worked beautifully! This also made a small gap between the door and glass so I can slide photos and documents under for display. So easy to clean too. 🙂
Love the idea of the desk. Where is the office chair from?
Thanks
Hi Carla,
Thank you. The chair is from Wayfair. 🙂
Do you know how thick your glass is?
Hi Chloe,
I purchased the 1/4 inch.
I LOVE this so much! I don’t know if I’ve ever met anyone who is equally as OBSESSED WITH GOLD as I am!! 🤣 I’ve been hoarding the legs and at this rate, literally everything in my house will be dipped gold with hairpin legs. Do you just buy yours on Amazon or do you have a secret bargain resource? All of mine have been taken from other pieces of furniture.
Since we’re talkin doors…do you have any suggestions for painting/staining glass? My family is from Shiner, TX and my grandpa rescued all the beautiful doors that were on the Victorian homes built by the German settlers in the late 1800’s!! So I nabbed some of them to repurpose. My favorite has small ruby red glass in the corners but one piece is missing. I am thinking it’ll be much easier (CHEAPER) to DIY a piece of replacement glass rather than trying to find a perfectly beveled piece in a very specific size 🤷🏻♀️
Please share your secrets if you have any 💜 TIA!!!
Fellow Gold Addict,
Jess
Hi Jess! Those doors sound divine. L O V E old doors. I have several old doors that belonged to my Grandmother, and I will never part with them. I don’t have any experience in stained glass repair, but it sounds like you have a good idea.
As for the hairpin legs, yes, I usually purchase from Amazon. Now you have me thinking that I need to do something with gold hairpin legs. LOL xo, Do