
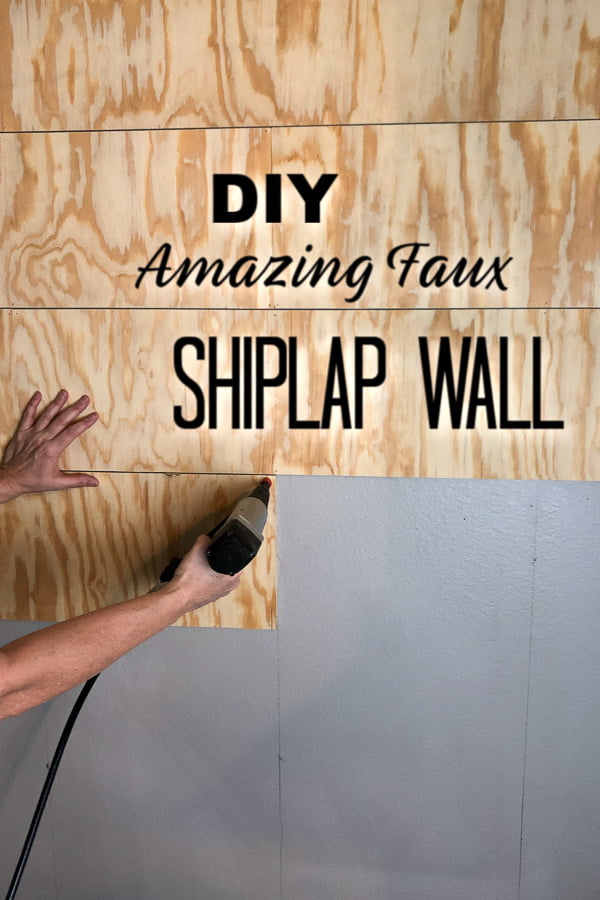
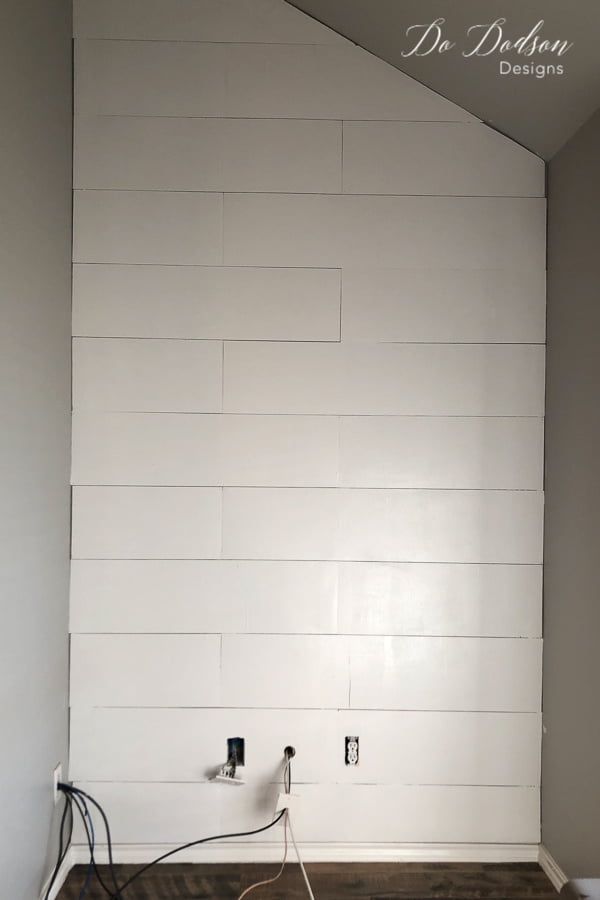
Adding a faux shiplap wall to a small wall adds tons of character, and it’s not as hard as you may think. Well, I guess that depends on how tall your walls are. Mine is 10 ft! It’s been thirteen years since we moved into our brand spanking new home. Not MY idea! I wanted a fixer-upper, but it didn’t take long to find ways to make my new home have the charm like those dreamy old farmhouses.
Estimated reading time: 6 minutes
This post contains a few affiliate links to help you find the products I use. You are not charged extra to use any of the links, but any income I make will be used for more fun projects! To see my full disclaimer, click here.
Create An Amazing Faux Shiplap Wall
Gather Your Supplies
Before we get started, I have a supply list below to find the products you need to create a faux shiplap wall. Here you go!
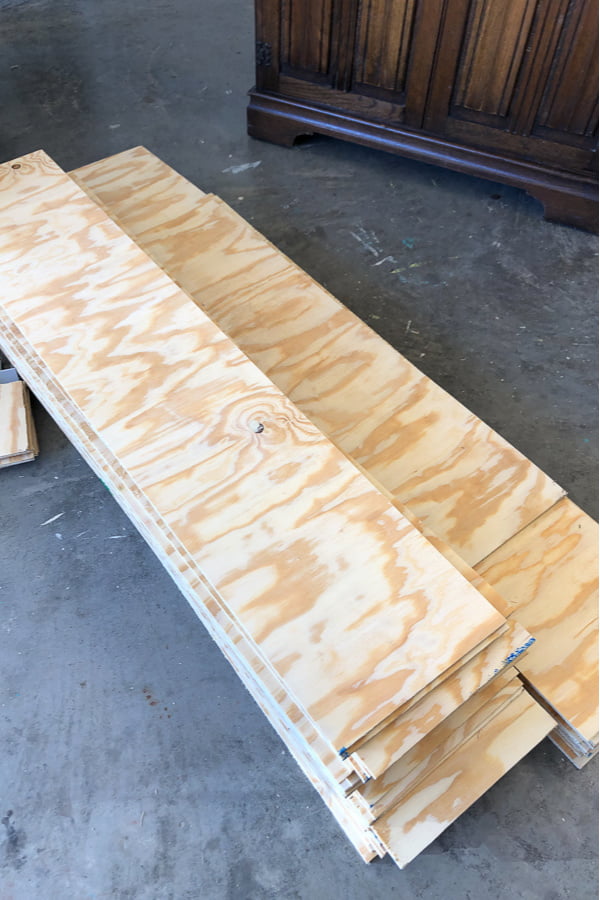
- 1 1/4 inch Plywood (cut in 10-inch strips)
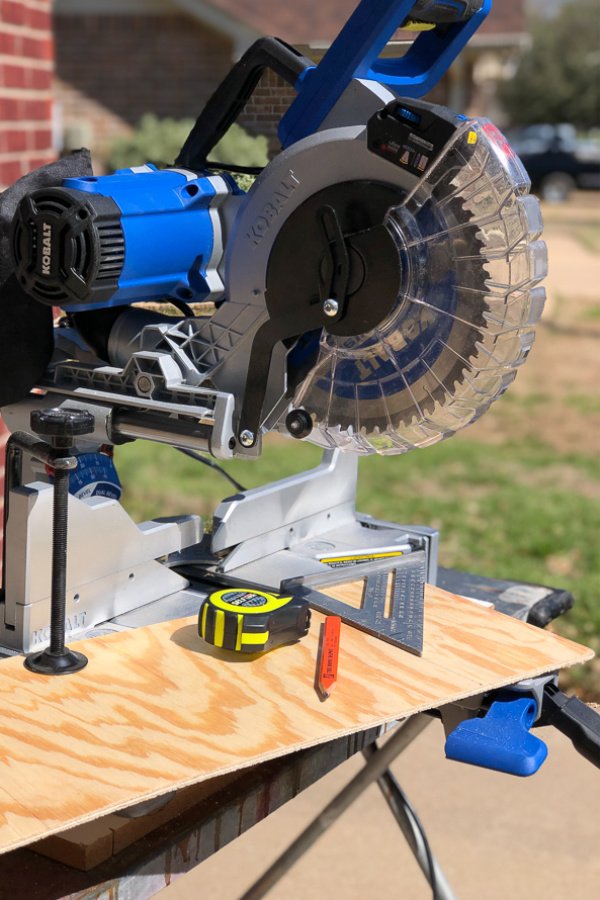
- Compound Miter Saw
- Speed Square
- Tape Measure
- Carpenter Pencil
- Pneumatic Nail Gun
- 3 ft Level
- Paintbrush
- Zinsser Primer
- White Wall Paint
- Rolling Pan (for paint)
Purchasing and Pre-cutting The Plywood
Did you know that 1/4 inch plywood works well to create a faux shiplap wall? I wouldn’t have believed it either until I researched it on Pinterest. Lots of great tutorials there.

I had the DIY Home Store cut the Plywood into 10-inch strips. Most stores will do this for free or a small charge, but It is so worth it! It will save you lots of time when you’re creating a faux shiplap wall.
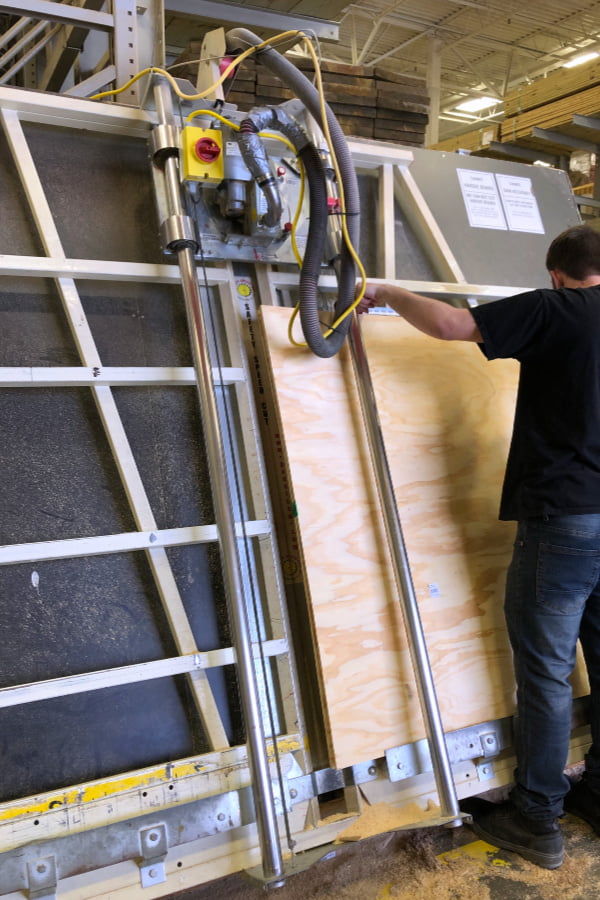
For this project, I calculated that I would need 5 sheets of the 1/4 inch plywood, but you will need to measure your specific area to determine the amount you will need for your project.
Cutting The Right Lengths
It’s always a good idea to get more than you need because you will want to allow for a mistake or two. What’s that old carpenter’s saying? Measure twice, cut once? My brother taught me that when I built my first home. Great advice.
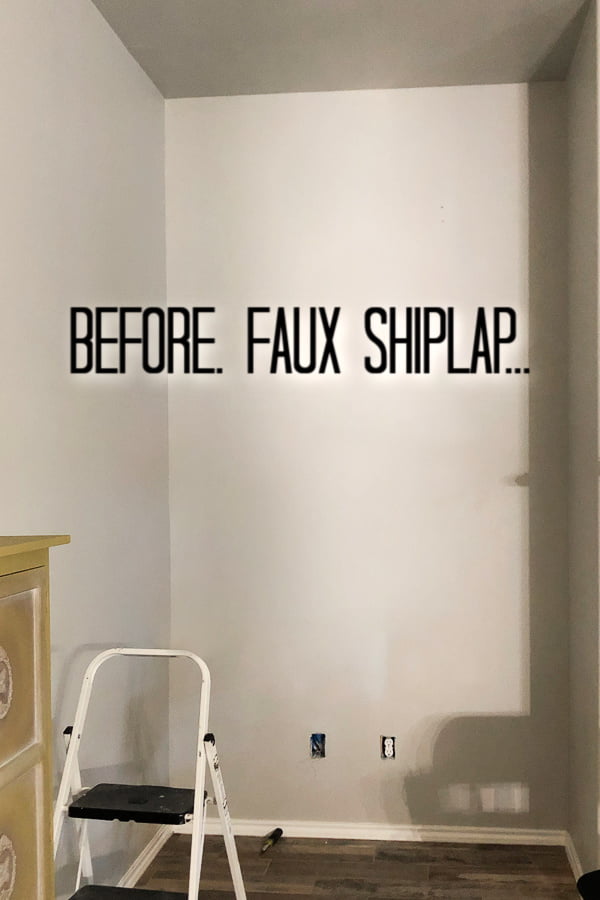
Straight And Level Lines
Before applying the plywood strips to the wall, you will need to locate the studs inside the wall. You can use a stud finder or measure over 16 inches from the wall and use a small nail and hammer to locate them. Since you will be covering up the sheetrock wall, it really doesn’t matter if you have a few ugly holes. Before long, you’ll have a brand new, old-looking faux shiplap wall.
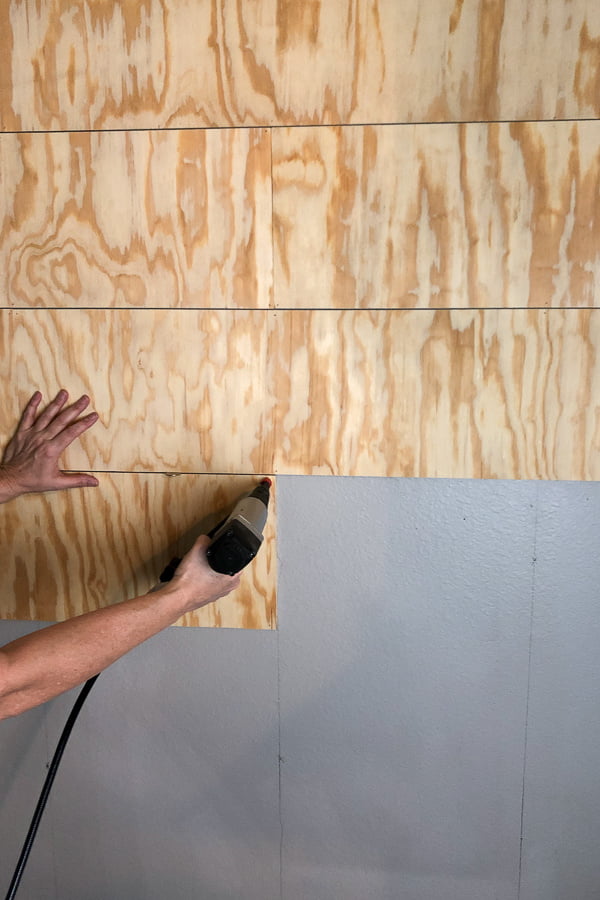
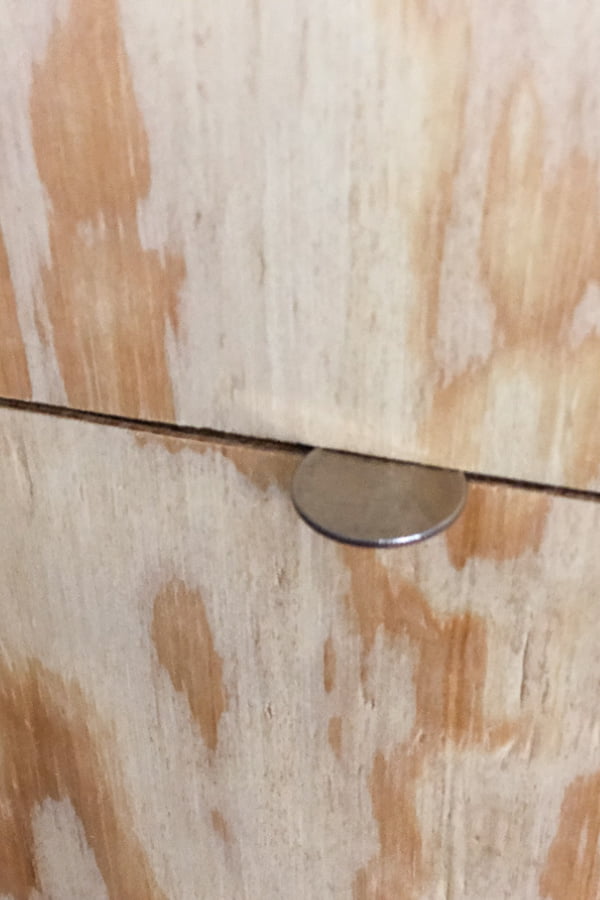
Use a spacer between each board for the best results. I used a quarter, but a nickel will work too. The tutorial I read used wood filler to cover the nail holes, but I prefer it to look old, so I just painted over them.
Before Painting Plywood
Use a good stain blocker before painting your new faux shiplap wall. The tannin from the wood will bleed through the paint, especially if you’re using white paint.
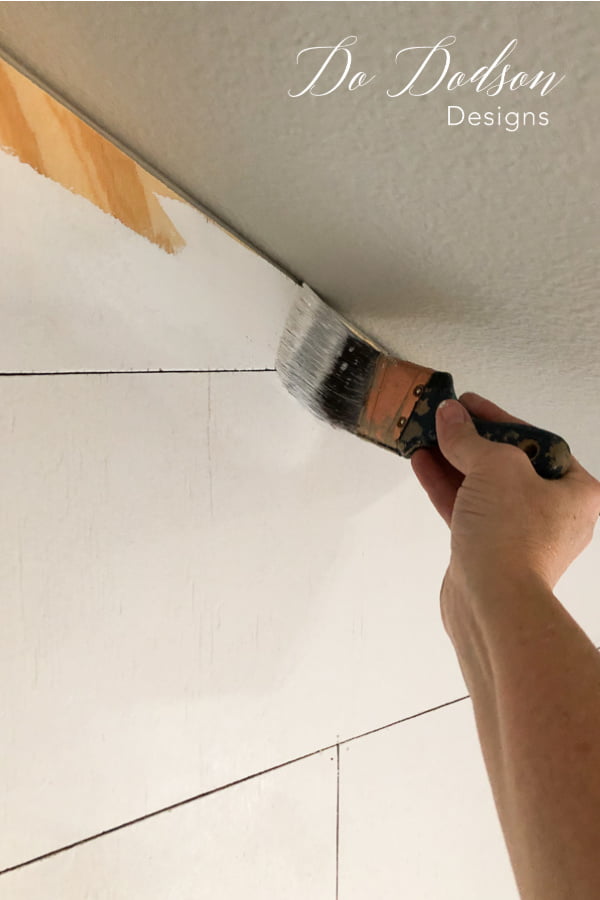
Follow up with good quality paint—the color of your choice. I finished the wall by trimming around the edges with 1X2 paintable pine to give it that rustic old look.
A Wall To Be Proud Of
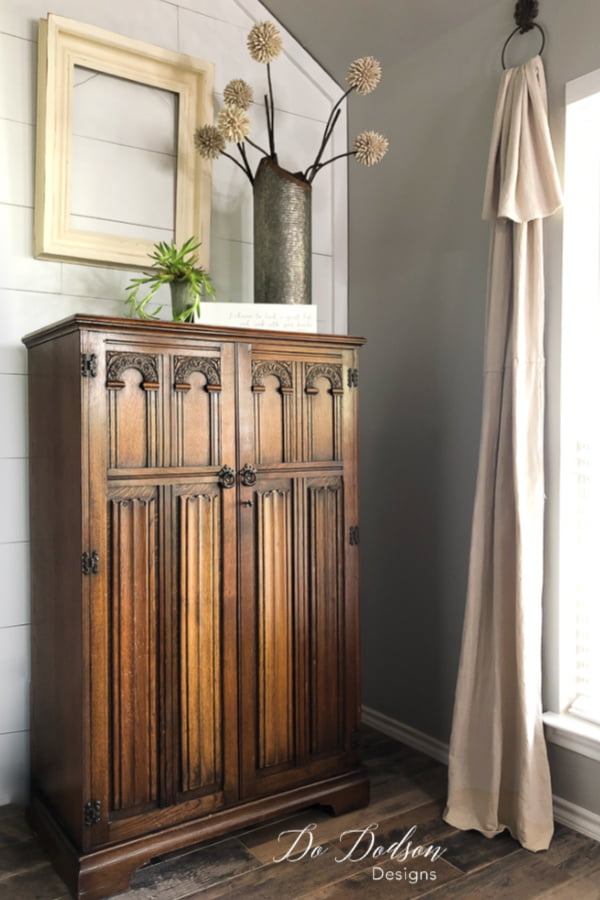
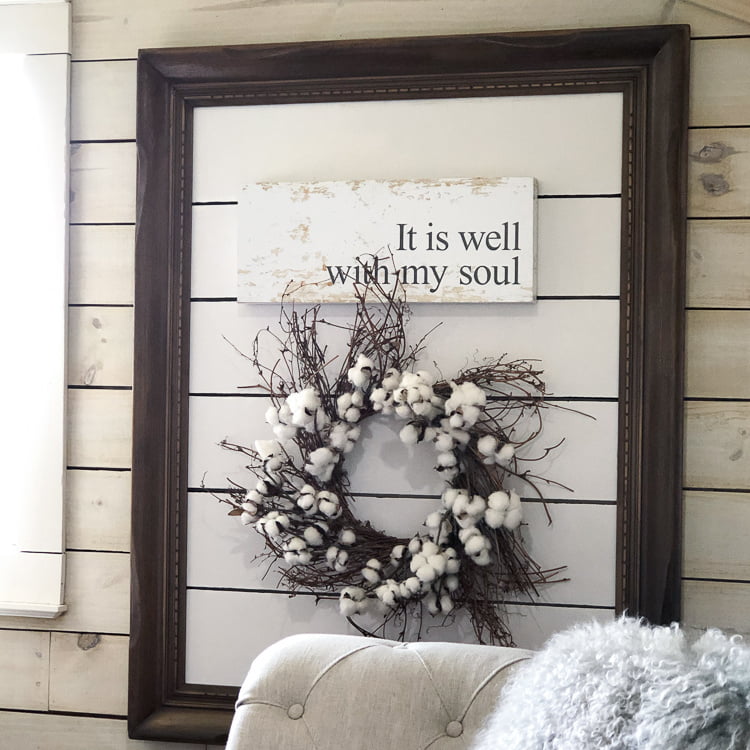
And there you have it. A faux shiplap wall that you can be proud of. I’m proud of myself! Those 10 ft ceilings were a killer! I hope this will inspire you to try something new and make it look old. Old is the new, new. I think the hubby likes it too. Oh, and wait! I had some left-over plywood I used on another project from this one. CLICK HERE to see how I used this same DIY shiplap in a frame for a unique home decor idea.
Until the next project… xo, Do

Great idea! This is how I am going to finish the wall in my sewing studio. 🙂
Thank you, Sandra! I’m pretty happy with it. I’d love for you to share a photo of your wall when it’s complete. I get all excited to see makeovers. Thanks for stopping by.
I have also heard 6″ wide looks nice, if you were to do it again would you stick with 10″ wide? mix in narrower? or do all a narrower strip width?
Hi Lee Ann! My personal opinion is that it depends on the area that you want to cover. If I were doing a small area with low ceilings, I would definitely use the 6 inches. My ceilings are 10 ft so I chose the wider.
Hope this helps. xo, Do
My ceilings are 9 ft and the area is open concept. The other question would be how to finish the eds where the wall has a chamfered corner which would leave the ends exposed
I went back and trimmed mine in 1X2 pine. I used a primer and painted it to match the shiplap. I wanted to keep the simple look so I didn’t use the traditional trim.
Love it, great tutorial!
Thank you! So glad you enjoyed it. xo
Would I need to install my baseboard first before installing the shiplap and then measure my square footage? I am working on a new project that I’ve removed the baseboard, door and window trim. I was just wondering if I needed to trim out first and then install my shiplap?
Hi Bren!
That depends on the wall. I didn’t remove my baseboard because my area is small and the furniture covers it. It was flush with the trim. If you’re doing a large wall I would remove the baseboard before creating the shiplap wall. Good luck with your DIY project. I love my walls. 🙂
I am by no means a carpenter, I try to do as much DIY projects as I can.
I have a wall in my small den that I’ve been wanting to do, your tutorial made it look easy. Thanks for building some confidence. This will be on my Springtime project.
Fantastic! It’s a great Springtime project and you’ll be so proud when it’s done. But I’m warning you now… one completed DIY home project leads to another. 🙂 It’s great fun. Best of luck to you. Do