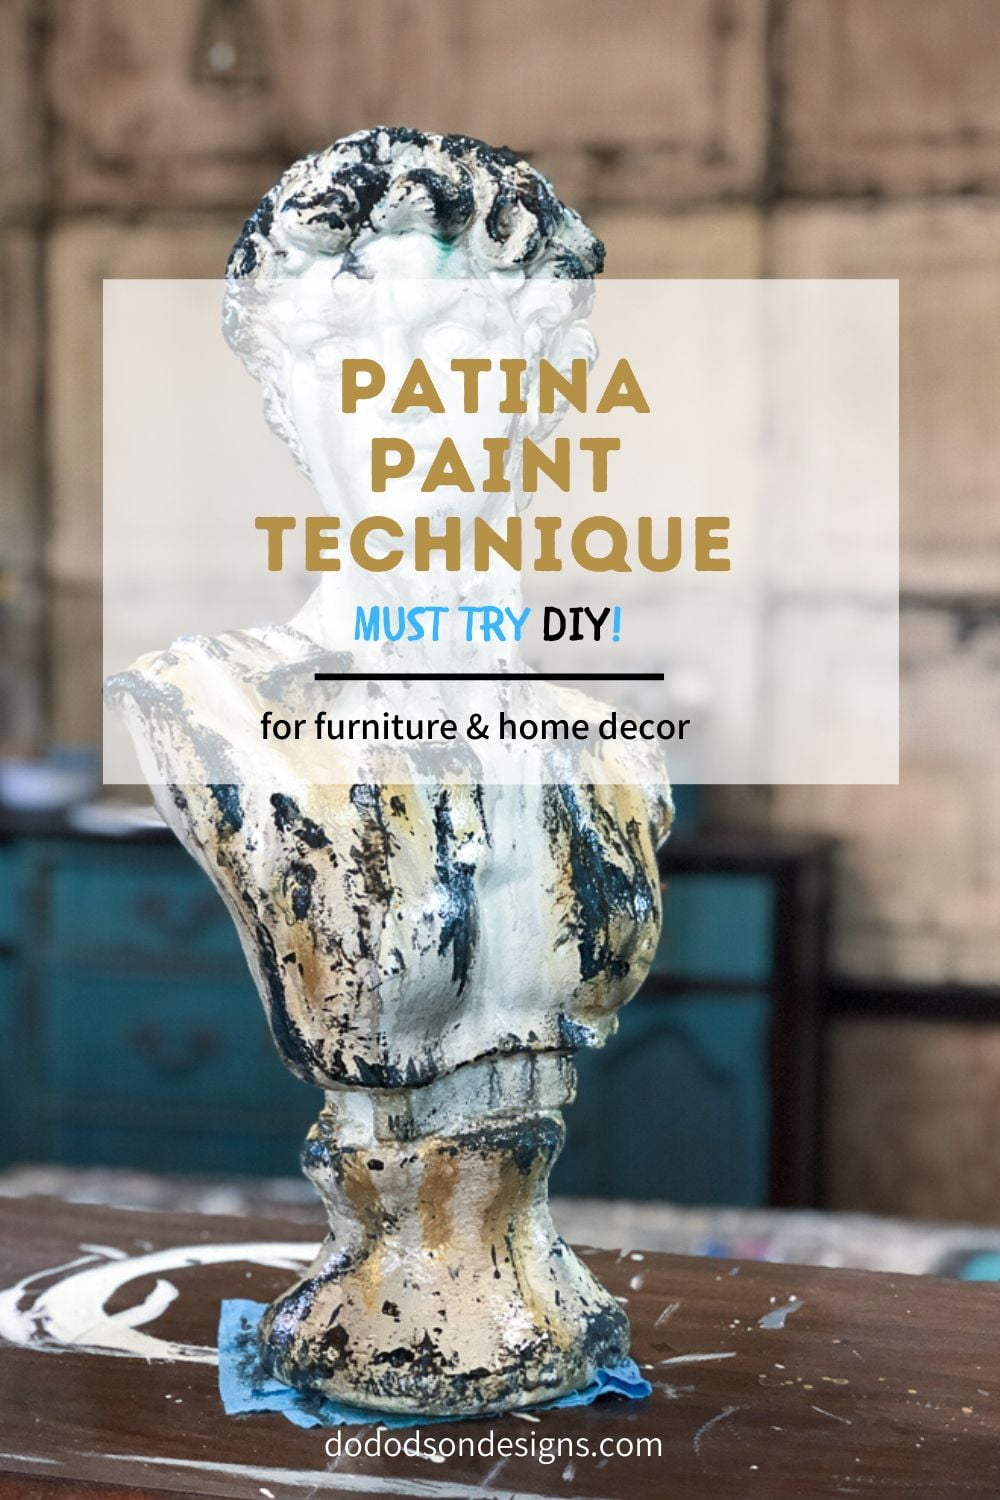
Creating an aged patina finish is a great way to add a unique look to some great thrift store finds. Guess what? They make great gifts! You could certainly WOW the whole family with your great artistic skills. It’s really quite simple, and I’ll show you how. Let’s get started!
This post contains a few affiliate links to help you find the products I use. You are not charged extra to use any of the links, but any income I make will be used for more fun projects! To see my full disclaimer, click here.
Thrift Store Finds That Make You Go WOW!
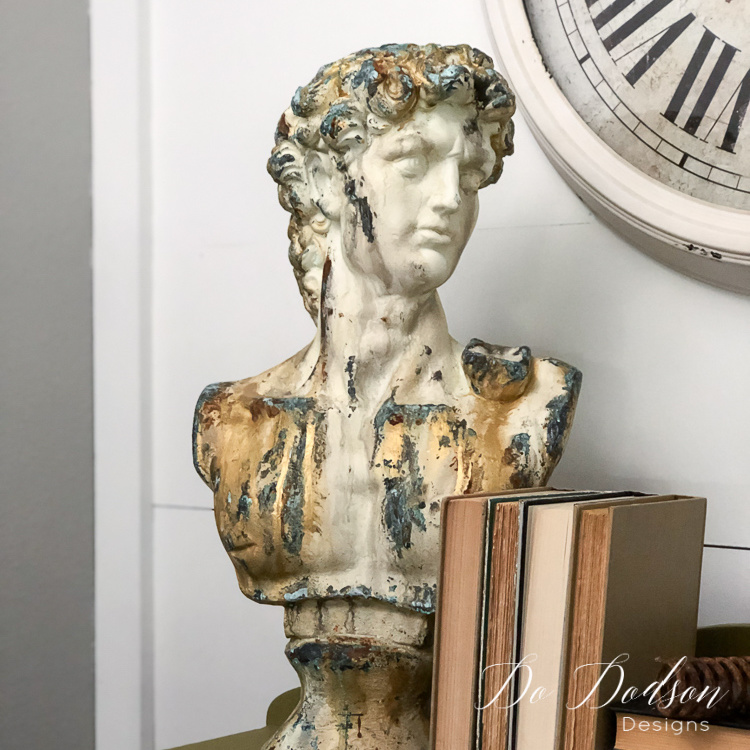
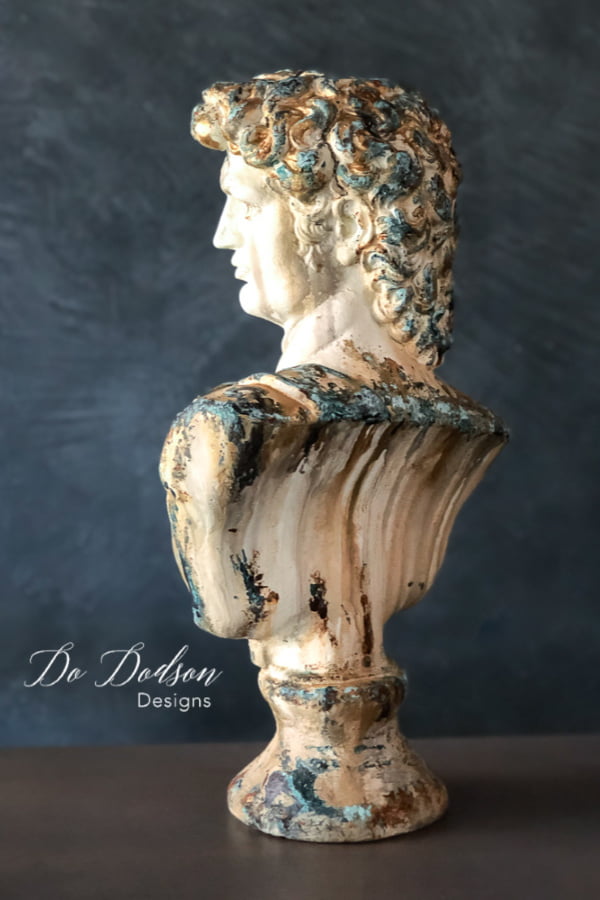
When I stumbled across a bust of Michelangelo’s David (which I lovingly refer to as “My David”) in the thrift store, I swooped down on him like an eagle on his prey. I found myself glaring at others in the store as if they might try to steal him and get to the checkout first. Ha!
Actually, they were probably looking at the crazy way I had him clutch to my body. They were probably thinking to themselves, “what is she going to do with that?” But I knew immediately I would add an aged patina finish and make My David amazing again. It was LOVE at first sight for me.

PRODUCT LIST:
Click the product below to find where to purchase it.
- Slick Stick (if you’re painting on a slick surface like glass or tile)
- Paint Brush
- Butter Cream (basecoat)
- Gravel Road (drippy first layer)
- Putty Knife
- Spray Mist Bottle (water)
- Bronze Patina Paint
- Iron Patina Paint
- Green Patina Spray
- Blue Patina Spray
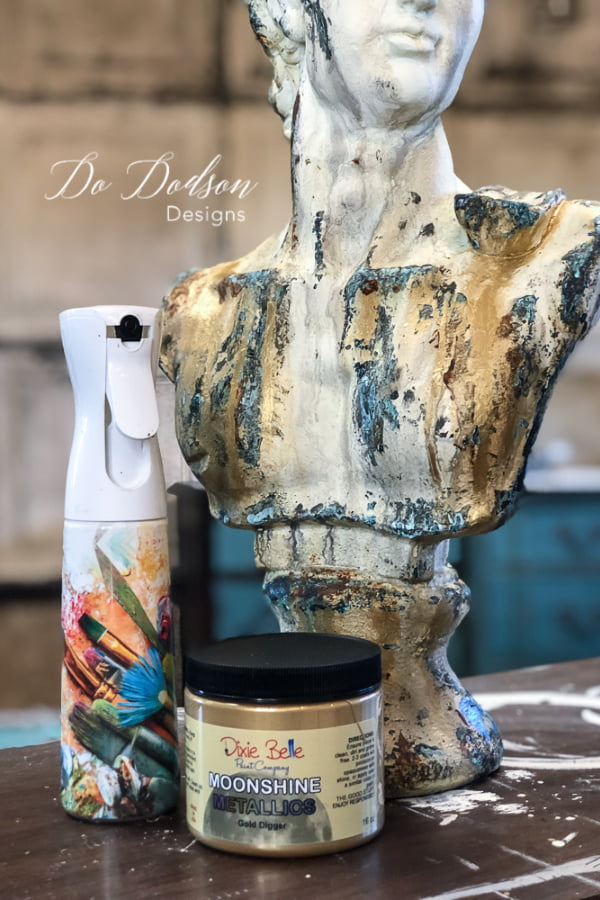
- Metallic Paint (Gold Digger)
- Blue Shop Towels
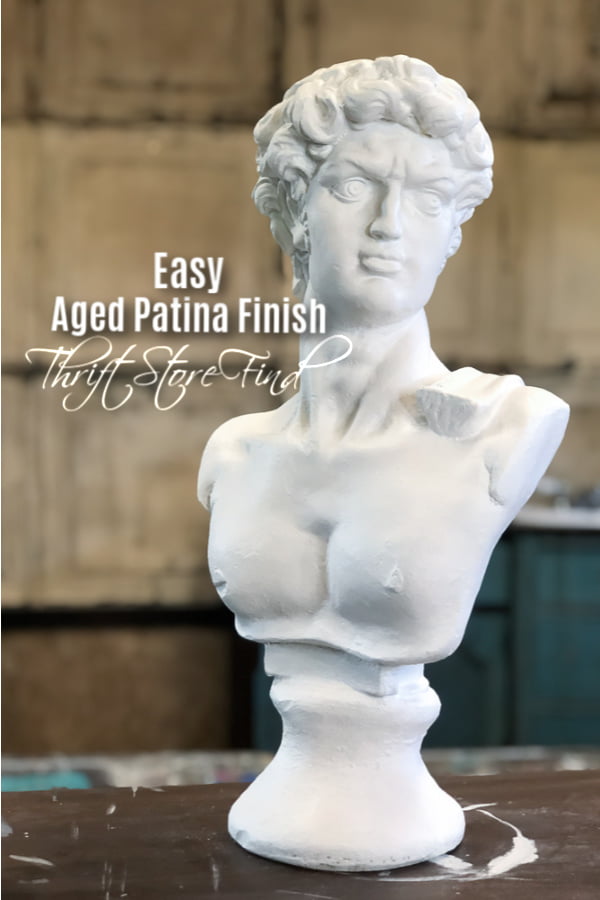
To start the project, I painted the bust with one coat of Butter Cream chalk mineral paint and allowed it to dry overnight.
Creating A Drippy Look
To create the base drippy look before the aged patina finish (layers), use a contrasting color of your choice (dark colors if the background is white) and apply it with a putty knife by scraping it gently across the high points of your project. Be mindful of the placement and where you want the drips to occur. For example, I purposely didn’t apply the paint near the face because I think he’s BEAUTIFUL. 🙂
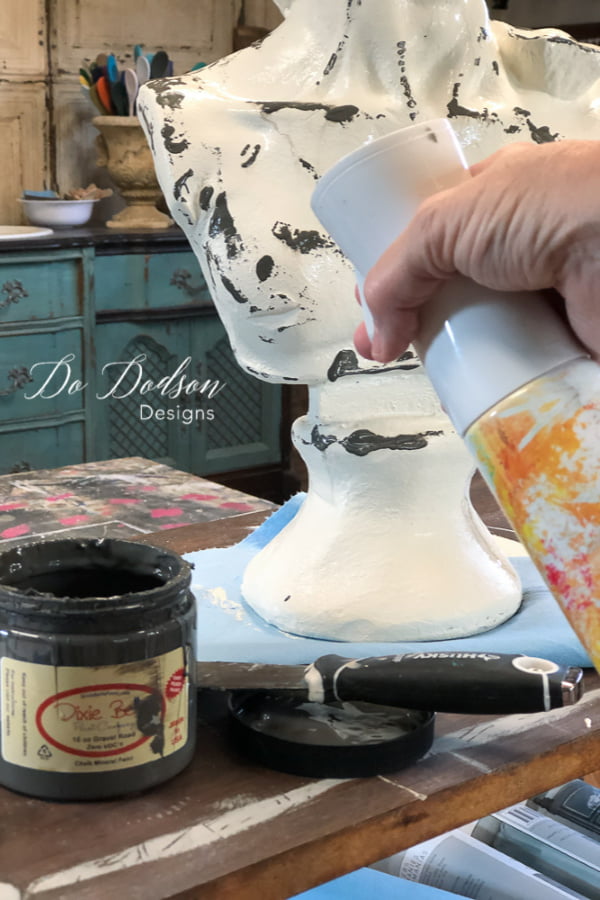
While the paint is still wet, use a spray mist bottle with water to create a drippy look. You will need a lot of towels for this process because it can get messy. Spray in a short burst directly where you want the runs to occur. Have fun with it! After your project is dried (dry time is important between layers and should be allowed to dry thoroughly), it’s time to add the aged patina finish layers.
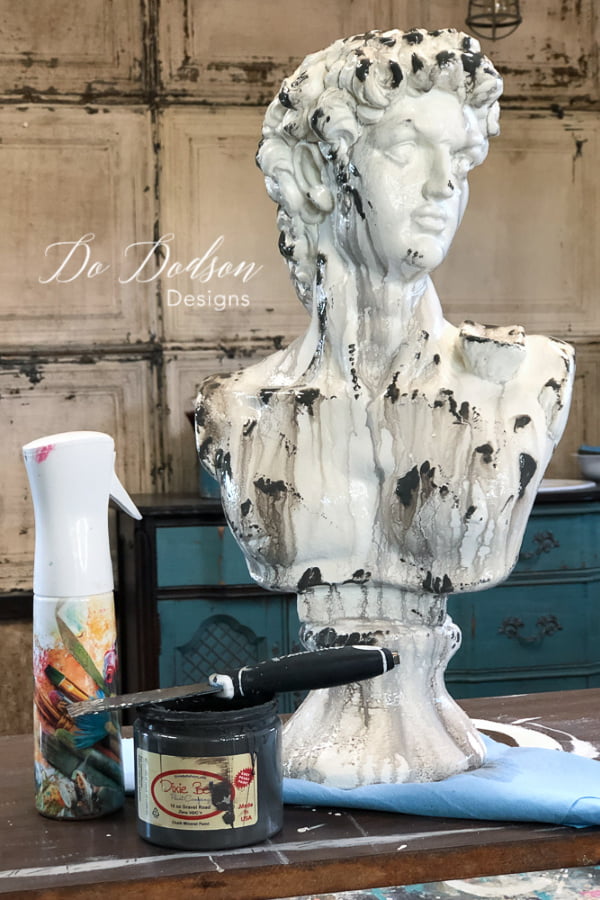
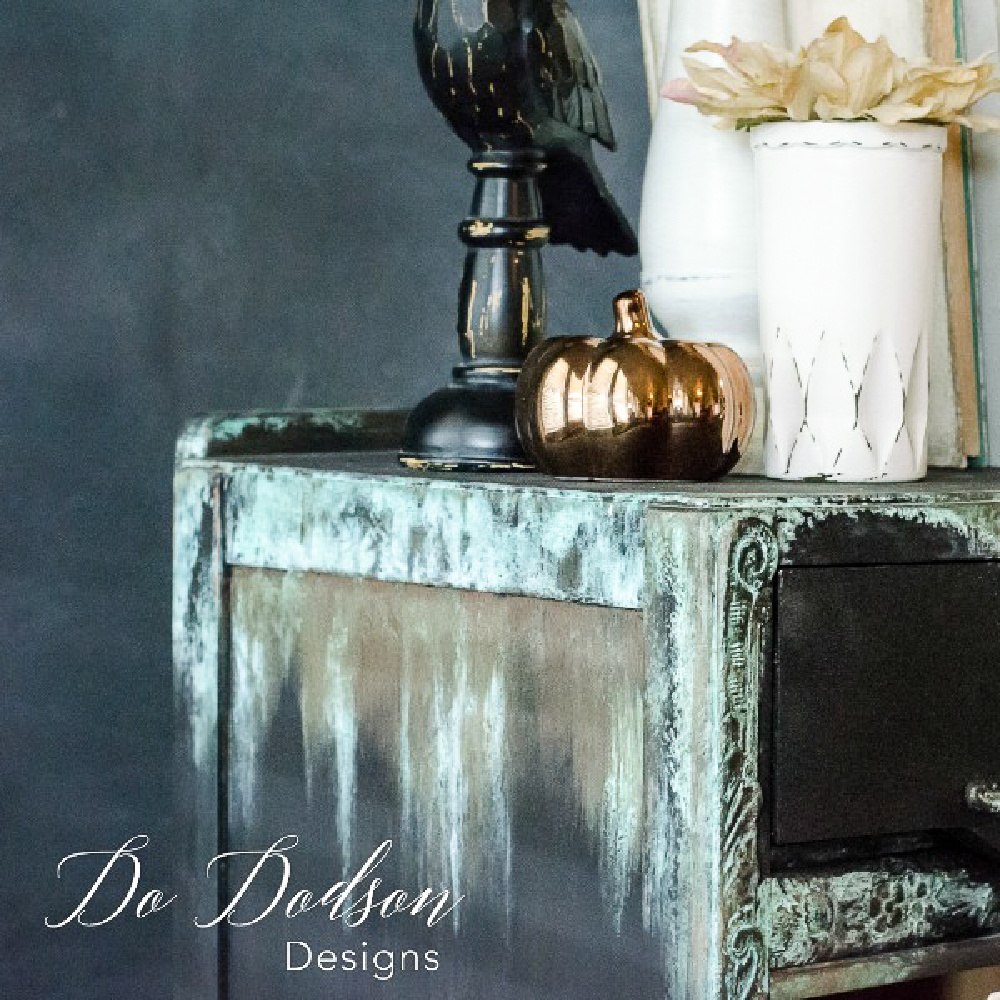
Creating The Aged Patina Finish
Here’s where it gets fun! With the same putty knife, apply the Patina Paint to the highest points of your project. Because Patina Paint is unpredictable, start with a little and see how you like it. While the Patina Paint is still wet, liberally spray the Patina Spray over the project and step away. It really is a process, and it takes time. If you want more, add more and respray.
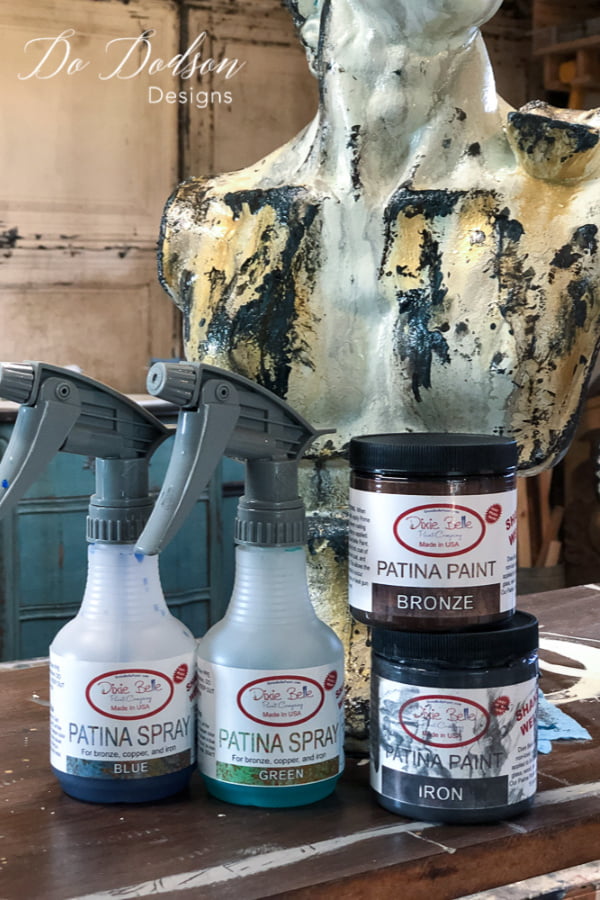
RECIPE FOR PATINA FINISH
- Iron Patina Paint | Green Patina Spray = RUST
- Bronze Patina Paint | Blue Patina Spray = BLUE Bronze
- Copper Patina Paint | Green Patina Spray = Green/Blue
Try a mixture of all three and see what happens. For some of you… it’s a no-go. But for those risk-takers like me, we are all about the unknown and embrace the unexpected. I call them happy surprises.
Aged Patina Finish In Progress
During the aged patina finish process, you may want to walk away. Spray it and “WALK AWAY!” The process depending on the paint and spray can take anywhere from 4-6 hours. The Rust Finish takes the longest.

Adding Metallic Gold For A Shimmery Finish
The last step in this whole process is adding a touch of metallic gold. Apply the metallic gold paint with the same putty knife in the same fashion. I applied a good amount and used the spray mist water bottle to create a drippy smooth look. Oh my goodness, this was the icing on the cake!
Isn’t David Handsome?
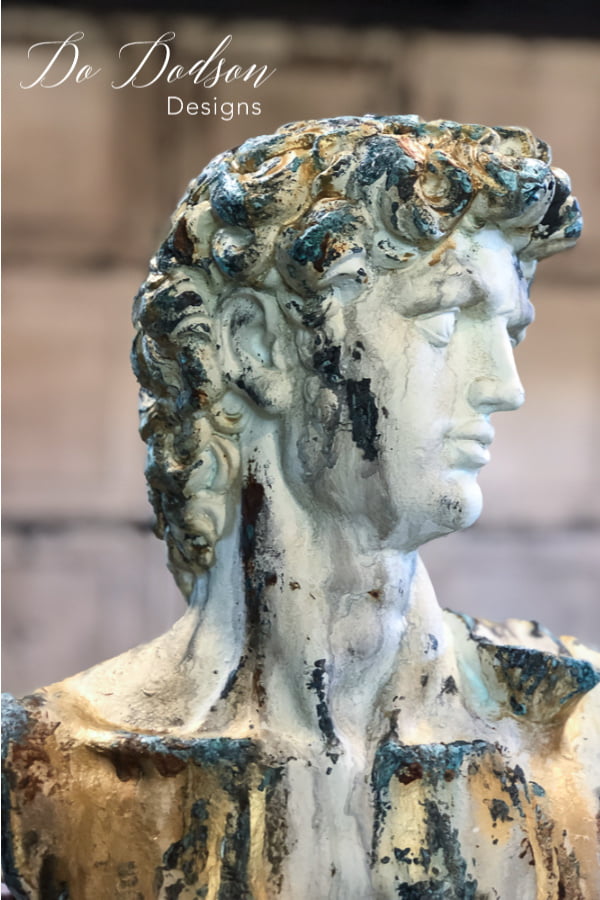

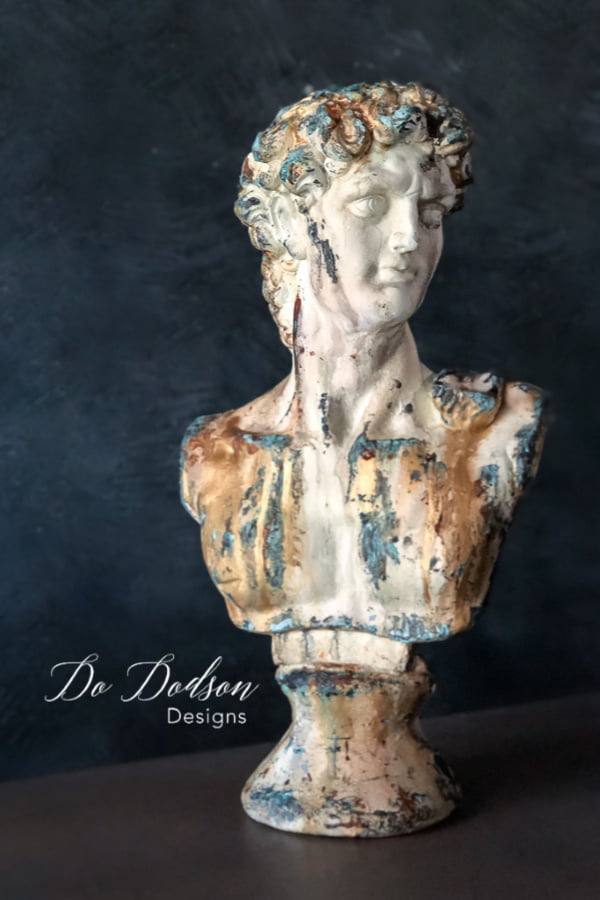
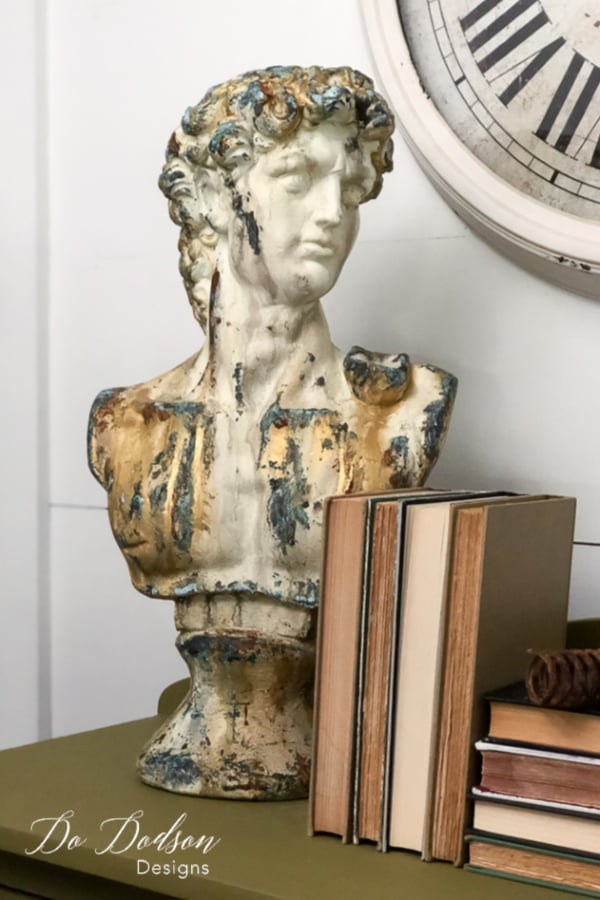
It was such a fun makeover, and it was really pretty easy to create an aged patina finish with the Patina Paint. So, what do you think? I’d love to hear your thoughts. Please drop me your thoughts in the comment section below. I’d love to hear from you.
Would you consider adding this finish to your home decor… or better yet, FURNITURE MAKEOVERS! I just so happen to have a RUST Patina Finish I did on a second-hand chest. CLICK HERE to see more of the rusty goodness! Or… check out this upcycled home decor DIY.
Until the next project… xo, Do
Very cool. I had an idea of doing something similar to a coffee table, but didn’t know about patina paint. I think I’ll try it now that I’ve seen the David. I’ve also enjoyed your other furniture posts. I’ve got a round table that is crying out for some love.
Hi Fran,
Here’s a coffee table I did with this paint. Good luck!
https://dododsondesigns.com/man-cave-furniture/
xo, Do
I just ran up on this post while I was looking at your furniture makeovers. Thank you for posting it. I have a chipped plaster bust I’ve held onto for about 15 years because I love it, but I can’t display it because the chips make it unacceptable. NOW I know what to do. I’ll refinish it per your example and the chips won’t matter. The bust is of the founder of the company I used to work for. They threw it out because it was damaged and I salvaged it. I no longer work there, but I think of the company very fondly none-the-less, and the founder was a very great man.
I just wanted to say Thank you.
Awe, I love this so much. Something this personal should be saved. I’m so glad I could help. 🙂
HI. This looks great. Did you apply the slick stick first, and if so, just with a brush? Thanks.
Hi Robin,
For this project I did not use slick stick. I listed it for those that may want to paint on slick surfaces such as glass or anything shiny. This bust was made from plaster so I just painted it with my base color and then added the patina. I hope this helps. Have fun creating! 🙂 xo